

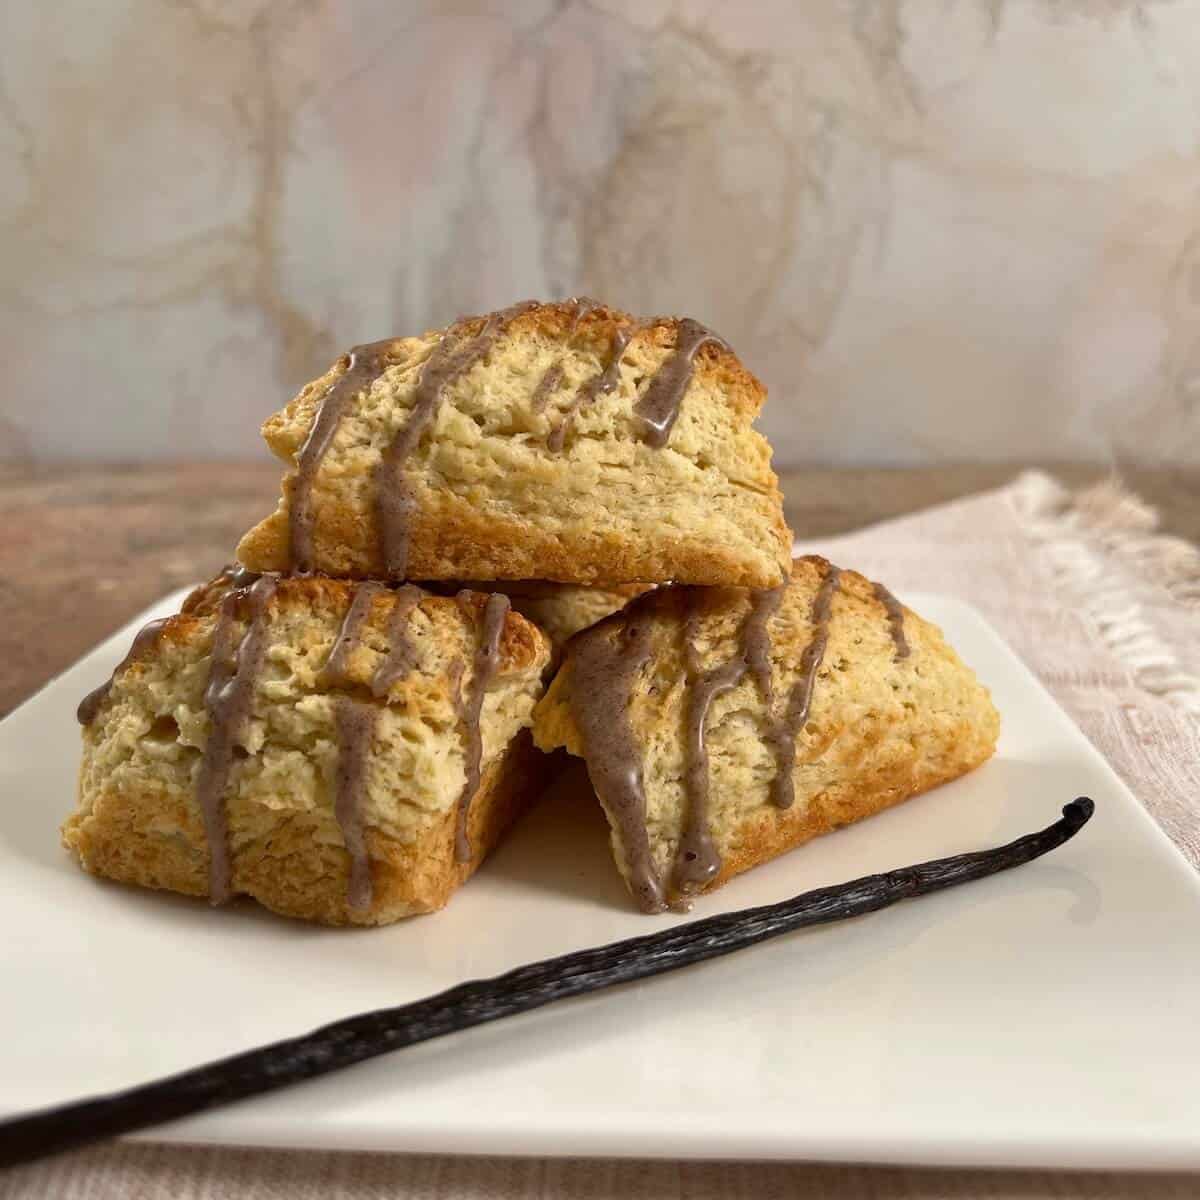
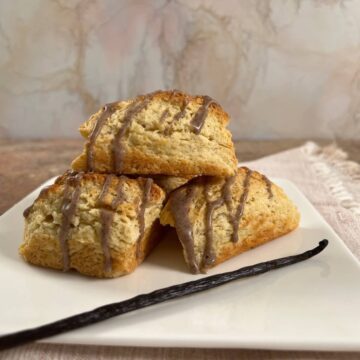
These Mini Vanilla Bean Scones pack all the buttery, flaky goodness of a bakery-style scone into an elegant petite treat. They're full of real vanilla flavor, made even better with a simple vanilla glaze. Enjoy them for brunch, afternoon tea, a coffee break, or whenever you want a little sweet treat!
Jump to:
Quick Recipe Summary ✨
Mini Vanilla Bean Scones: Tender, buttery mini scones flavored with vanilla bean paste and topped with a sweet vanilla glaze. Their petite size makes them perfect for brunches, afternoon tea, holiday gatherings, or whenever you want a bakery-style treat that's just the right size.
Rich vanilla bean flavor: Vanilla bean paste in the scones and ground vanilla bean powder in the glaze add deep vanilla flavor and beautiful vanilla flecks throughout.
Easy to make ahead: Freeze baked or unbaked scones so you can enjoy fresh, homemade vanilla bean scones whenever the craving strikes.
Active Time: About 25 minutes • Chill Time: 30 minutes • Bake Time: 20 to 23 minutes • Total Time: About 1 hour 20 minutes
Difficulty Level: ⭐⭐ Easy. Keeping the butter cold and avoiding overmixing are the biggest secrets to flaky scones.
Yield: 16 mini scones • Freezer-friendly: Up to 3 months • Make-ahead: Freeze unbaked or baked scones
👉 Follow the detailed instructions and troubleshooting tips below for flaky, tender mini vanilla bean scones every time!
SUMMARIZE & SAVE THIS CONTENT ON
Why this recipe works
- Fold the dough: A few simple folds before shaping create flaky layers with soft, tender centers for a bakery-style texture
- Chill the shaped dough: The scones will hold their shape better, rise taller in the oven, and achieve their flaky texture
- Bake in a mini scone pan: You'll get evenly baked scones with crisp edges and neatly defined triangles
Sometimes you just want a small bite of scone. But not just any scone - if it's going to be small, you want that scone to pack in a lot of flavor.
That's why these Mini Vanilla Bean Scones fit the bill perfectly!
These scones layer vanilla flavor by combining vanilla bean paste in the dough with vanilla bean powder in the glaze (see the Ingredient Notes for more info on these products). Together they create rich vanilla flavor and beautiful vanilla flecks without the expense of using whole vanilla beans.
Unlike traditional bakery-sized cream scones, these mini vanilla bean scones are perfect when you want just a little something sweet. Similar to my Mini Lemon Tartlets, they're easy to serve at brunches, showers, and afternoon teas, and their smaller size means every bite gets a little more of that sweet vanilla glaze.
Arrange them on a tiered tea stand with berry jam, lemon curd, and clotted cream for a classic afternoon tea spread, or enjoy one alongside your morning coffee whenever you're craving a bakery-style treat.
Recipe ingredients
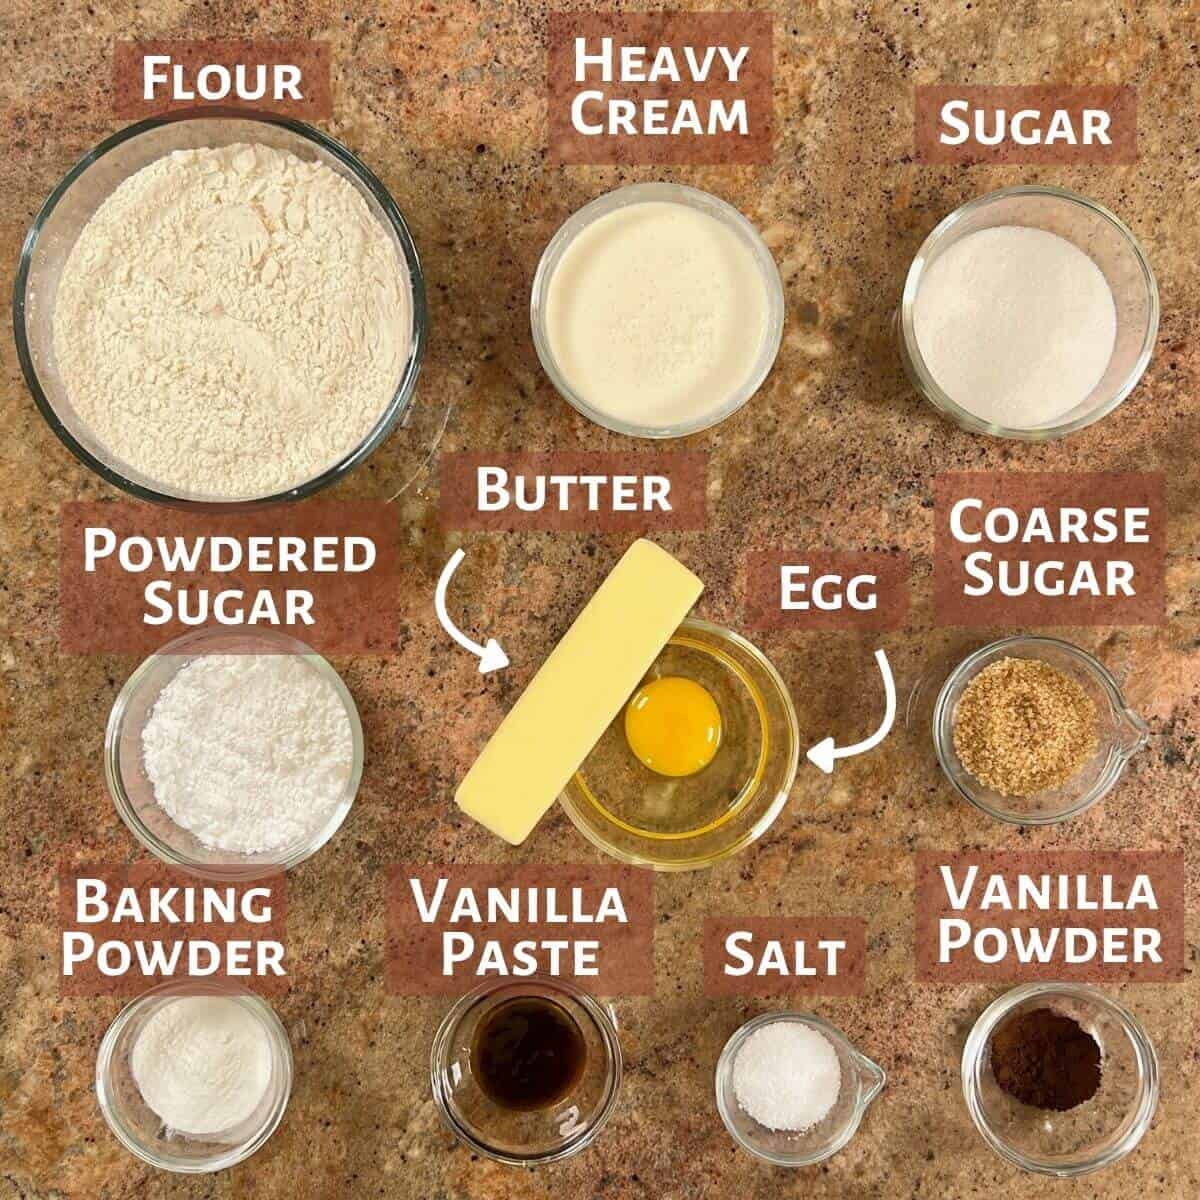
You'll need the following ingredients to make this mini vanilla bean scone recipe:
Ingredient Notes
The basic ingredients for cream scones don't vary a whole lot: all-purpose flour, heavy cream, butter, sugar, baking powder, an egg, and salt.
Butter: How you cut up your butter isn't as important as keeping it cold. Generally I'll grate frozen butter on a box grater before cutting it into the flour mixture. You can also cut chilled butter into small ½-inch cubes. Either way, make sure the butter is well chilled before cutting it into the flour mixture.
Some cream scones recipes use more butter than the 3 : 1 : 2 recipe ratio of flour, butter, and cream (the given amounts in this recipe use a 9 : 3 : 6 ratio). For this recipe, you can add another 2 tablespoons of butter for more richness if you'd like.
Baking powder: This scone recipe uses a generous amount of baking powder to insure you'll have tall, tender scones. Don't substitute baking soda as the scones will have a metallic taste to them.
Heavy cream: Enriches the dough for a tender crumb while keeping the texture light instead of cakey.
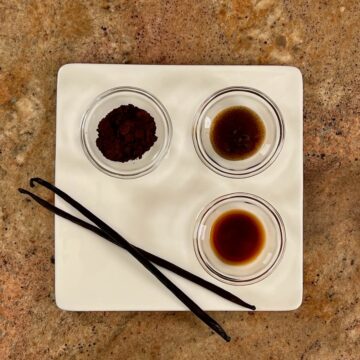
Vanilla bean paste: Made from vanilla extract and real vanilla bean seeds, vanilla bean paste adds concentrated vanilla flavor and beautiful vanilla flecks without the expense of whole vanilla beans. It's my favorite choice for these scones because it gives rich vanilla flavor and those classic specks throughout the dough.
You can use the same amount of vanilla extract or scrape the seeds from one whole vanilla bean if you prefer.
Vanilla bean powder: Made from finely ground whole vanilla beans, vanilla bean powder provides concentrated vanilla flavor and the signature dark vanilla flecks without adding liquid. Unlike some products labeled simply "vanilla powder," pure vanilla bean powder contains only ground vanilla beans.
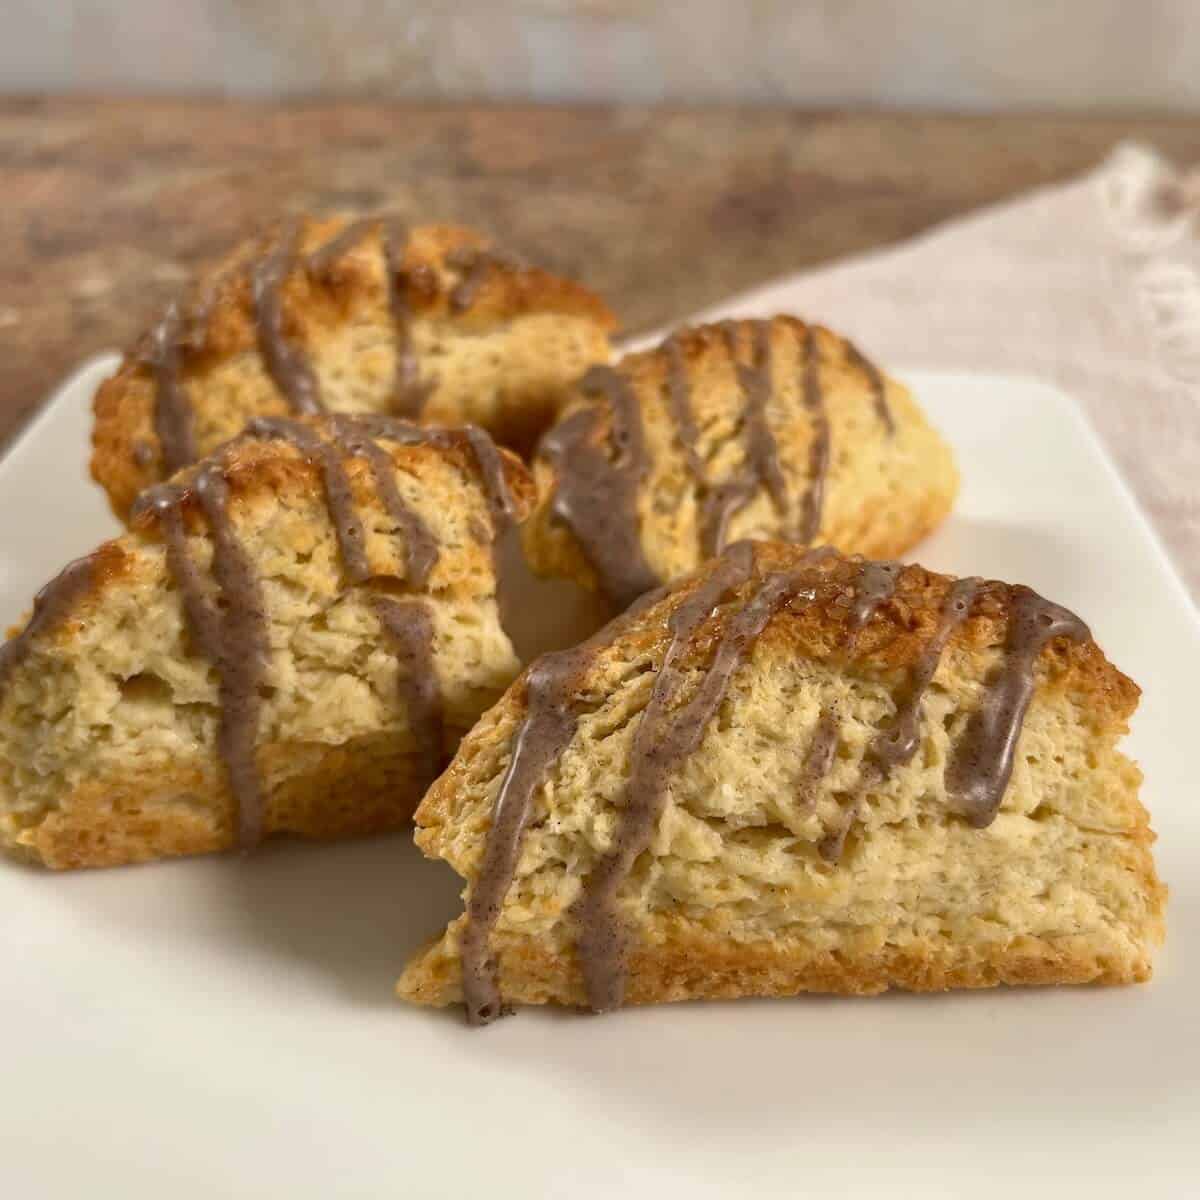
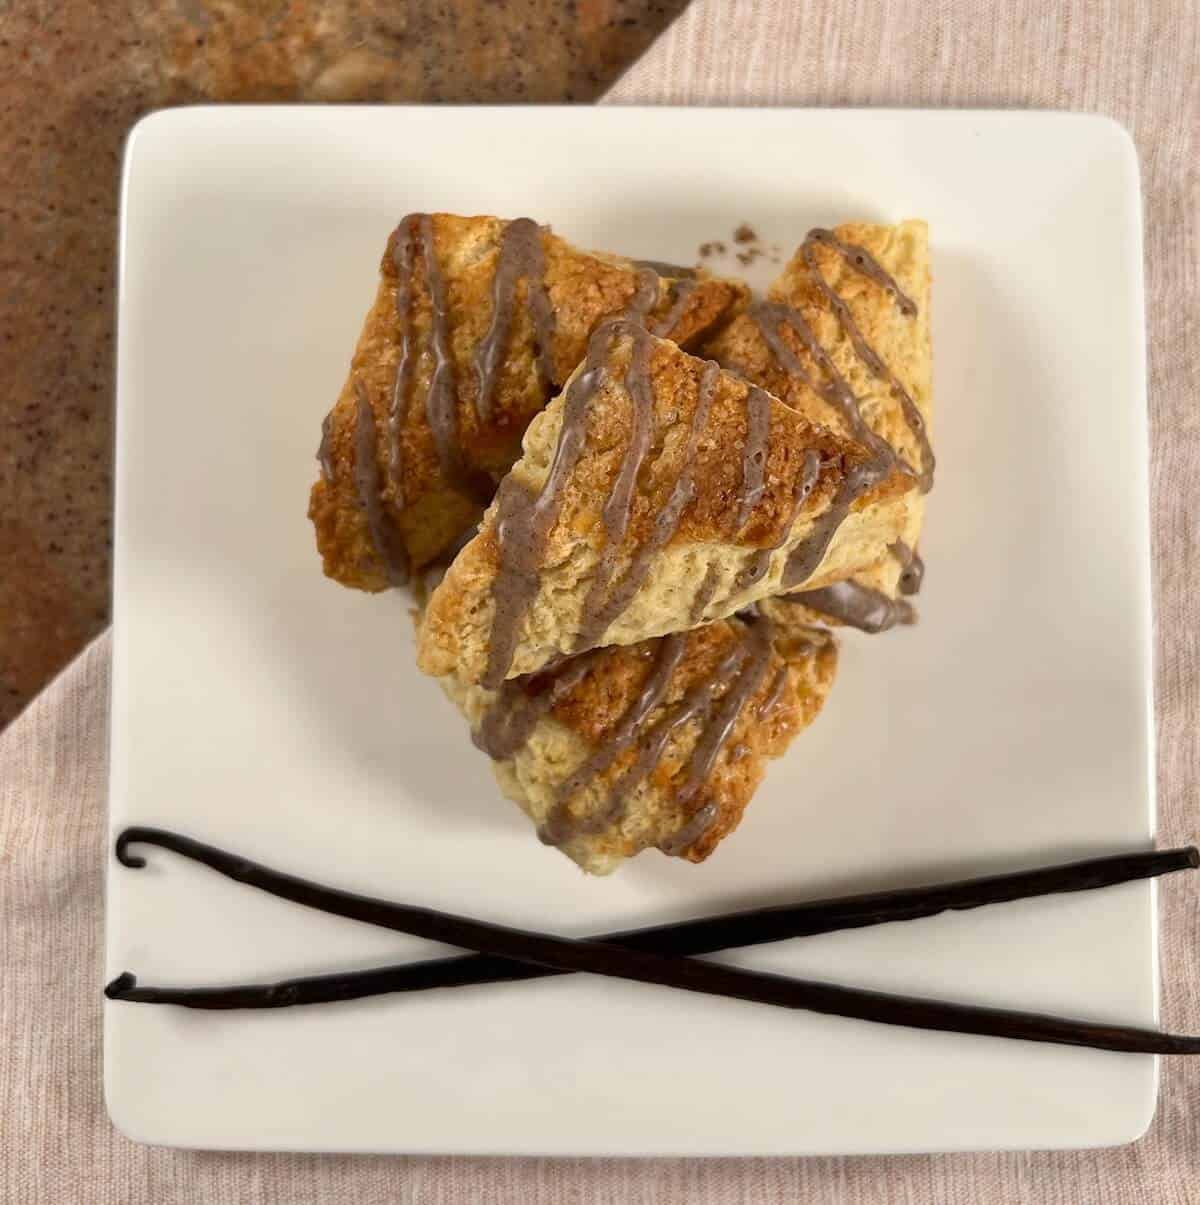
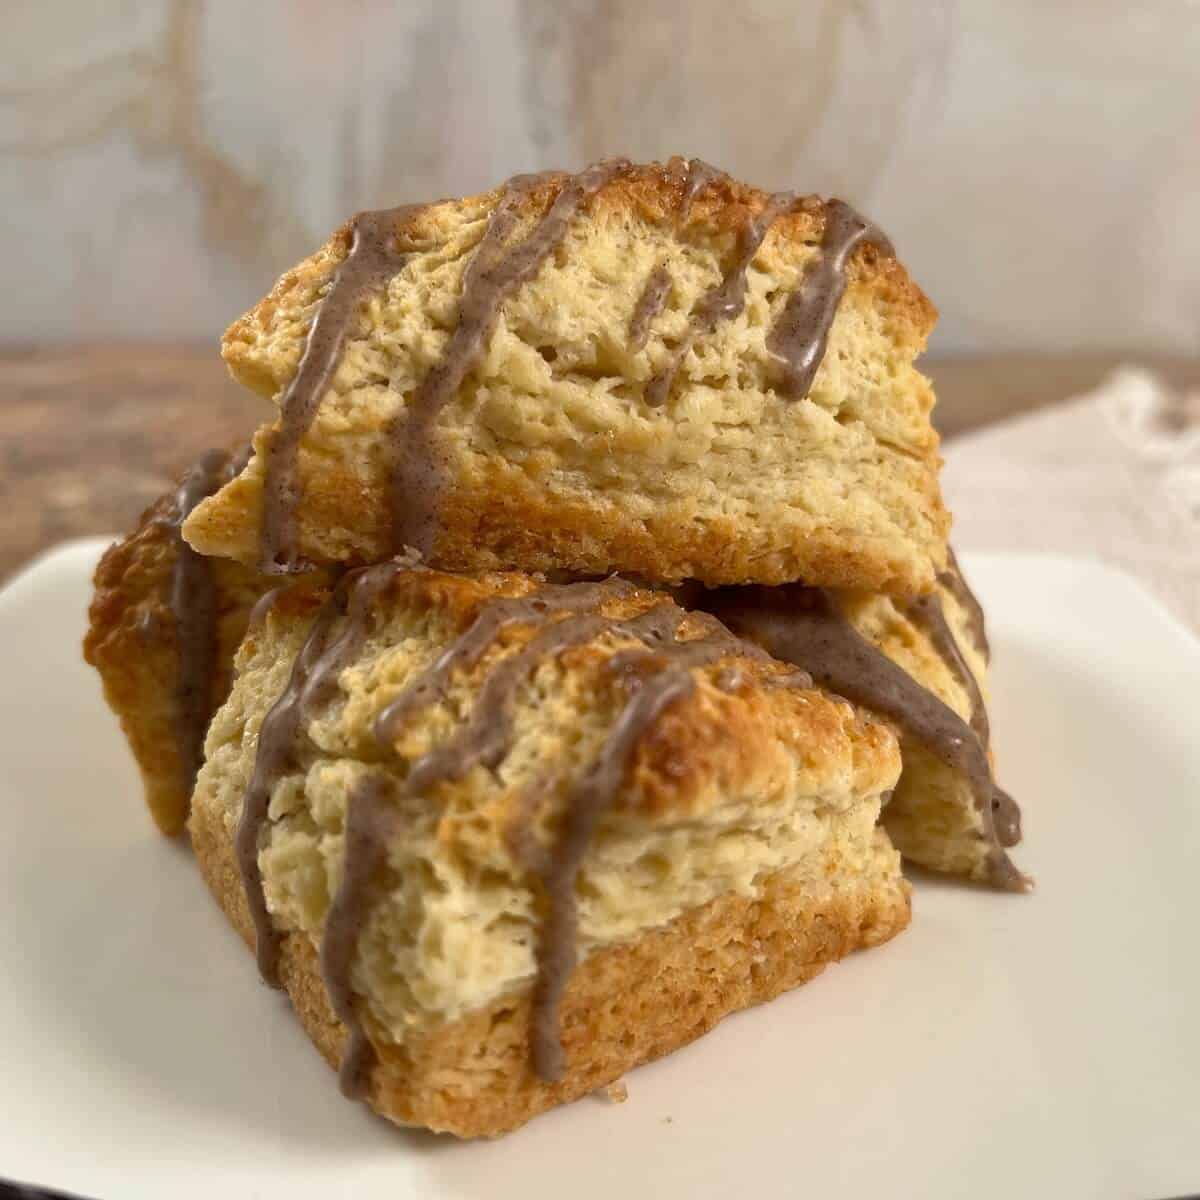
However, vanilla bean powder does darken the icing's coloring (that's why the icing looks dark in these photos). You can use the same amount of vanilla bean paste or vanilla extract to keep the color neutral, if desired.
Want to know more about the different types of vanilla? See my Types of Vanilla Explained guide for how whole vanilla beans, vanilla extract, vanilla bean paste, and vanilla bean powder differ, when to use each one, and how to substitute them.
See the recipe card for a full list of ingredients and measurements.
How to make Mini Vanilla Bean Scones
Step 1: Make the dough
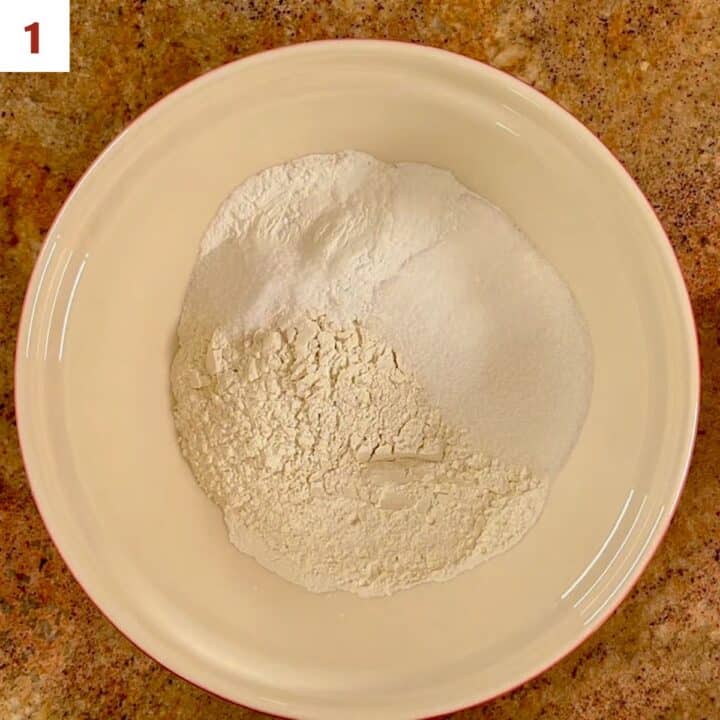
In a large bowl, combine the flour, sugar, baking powder, and salt (photo 1).
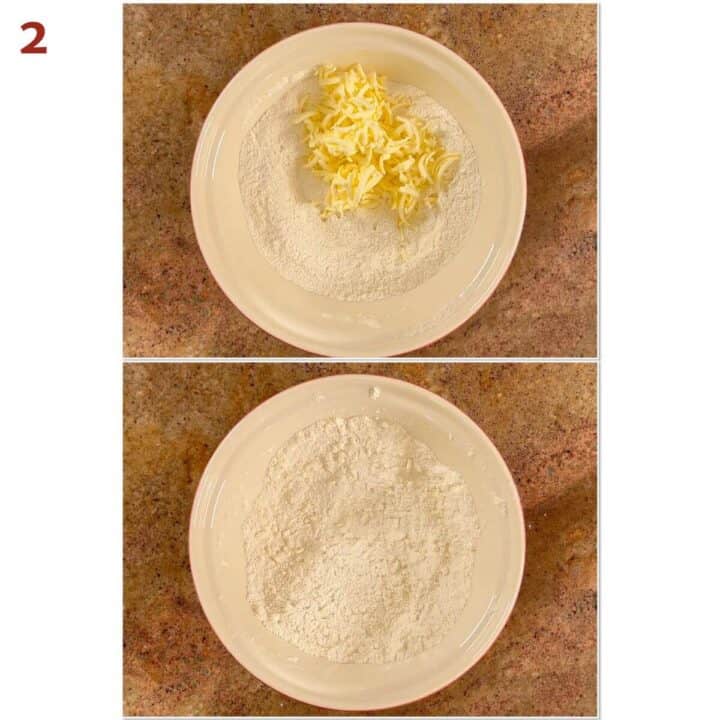
Toss the butter into the flour mixture to coat, then use a pastry blender, two forks, or your hands to work the butter into the flour until coarse, pea-sized crumbs appear (photo 2).
Don't overwork the butter
You don't want the butter to warm up and mix completely into the flour - instead you want to see distinct bits of butter in the dough. This is what creates the flakiness of the baked scone.
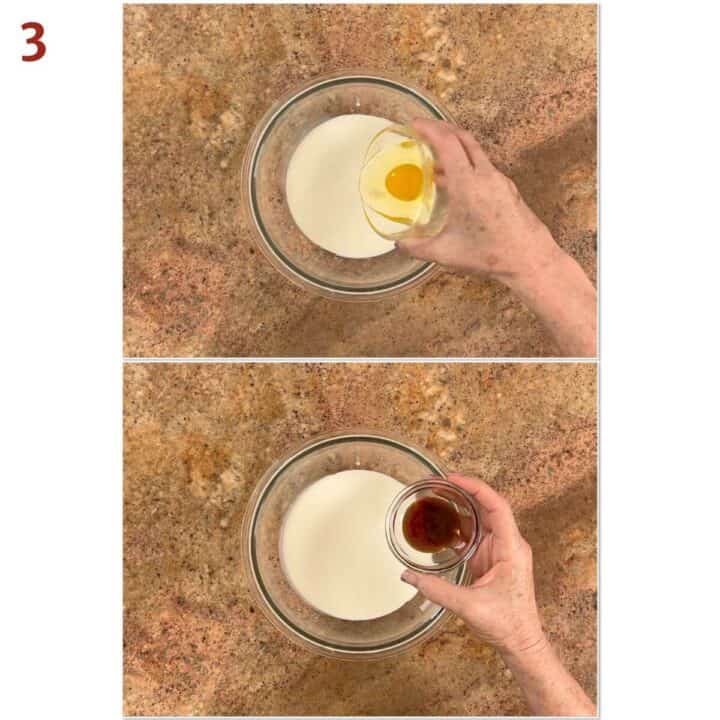
In a small bowl, whisk together the heavy cream, egg, and the vanilla bean paste (photo 3).
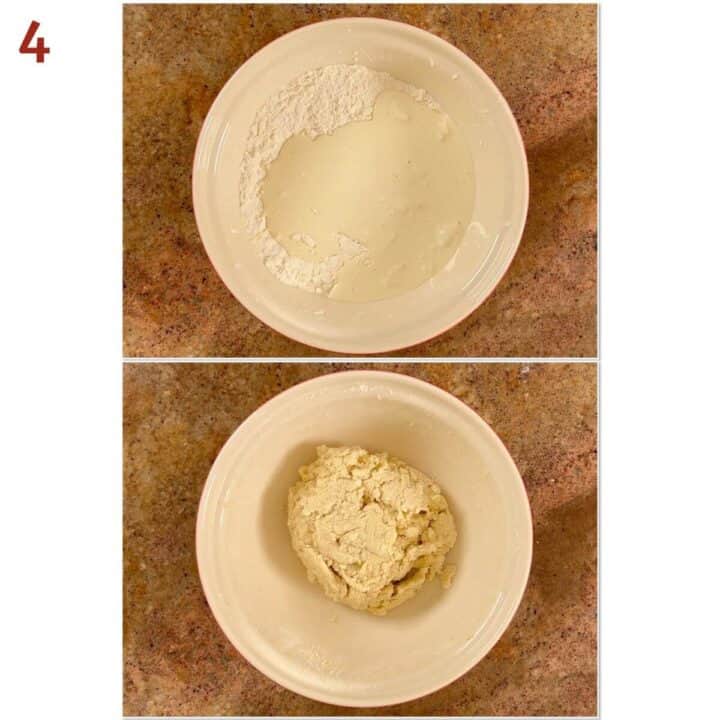
Slowly add the heavy cream mixture to the flour mixture and mix until the dough just holds together (photo 4).
Using a bowl scraper will help to combine the dough in the bowl without your hands warming up the butter, plus you can see any crumbs at the bottom that still need to be mixed in.
Push the dough into a ball in the bowl.
The weather matters
The amount of cream your dough needs depends on the humidity in your kitchen. On dry days you may need another tablespoon or two of cream, while humid days may require a little extra flour.
To test, squeeze a small amount of dough between your fingers - if it is very crumbly, add more liquid, 1 tablespoon at a time (2 tablespoons maximum). If the dough is too wet, you can knead in 1 tablespoon of flour when you turn out the dough.
Again, don't overwork the dough - you want to keep that butter cold and separate from the flour.
Make the dough in a food processor
I've noticed as I've grown older that it's getting harder for me to make scone dough by hand, especially if I'm using frozen butter.
Using the food processor is a quick and efficient way to make scone dough, as long as you follow the #1 rule: Don't overwork the dough! Use short 5 to 10 second pulses to process the dough - you still want to see the chunks of butter after the dough is mixed. Here's a step-by-step breakdown:
- Pulse the flour, sugar, baking powder, and salt until it's combined.
- Add the cold butter to the flour mixture and pulse a few times. Stop as soon as you see the flour mixture looking crumbly with pea-sized pieces of butter.
- Add the cream mixture and pulse just until the dough holds together.
Now you're ready to turn out the dough and continue with the recipe.
Step 2: Portion the dough
Turn the dough out onto a lightly floured surface and shape it into a rough square about 1-inch high.
Fold the dough in half (using the bench scraper helps) into a rectangle. Flatten the dough with the bench scraper, then refold the short edge and flatten again (photo 5). Reshape the dough into a square, about 6- x 6-inches.
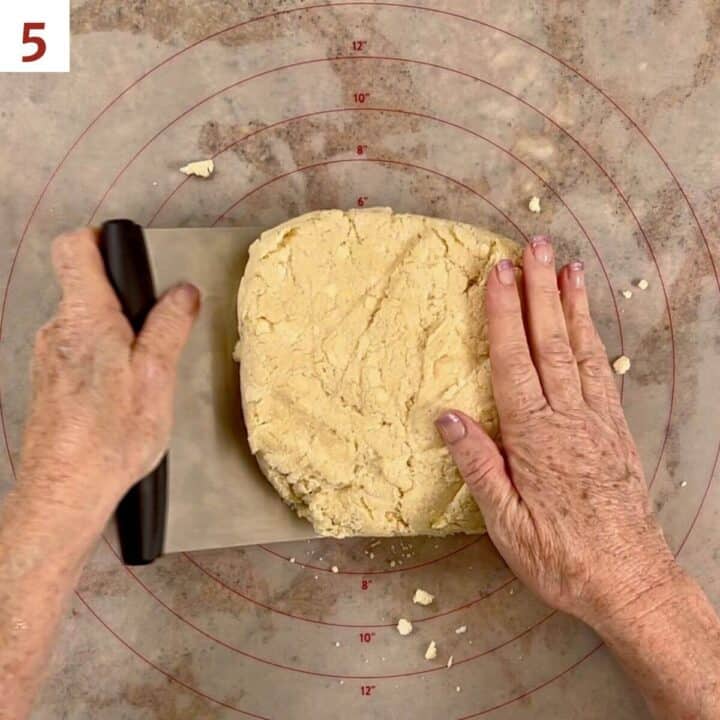
Do this "fold and flatten" method a few times. Folding creates alternating layers of dough and butter. As the butter melts in the oven, it releases steam that separates those layers, giving the scones their tender, flaky texture.
Chill the dough
Chilling the dough now helps to harden up the butter after all that folding. Remember, cold butter = flaky scones!
Cover with plastic wrap, and refrigerate the dough at least 30 minutes or up to overnight.
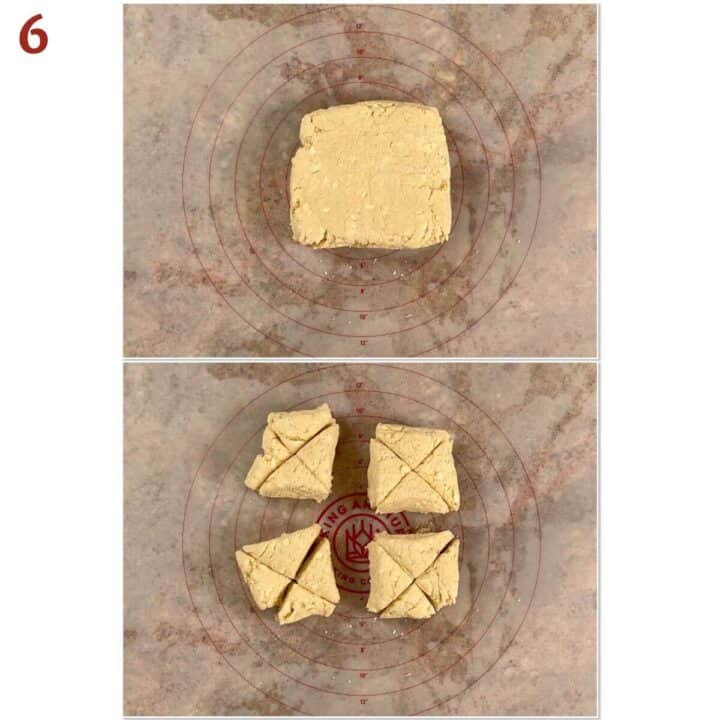
Use a bench scraper to cut the dough into 4 small squares, then cut each square across the diagonal to form 16 small triangles (photo 6).
Step 3: Bake the scones
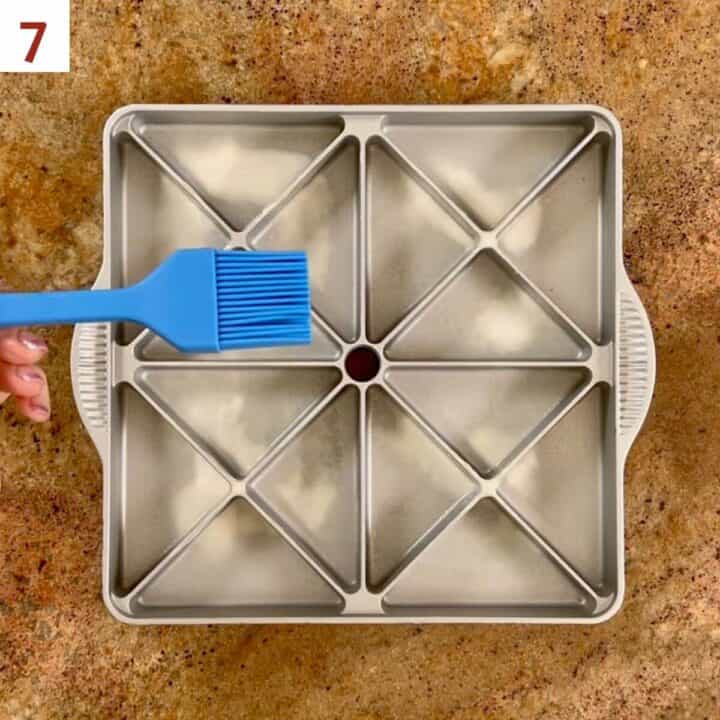
Coat the wells of a mini scone pan pan with baking spray, and use a pastry brush to make sure you get up the walls and into the corners (photo 7).
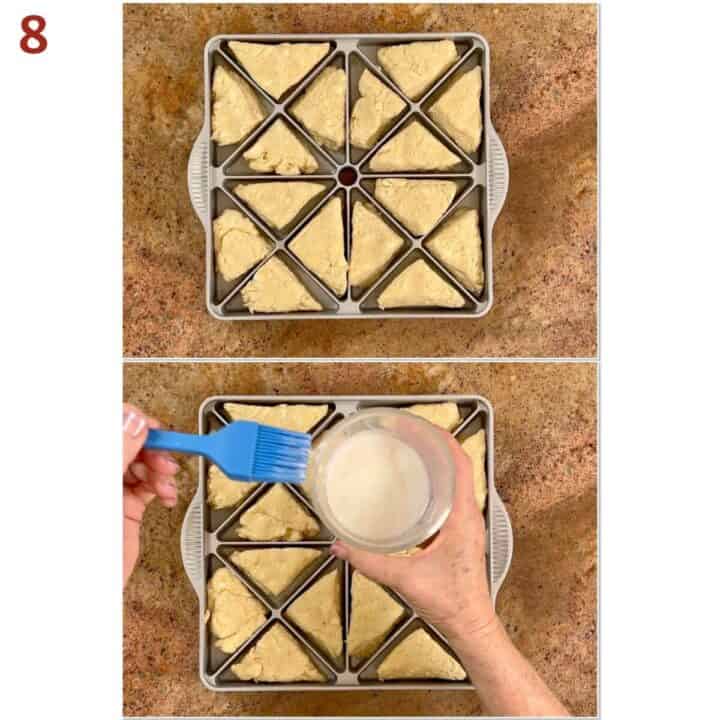
Place the mini scones into the wells of the scone pan, pressing down so the dough is level with the walls of the pan. If necessary, even out the dough portions (somehow I never get even cut triangles).
Brush the tops of each scone with heavy cream and sprinkle with coarse sugar (photo 8).
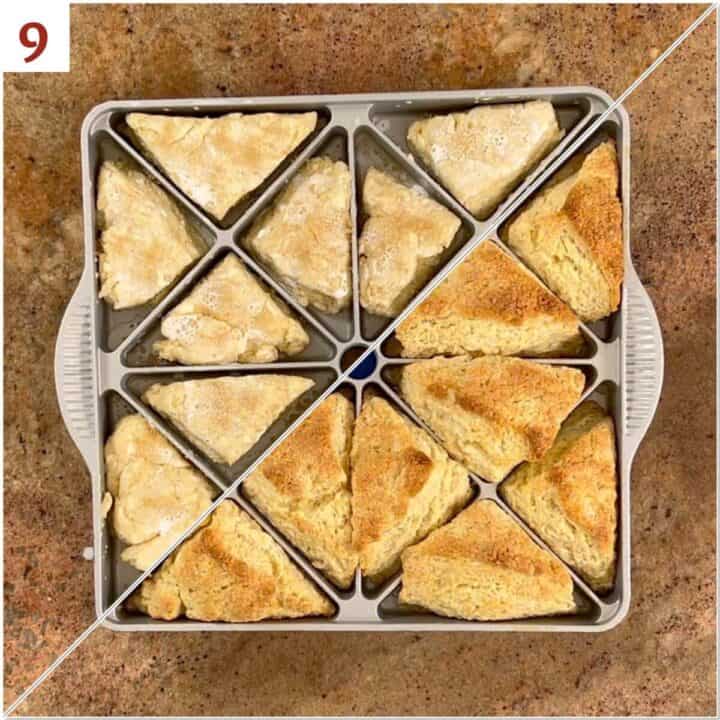
Bake for 20 to 23 minutes or until golden brown (photo 9).
Remove from the oven and cool the scones on the baking pan for 2 minutes, then move to a cooling rack. Allow to cool for 10 to 15 minutes.
Step 4: Make the vanilla icing
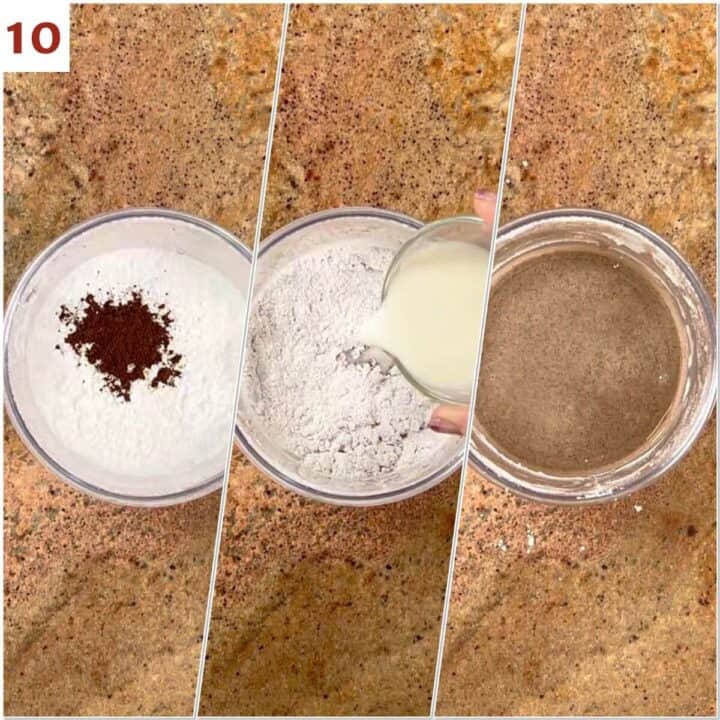
Whisk sifted powdered sugar, vanilla bean powder, and milk in a small bowl (photo 10).
Adjust the consistency by adding 1 teaspoon of milk or more sifted powdered sugar as needed.
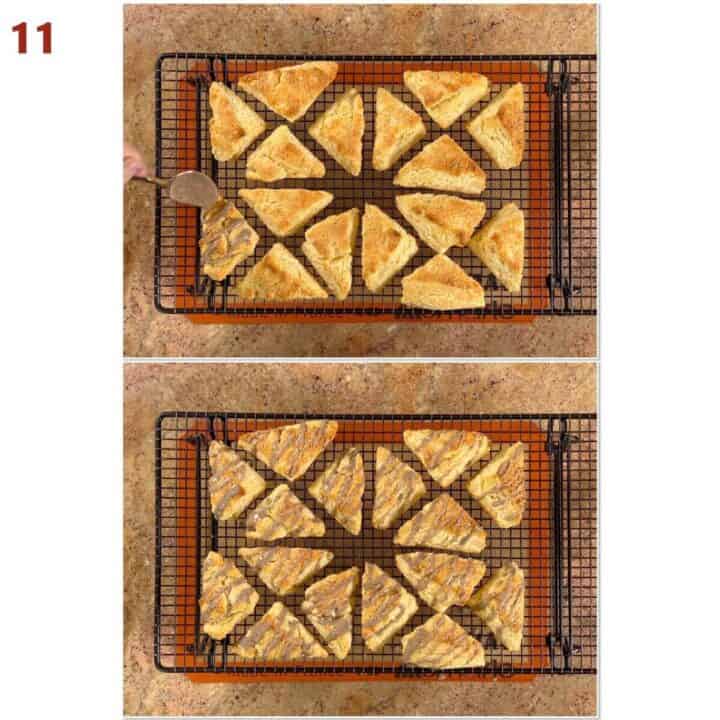
Drizzle the glaze on the scones and allow to set.
You can place a Silpat silicone mat or parchment paper under the cooling rack to catch any drips.
Storage and make-ahead instructions
Storage instructions: Scones are best enjoyed right away, though leftover scones keep well at room temperature or in the refrigerator, stored in an airtight container, for about 3 to 5 days. Glazed or plain scones freeze well, in an airtight bag, for up to 3 months. Thaw overnight in the refrigerator then warm to your liking before enjoying.
Make-ahead instructions: For freshly baked scones anytime, freeze the cut, unbaked scones in a ziplock bag. Take out as many as you want to bake (there's no need to defrost them first), and bake at 375 °F
for 20 to 25 minutes. Drizzle on the icing after cooling.
Yield Notes
The recipe as written makes 16 mini scones, and doubles easily if you're baking for a brunch, shower, holiday gathering, or afternoon tea. Prepare and shape the dough as directed, then bake in batches or freeze the extra unbaked scones so you can bake them fresh later.
Troubleshooting tips
Here are some issues you might encounter when making vanilla bean scones:
- My dough won't come together: Humidity affects flour. Add more heavy cream one tablespoon at a time until the dough just holds together
- My scones are dry: Too much flour can make scones crumbly. Using a kitchen scale to measure out the flour (or at least spoon the flour into the measuring cup and level it off) is the best way to make sure you have the correct amount of flour
- My scones spread instead of rising: The butter became too warm and blended into the flour. Don't over-mix the dough - you want to see pockets of butter in the finished dough, and be sure to chill the dough well before baking
- My scones aren't flaky: The butter likely became too warm and blended into the flour (see above) or the dough wasn't folded enough. Folding ensures the dough has layers of flour and butter, and it's those pockets of butter that steam and spread during baking, creating flakiness
- My scones are tough: Overmixing develops the gluten in the flour. Stir only until the dough comes together, then stop
- My glaze is too thin: Add more powdered sugar in one teaspoon increments
- My glaze won't drizzle: Add milk in one teaspoon increments
Questions asked and answered
Here are some questions you might have...
Sure! The scones are buttery and flavorful enough to enjoy plain. Brushing the tops with heavy cream and sprinkling them with coarse sugar before baking creates a lightly crisp, golden crust. If you prefer a less sweet scone, simply skip the glaze and serve them with butter, berry jam, lemon curd, or clotted cream.
Sure! Shape the dough into triangles as discussed, then place them about 2-inches apart on a half sheet baking pan lined with a Silpat silicone mat or parchment paper. Bake as directed.
Those tiny black specks are real vanilla bean seeds from the vanilla bean paste or vanilla bean powder. They're completely normal and are a sign that you're using real vanilla rather than artificial flavoring.
Didn't find the answer you're looking for?
Ask AI to answer for this specific recipe:
Disclaimer: I am not responsible for the quality of AI information

I hope you like this recipe! Let me know if you have any questions, and don't forget to leave a comment and rating. Thanks!
Slainté! L'chaim! Cheers!
- Tammy
More biscuit and scone recipes to try



Recipe
Mini Vanilla Bean Scones
Equipment
- mini scone pan see Recipe Notes
- box grater if butter is frozen
Ingredients
For the scones
- 2¾ cups all-purpose flour
- ⅓ cup granulated sugar
- 4 teaspoons baking powder
- 1¼ teaspoon kosher salt
- ½ cup unsalted butter, cold, grated or cubed, see Recipe Notes
- ¾ cup heavy cream, plus extra for brushing on top
- 1 large egg, beaten
- 2 teaspoons vanilla bean paste, see Recipe Notes
- coarse sugar, for sprinkling, optional
For the glaze
- ½ cup powdered sugar
- 1 to 2 tablespoons milk
- ½ teaspoon vanilla bean powder, or vanilla bean paste, see Recipe Notes
Instructions
- Preheat the oven to 400 °F. Coat the wells of a mini scone pan pan with baking spray, and use a pastry brush to make sure you get up the walls and into the corners. Set aside. Note: The instructions below are for making the dough by hand. If you want to use the food processor to make the dough, see the instructions in the post above.
- Make the dough: In a large bowl, combine 2¾ cups all-purpose flour, ⅓ cup granulated sugar, 4 teaspoons baking powder, and 1¼ teaspoon kosher salt.
- Toss ½ cup unsalted butter (cold, and grated or cubed) into the flour mixture to coat, then use a pastry blender, two forks, or your hands to work the butter into the flour mixture until coarse, pea-sized crumbs appear. Don't overdo this step as you don't want the butter to warm up and mix completely into the flour.
- In a small bowl, whisk together ¾ cup heavy cream, 1 large egg, and 2 teaspoons vanilla bean paste.
- Slowly add the heavy cream mixture to the flour mixture and mix until the dough just holds together. Using a bowl scraper will help to combine the dough in the bowl without your hands warming up the butter, plus you can see any crumbs at the bottom that still need to be mixed in. The amount of the heavy cream mixture to add depends on the humidity of the day. Squeeze a small amount of dough between your fingers, and add more of heavy cream or flour, 1 tablespoon at a time (2 tablespoons maximum), if it's too crumbly or too wet. Remember, do not over mix the dough - you want to keep that butter cold and separate from the flour.
- Use the bowl scraper to push the dough into a ball in the bowl, then turn the dough out onto a lightly floured surface and shape it into a rough square about 1-inch high.
- Fold the dough in half (using the bench scraper helps) into a rectangle. Flatten the dough with the bench scraper, then refold the short edge and flatten again. Do this "fold and flatten" method a few times. This help to create the flaky layers in the scones.
- Reshape the dough into a square, about 6- x 6-inches. Cover with plastic wrap and refrigerate the dough at least 30 minutes or up to overnight.
- Use a bench scraper to cut the dough into 4 small squares, then cut each square across the diagonal to form 16 small triangles.
- Place the mini scones into the wells of the scone pan, pressing down so the dough is level with the walls of the pan. If necessary, even out the dough portions (somehow I never get even cut triangles).Brush the tops of each scone with heavy cream and sprinkle with coarse sugar.
- Bake for 20 to 23 minutes or until golden brown. Remove from the oven and cool the scones on the baking pan for 5 minutes, then transfer the scones to a cooling rack. Allow to cool for 10 to 15 minutes.
- For the vanilla icing: Whisk ½ cup powdered sugar (sifted), 1 to 2 tablespoons milk, and ½ teaspoon vanilla bean powder in a bowl until smooth. Adjust the consistency by adding 1 teaspoon of milk or more sifted powdered sugar as needed.
- Drizzle the glaze on the scones and allow to set. You can place a Silpat silicone mat or parchment paper under the cooling rack to catch any drips.
- Serve warm or at room temperature. Pair them with homemade berry jam, lemon curd, and clotted cream for a lovely combination. Enjoy!
- Storage Instructions: Scones are best enjoyed right away, though leftover scones keep well at room temperature or in the refrigerator, stored in an airtight container, for about 3 to 5 days. Glazed or plain scones freeze well, in an airtight bag, for up to 3 months. Thaw overnight in the refrigerator then warm to your liking before enjoying.
- Make-ahead instructions: For freshly baked scones anytime, freeze the cut, unbaked scones in a ziplock bag. Take out as many as you want to bake (there's no need to defrost them first), and bake at 375 °F for 20 to 25 minutes. Drizzle on the icing after cooling.
- The recipe as written makes 16 mini scones, and doubles easily if you're baking for a brunch, shower, holiday gathering, or afternoon tea. Prepare and shape the dough as directed, then bake in batches or freeze the extra unbaked scones so you can bake them fresh later.




Comments
No Comments