
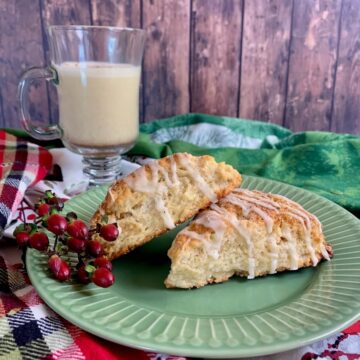
Chocolate Chip Scones are a simple pleasure, having a tender flaky texture and crumbly exterior with just the right amount of sweetness. They're perfect for breakfast or brunch, and make a nice addition to an afternoon tea!

Jump to:
- Quick Recipe Summary ✨
- Why this recipe works
- Why are homemade chocolate chip scones better than coffee shop scones?
- Recipe Ingredients
- How to make chocolate chip scones
- Making scones in the food processor
- Storage and make-ahead instructions
- How to make mini scones
- What goes with scones?
- Chocolate Chip Scone troubleshooting
- Questions asked and answered
- More biscuit and scone recipes to try
- Recipe
- Comments
Quick Recipe Summary ✨
Chocolate Chip Scones: Buttery, flaky bakery-style scones loaded with chocolate chips and baked until golden brown with crisp edges and a tender, melt-in-your-mouth interior.
Easy cream scone method: Heavy cream and cold butter create rich flavor and delicate layers without requiring complicated techniques.
Perfect for breakfast or brunch: These coffeehouse-worthy scones come together quickly and can be frozen before baking for fresh-from-the-oven scones anytime.
Active Time: About 20 minutes • Chill Time: 30 minutes • Bake Time: 18 to 23 minutes • Total Time: About 1 hour ⏱️
Difficulty Level: ⭐ Easy. Simple technique, just keep ingredients cold and don't over-mix
Yield: 8 to 12 scones • Freezer-friendly: Up to 3 months • Make-ahead: Freeze unbaked and bake fresh anytime
👉 Follow the tips below to make bakery-quality chocolate chip scones with flaky layers, tender crumb, and perfect rise every time!
SUMMARIZE & SAVE THIS CONTENT ON
Why this recipe works
- The cream scone method creates a rich, tender crumb with very little fuss
- Cold butter and a hot oven work together to create tall, flaky layers.
- Chocolate chips are balanced against a lightly sweetened dough, so the scones aren't overly sugary
- Chilling the dough helps the scones hold their shape and bake up bakery-style thick
- The recipe is easy to customize with mini chips, dark chocolate chips, or your favorite add-ins
Chocolate Chip Scones are one of life's simple pleasures. You'll see them in major coffeehouses and in the bakery section of your local supermarket. But sometimes these commercially made scones can be dry and crumbly with no real flavor.
That's when it's time to bake your own! These easy Chocolate Chip Scones only take a few minutes of hands-on work time, and will be better than anything you can buy!
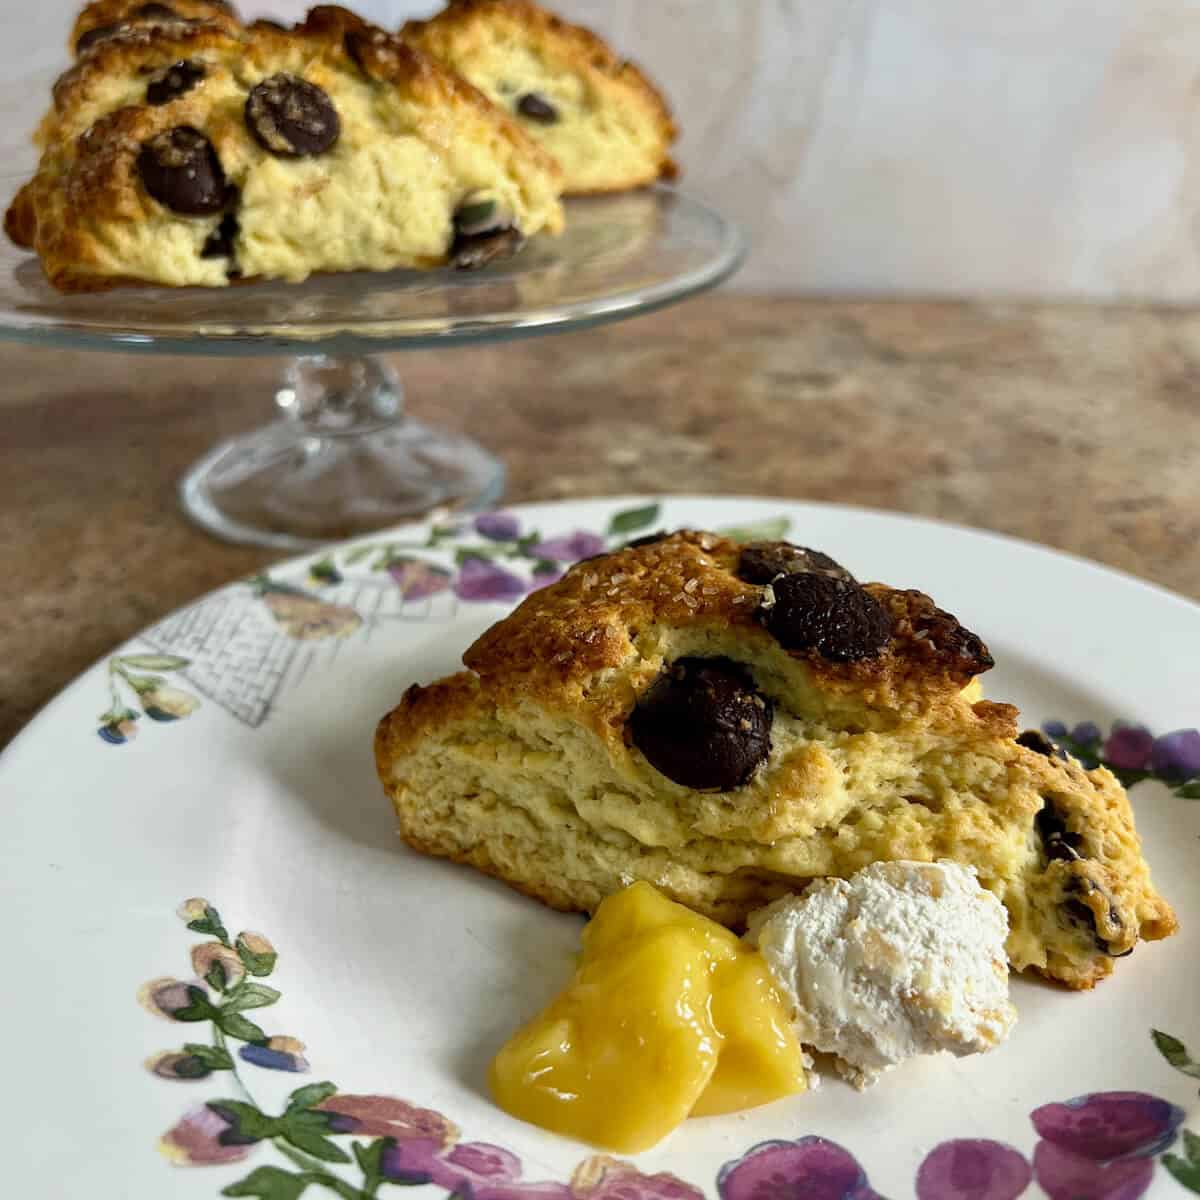
These chocolate chip scones are buttery and lightly sweet rather than dessert-like. The scones bake up with crisp golden edges and a tender, flaky interior, while the chocolate chips add bursts of melted chocolate throughout. Richer and more crumbly than muffins, they're perfect for breakfast or brunch, and make a nice addition to an afternoon tea.
So why bother with dry, bland supermarket or coffeehouse chocolate chip scones? You can have freshly-baked homemade Chocolate Chip Scones that will be so much better than store bought!
Why are homemade chocolate chip scones better than coffee shop scones?
I often say that homemade scones are much better than what you can buy. Here's a few reasons why that is:
| Homemade Chocolate Chip Scones | Coffee Shop Scones |
| Baked fresh when you want them | May sit for hours |
| Tender, flaky texture | Often drier |
| Customizable chocolate and flavoring options | Fixed recipe |
| No preservatives | Commercial ingredients |
| Best served warm | Usually served at room temperature |
The secret is using heavy cream, cold butter, and a minimal mixing technique. Together they create tender, flaky scones with crisp edges and a soft interior that are difficult to match in mass-produced bakery scones.
Recipe Ingredients
You'll need the following ingredients to make this chocolate chip scones recipe:
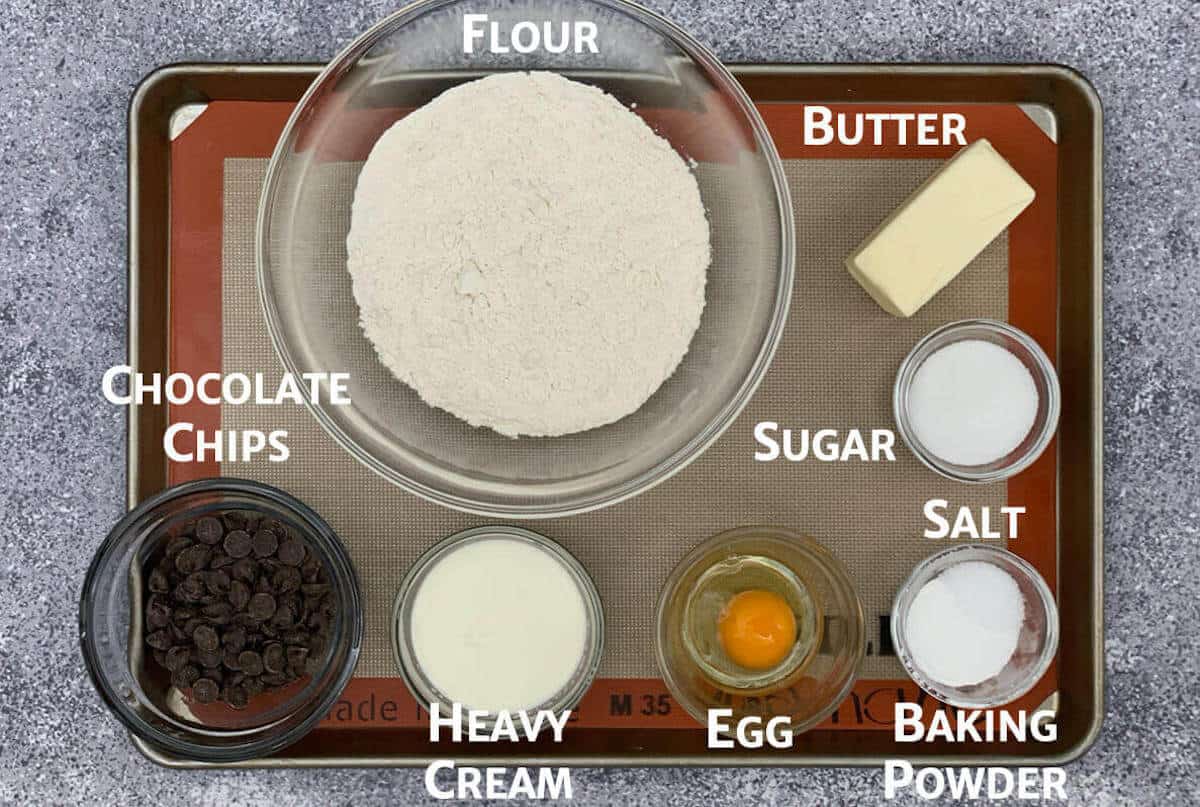
Ingredient Notes
The basic ingredients for cream scones don't vary a whole lot: all-purpose flour, heavy cream, butter, sugar, baking powder, an egg, and salt.
For a deeper look at the cream scone method and how changing the flour, butter, and cream ratios affects texture, see How to Make Cream Scones.
Butter: How you cut up your butter isn't as important as keeping it cold. Generally I'll grate frozen butter on a box grater before cutting it into the flour mixture. You can also cut chilled butter into small ½-inch cubes. Either way, make sure the butter is well chilled before cutting it into the flour mixture.
Some cream scones recipes use more butter than the 3 : 1 : 2 recipe ratio. For this recipe, you can add another 2 tablespoons of butter for more richness if you'd like.
Baking powder: This is what gives the scones their rise and light texture. Be sure your baking powder is fresh for the tallest, fluffiest scones. Don't substitute baking soda as the scones will have a metallic taste to them.
Chocolate chips: I prefer using regular chips because they balance the buttery scone dough without making the scones overly sweet, plus they create larger pockets of melted chocolate. Using mini chocolate chips will give you more even distribution of chocolate in every bite.
As for type, milk, semi-sweet, or dark chocolate chips all work equally well, so use your favorite.
Flavorings: To flavor your scones, you can use vanilla extract or vanilla bean paste (which adds specks of vanilla bean in addition to the flavoring). Or, use ½ teaspoon of vanilla extract and ¼ teaspoon of another extract like almond, mint, or Fiori di Sicilia (an orange vanilla flavoring).
Toppings: The scones are topped with a bit of coarse sugar sprinkled on before baking to add a little crunch.
See the recipe card for a full list of ingredients and measurements.
How to make chocolate chip scones
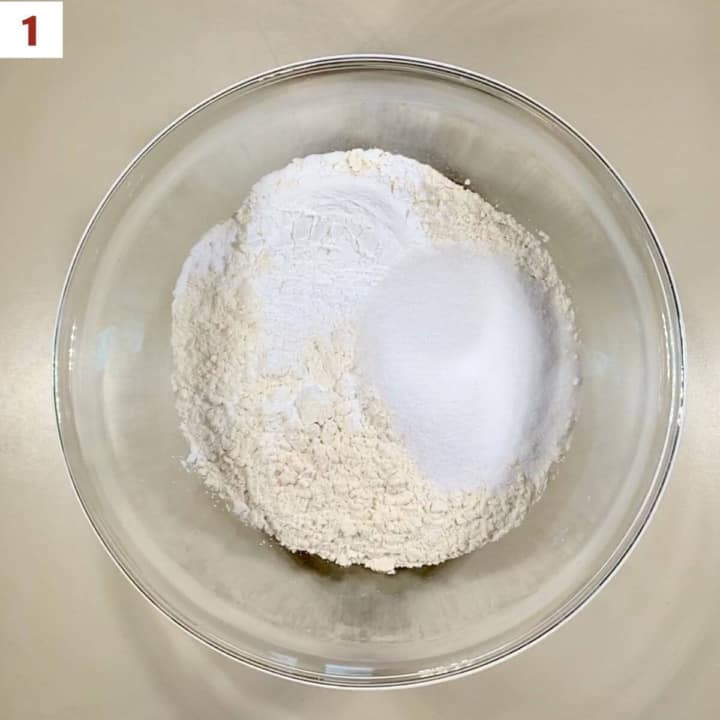
Step 1: Make the dough
In a large bowl, combine the flour, sugar, baking powder, and salt (photo 1).
Toss the butter into the flour mixture to coat, then use a pastry blender, two forks, or your hands to work the butter into the flour until coarse, pea-sized crumbs appear (photo 2).
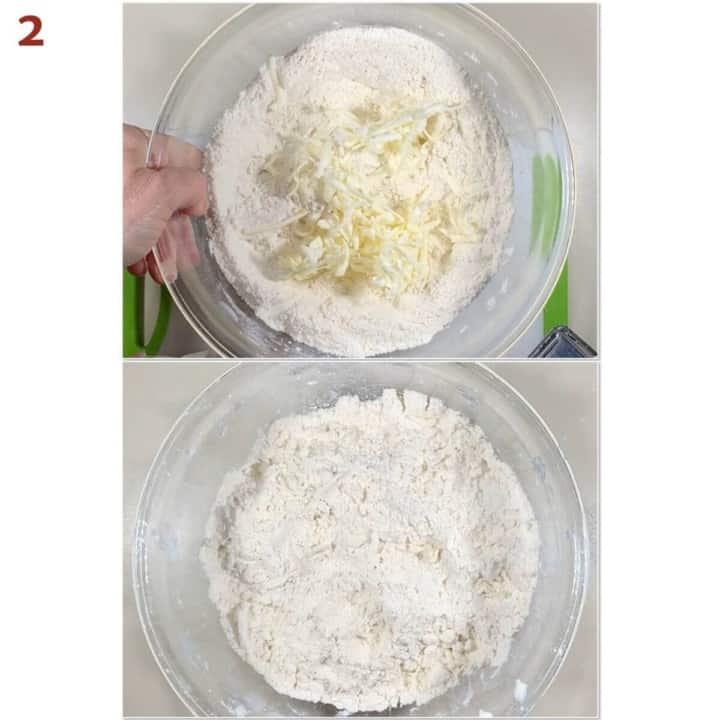
Don't overwork the butter
You don't want the butter to warm up and mix completely into the flour - instead you want to see distinct bits of butter in the dough. This is what creates the flakiness of the baked scone.
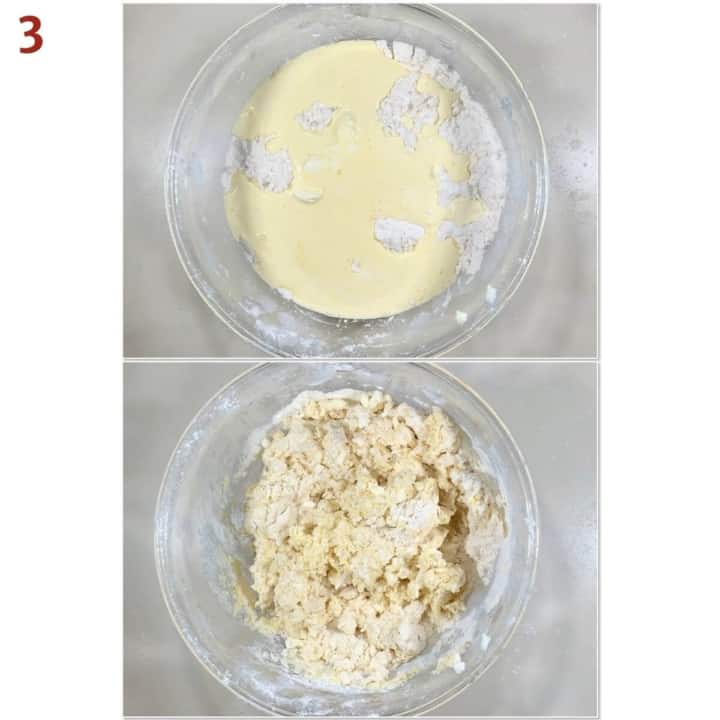
In a small bowl, whisk together the heavy cream, egg, and vanilla extract (if using).
Slowly add the heavy cream mixture to the flour mixture and mix until the dough just holds together (photo 3).
Using a bowl scraper will help to combine the dough in the bowl without your hands warming up the butter, plus you can see any crumbs at the bottom that still need to be mixed in.
The weather matters
You have to be flexible about the amount of liquid to add to the flour mixture as the actual amount will depend on the humidity of the day.
To test, squeeze a small amount of dough between your fingers - if it is very crumbly, add more liquid, 1 tablespoon at a time (2 tablespoons maximum). If the dough is too wet, you can knead in 1 tablespoon of flour when you turn out the dough.
Again, don't over-mix the dough - you want to keep that butter cold and separate from the flour.
Making scones in the food processor
I've noticed as I've grown older that it's getting harder for me to make scone dough by hand, especially if I'm using frozen butter.
Using the food processor is a quick and efficient way to make scone dough, as long as you follow the #1 rule: Don't overwork the dough! Use short 5 to 10 second pulses to process the dough - you still want to see the chunks of butter after the dough is mixed. Here's a step-by-step breakdown:
- Pulse the flour, sugar, baking powder, and salt until it's combined.
- Add the cold butter to the flour mixture and pulse a few times. Stop as soon as you see the flour mixture looking crumbly with pea-sized pieces of butter.
- Add the liquid ingredients and pulse just until the dough holds together.
Now you're ready to turn out the dough and continue with the recipe.
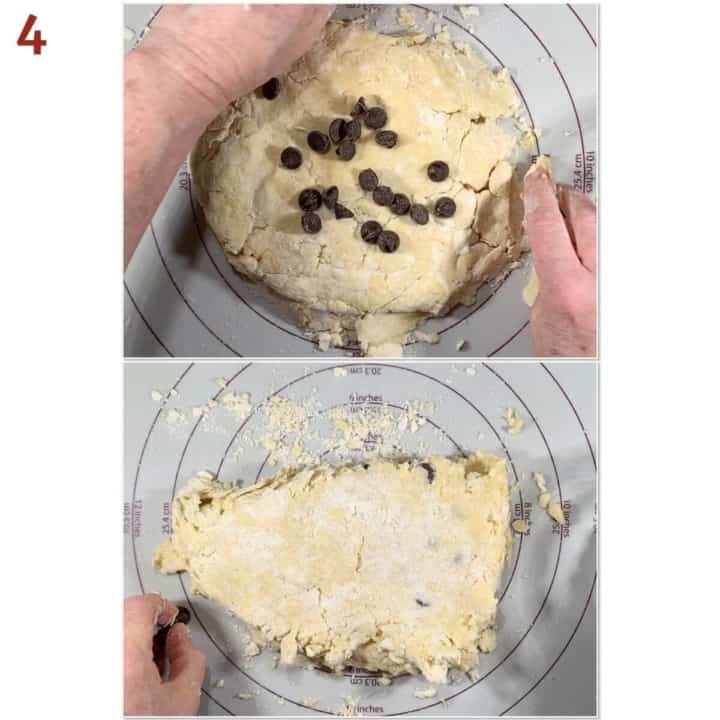
Step 2: Fold in the chocolate chips
Use the bowl scraper to push the dough into a ball in the bowl, then turn the dough out onto a lightly floured surface and shape it into a rough square about 1-inch high.
Sprinkle some of the chocolate chips on the dough, then fold it in half to seal them in (reserve some chocolate chips to press into the dough later). Repeat a couple more times, so the cranberries are evenly distributed in the dough (photo 4). This process is similar to how mix-ins are kneaded into bread dough.
Chill the dough before baking
Chilling the dough now helps to harden up the butter after all that folding. Remember, cold butter = flaky scones!
Gather the dough, and flatten it into a 6-inch disk (if you want square scones, shape the dough into a rectangle with the short side about 4-inches long). Use a bench scraper to release the dough, if needed.
Cover with plastic wrap, and refrigerate the dough at least 30 minutes or up to overnight.
Step 3: Portion the dough
Once the dough is chilled, you have your choice of how to shape the scones:
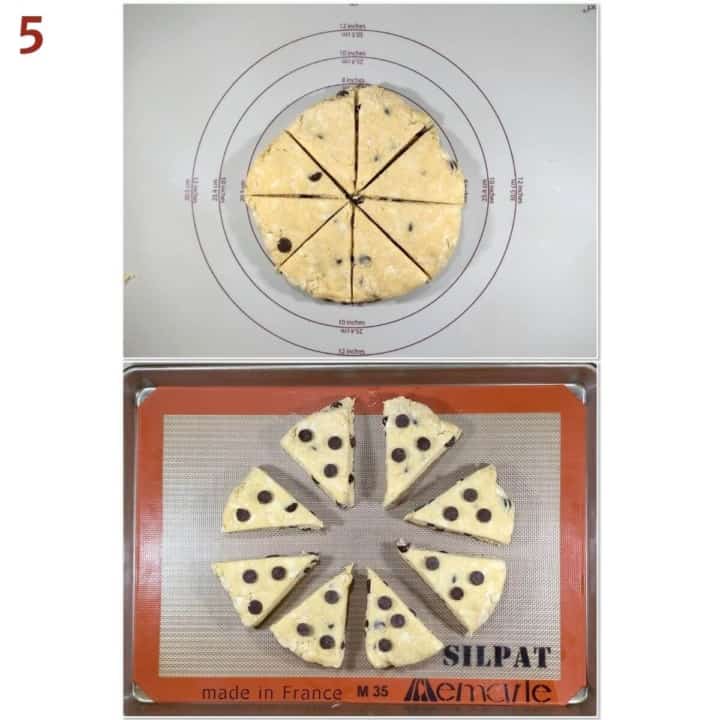
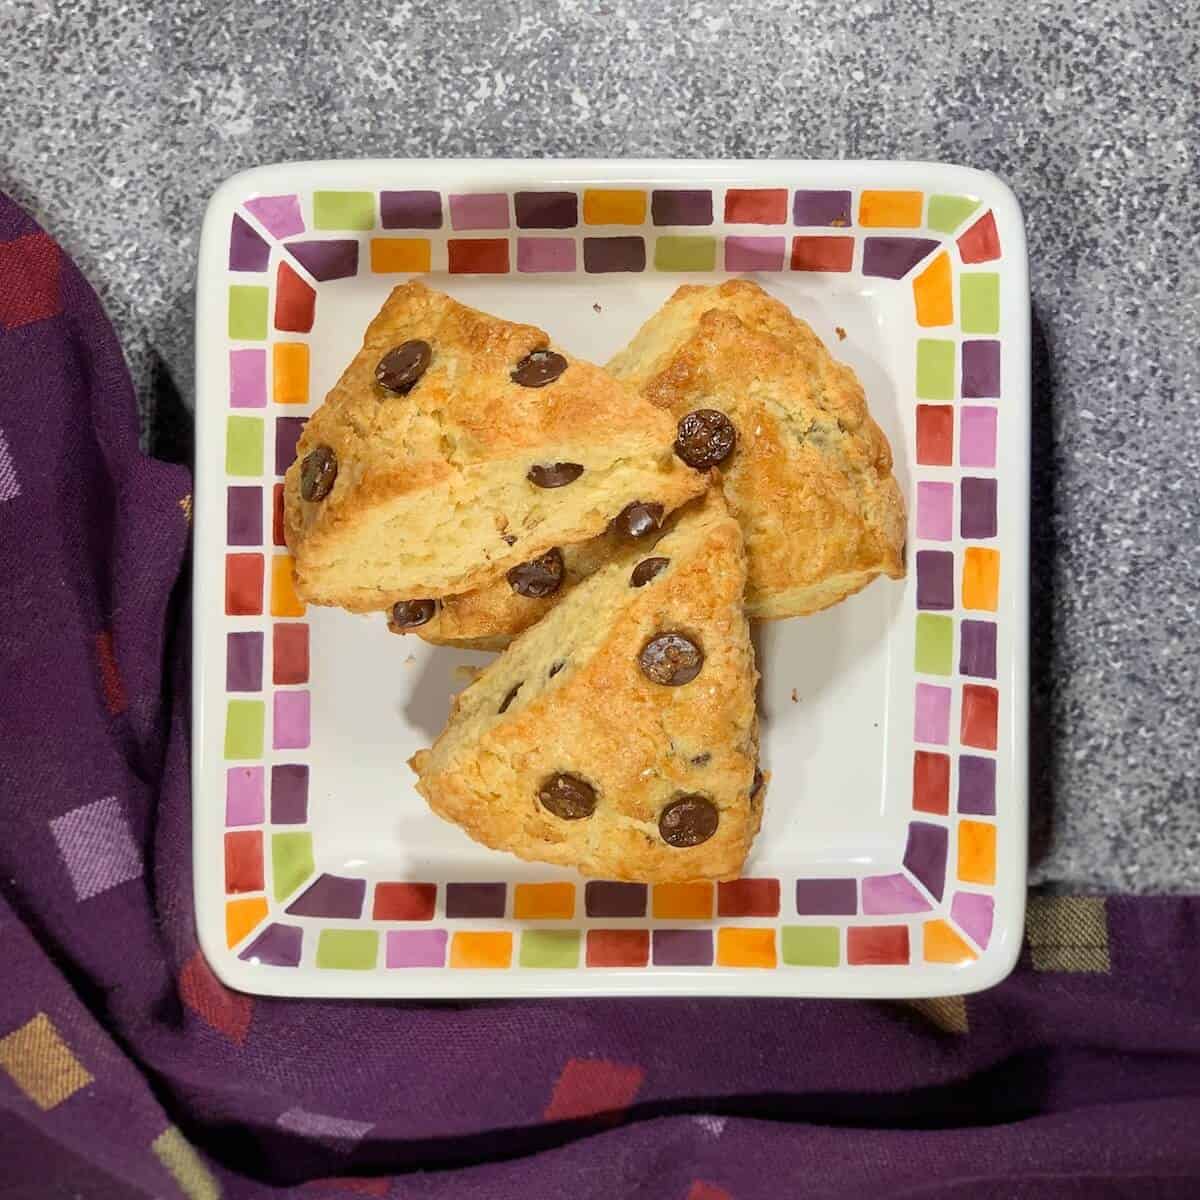
- For wedge-shaped scones: Roll out the disk into an 8-inch circle, then use the bench scraper to cut the disk into 8 wedges (photo 5).
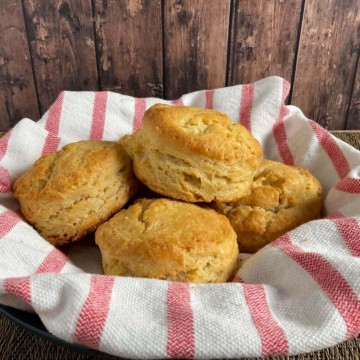
- For round scones: Roll out the disk to a height of about ¾ inches. Use a 3-inch round cookie cutter to cut out rounds (gather, press, and cut the leftover dough again as needed, but hopefully not more than 2 times).
- For square scones: Roll out the dough into a 12- by 4-inch rectangle, then cut into twelve 2-inch squares.
Place the scones about 2-inches apart on a half baking sheet pan covered in a Silpat silicone mat or parchment paper. Press in the reserved dried chocolate chips on the tops of the scones. Brush the tops of each scone with heavy cream with a pastry brush and sprinkle on some coarse sugar.
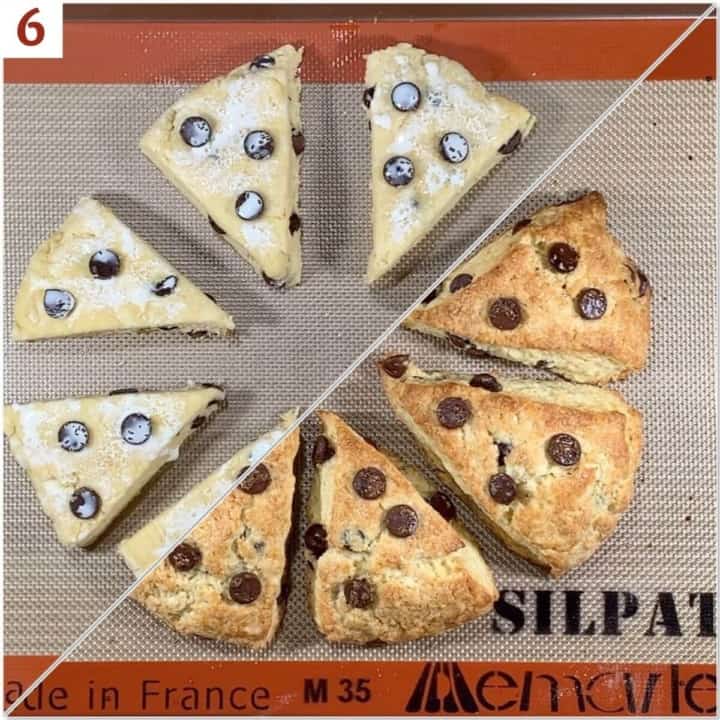
Step 4: Bake the scones
Bake the scones at 400°F for about 18 to 23 minutes or until golden brown (photo 6).
Remove from the oven and cool the scones on the baking pan for 2 minutes, then move to a cooling rack. Allow to cool for at least 10 minutes.
Storage and make-ahead instructions
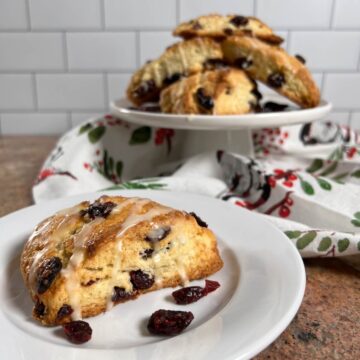
Storage Instructions: Scones are best enjoyed right away, though leftover scones keep well at room temperature or in the refrigerator for about 3 to 5 days. Glazed or plain scones freeze well, up to 3 months. Thaw overnight in the refrigerator then warm to your liking before serving.
Make-ahead instructions: For freshly baked scones anytime, freeze the cut, unbaked scones in a ziplock bag. Take out as many as you want to bake (there's no need to defrost them first), and bake at 375 °F for 20 to 25 minutes.
Yield Notes
The yield is generally about 8 scones (that's what I get from a circle cut into wedges or with a 3-inch round cookie cutter), and up to 12 (cutting the square scones). Your yield may vary.
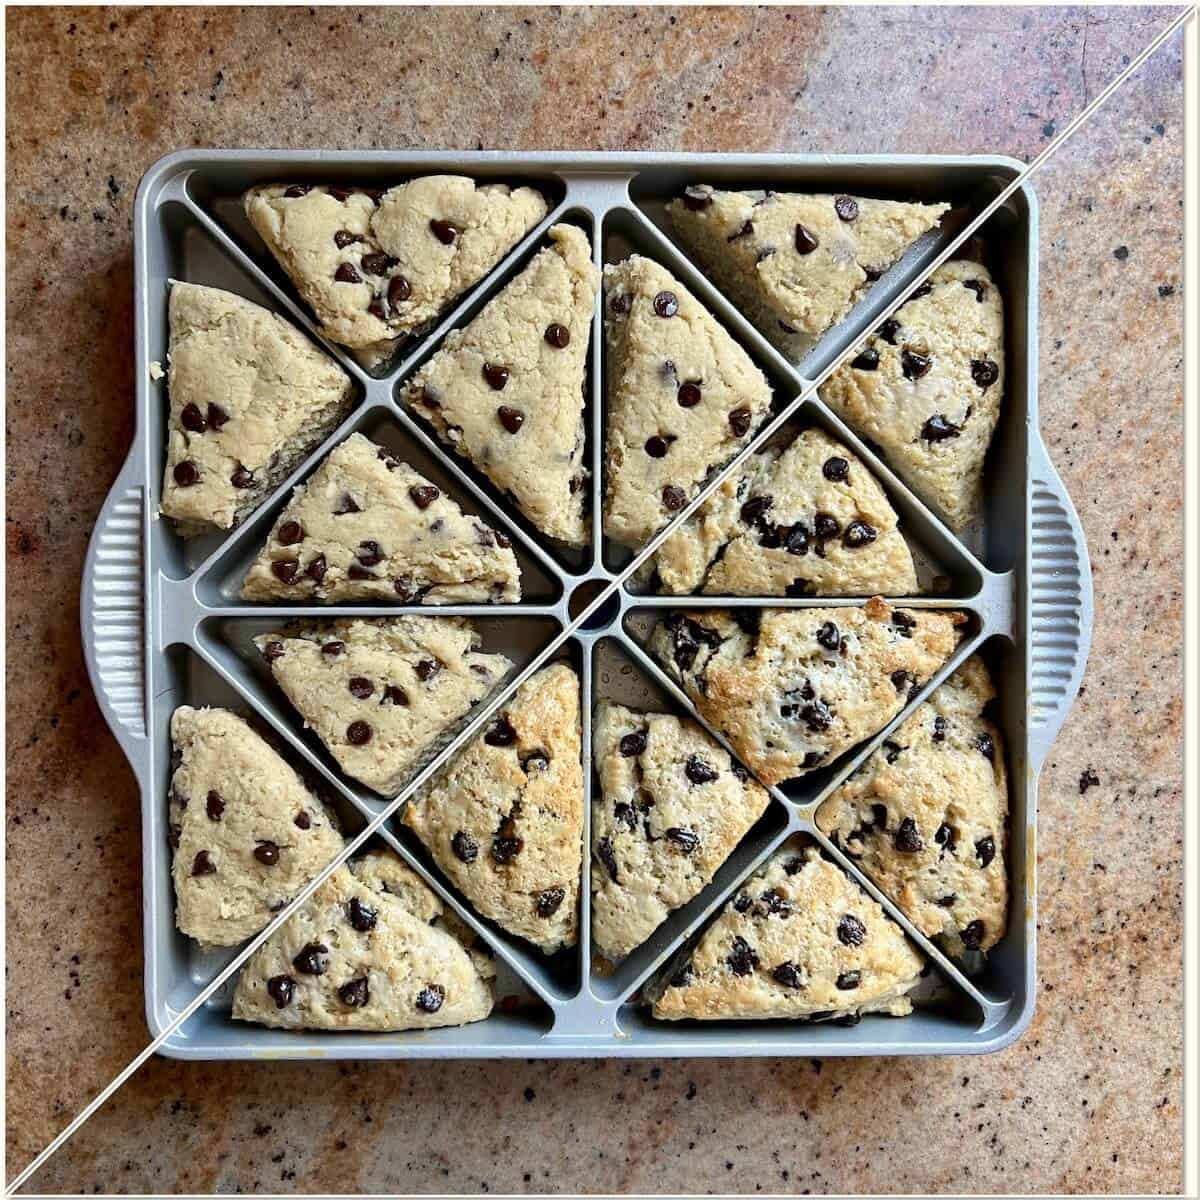
How to make mini scones
If you want to use a mini scone pan to make 16 mini scones, you'll need to increase the ingredient amounts to a 12: 4 : 8 recipe ratio (the adjusted amounts are given in the Recipe Notes.
Using those ingredient amounts, make the dough as directed above. Fold in any desired mix-ins (mini chocolate chips work especially well), then shape the dough into a large square. Cut the square into four small squares, then each square into four triangles. Place the dough triangles in the mini scone pan sprayed with baking spray and press slightly to fill the compartments. Bake as directed.
What goes with scones?
Why, homemade lemon curd and clotted cream, of course! I've also seen whipped cream, butter, crème fraîche, and various jams and jellies at teas I've attended, just to name a few. No rules!
Chocolate Chip Scone troubleshooting
Here are some issues you might encounter when making chocolate chip scones:
- My scones spread: If the butter got too warm, the scones can spread instead of rising. Chilling the shaped scones for 15 to 20 minutes before baking helps them hold their shape.
- My scones are dry: Too much flour or a few extra minutes in the oven are usually the culprits. For the most tender scones, measure the flour by weight (using a kitchen scale) or use the spoon-and-level method instead of scooping directly from the bag. Bake just until they're lightly golden.
- My scones are dense instead of flaky: Overmixing develops gluten, which makes scones tougher. Mix the dough only until it comes together, then stop.
- My scones didn't rise very much: Check that your baking powder is fresh, and make sure the dough is well chilled before baking. Cold dough, active baking powder, and a hot oven are the secret to tall scones.
- My chocolate chips are sinking or unevenly distributed: Regular chocolate chips can sometimes settle into pockets of dough. Mini chocolate chips tend to stay more evenly distributed, giving you chocolate in every bite.
- My chocolate chips are melting out: The dough may have become too warm before baking. Chilling the shaped scones helps keep everything in place.
Questions asked and answered
Here are some questions you might have...
The best way to make sure you have scone success is to be sure not to over-work the scone dough by cutting in the butter too much. You want the dough to have pea-sized chunks of butter that you can see. Chilling the dough right before baking also helps to firm up the butter before baking.
Why? Like with biscuits, cold chunks of butter in the dough ensure that the scone will have the texture you want. This is because when the scones bake, the steam created by the water in the butter evaporating makes the flaky, crumbly texture that scones are known for.
Scones are meant to be lightly sweetened quick breads rather than cookies. Most of the sweetness in these chocolate chip scones comes from the chocolate chips, allowing the buttery flavor and tender texture of the scone to shine through.
Technically, yes, you can use baking soda in scones. You'll have to make sure that there is some sort of acid for the baking soda to react with in order for it to leaven the scone dough, like buttermilk or lemon juice. Use about ¼ of the amount of the baking powder so the scones don't have a metallic taste.
Yes! Heavy cream just makes the scones richer, but you can use any type of milk or milk-alternative that you'd like.
Sure! Pecans or walnuts pair especially well with the chocolate chips.
Didn't find the answer you're looking for?
Ask AI to answer for this specific recipe:
Disclaimer: I am not responsible for the quality of AI information

I hope you like this recipe! Let me know if you have any questions, and don't forget to leave a comment and rating. Thanks!
Slainté! L'chaim! Cheers!
- Tammy
More biscuit and scone recipes to try


Recipe

Chocolate Chip Scones
Equipment
- box grater if butter is frozen
- 3-inch round cookie cutter or your choice of size and shape, optional
Ingredients
- 2 cups all-purpose flour
- ¼ cup granulated sugar
- 1 tablespoon baking powder
- 1 teaspoon kosher salt
- 6 tablespoons unsalted butter, cold, grated or cubed, see Recipe Notes
- ½ cup heavy cream, plus extra for brushing on top, see Recipe Notes
- 1 large egg, beaten
- 1 teaspoon pure vanilla extract, vanilla bean paste, or another flavoring, optional, see Recipe Notes
- 3 ounces chocolate chips, (½ cup), see Recipe Notes
- coarse sugar, for sprinkling, optional
Instructions
- Preheat the oven to 400 °F. Line a half baking sheet pan with a Silpat silicone mat or parchment paper. Set aside.Note: The instructions below are for making the dough by hand. If you want to use the food processor to make the dough, see the instructions in the post above.
- In a large bowl, combine 2 cups all-purpose flour, ¼ cup granulated sugar, 1 tablespoon baking powder, and 1 teaspoon kosher salt.
- Toss 6 tablespoons unsalted butter into the flour mixture to coat, then use a pastry blender, two forks, or your hands to work the butter into the flour mixture until coarse, pea-sized crumbs appear. Don't overdo this step as you don't want the butter to warm up and mix completely into the flour.
- In a small bowl, whisk together ½ cup heavy cream, 1 large egg, and 1 teaspoon pure vanilla extract (if using).
- Slowly add the heavy cream mixture to the flour mixture and mix until the dough just holds together. Using a bowl scraper will help to combine the dough in the bowl without your hands warming up the butter, plus you can see any crumbs at the bottom that still need to be mixed in. Remember, do not over mix the dough - you want to keep that butter cold and separate from the flour.The amount of the heavy cream mixture to add depends on the humidity of the day. Squeeze a small amount of dough between your fingers, and add more heavy cream or flour, 1 tablespoon at a time (2 tablespoons maximum), if it's too crumbly or too wet.
- Use the bowl scraper to push the dough into a ball in the bowl, then turn the dough out onto a lightly floured surface and shape it into a rough square about 1-inch high.
- Sprinkle some of the 3 ounces chocolate chips on the dough, then fold the dough over them. Flatten the dough and reshape into a disk. Do this "fill and fold" method a few times until you have enough layers of your mix-in incorporated into the dough. Reserve some of the chocolate chips to press into the surface of the scones before baking.
- Gather the dough, and flatten it into a 6-inch disk (if you want square scones, shape the dough into a rectangle with the short side about 4-inches long). Use a bench scraper to release the dough, if needed. Cover with plastic wrap, and refrigerate the dough at least 30 minutes or up to overnight.
- Once the dough is chilled, you have your choice of how to shape the scones:For wedge-shaped scones: Roll out the disk into an 8-inch circle, then use the bench scraper to cut the disk into 8 wedges. For round scones: Roll out the disk to a height of about ¾ inches. Use a 3-inch round cookie cutter to cut out rounds (gather, press, and cut the leftover dough again as needed, but hopefully not more than 2 times).For square scones: Roll out the dough into a 12- by 4-inch rectangle, then cut into twelve 2-inch squares.
- Place the scones about 2-inches apart on the prepared baking pan. Press in the reserved chocolate chips on the tops of the scones. Brush the tops of each scone with heavy cream and sprinkle with coarse sugar.
- Bake for about 18 to 23 minutes or until golden brown. Remove from the oven and cool the scones on the baking pan for 2 minutes, then move to a cooling rack. Allow to cool for at least 10 minutes.
- Serve warm or at room temperature. Pair them with lemon curd and clotted cream for a lovely combination. Enjoy!
- Storage Instructions: Scones are best enjoyed right away, though leftover scones keep well at room temperature or in the refrigerator for about 3 to 5 days. Glazed or plain scones freeze well, up to 3 months. Thaw overnight in the refrigerator then warm to your liking before enjoying.
- Make-ahead instructions: For freshly baked scones anytime, freeze the cut, unbaked scones in a ziplock bag. Take out as many as you want to bake (there's no need to defrost them first), and bake at 375 °F for 20 to 25 minutes.
- The yield is generally about 8 scones (that's what I get from a circle cut into wedges or using a 3-inch round cookie cutter), but yours may vary.
Notes
- 2¾ cups (336 grams) all-purpose flour
- ⅓ cup (67 grams) granulated sugar
- 4 teaspoons (15 grams) baking powder
- 1¼ teaspoons (5 grams) kosher salt
- ½ cup (114 grams) unsalted butter
- ¾ cup (190 grams) heavy cream
- 1 large egg
- 2 teaspoons vanilla
- 4 ounces (⅔ cup) mini chocolate chips


Ella says
I made these with a 1/4 teaspoon of vanilla and 1 teaspoon of almond extract to make chocolate chip almond scones and they turned out great! My boyfriend doesn't like almond but even he loved the scones!
Tammy Spencer says
Those are yummy flavors to pair with chocolate chip scones. I'll include these ideas in the Recipe Notes. Thanks for sharing! 😉