
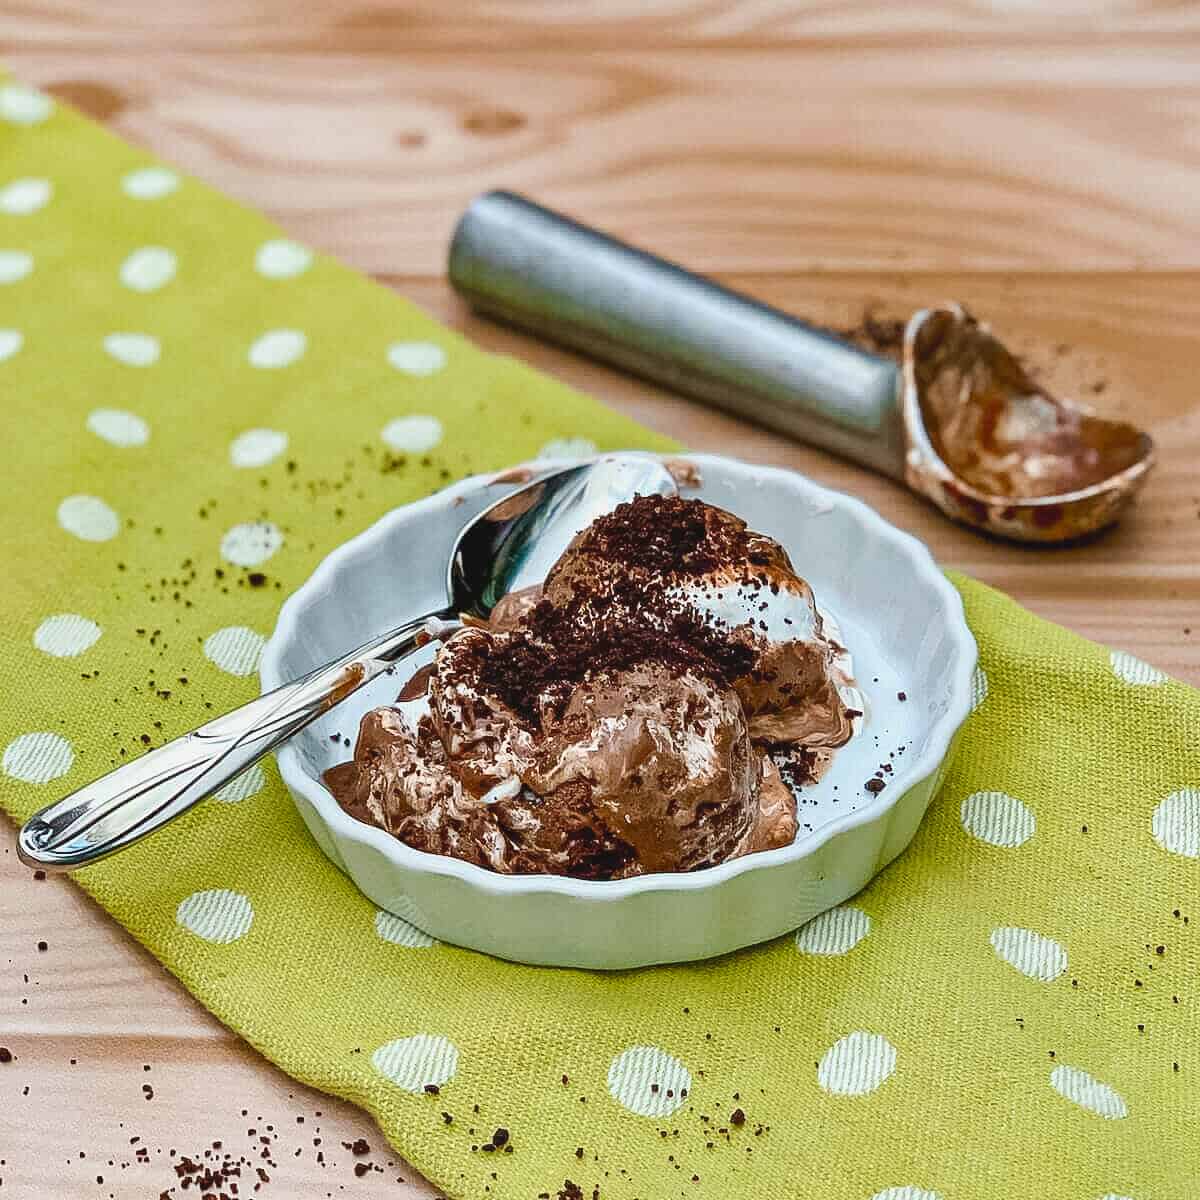
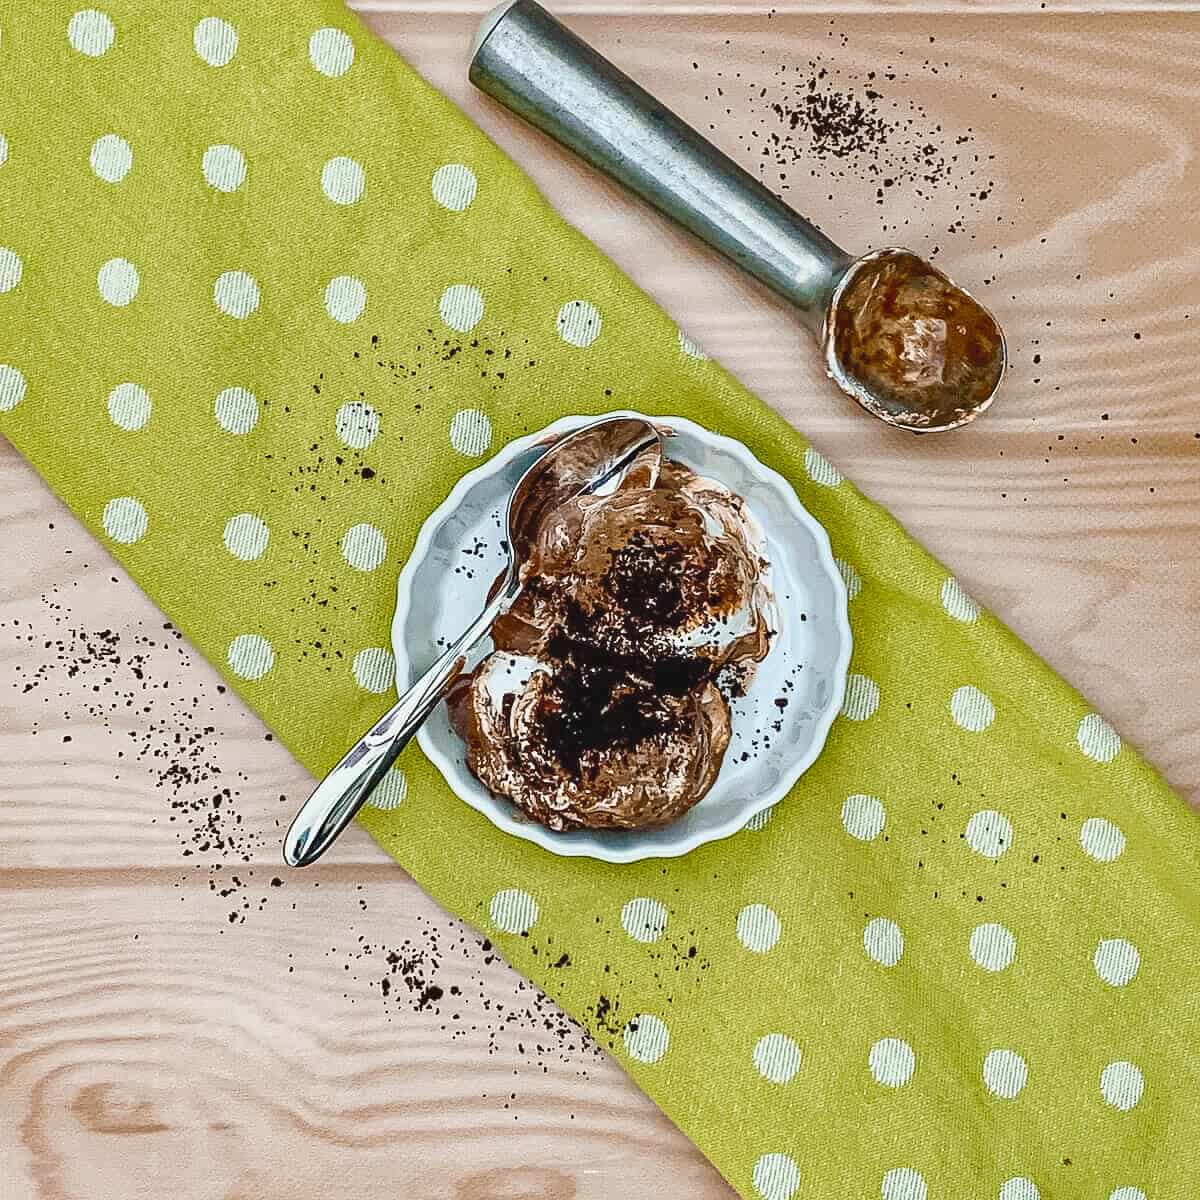
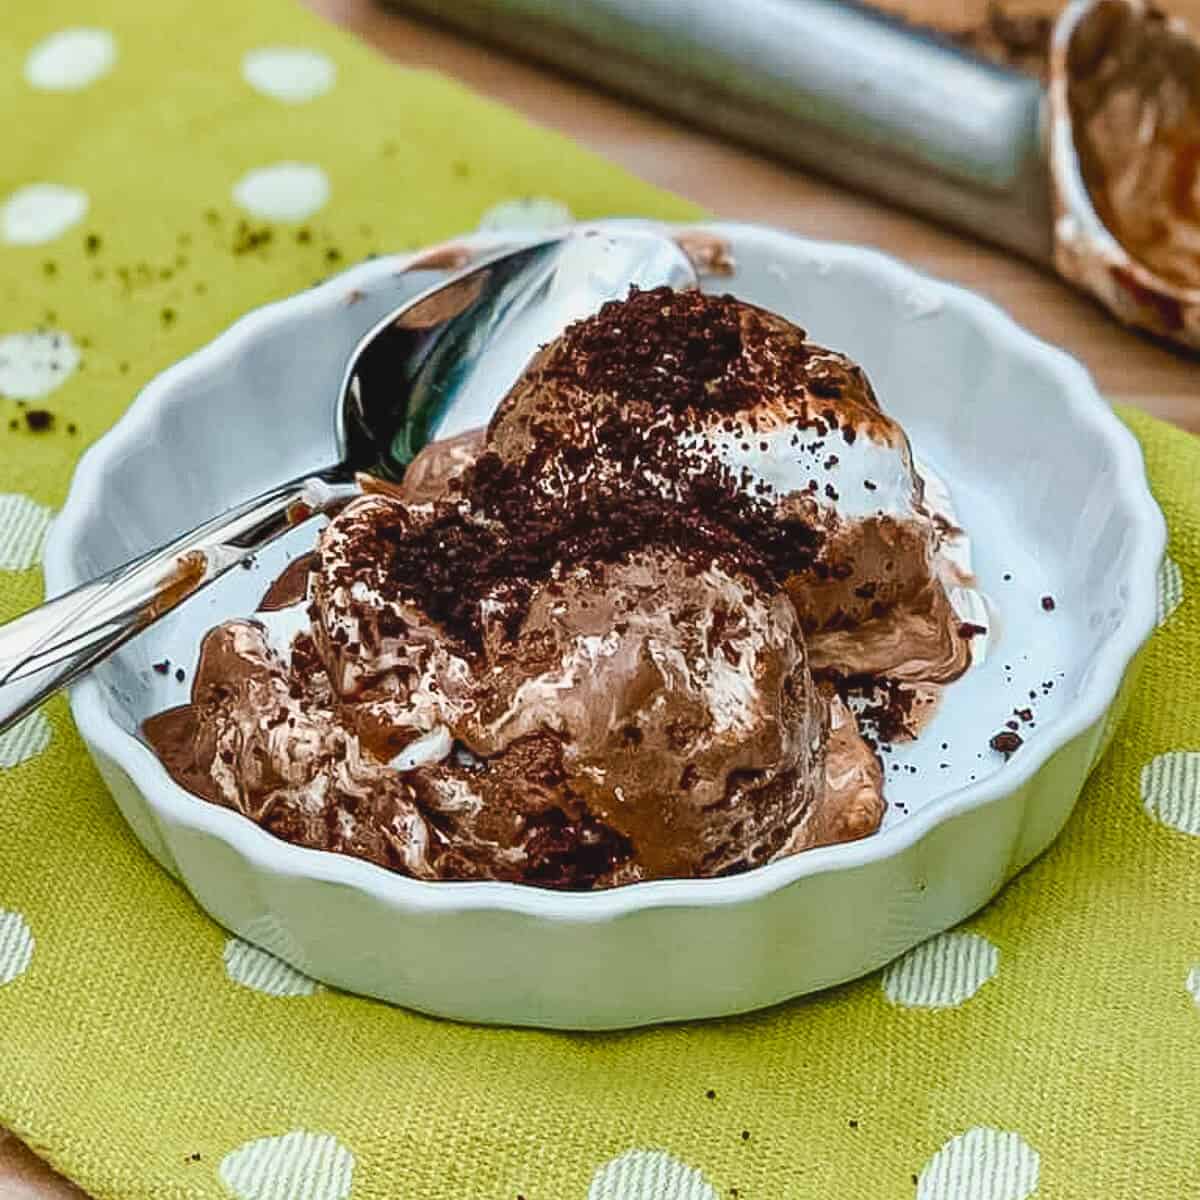
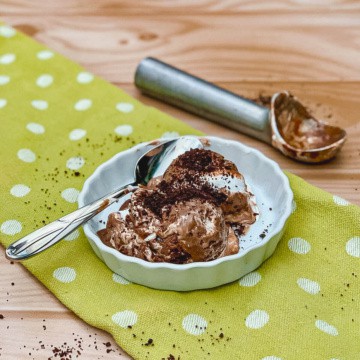
This Chocolate Marshmallow Ice Cream with Mint & Cookie Crumbs features rich chocolate frozen custard, swirls of marshmallow creme, crunchy chocolate cookie crumbs, and a hint of fresh mint. Creamy and chocolatey with plenty of texture, it's a fun twist on classic chocolate ice cream.
Jump to:
- Quick Recipe Summary ✨
- Why this recipe works
- What's the difference between frozen custard and ice cream?
- Recipe Ingredients
- Infuse flavor with mint
- How to make Chocolate Marshmallow Ice Cream
- Storage instructions
- Frozen custard ice cream troubleshooting
- Questions asked and answered
- More frozen treat and topping recipes to try
- Recipe
- Comments
[June, 2022: I've reworked the recipe and updated this post with all new pictures. Enjoy!]
Quick Recipe Summary ✨
Chocolate Marshmallow Ice Cream with Mint & Cookie Crumbs: Rich dark chocolate frozen custard is infused with fresh mint, then churned with chocolate cookie crumbs and swirls of marshmallow creme for a creamy ice cream packed with flavor and texture.
Fresh mint flavor: Fresh mint steeped into the cream creates a smooth, natural mint flavor that complements the chocolate without overpowering it.
Homemade frozen custard: Gives this ice cream an ultra-rich, scoopable texture with no stabilizers or artificial ingredients.
Active Time: About 1 hour • Chill Time: About 4½ hours • Churn Time: About 25 minutes • Total Time: About 6 hours (mostly hands-off!)
Yield: About 1 quart • Freezer-friendly: Up to 1 month
Difficulty Level: ⭐⭐⭐ Medium. Making the custard requires a little patience, but the techniques are straightforward and well worth the effort.
👉 Follow the detailed instructions, step-by-step photos, and troubleshooting tips below for creamy homemade Chocolate Marshmallow Ice Cream with beautiful marshmallow and cookie crumb swirls every time!
SUMMARIZE & SAVE THIS CONTENT ON
Why this recipe works
- Fresh mint adds cool, balanced flavor without overwhelming the chocolate
- A cooked custard base creates a rich, smooth, creamy texture
- Cocoa powder and dark chocolate provide deep chocolate flavor in every scoop
- Marshmallow creme stays soft in the freezer, creating ribbons of sweetness throughout
- Chocolate cookie crumbs add crunch and contrast to the creamy ice cream
My younger daughter tasted Ben & Jerry's Minter Wonderland Ice Cream and started her thinking. That B&J flavor consists of mint chocolate ice cream with marshmallow and chocolate cookie crumbs. Except the ice cream wasn't minty enough for her. And the cookie crumbs weren't chocolatey enough.
She knew we could do better. That's how this copycat Ben & Jerry's Chocolate Marshmallow Ice Cream with Mint & Cookie Crumbs was born!
This is more than just chocolate marshmallow ice cream with mint. The frozen custard base has a deep chocolate flavor with lovely minty undertones. It's rich and smooth, with a creamy texture and mouthfeel. The marshmallow creme is chewy, and the cookie crumbs add a chocolatey crunch.
Overall, a flavor and texture tour-de-force.
Another benefit to making a homemade ice cream recipe rather than buying some is that it doesn't contain all the emulsifiers and stabilizers and the like.
I'm glad my daughter inspired us to make this Chocolate Marshmallow Ice Cream recipe. We make it better!
⭐⭐⭐⭐⭐
It's like a better version of Ben and Jerry's! Can't wait to try it!!!
- Carolyn
What's the difference between frozen custard and ice cream?
The difference between ice cream and frozen custard is how the base is made, which effects how rich the final product is. Essentially, there are two ways to make a homemade ice cream recipe.
Method 1: Churn an uncooked base
The first method involves taking a chilled sweetened cream base and...uhm...freezing it. No eggs are needed for this preparation.
That's right, if your ice cream maker is ready (mine needs to be chilled for 15 hours before use), then you can combine milk and cream, flavor and sweeten it as you prefer, and churn away (even adding in mix-ins if you'd like). You'll have ice cream in about 30 minutes. Add in the chilling time required to firm it up, about 2 to 4 hours, for a total time of about 4½ hours.
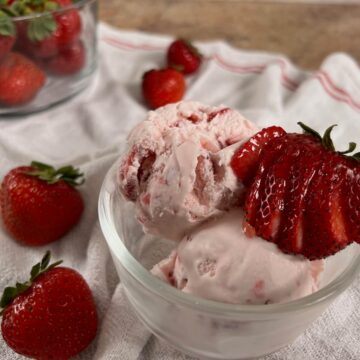
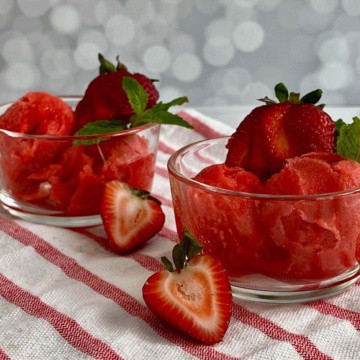
This is how making this Fresh Strawberry Ice Cream is done (it's also how sherbet and sorbet are made, albeit with different bases).
Method 2: Churn a cooked custard base
If you want a richer product, then you'll want to go with the second way, cooking a frozen custard using cream and egg yolks. Start with making a crème anglaise custard (aka vanilla sauce) in the flavor you want, thoroughly chill it (usually overnight), then churn it.
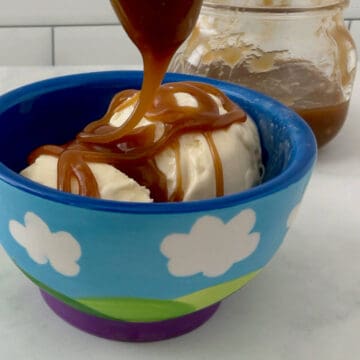
What this technique gives you is a rich custard base, and a richer final product. So in essence this Chocolate Marshmallow Ice Cream recipe is frozen custard. This method is also how I make my Salted Caramel Swirl Gelato and double chocolate version of Mint Chocolate Chip Gelato.
Either way, after creating a flavored base, you can add all sorts of mix-ins while churning. That's where you can really start getting creative!
Recipe Ingredients
You'll need the following ingredients to make this Chocolate Marshmallow Ice Cream recipe:
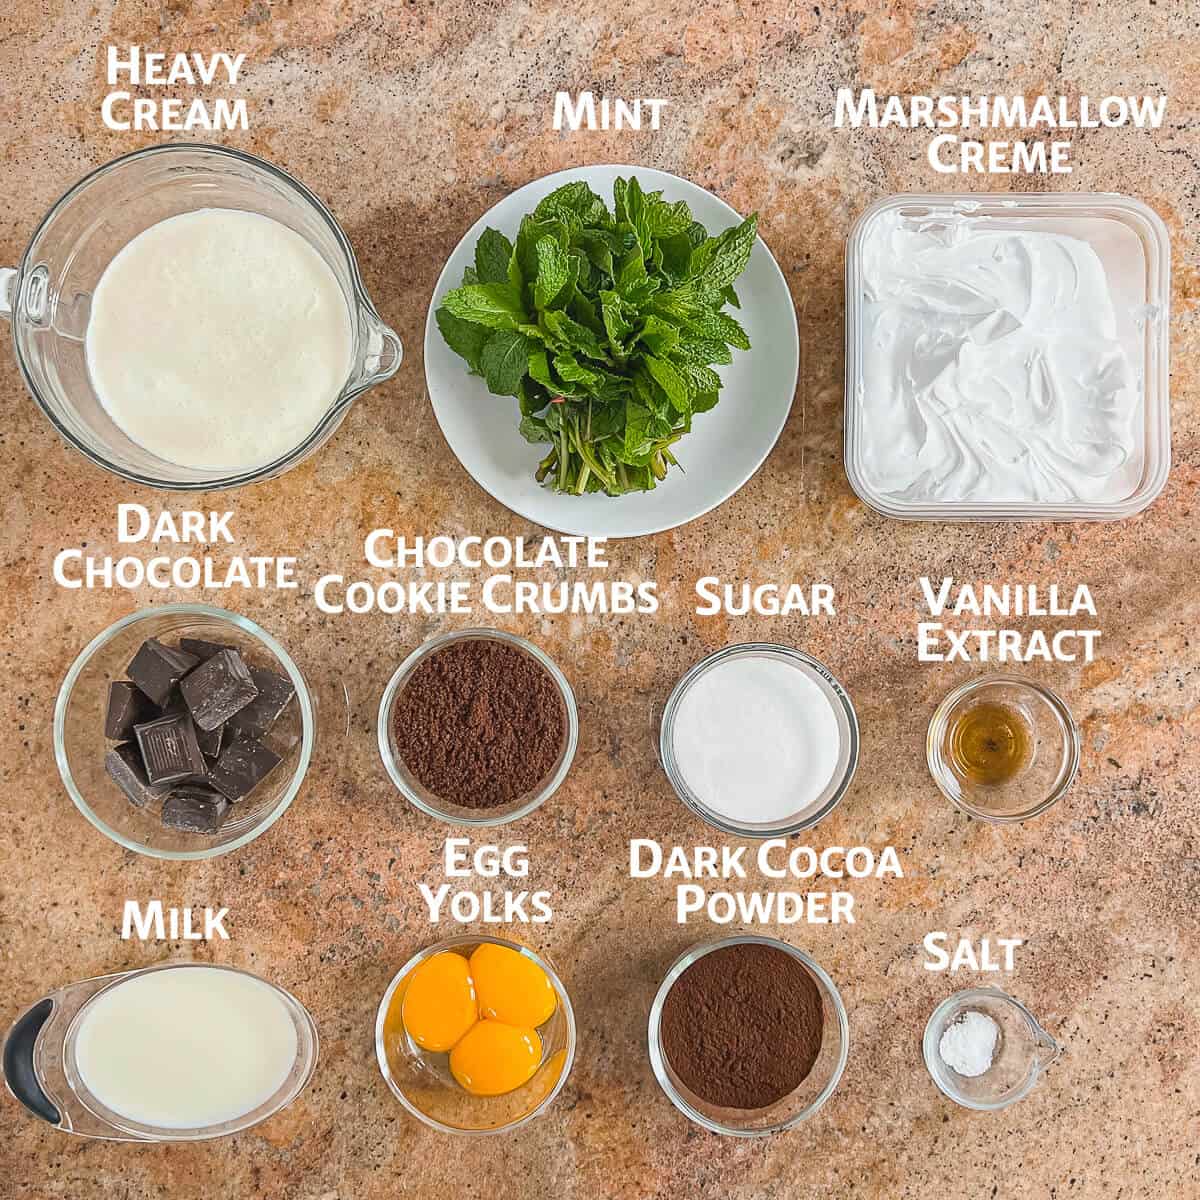
Ingredient Notes
Like with many rich ice cream recipes, you need heavy cream, milk, sugar, and egg yolks.
Milk & Heavy Cream: Provides the basis for the dairy custard.
Mint: Fresh mint is infused into the heavy cream, lending a soft mint flavor to the chocolate frozen custard. It's more subtle then using mint extract, which will be more pronounced. Personally, I like the gentle mint flavor in this recipe.
As a guide, one 1-ounce package of mint will yield about ½ cup (15 grams) of mint leaves. For a more pronounced mint flavor, use up to 1 cup (30 grams) of fresh mint leaves or ¼ teaspoon of mint extract.
Chocolate: Used two ways in the chocolate custard, as dark chocolate cocoa powder and dark chocolate wafers (or a chopped dark chocolate bar). You can use regular cocoa powder and semisweet chocolate if you prefer - the chocolate flavor will just be less intense.
Mix-ins: Here we're using homemade Marshmallow Creme (aka Marshmallow Fluff) and homemade Chocolate Cookie Crumbs. Store-bought is fine to use also, if you prefer.
See the recipe card for a full list of ingredients and measurements.
Infuse flavor with mint
I like recipes with fresh mint because I can infuse the flavor into certain ingredients. When mint and chocolate are paired, the flavors complement each other so well.
For Double Chocolate Mint cookies, mint is steeped in melted butter, bringing that bright mint flavor to the cookie without it tasting plastic-y (as I sometimes find recipes using peppermint extract do). A humble chocolate chocolate chip cookie gets elevated into something sublime.
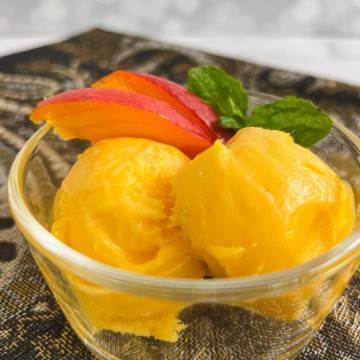
In a recipe for homemade mint ice cream or gelato (like with this Mint Chocolate Chip Gelato), infusing fresh mint into the milk or cream is a great way to add a hint of mint to the finished product. You can even add mint flavor by infusing it into simple syrup (sugar fully dissolved in water). Strawberry-Mint Sorbet is flavored this way.
I've also infused mint into heavy cream to make lovely Mint Chocolate Chunk scones. You can get that recipe if you sign up for my weekly featured recipe email. Just click on the button below. So much minty goodness!
How to make Chocolate Marshmallow Ice Cream
Step 1: Make the chocolate custard base
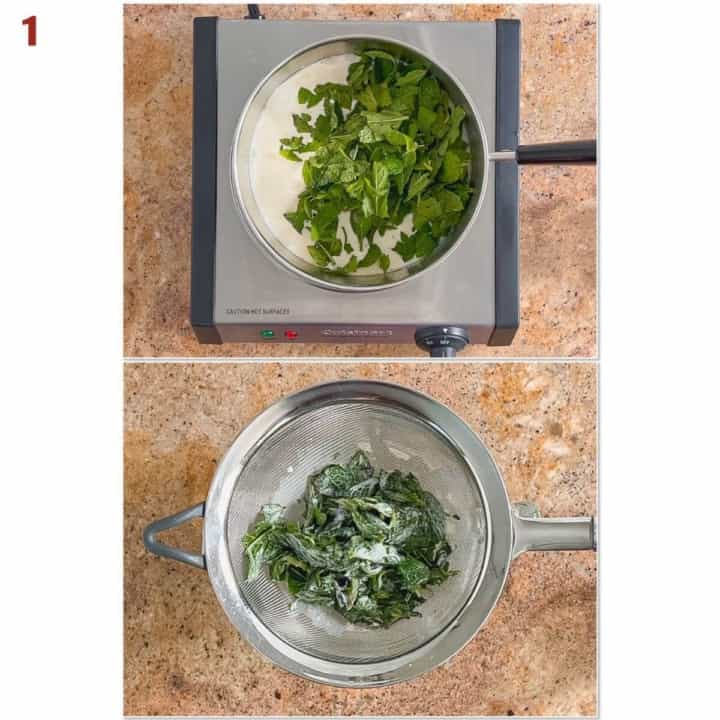
Combine the heavy cream and mint in a 3-quart saucepan. Heat over medium heat until small bubbles form and it starts to steam, about 6 to 7 minutes. Remove from heat and let the mixture steep for 20 minutes.
Strain out the mint leaves using a fine mesh strainer, pressing the liquid through the leaves to extract all the mint flavor (photo 1).
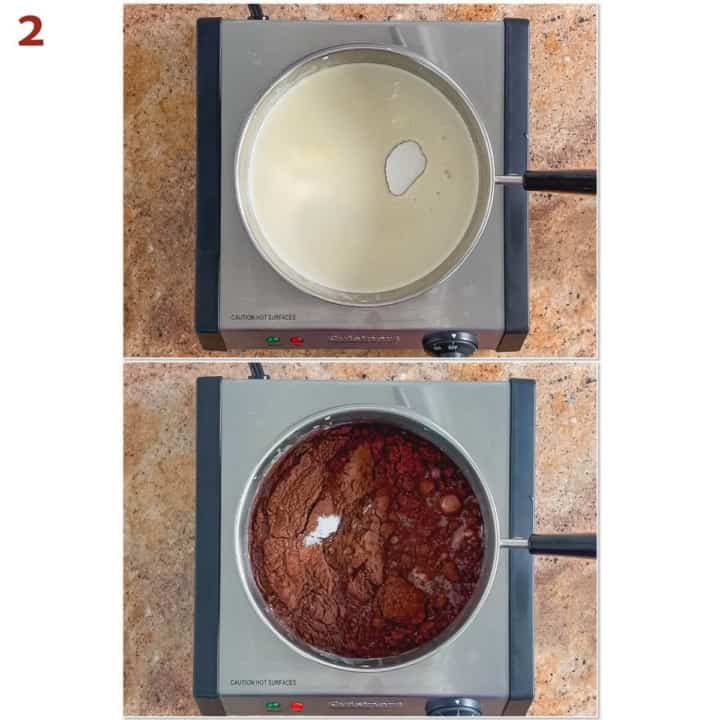
Return the mint-flavored heavy cream to the saucepan and heat until it's steaming again, but not boiling.
Add the milk, sugar, cocoa powder, and salt (photo 2). Cook over medium heat until the sugar dissolves and the mixture is steaming with small bubbles forming, about 6 to 8 minutes.
Whisk the egg yolks in a medium bowl. Gently heat the egg yolks by slowly adding ½ cup of the warmed chocolate cream to the egg yolks while continuously whisking. This process is called tempering the eggs.
Add another ½ cup of the chocolate cream and temper the egg yolks again (photo 3).
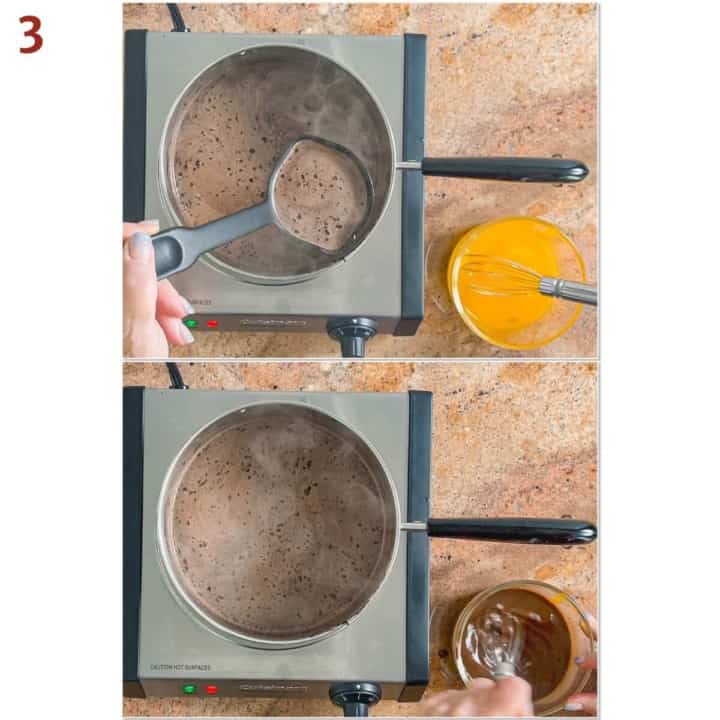
What is egg tempering?
When I first encountered the term "temper the eggs," I had no idea what it meant, but I have since learned it's an important step in making custards.
The idea is when you add eggs to a hot liquid, the eggs will immediately curdle, leaving streaks of egg whites in the liquid (which is most unwelcome). What tempering does is it raises the temperature of the eggs slowly by whisking in a little bit of the hot liquid, thereby avoiding the curdling conundrum.
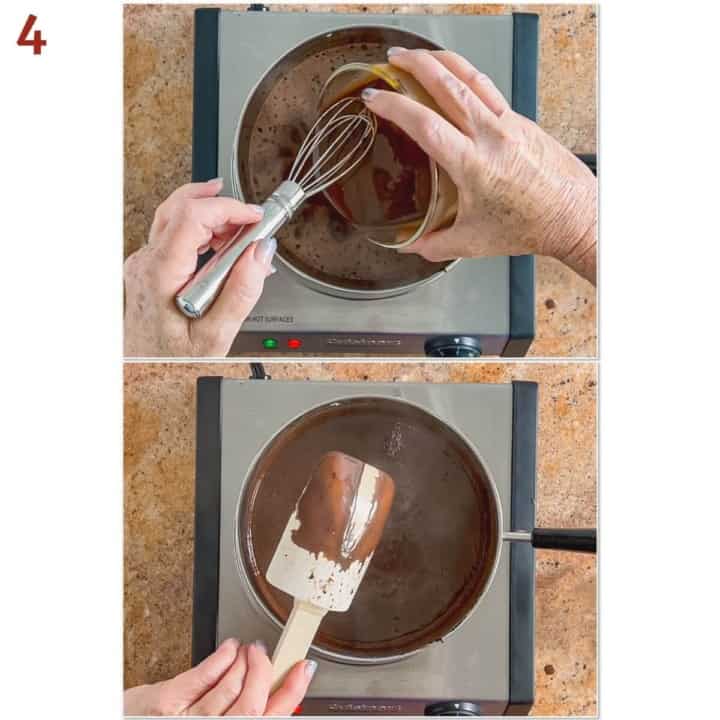
Pour the warmed egg mixture back into the saucepan with the remaining chocolate cream.
Bring the mixture to a simmer over medium heat (don't let it boil).
Cook until the custard has thickened, stirring constantly, about 4 to 6 minutes. It should coat the back of the spoon and leave a trail when you draw your finger through it, about 170°F on a digital thermometer (photo 4).
Strain the custard through a fine mesh strainer into a clean bowl. If the custard boiled during thickening, straining it out will help remove any curdled bits of egg (photo 5).

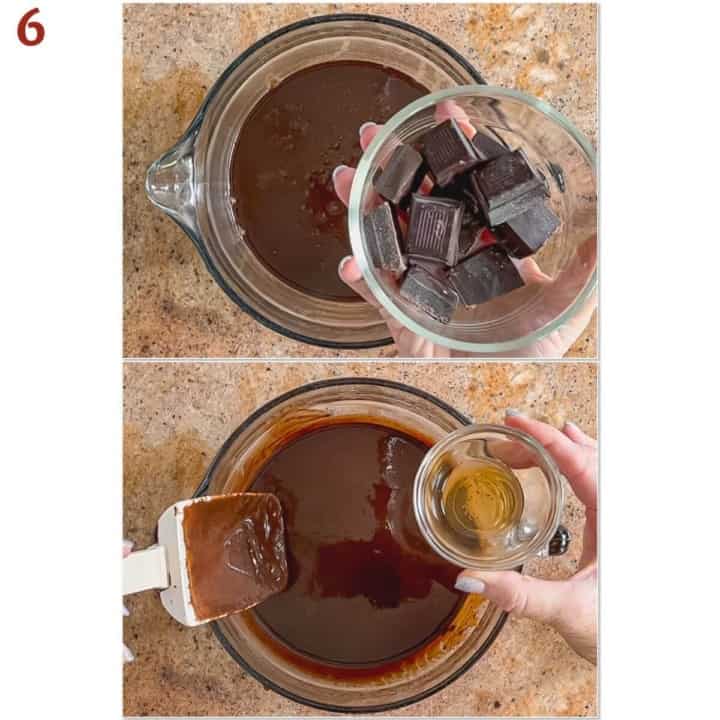
Add the chocolate wafers (or chopped chocolate) and stir until melted, although the custard doesn't have to be completely smooth. Stir in the vanilla extract (photo 6).
Step 2: Chill the chocolate custard base
Put the chocolate custard bowl in a larger bowl filled with an ice bath (½ ice cubes, ½ water, reaching halfway up the sides of the bowl). Stir the custard occasionally until it's cooled to room temperature, around 70 to 80˚F. This will take about 30 minutes.
Place a piece of plastic wrap on the surface of the custard and refrigerate until chilled, at least 4 hours or overnight. Chilled custard can be kept in the refrigerator for several days. For the best results, make sure the base is about 40˚F prior to churning.
Cool the cooked custard quickly
Cooling any hot food before refrigerating it is important, especially cooked custards. You don't want to raise the temperature of the refrigerator's interior as that hot food cools.
For food safety, it's important to cool the cooked custard quickly. Bacteria grow most rapidly in the temperature danger zone between 40°F and 140°F, so reducing the amount of time food spends in that range helps keep it safe to eat. An ice bath is an easy way to cool the custard rapidly before refrigerating it, and it has the added benefit of speeding up the chilling process before churning the ice cream.
Step 3: Churn the ice cream
Stir the chilled custard well. Transfer to an ice cream maker and begin to freeze according to the manufacturer's instructions. The volume of the base will increase as it freezes (photo 7).
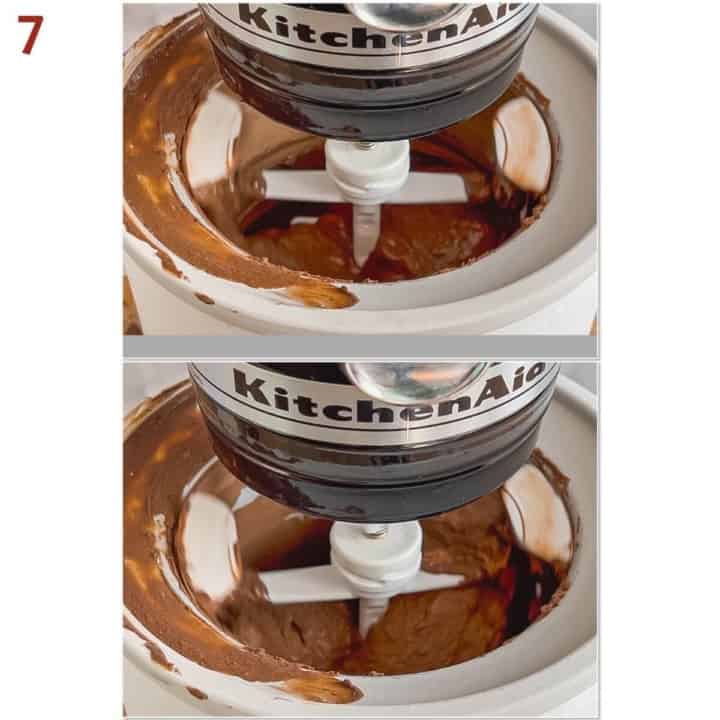
Ice cream makers
There are plenty of inexpensive ice cream makers on the market to choose from. The one I'm using is a KitchenAid Ice Cream Maker Attachment for a KitchenAid Stand Mixer - I keep the bowl chilled in the freezer so that I can use it at a moment's notice. Another good option is a Cuisinart Ice Cream Maker. There are other versions available that you don't have to pre-chill, but they are more pricey.
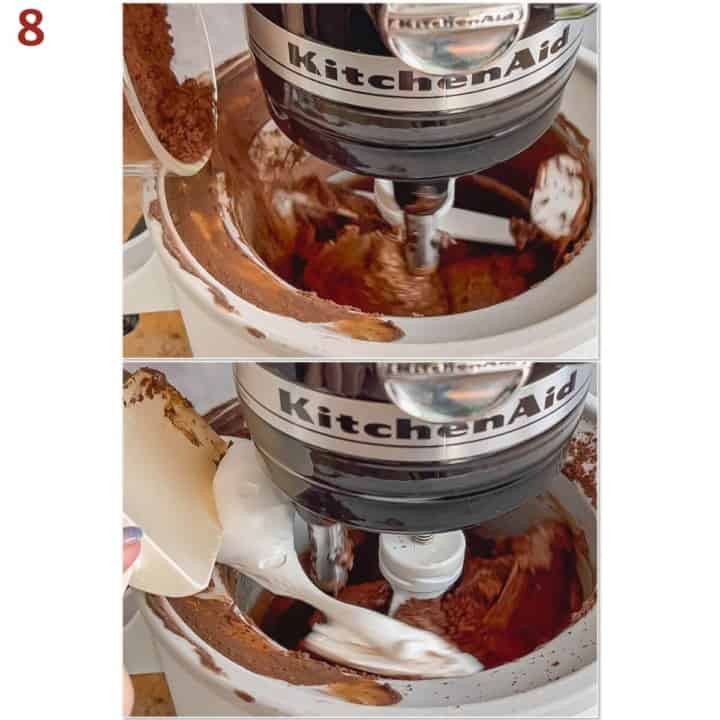
Once the custard base begins to thicken but is still soft (after about 15 to 20 minutes), add the chocolate cookie crumbs. Once that has mixed in, spoon in 1½ cups of the marshmallow creme, leaving discernible streaks throughout (photo 8).
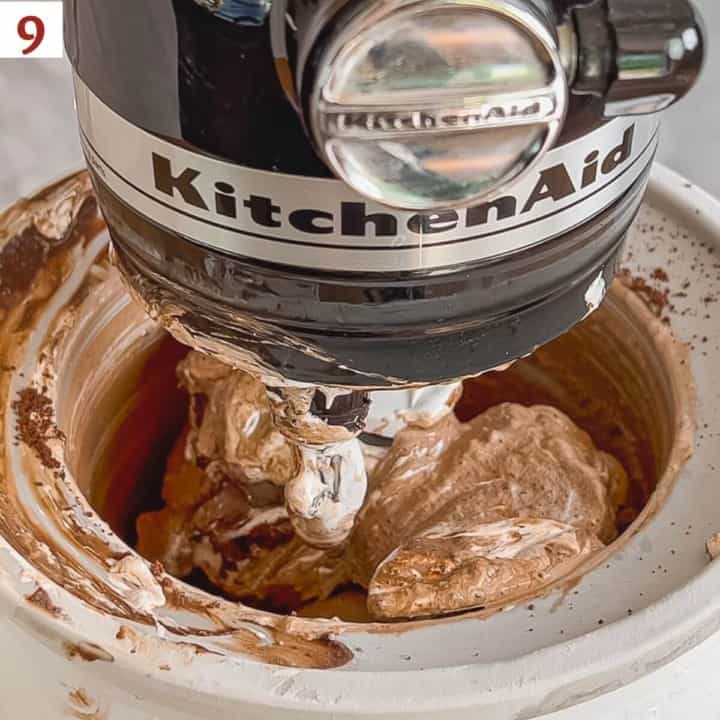
Continue churning until the ice cream has thickened more, about another 5 minutes (photo 9).
Step 4: Ripen the ice cream
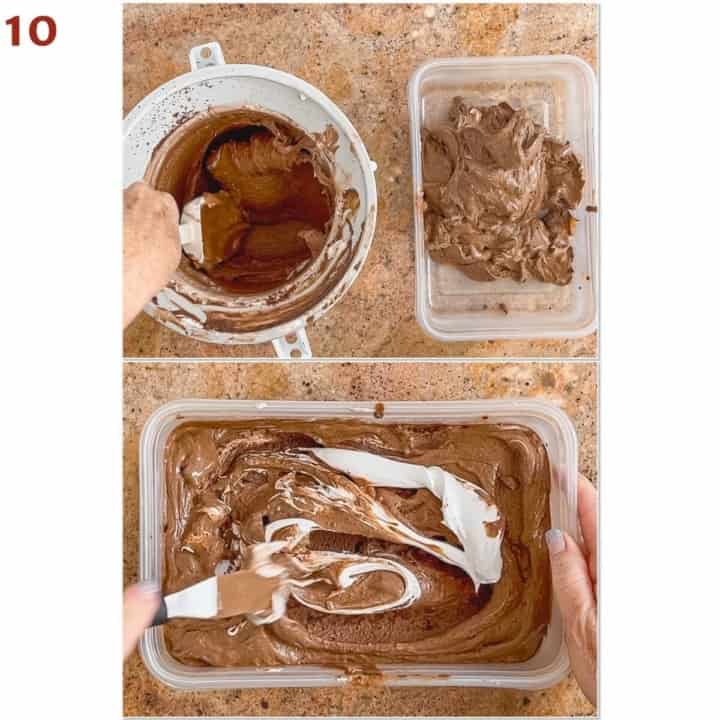
Transfer the frozen custard to a freezer-safe container. If you want, you can add in more of the marshmallow fluff, streaking it through with a small offset spatula.
When you're satisfied with the amount and distribution of the fluff, smooth the top (photo 10).
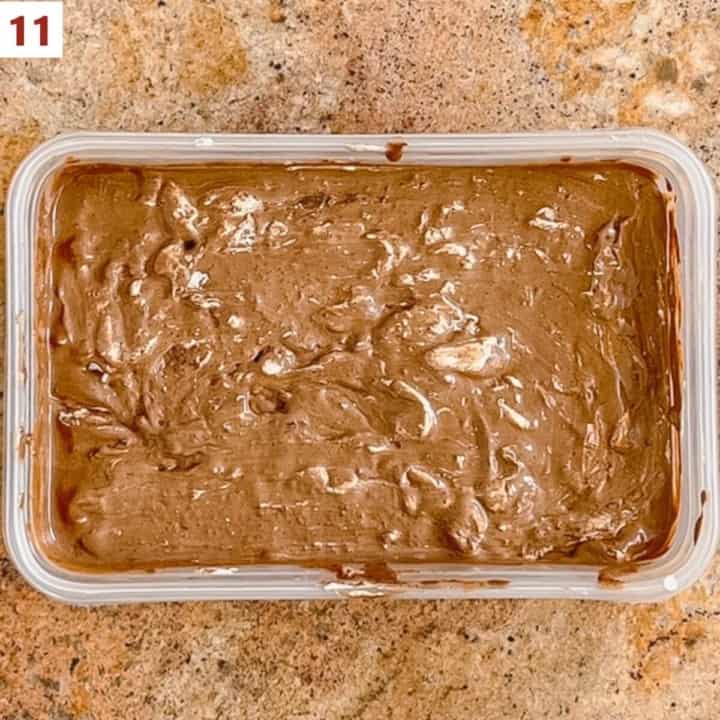
Freeze the ice cream for 2 to 4 hours to allow it to firm up, a process called ripening (photo 11).
Storage instructions
Homemade ice cream will last for up to a month in a plastic freezer container placed in the rear of the freezer. After that, the ice cream may develop ice crystals and lose its creamy texture.
Frozen custard ice cream troubleshooting
Here are some issues you might encounter when making Chocolate Marshmallow Ice cream:
- My ice cream is icy instead of creamy:The custard may not have been chilled completely before churning, or the ice cream may not have frozen quickly enough after churning.
- My ice cream isn't freezing: It could be that the base isn't cold enough, especially a cooked custard base. If the base is too warm, it slows down the freezing process during churning. For the best results, make sure the base is about 40˚F prior to churning.
- My ice cream froze too hard: Homemade ice cream often firms up after several hours in the freezer. Let it sit at room temperature for 5 to 10 minutes before scooping.
- My custard curdled: The mixture got too hot while cooking. Strain it through a fine mesh sieve and blend until smooth before chilling.
- I ended up with scrambled eggs in the custard: The eggs weren't tempered slowly enough. Pour the hot dairy into the yolks gradually while whisking constantly. Strain the custard before chilling to remove any small egg particles and ensure a silky-smooth texture.
- The mint flavor is too weak: Fresh mint varies in strength, but you don't want it to be overpowering (we're going for subtlety here). For a more pronounced mint flavor, steep the leaves a little longer before straining the custard.
- The mint flavor is too strong: Steeping the mint for too long can make it overpower the chocolate. Reduce the steeping time slightly on your next batch.
- My marshmallow swirl disappeared: Marshmallow creme should be layered into the churned ice cream rather than fully mixed in so it stays in distinct ribbons.
Questions asked and answered
Here are some questions you might have...
Marshmallow creme contains a high percentage of sugar, which lowers its freezing point. Instead of becoming hard like a marshmallow, it stays soft and chewy even after the ice cream has fully frozen.
Fresh mint is usually spearmint, and there are different varieties available as well. Check with your local supermarket or farmer's market to see what they offer.
Yes, although the texture won't be quite as smooth. Freeze the chilled custard in a shallow pan and stir vigorously every 30 to 45 minutes until mostly frozen, then fold in the mix-ins.
Didn't find the answer you're looking for?
Ask AI to answer for this specific recipe:
Disclaimer: I am not responsible for the quality of AI information

I hope you like this recipe! Let me know if you have any questions, and don't forget to leave a comment and rating. Thanks!
Slainté! L'chaim! Cheers!
- Tammy
More frozen treat and topping recipes to try

Recipe
Chocolate Marshmallow Ice Cream with Mint & Cookie Crumbs
Ingredients
For the custard base
- 2 cups heavy cream
- ½ cup fresh mint, see Recipe Notes
- 1 cup milk
- ⅔ cup granulated sugar
- ¼ cup dark chocolate cocoa powder, plus 1½ tablespoons, see Recipe Notes
- ¼ teaspoon kosher salt
- 3 large egg yolks, beaten, at room temperature
- 4 ounces dark chocolate wafers, or a solid dark chocolate bar, chopped (⅔ cup), see Recipe Notes
- 1 teaspoon pure vanilla extract
For the mix ins
- ½ cup chocolate cookie crumbs, or store bought chocolate cookies, crushed
- 1½ cups marshmallow creme, homemade or store bought
Instructions
- Make the custard base: Combine 2 cups heavy cream and ½ cup fresh mint in a 3-quart saucepan. Heat over medium heat until small bubbles form and it starts to steam, about 6 to 7 minutes. Remove from heat and let the mixture steep for 20 minutes.
- Strain out the mint leaves using a fine mesh strainer, pressing the liquid through the leaves to extract all the mint flavor. Return the mint-flavored heavy cream to the saucepan and heat until it's steaming again, but not boiling.
- Add 1 cup milk, ⅔ cup granulated sugar, ¼ cup dark chocolate cocoa powder, and ¼ teaspoon kosher salt. Cook over medium heat until the sugar dissolves and the mixture is steaming with small bubbles forming, about 6 to 8 minutes.
- Whisk 3 large egg yolks in a medium bowl. Gently heat the egg yolks by slowly adding ½ cup of the warmed chocolate cream to the egg yolks while continuously whisking. Add another ½ cup of the chocolate cream and temper the egg yolks again. This process is called tempering the eggs, and its purpose is to prevent the eggs from curdling while the custard cooks.
- Pour the warmed egg mixture back into the saucepan with the remaining chocolate cream. Bring the mixture to a simmer over medium heat (don't let it boil). Cook until the custard has thickened, stirring constantly, about 4 to 6 minutes. It should coat the back of the spoon and leave a trail when you draw your finger through it (about 170 °F on a digital thermometer).
- Strain the custard through a fine mesh strainer into a clean bowl. If the custard boiled during thickening, straining it out will help remove any curdled bits of egg. Add 4 ounces dark chocolate wafers (or chopped chocolate) and stir until melted, although the custard doesn't have to be completely smooth. Stir in 1 teaspoon pure vanilla extract.
- Cool the base using an ice bath (equal parts ice cubes and water, reaching halfway up the sides of the bowl). Stir the custard occasionally until it's cooled to room temperature (about 80 °F). This will take about 30 minutes.
- Place a piece of plastic wrap on the surface of the custard and refrigerate until chilled, at least 4 hours or overnight. Chilled custard can be kept in the refrigerator for several days. For the best results, make sure the base is about 40 °F prior to churning.
- Churn the ice cream: Stir the chilled custard well. Transfer to an ice cream maker and begin to freeze according to the manufacturer's instructions. The volume of the base will increase as it freezes.
- Add the mix-ins: Once the ice cream begins to thicken but is still soft (after about 15 to 20 minutes), add ½ cup chocolate cookie crumbs into the ice cream. Once that has mixed in, spoon in 1½ cups marshmallow creme, leaving discernible streaks throughout.
- Continue churning until the ice cream has thickened more, about another 5 minutes. The finished ice cream will be soft.
- Ripen the ice cream: Transfer the ice cream to a freezer-safe container. If you want, you can add in more of the marshmallow creme, streaking it through with a small offset spatula. When you're satisfied with the amount and distribution of the creme, smooth the top. Freeze the ice cream for 2 to 4 hours to allow it to firm up, a process called ripening.
- Serve with extra sprinkles of the chocolate cookie crumbs and enjoy!
- This recipe makes about 1 quart of gelato.
- Storage instructions: Homemade ice cream will last for up to a month in a plastic freezer container placed in the rear of the freezer. After that, the ice cream may develop ice crystals and lose its creamy texture.


Carolyn says
It's like a better version of Ben and Jerry's! Can't wait to try it!!!