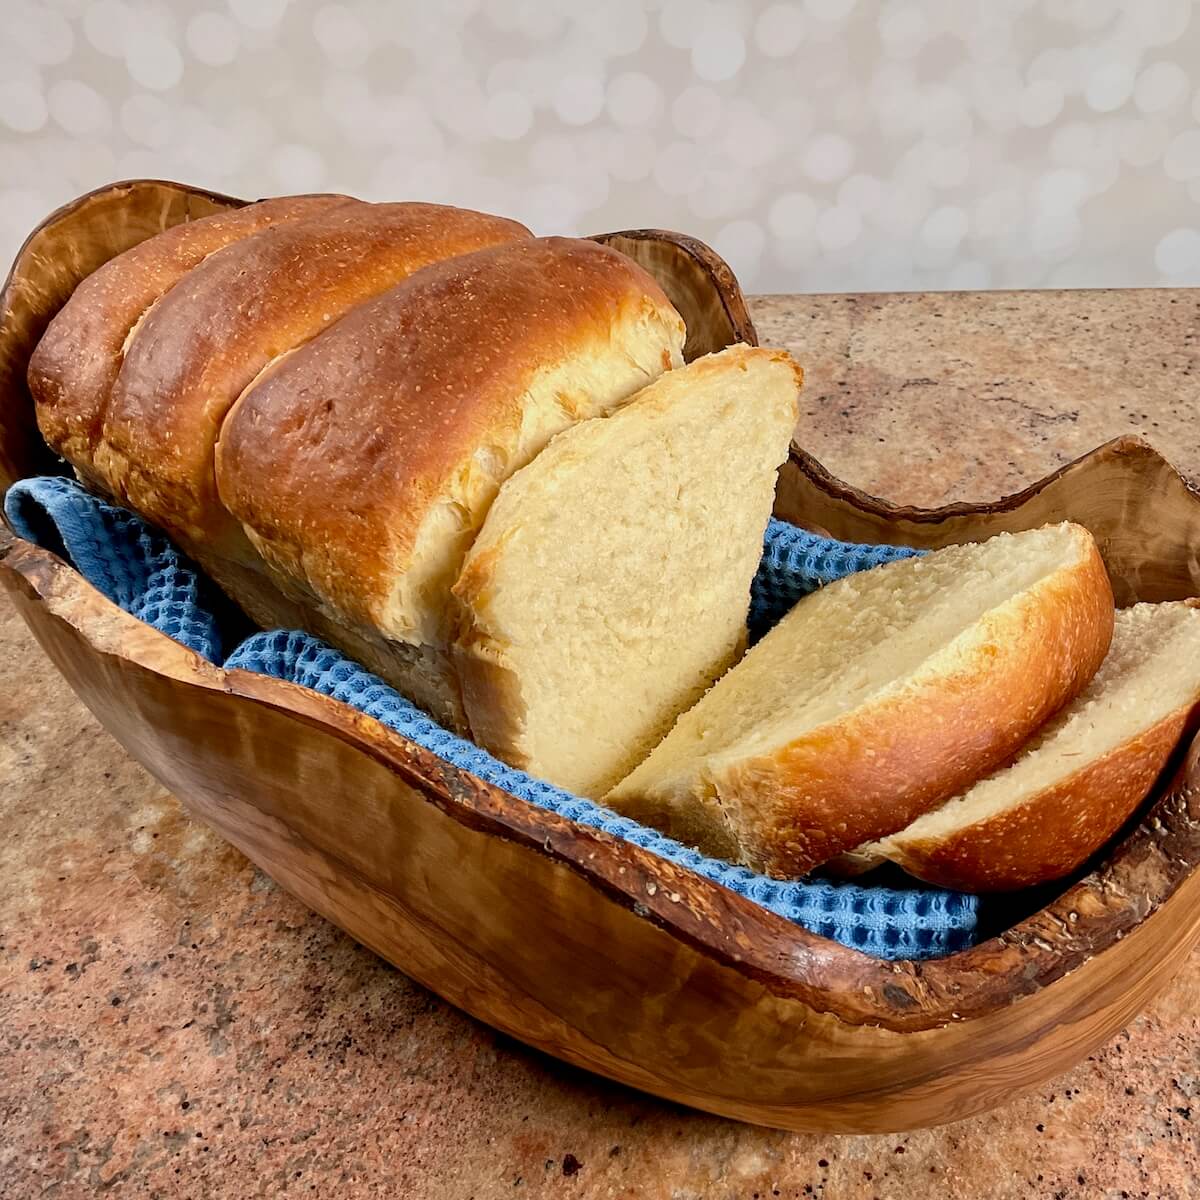
Easy to make with a mild sourdough tang, this sourdough discard sandwich bread is light and fluffy with a soft crust. A variation on sourdough dinner rolls using unfed sourdough starter and potato flour, you'll love the buttery taste of this soft sandwich bread!
Jump to:
- Why this recipe works
- Recipe ingredients
- How to leave out the commercial yeast
- How to make sourdough discard sandwich bread
- Other ways to shape the loaf
- Storage and make-ahead instructions
- How to display your bread beautifully
- Questions asked and answered
- More recipes featuring sourdough discard to try
- Good news for sourdough bakers!
- Recipe
- Comments
[Note: This post is sponsored by Forest Decor]
Why this recipe works
- Sourdough starter discard adds a mild sourdough tang
- Milk and potato flour keep this sourdough sandwich bread soft and fluffy
- Great way to use unfed sourdough starter
- Comes together in about 3 hours
If you maintain sourdough starter by removing some of the starter in the crock before feeding it flour and water, you can use that sourdough starter discard in sweet and savory recipes.
Based on my soft sourdough dinner rolls recipe, this sourdough discard sandwich bread with yeast is a quick and easy bread that you uses your unfed sourdough starter. It produces a loaf that's light and fluffy with a soft crust. The sourdough starter gives the bread a mild tang, but that's mostly overshadowed by its rich buttery flavor.
Plus, you can have the bread ready in about 3 hours.
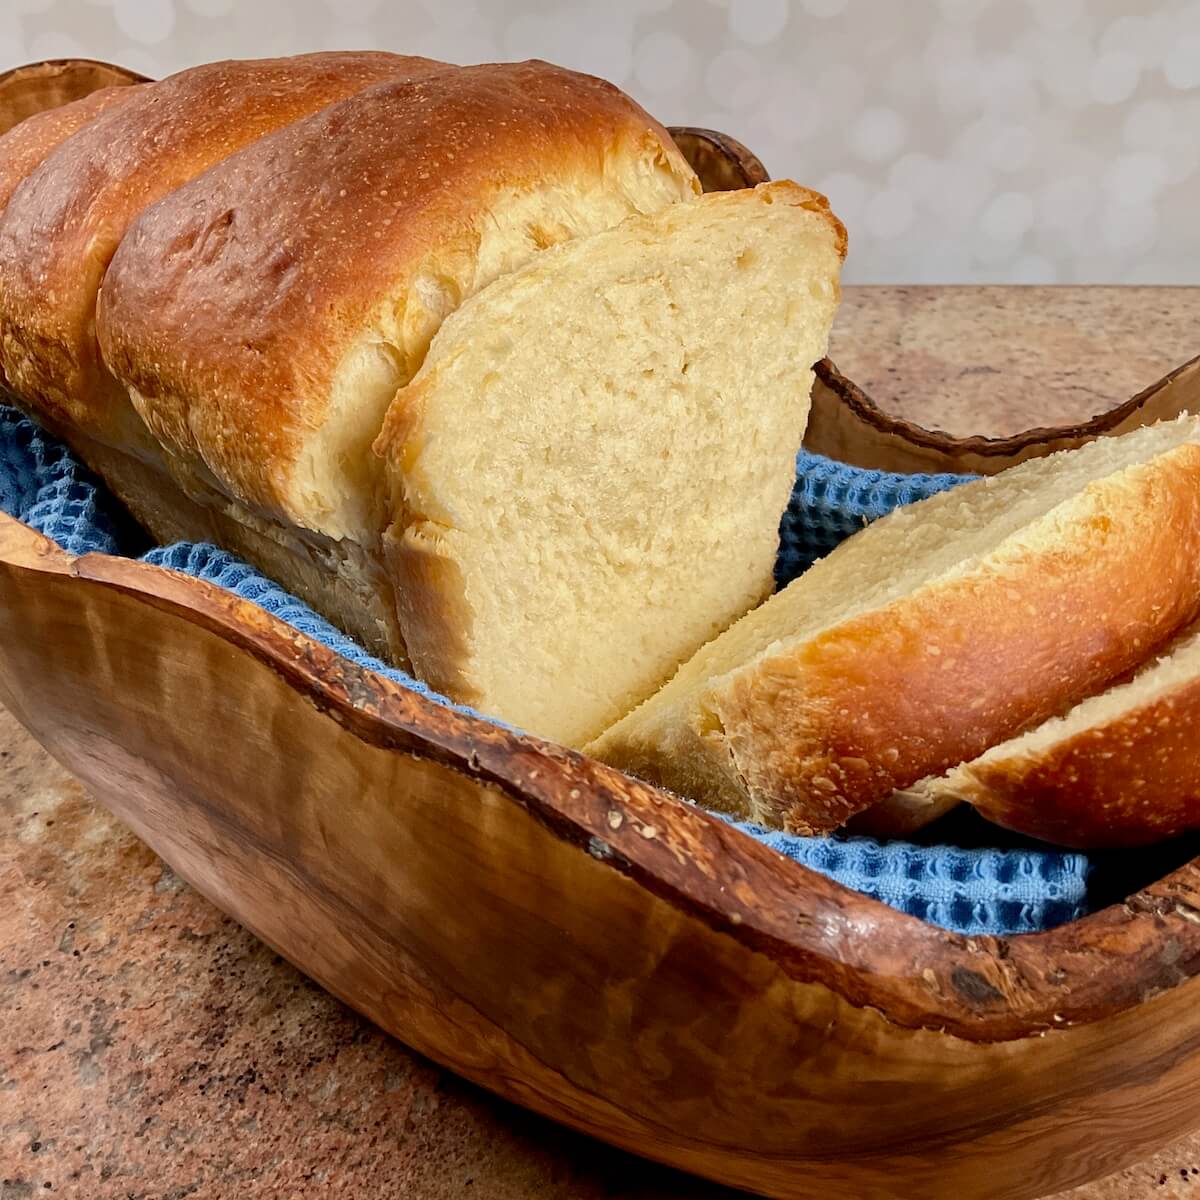
This sourdough sandwich bread recipe is perfect for any sandwich when you don't want a chewy-style bread (think peanut butter and jelly, Italian tuna salad, grilled cheese (maybe to serve alongside an easy broccoli cheese soup), or a fluffernutter sandwich). And it makes a killer french toast and bread pudding!
⭐⭐⭐⭐⭐
This bread was so good! My favorite part was the center, which was ever so slightly underbaked and the only soft, chewy texture reminded me of Challah. We used it for peanut butter and jelly sandwiches, but also just cut off a few slices and enjoyed with butter. It was a hit with the whole family!
- Shira
Recipe ingredients
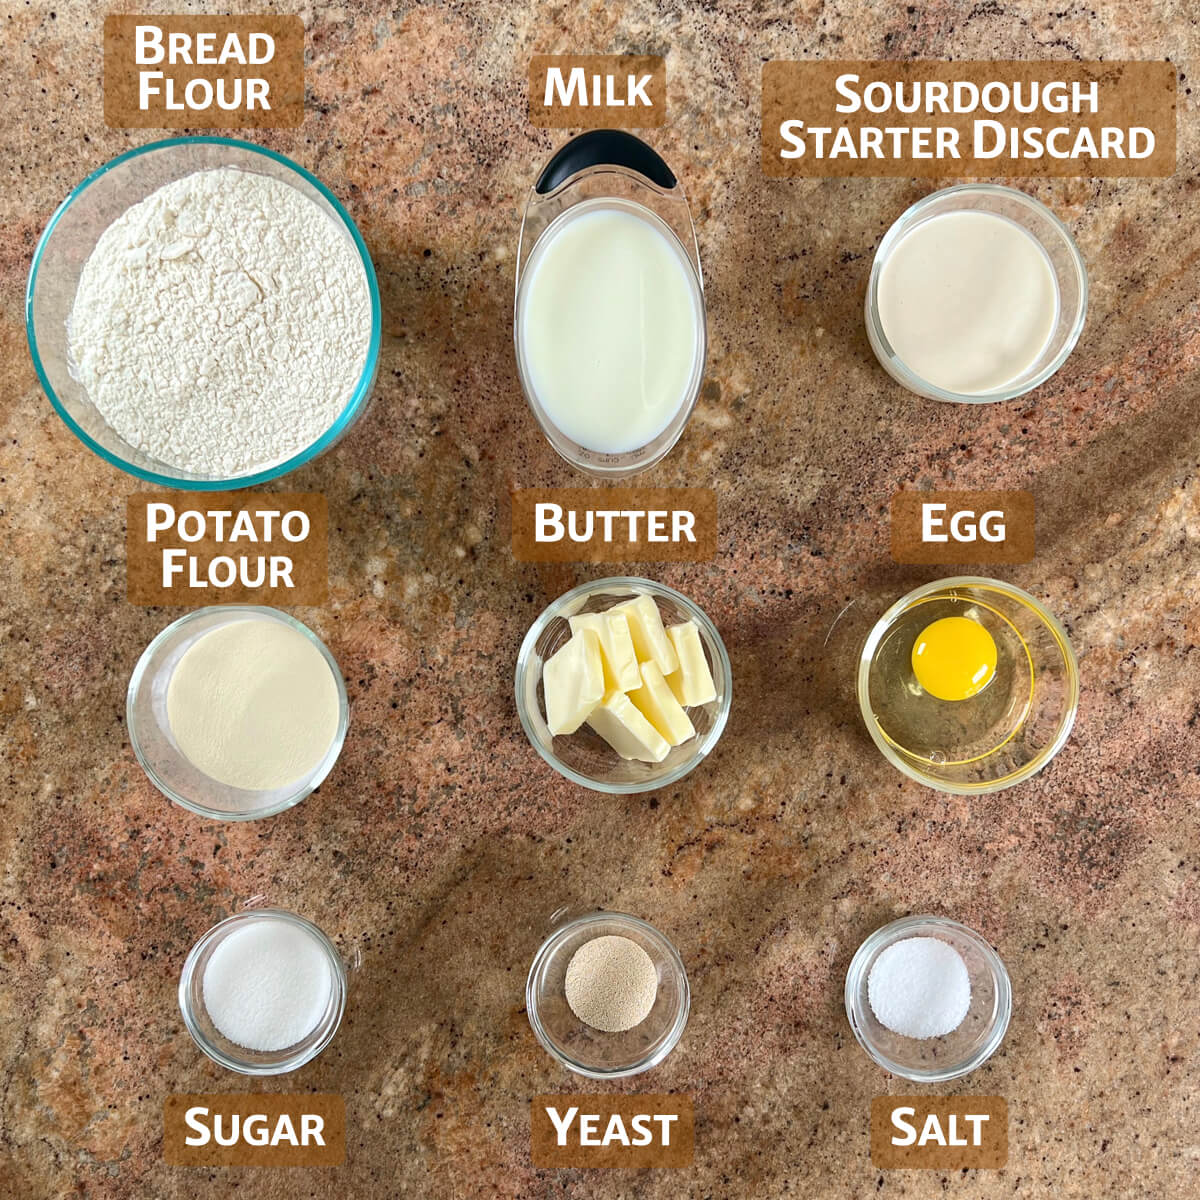
You'll need the following ingredients to make this sourdough discard sandwich bread recipe:
Ingredient Notes
Flour: I use bread flour, for this recipe, but you could also use all-purpose flour. Bread flour will give the bread a better structure, but the bread will be still soft and fluffy no matter which type of flour you use.
Yeast: I use instant yeast when I bake bread, but you can also use Active Dry yeast (see the FAQs for a discussion of the differences between them). If you'd like to omit the yeast and just use fed, active sourdough starter, see the instructions below.
Sourdough starter discard: Sourdough discard is unfed sourdough starter, i.e. the amount you remove from your crock before feeding the remainder (I do this weekly). Since it's not active starter, it's used for flavor rather than fermentation (you'll need yeast for that).
Milk: Helps to make a softer dough. You can use any type of milk you have on hand, including whole, low-fat, non-fat, or even an unsweetened plain non-dairy milk. If you prefer, you can substitute 1 cup hot water and ¼ cup nonfat dry milk for the milk.
Potato flour: Helps keep the bread soft and fluffy. If you choose not to use potato flour, increase the amount of flour to compensate.
See the recipe card for a full list of ingredients and measurements.
How to leave out the commercial yeast
If you don't want to use commercial yeast in this sourdough discard sandwich bread recipe, replace the yeast with ½ cup (114 grams) of active, fed starter, reduce the amount of flour by about ½ cup (57 grams), and reduce the milk by about ¼ cup (57 grams). The rising time will be longer (about double) for both the first and second rises. (Note: there are some rounding inconsistencies here due to the volume vs. weight measurement conversion.)
How to make sourdough discard sandwich bread
Step 1: Mix the dough
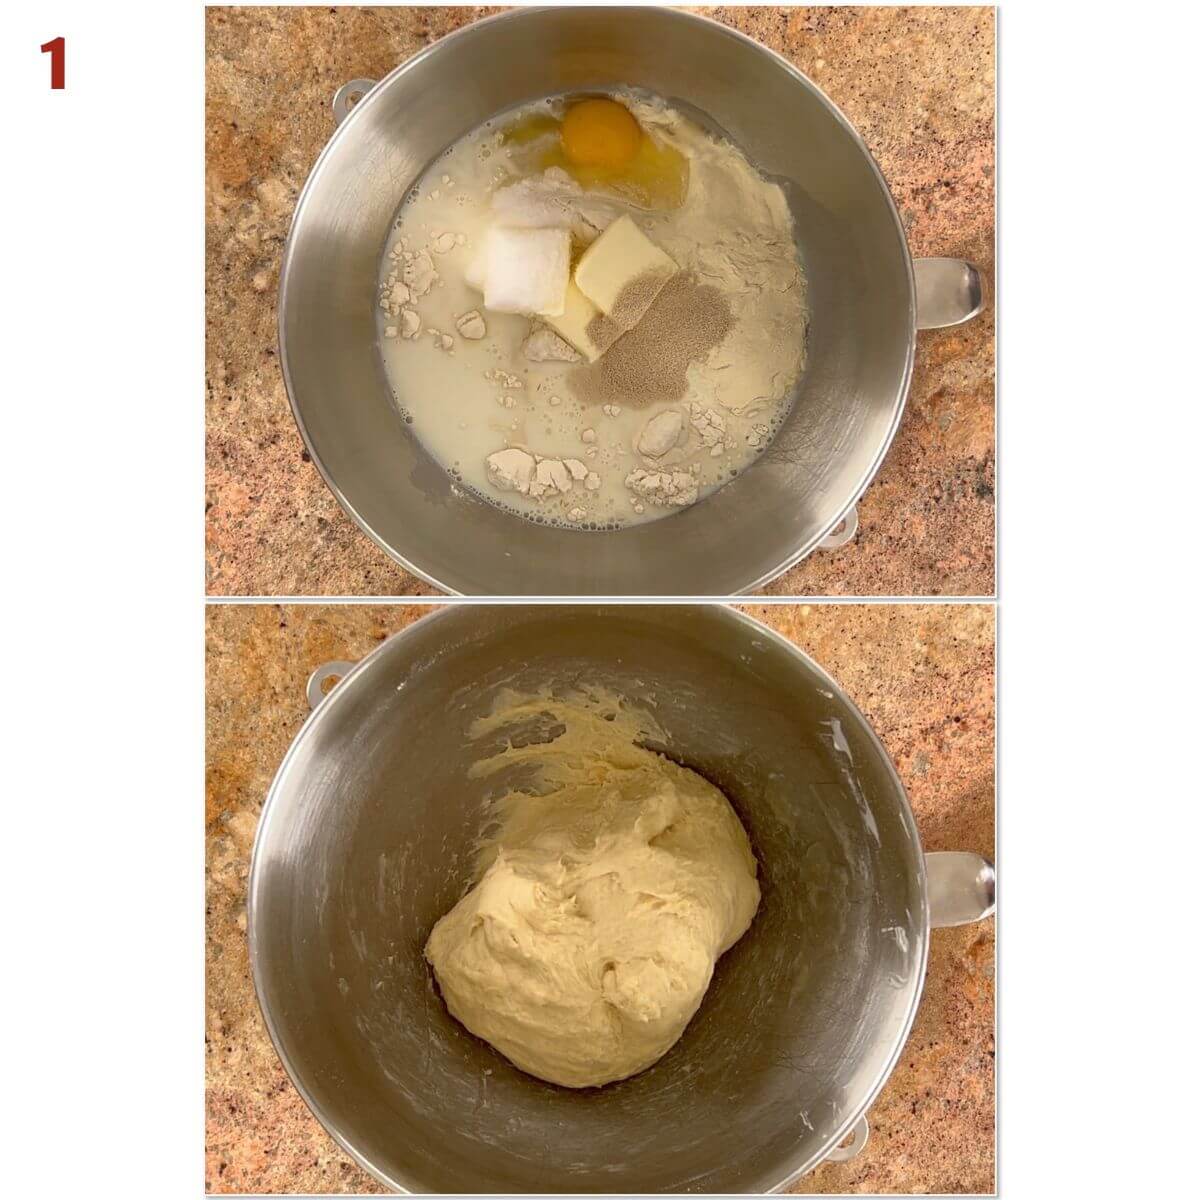
Combine all the ingredients in the bowl of a stand mixer fitted with a dough hook. Mix and knead on medium speed until a soft, slightly sticky dough forms (photo 1). If necessary, add flour or water in 1 tablespoon increments until the dough pulls away from the sides of the bowl.
If you don't have a stand mixer, you can mix this dough in a bread machine on the dough cycle or by hand with a large wooden spoon or a rubber spatula.
Step 2: The first rise
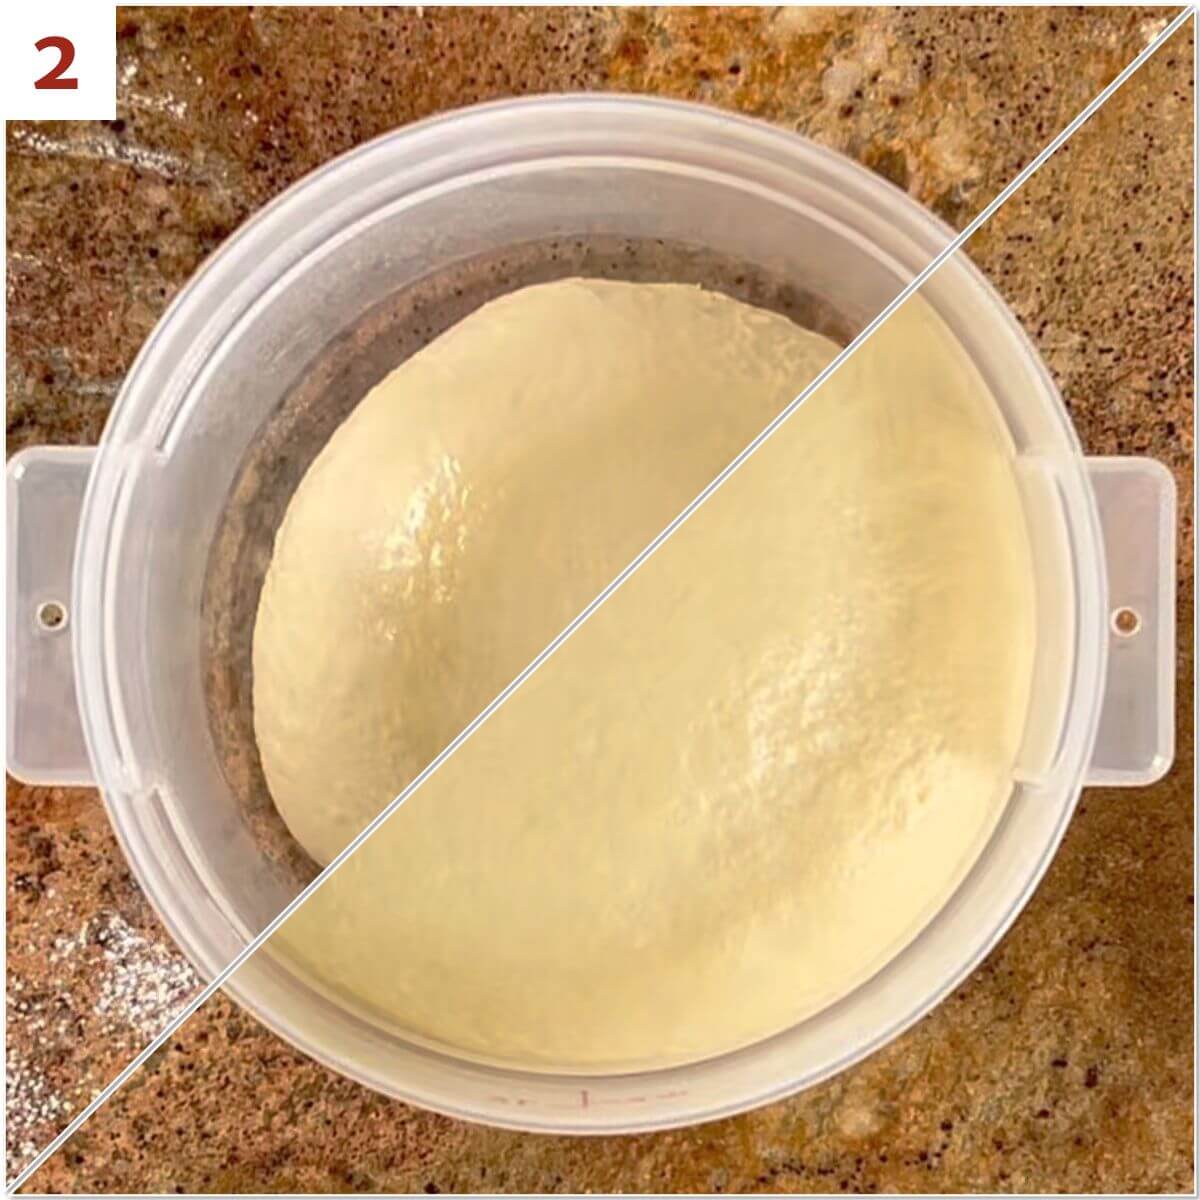
Lightly spray a large bowl with canola oil spray. Place the dough in the bowl, turning it to coat all sides in the oil. Cover the bowl and allow the dough to rise in a warm place for 1 to 2 hours or until doubled in size (photo 2). An oven with the light on works wonderfully.
Step 3: Shape the loaf
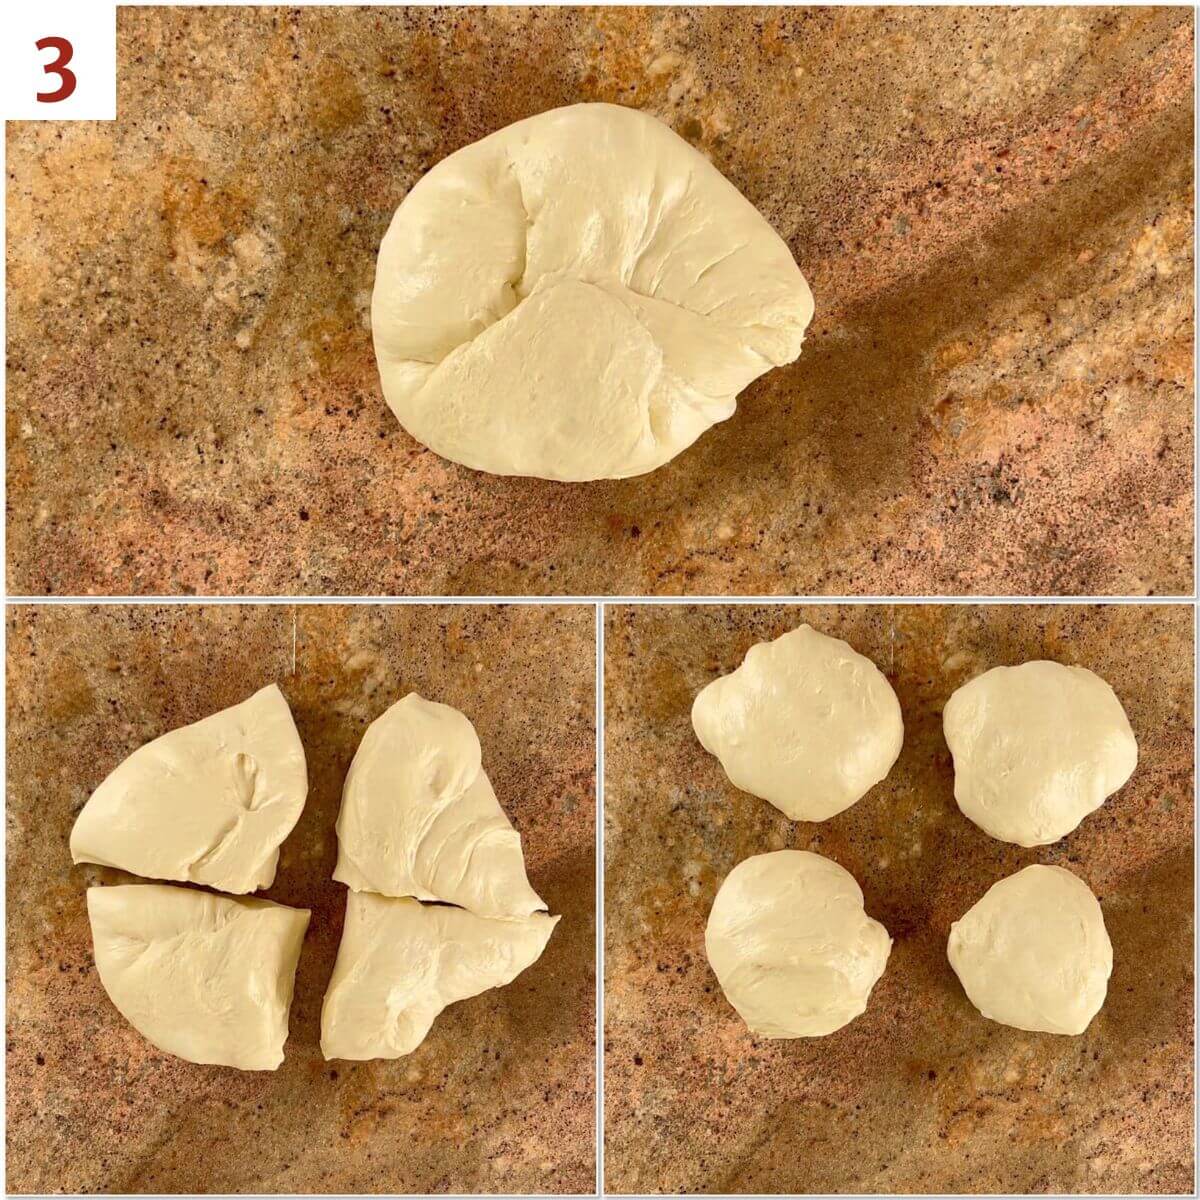
After the dough has risen, knead it gently to deflate it. Divide the dough into 4 equal pieces with a bench scraper. Shape each piece into a rough ball by pulling the edges into the center, then turn face down (photo 3). Cover and allow to rest for 20 minutes.
Spray a standard loaf pan with baking spray.
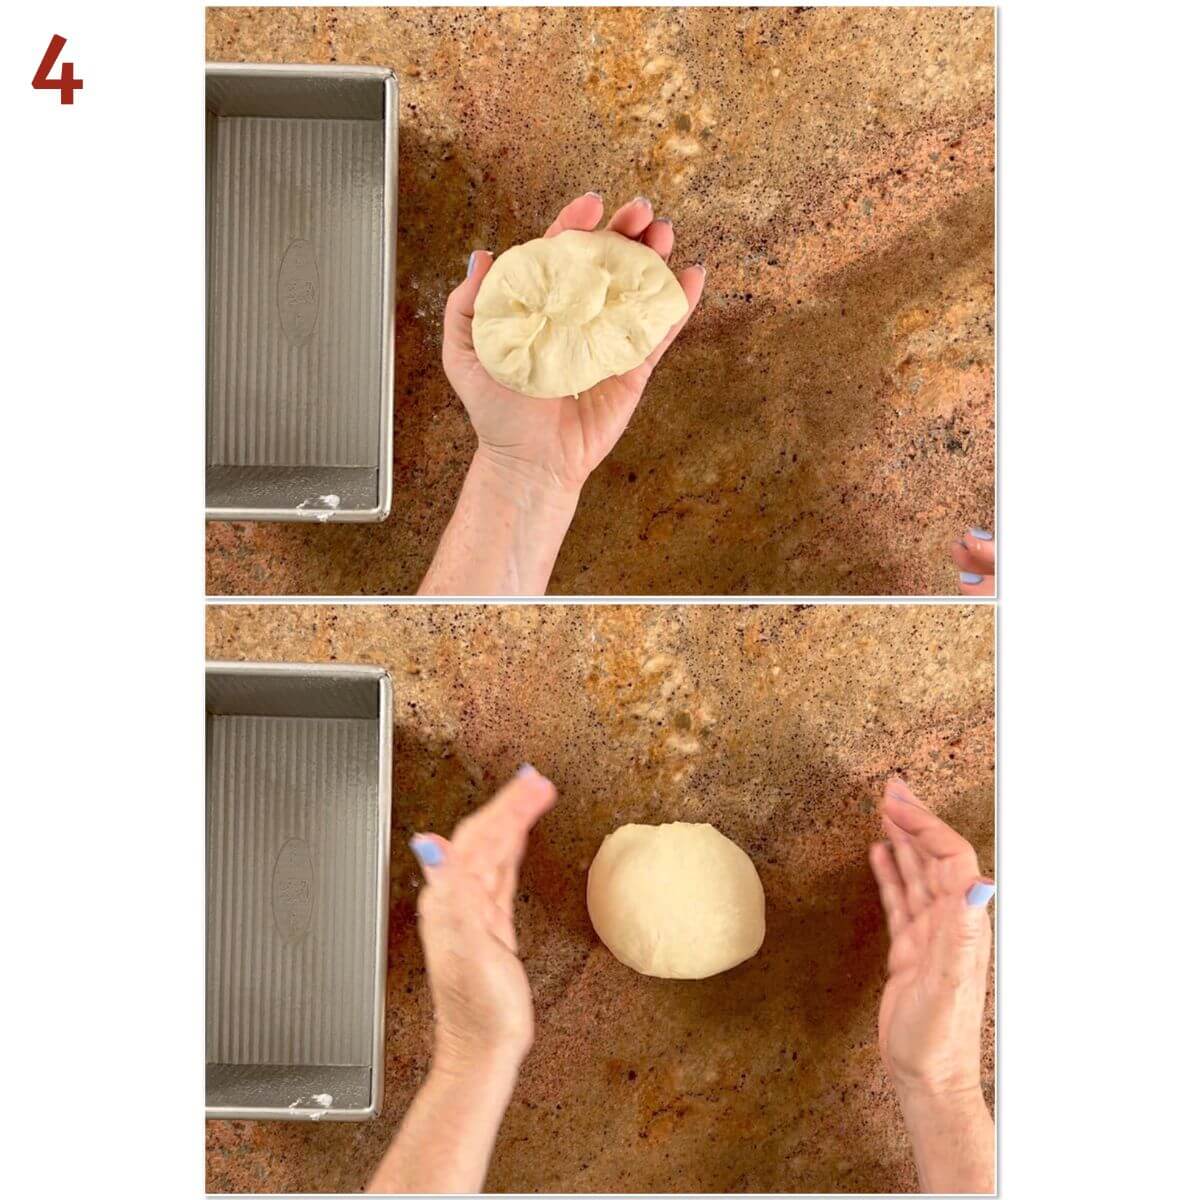
Reshape the dough into a ball, again pulling the edges into the center. Turn over and roll the balls on the counter to seal (photo 4).
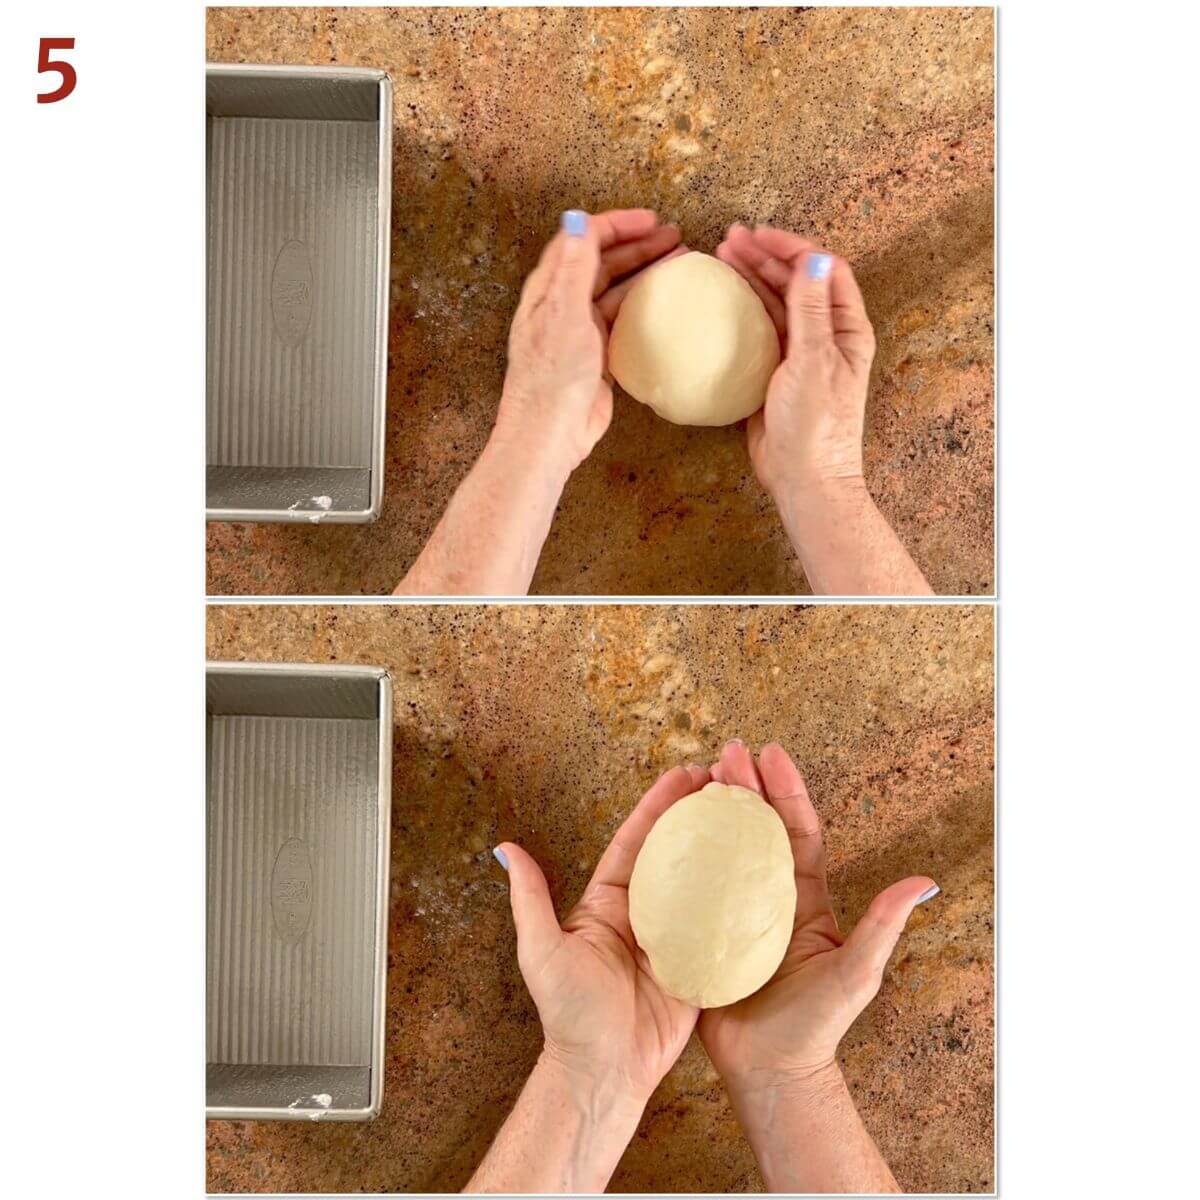
Tighten the top by pulling the dough towards you with your pinky fingers touching the counter. Rotate the ball and repeat the action, shaping each ball into a slight oval (photo 5).
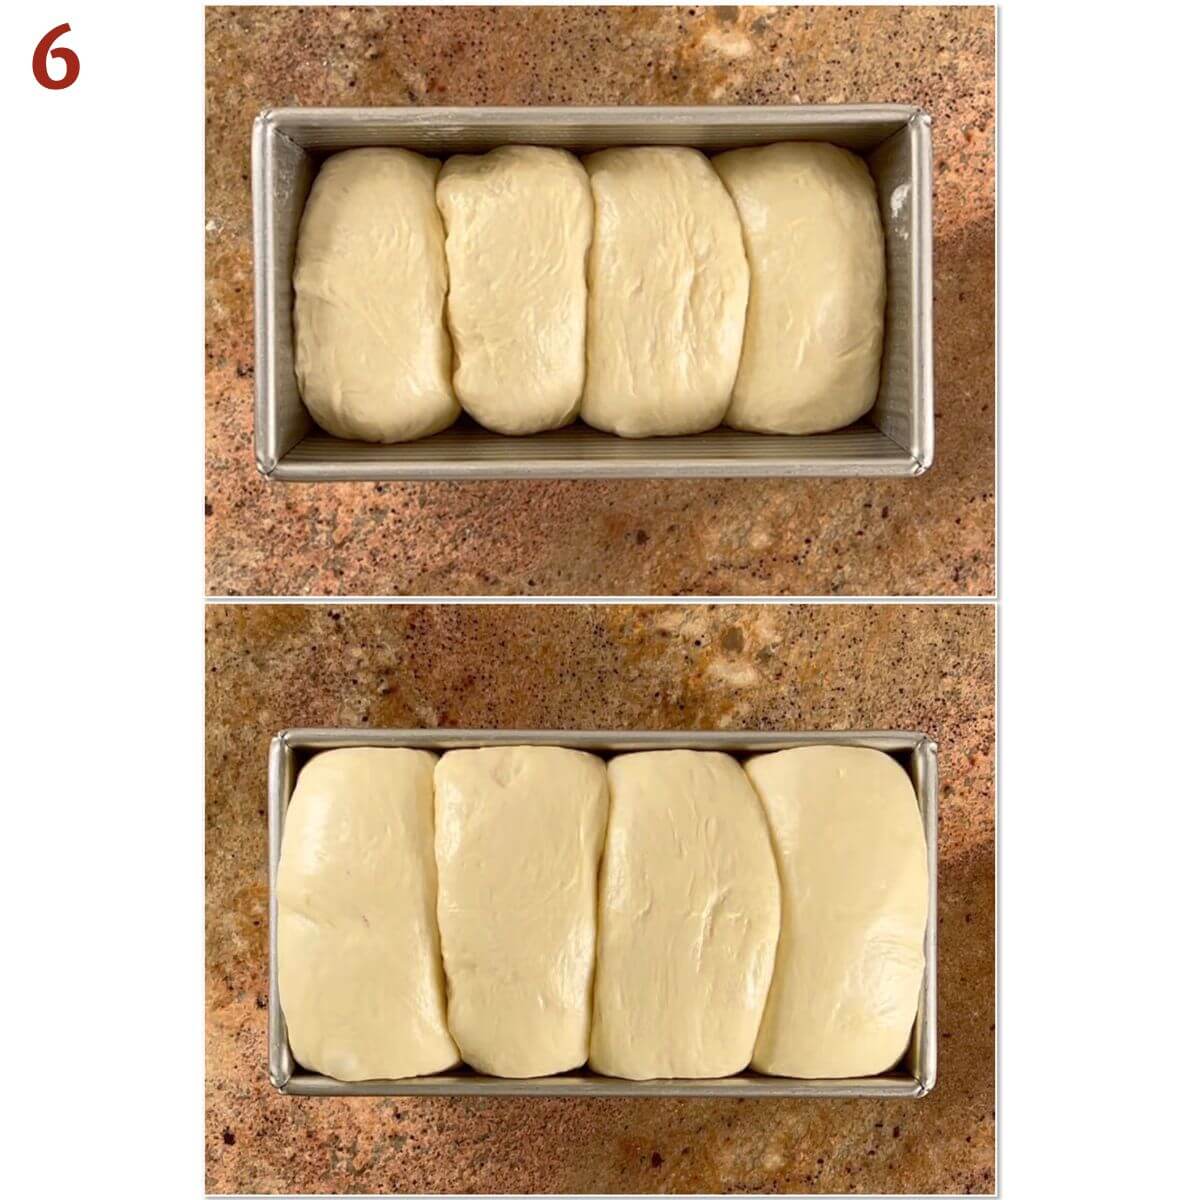
Place the dough balls side by side in the loaf pan. The dough will want to spread, so push them over to make room. Cover the loaf with plastic wrap and let it rise until it's puffy, about 1 hour (photo 6).
Place the oven rack in the lower third of your oven. Preheat the oven to 350°F.
Other ways to shape the loaf
I've used a 4-piece side-by-side method to shape this sourdough sandwich bread because the bread doesn't split as much during baking. You can use whatever shaping method you prefer. Here are recipes where I've used other bread loaf shaping techniques:
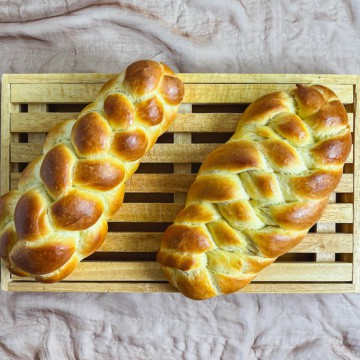
And since this dough is so soft, you can also braid it like a challah (a braided egg bread). You can use a standard 3-strand technique, or go fancier with a 4-strand, 6-strand, or even an 8-strand braid straight or round loaf.
Have fun with it!
Step 4: Bake the bread
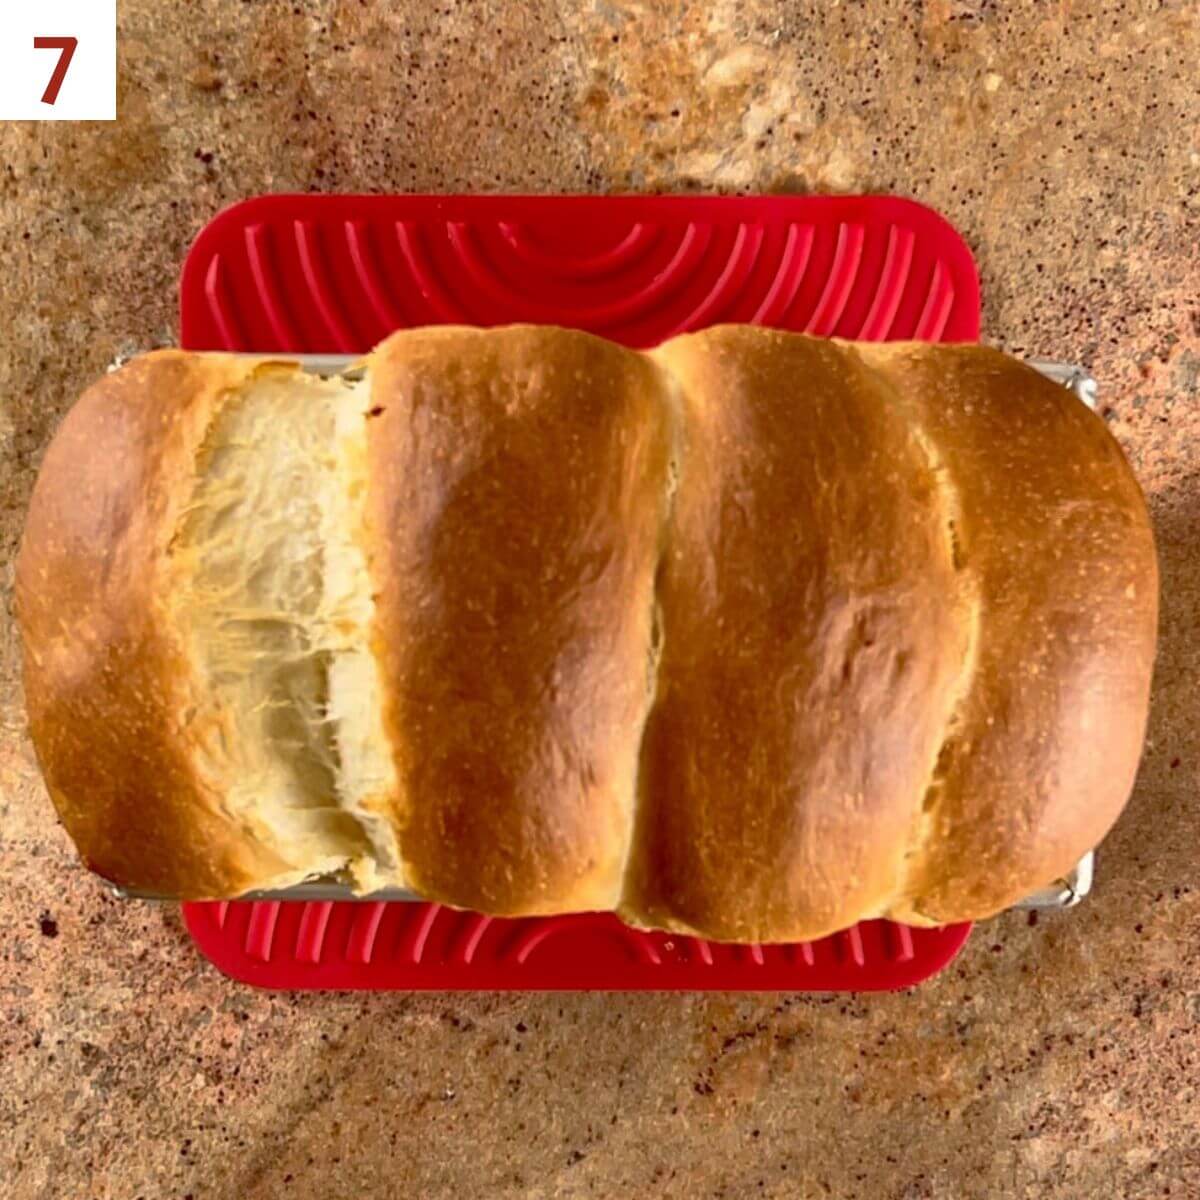
Bake the loaf for 33 to 38 minutes or until it's golden brown on top. If the top is browning too quickly, loosely cover the pan with aluminum foil (photo 7).
Remove the bread from the oven. You want the finished bread to read at least 190°F towards the bottom (a digital thermometer is helpful).
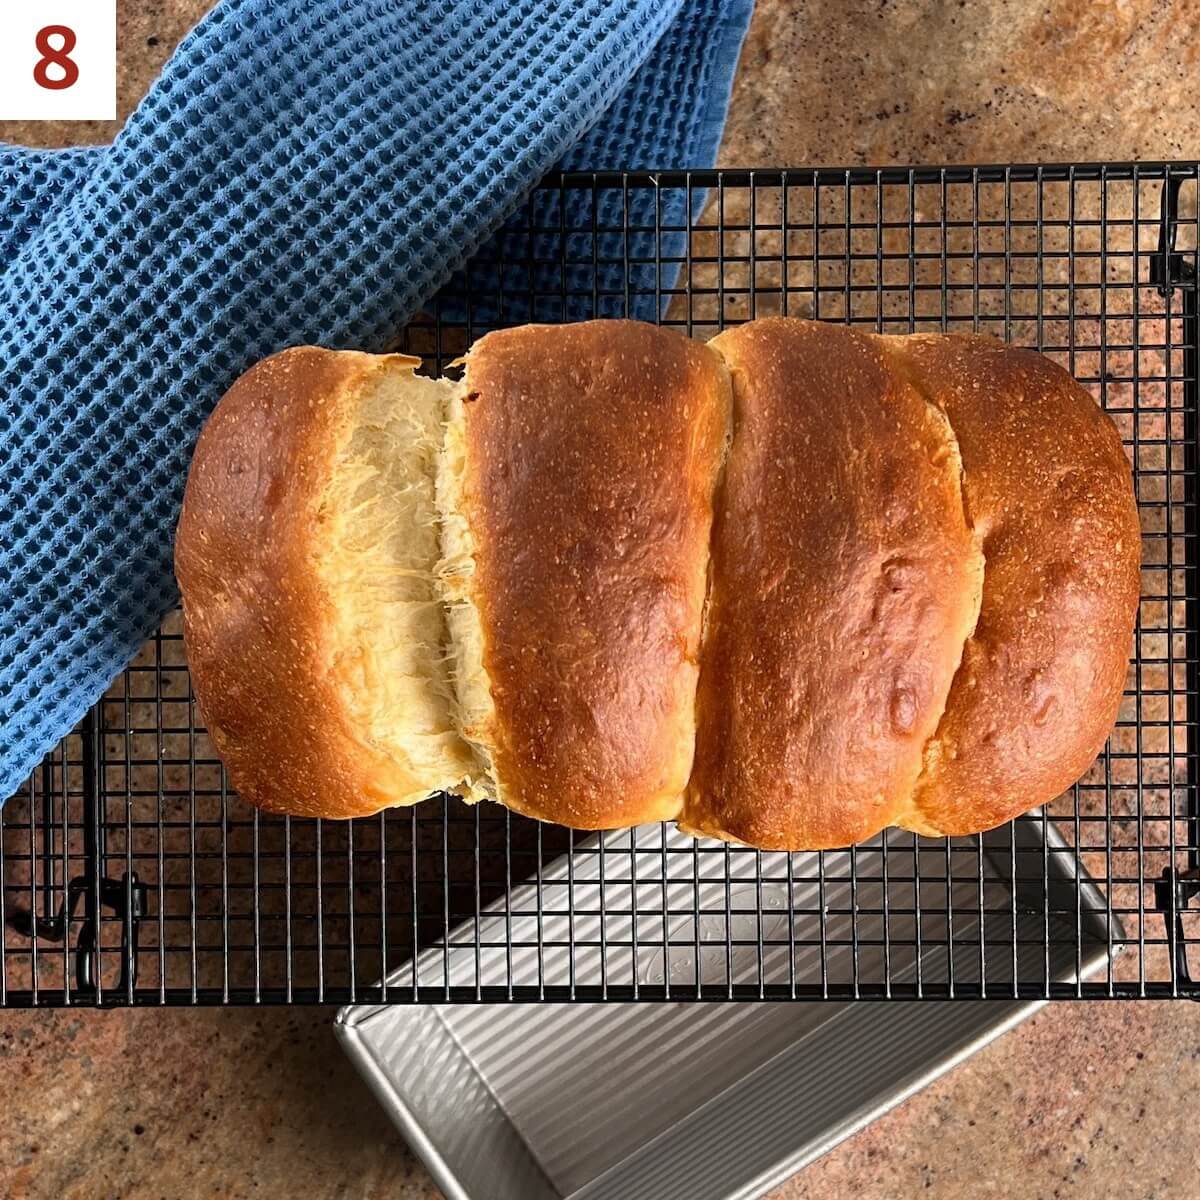
Allow the bread to cool in the pan for 15 minutes, then place on a cooling rack to cool completely before serving (photo 8).
Storage and make-ahead instructions
Storage instructions: This sourdough discard bread can be stored in an airtight container for 3 to 5 days at room temperature. For longer storage, freeze the bread for up to 3 months. Thaw in the refrigerator or at room temperature, then reheat as desired.
Make-ahead instructions: You can let the dough have its first rise in the refrigerator overnight. Cover the dough tightly and place in the refrigerator for up to 12 hours. Remove the dough from the refrigerator and allow to fully rise for 2 more hours before portioning and shaping. This will allow the dough to develop even more flavor.
You can also shape the bread before refrigerating it overnight. Remove the bread from the refrigerator and let it rise, still covered, on the counter for about 1 to 2 hours before baking.
How to display your bread beautifully
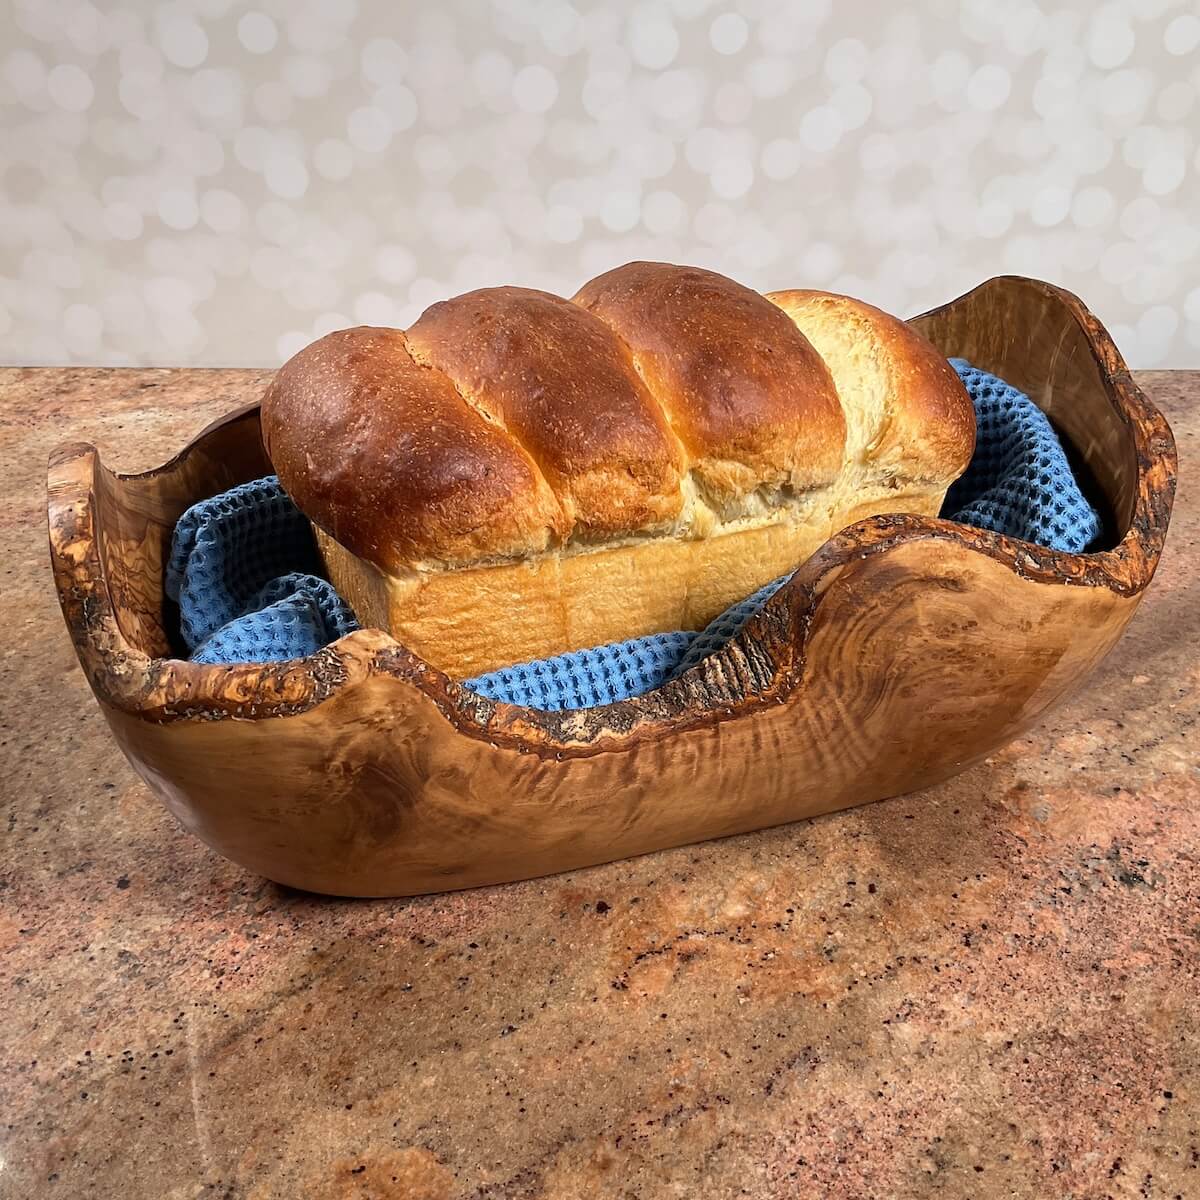
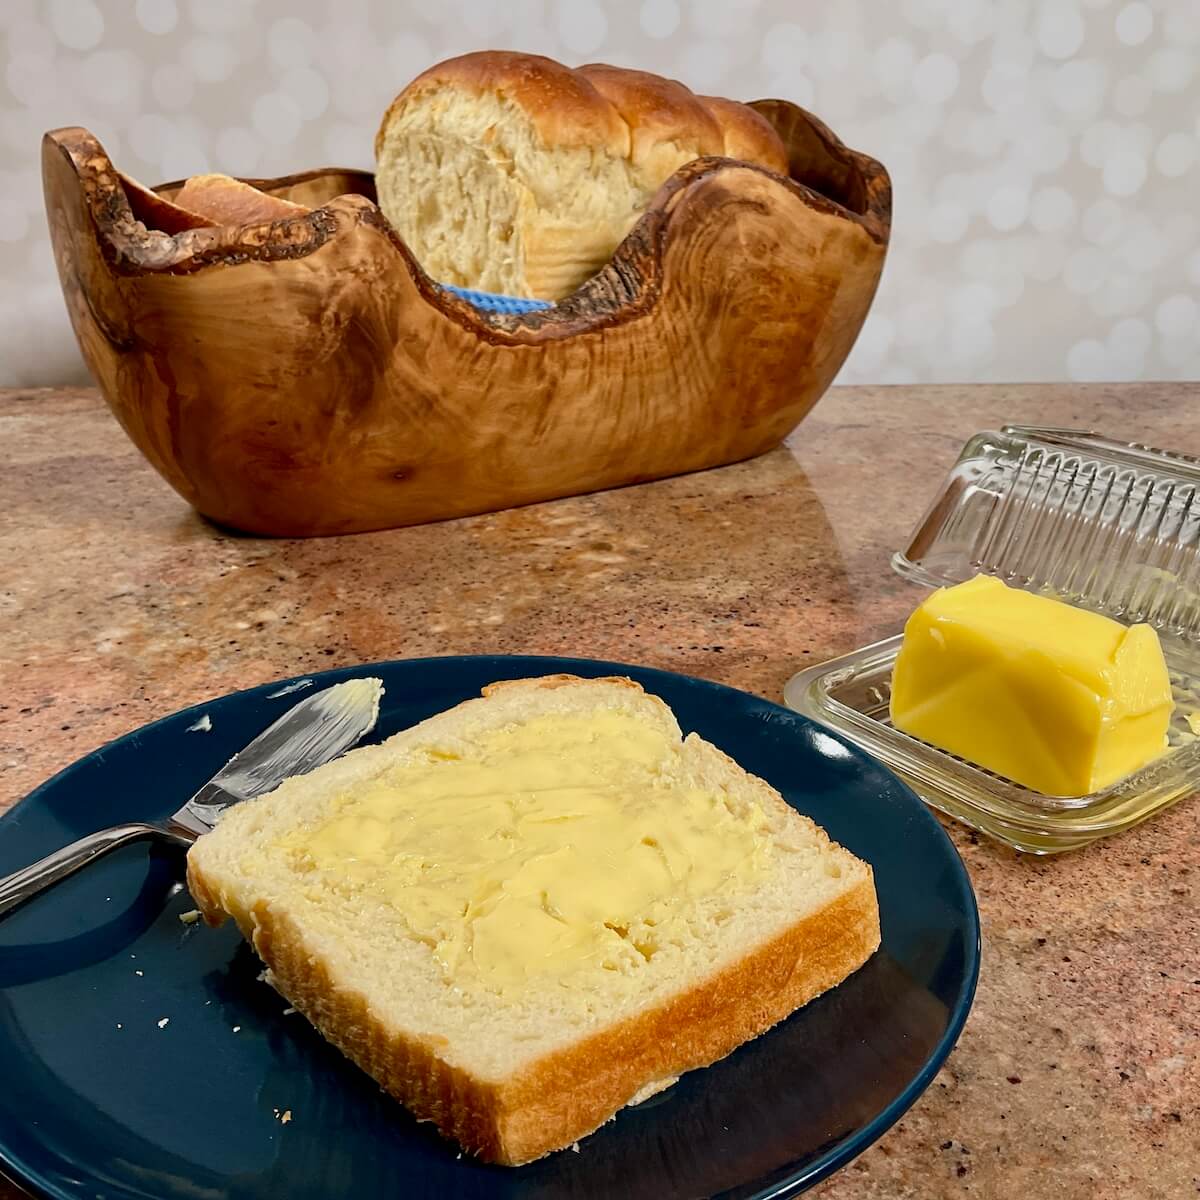
Did you notice that beautiful wooden bowl I'm using to display my sourdough discard loaf? It's a handcrafted olive wood bowl from Forest Decor, part of their extensive line of olive wood kitchenware and cutting boards, along with many other gift items (which can be personalized). As it says on their website, "each piece is handcrafted from premium quality olive wood, renowned for its durability and rich, unique grain patterns." If you want something truly unique, check them out!
Questions asked and answered
Here are some questions you might have...
Sourdough bread is naturally leavened by the wild yeast that's present in active, fed sourdough starter. Sourdough bread's flavor is directly influenced by the environment in which the yeast nurtured - hence the reason "San Francisco Sourdough" has its distinctive flavor that's different than sourdough made with yeast from another location.
Sourdough discard bread is made with unfed sourdough starter. Since the yeast isn't as active as its fed counterpart, it generally lacks the strength to made the bread dough rise efficiently, so commercial yeast is added to help the dough along.
Instant yeast doesn't need to be rehydrated (or "proved"), and can be added directly to the bread recipe's dry ingredients.
Active yeast needs to be rehydrated in a warm liquid before using (or have very warm liquid, between 120 to 130°F, in the recipe), and will take about 15 to 20 minutes longer to rise than instant yeast.
Whether you choose to proof your yeast is up to you.
More recipes featuring sourdough discard to try
Recipe
Sourdough Discard Sandwich Bread
Equipment
Ingredients
- 2¾ cups bread flour, or all purpose flour, adding more if needed
- 1 cup milk, warmed between 100°F to 110°F, see Recipe Notes
- ½ cup sourdough starter discard, at room temperature, see Recipe Notes
- ¼ cup potato flour
- 1 large egg, at room temperature
- 6 tablespoons unsalted butter, at room temperature
- 2 tablespoons granulated sugar
- 1½ teaspoons instant yeast, or rapid rise, see Recipe Notes
- 1½ teaspoons kosher salt
Instructions
- Make the dough: Combine all the ingredients together in the bowl of a stand mixer fitted with a dough hook. Mix and knead on medium speed until a soft, slightly sticky dough forms. If necessary, add flour or water in 1 tablespoon increments until the dough pulls away from the sides of the bowl.If you don't have a stand mixer, you can mix this dough in a bread machine on the dough cycle or by hand with a large wooden spoon or a rubber spatula.
- Keep the dough in the mixer and knead for an additional 2 minutes or by hand on a lightly floured surface. The dough will be soft and tacky.
- Lightly spray a large bowl with canola oil spray. Place the dough in the bowl, turning it to coat all sides in the oil. Cover the bowl and allow the dough to rise in a warm place for 1 to 2 hours or until doubled in size. An oven with the light on works wonderfully.
- Shape the loaf: After the dough has risen, knead it gently to deflate it. Divide the dough into 4 equal pieces with a bench scraper. Shape each piece into a rough ball by pulling the edges into the center, then turn face down. Cover and allow to rest for 20 minutes.
- Spray a standard loaf pan with baking spray.
- Reshape the dough into a ball, again pulling the edges into the center. Turn over and roll the balls on the counter to seal, then tighten the top by pulling the dough towards you with your pinky fingers touching the counter. Rotate the ball and repeat the action, shaping each ball into a slight oval.
- Place the dough balls side by side in the loaf pan. The dough will want to spread, so push them over to make room. Cover the loaf with plastic wrap and let it rise until it's puffy, about 1 hour.
- Place the oven rack in the lower third of your oven. Preheat the oven to 350 °F.
- Bake the bread: Bake the loaf for 33 to 38 minutes or until it's golden brown on top. If the top is browning too quickly, loosely cover the pan with aluminum foil. Remove the bread from the oven. You want the finished bread to read at least 190 °F towards the bottom (a digital thermometer is helpful).
- Allow the bread to cool in the pan for 15 minutes, then place on a cooling rack to cool completely before serving.
- Storage instructions: This bread can be stored in an airtight container for 3 to 5 days at room temperature. For longer storage, freeze the bread for up to 3 months. Thaw in the refrigerator or at room temperature, then reheat as desired.
- Make-ahead instructions: You can let the dough have its first rise in the refrigerator overnight. Cover the dough tightly and place in the refrigerator for up to 12 hours. Remove the dough from the refrigerator and allow to fully rise for 2 more hours before portioning and shaping. This will allow the dough to develop even more flavor.You can also shape the bread before refrigerating it overnight. Remove the bread from the refrigerator and let it rise, still covered, on the counter for about 1 to 2 hours before baking.








Marcia says
what can u substitute for potato flour?
Tammy Spencer says
Hi Marcia, good question! According to King Arthur Baking, besides potato flakes (the same weight amount), you can substitute cornstarch 1 : 1 to keep the bread moist, but it won’t provide any flavor (which may not be noticeable in this bread.
You can also use all-purpose flour, but the dough might be a little wetter & stickier. If you try any of these suggestions, please let me know how it goes. Happy baking! 🙂
Shira says
This bread was so good! My favorite part was the center, which was ever so slightly underbaked and the only soft, chewy texture reminded me of Challah. We used it for peanut butter and jelly sandwiches, but also just cut off a few slices and enjoyed with butter. It was a hit with the whole family!