
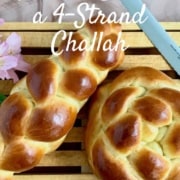
Learn to braid a straight four-strand braided challah for celebrations (or french toast) and a round four-strand challah for Rosh Hashanah (the Jewish New Year). Both will look like they came from a bakery!
Jump to:
- How do you braid a four-strand challah?
- Why these instructions work
- Recipe Ingredients
- How to make the challah ropes
- How to weave a straight four-strand challah
- How to weave a round four-strand challah
- Rest and bake the challah
- Storage instructions
- Troubleshooting challah that lost its shape after baking
- There are many ways to shape challah
- Questions asked and answered
- More shaped bread recipes to try
- Recipe
- Comments
How do you braid a four-strand challah?
To braid a four-strand challah, divide the dough into four equal ropes, pinch them together at one end, then follow a repeating pattern of moving the outer strands across and placing the top strand into the center. This technique works for both straight and round challahs, creating a bakery-style loaf that holds its shape while baking.
Why these instructions work
- Clear step-by-step instructions and photos show exactly where each strand goes, so you don't lose your place mid-braid for both straight and round challahs
- Written patterns you can repeat (not memorized diagrams) make the technique easy to master
- A video demonstration lets you see the motion in real time before you start
Whether it's straight, round, squared off, or in a wreath, bread comes in a variety of shapes. Most types of bread aren't associated with a specific shape, but challah, a Jewish egg bread similar to brioche, definitely is one of those. It's instantly recognizable.
A four-strand challah is a braided Jewish egg bread made by weaving four equal strands of dough into either a straight or round loaf, traditionally served for Shabbat, holidays, and special occasions.
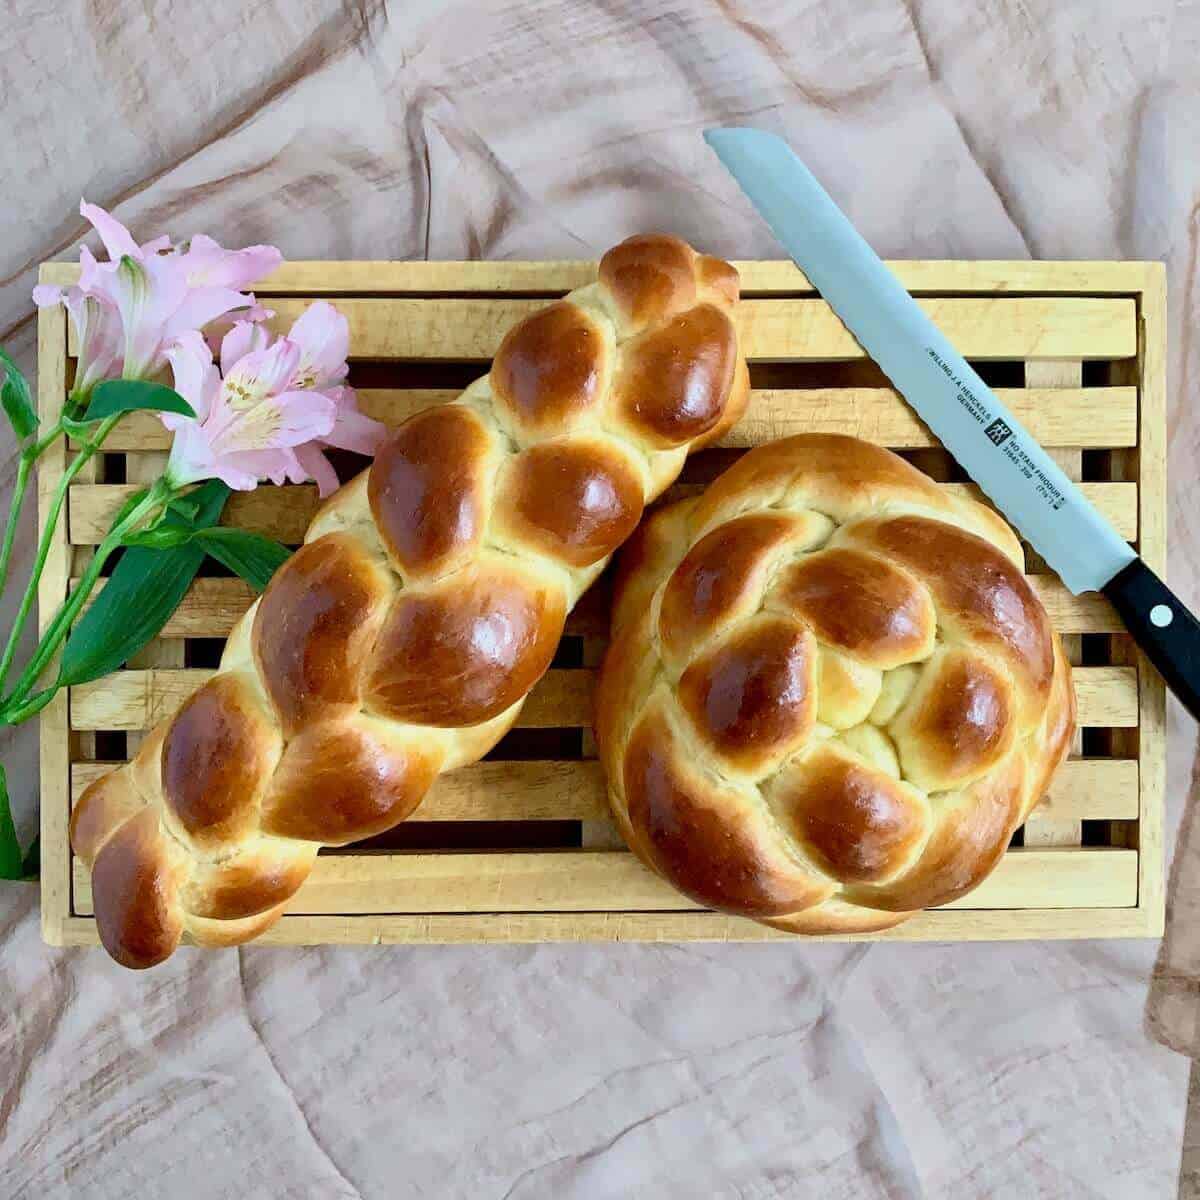
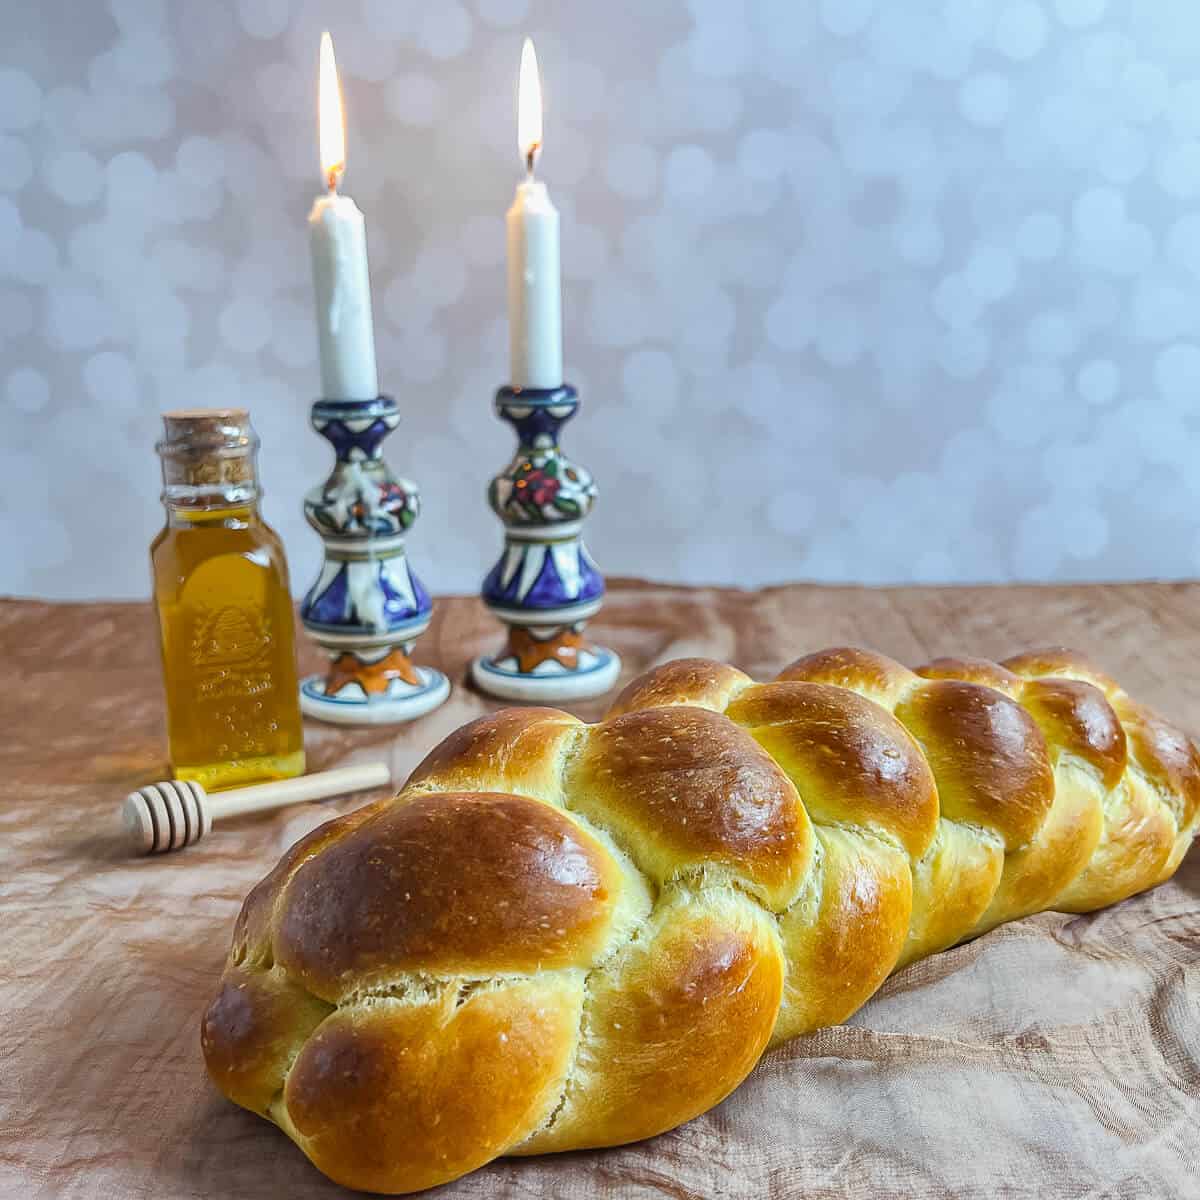
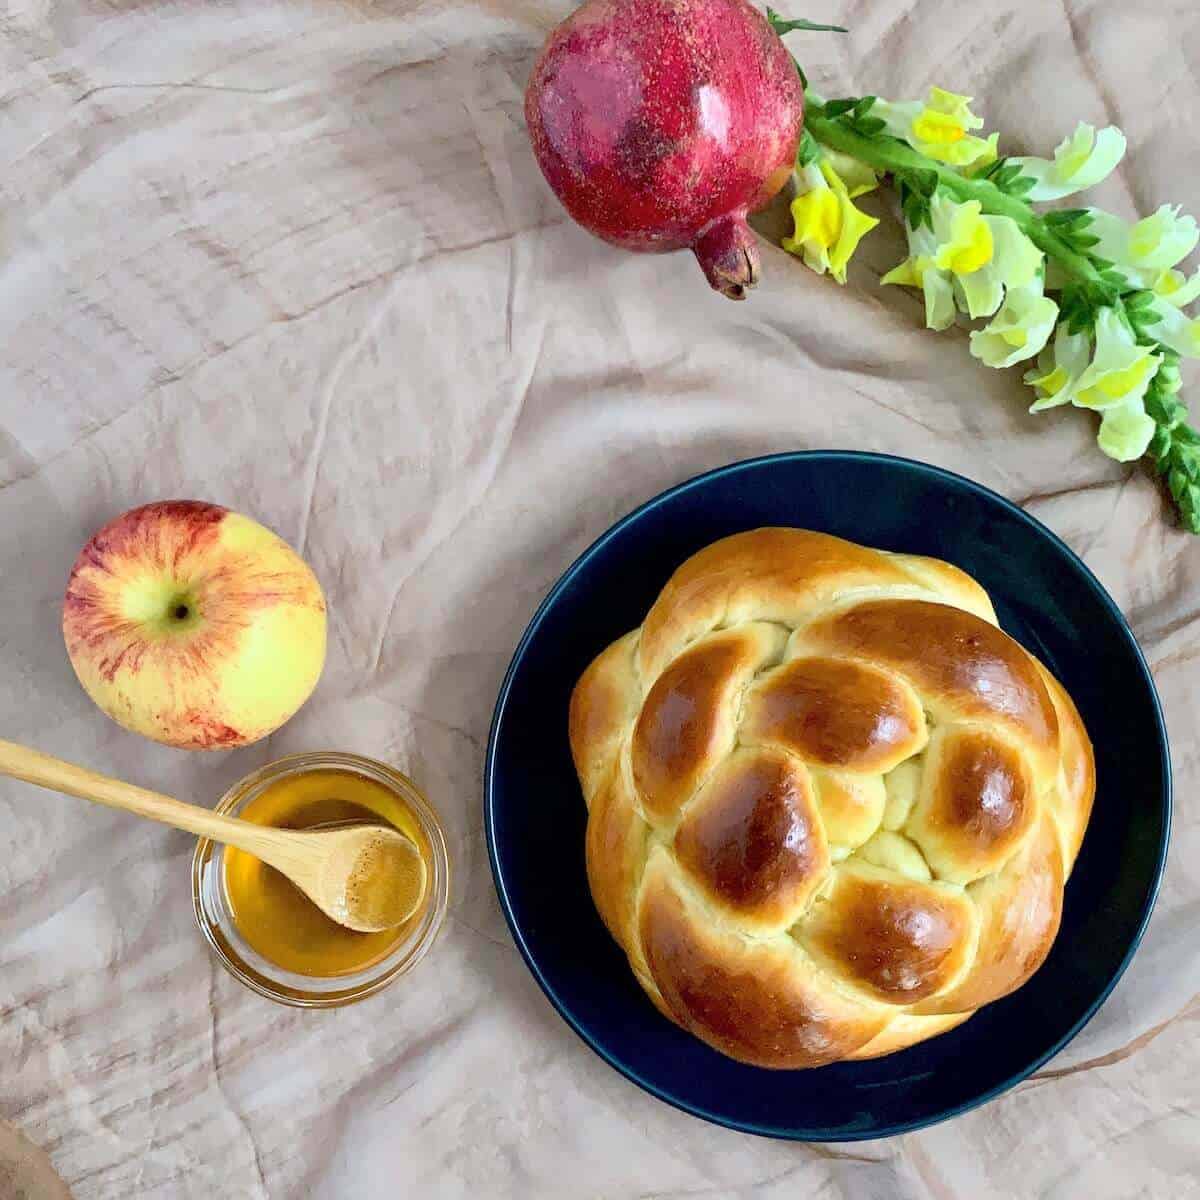
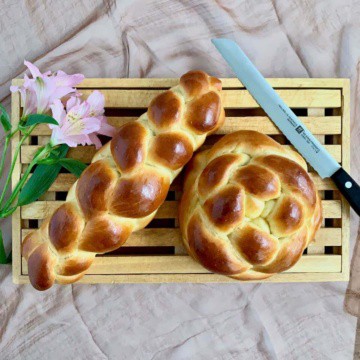
Round challah is traditionally served for Rosh Hashanah (the Jewish New Year). Straight challahs are served at many Jewish celebrations, from the weekly Shabbat (Sabbath) meal to weddings and Bar/Bat Mitzvahs. And of course, it's great for making french toast!
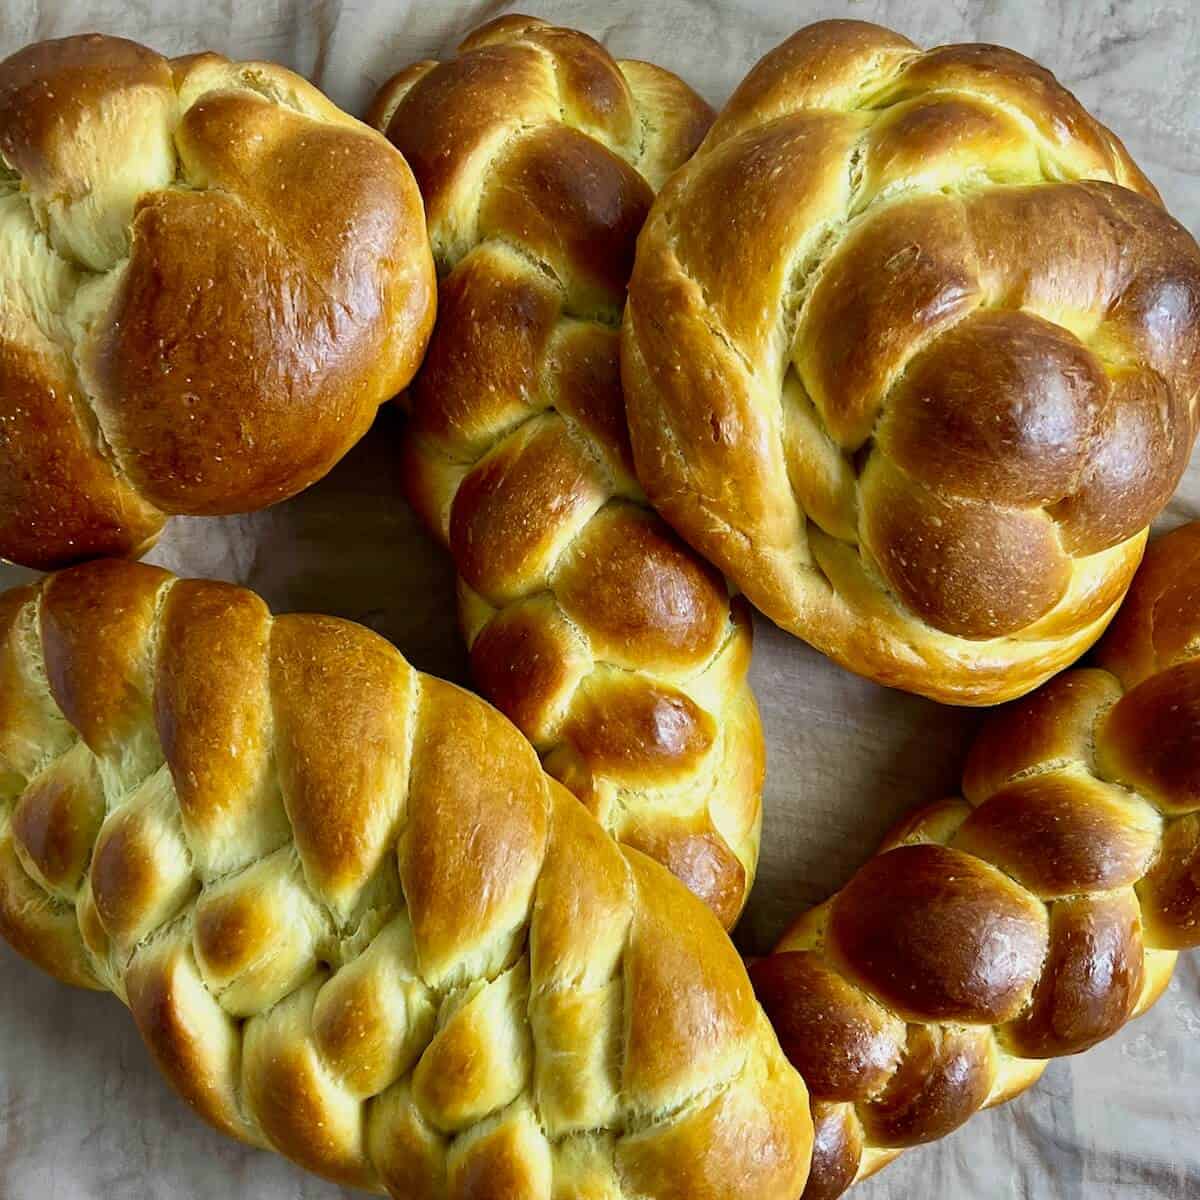
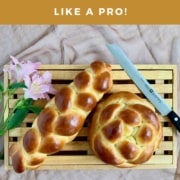
This finished straight four strand challah looks beautiful, with a shiny exterior and a soft interior. The round four strand challah looks impressive, but is really quite easy to weave.
Practice with patience and soon you'll master the patterns for shaping challah dough. You'll impress your family and friends, and you'll have the satisfaction you plaited like a pro with a challah bread worthy of a bakery.
Happy braiding!
Recipe Ingredients
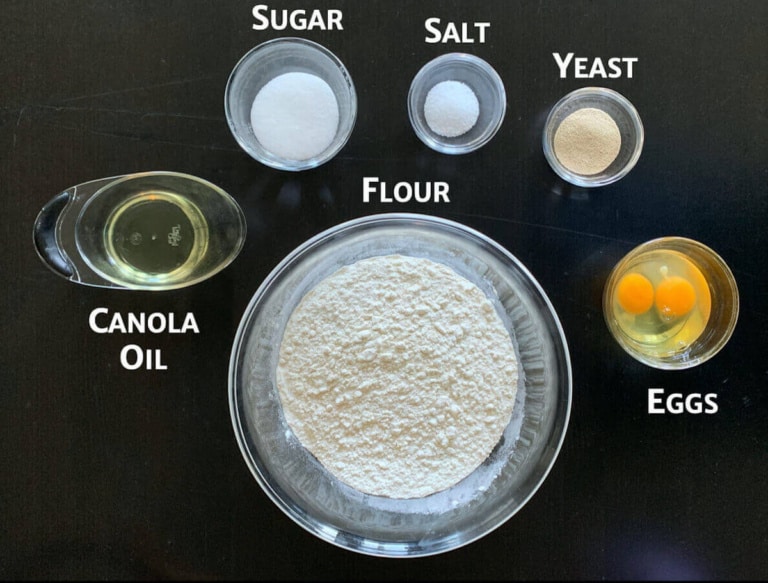
You'll need the following ingredients to make a challah recipe:
Ingredient Notes
As with most bread recipes, you need the basic bread ingredients: flour, water, yeast, and salt.
Eggs: The main difference between a basic bread dough and challah is that challah dough is enriched with eggs, like with a brioche recipe.
Canola oil: Oil is used instead of softened or melted butter to keep the bread dairy-free. That's especially important if you're keeping Kosher and want to serve the challah with a meal featuring meat. Jewish dietary laws forbid the mixing of milk and meat products at the same time.
Sugar: Challah is usually sweetened with sugar or honey for better flavor.
Mix-ins: These can be a fun way to add another flavor component to your challah. Some common mix-ins are raisins and chocolate chips, but you can experiment with other options like nuts, seeds, or chopped dried fruit.
Toppings: Sesame seeds and poppy seeds are common, and cinnamon sugar (1 teaspoon cinnamon mixed with 1 tablespoon granulated sugar) is a fun alternative. You can also go savory with spice mixes like za'atar. Get creative or leave it plain, your choice.
Here's the best homemade challah recipe, hands down. And as the dough rises, let's discuss how to braid it using a 4-strand braid, both straight and round.
How to make the challah ropes
Rolling out your blob of dough into ropes after the first rise is perhaps the most arduous part of the process, especially if you're braiding larger numbers of strands. Here are some tips to make the process a little easier:
- Divide the dough evenly by weight for uniform strands: Portion out the number of pieces you'll need for your braid, cutting it with a bench scraper or knife. For the best accuracy, weigh the total amount of your dough using a kitchen scale and divide that number by the number of strands you need. Then portion the pieces to that weight.
- Shape each portion into a ball, then roll into a short oval: As you go, roll each portion into a ball, then flatten and roll it up into an oval (about the size of a small potato).
- Rest the dough for 20 minutes to relax the gluten: Keep the balls covered with plastic wrap (to keep from drying out) and let them rest. This rest will help the gluten to relax so the final rope won't be as inclined to shrink back as you roll it out.
- Roll from the center outward, tapering the ends: Starting in the middle of the oval, start to roll and stretch the dough using both hands cupped over the rope. As the rope gets to your desired length, press down on the ends to taper them to a point.
The length of each strand will depend on the number of portions you have. Keep in mind that the thinner the strand, the longer (and thinner) the braided challah will be. Keeping the strands thicker will result in a shorter (and thicker) challah.
How to weave a straight four-strand challah
Straight four-strand braids are a little trickier than a basic 3-strand braid, but the technique isn't hard to master. With a little practice, your challah will look like it came straight from the bakery!
Straight four-strand challah pattern (summary):
Move the outer strand across once, then repeat a two-step pattern of placing the second strand over and the top strand into the center.
Step 1
Shape 4 dough portions into long ropes. Lay all the ropes side by side on a lightly floured surface and pinch them together at the top.
Take the topmost right strand and place it on the opposite side. You're only going to do this step once (photo 1).
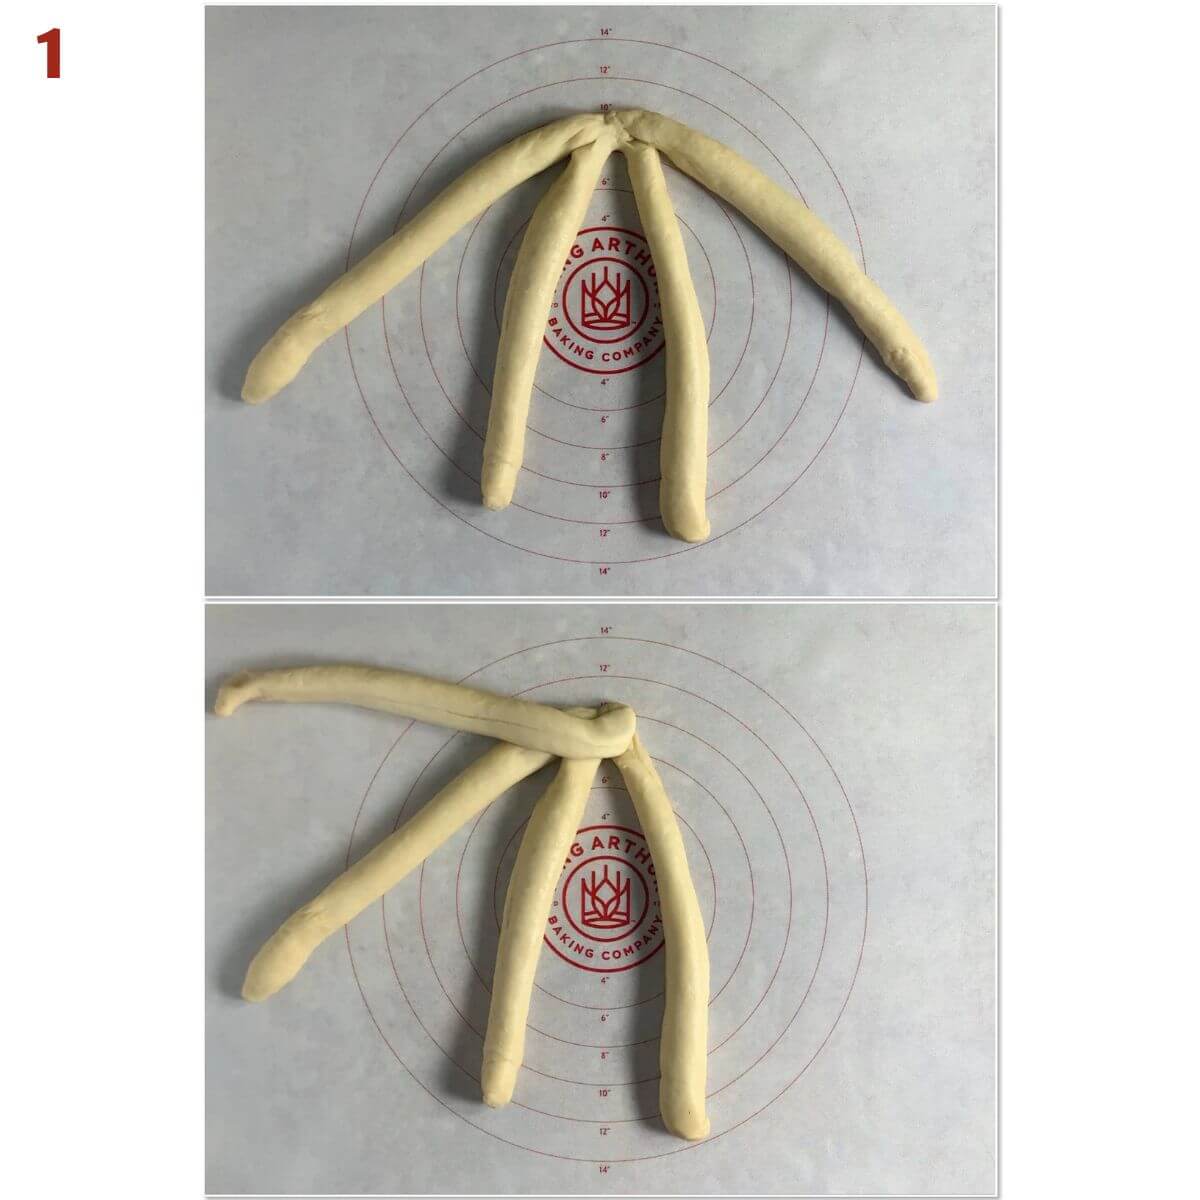
Step 2
Take the second from the top left strand and place it on the opposite side. Take the topmost left strand and place it in the middle of the two remaining strands (photo 2).
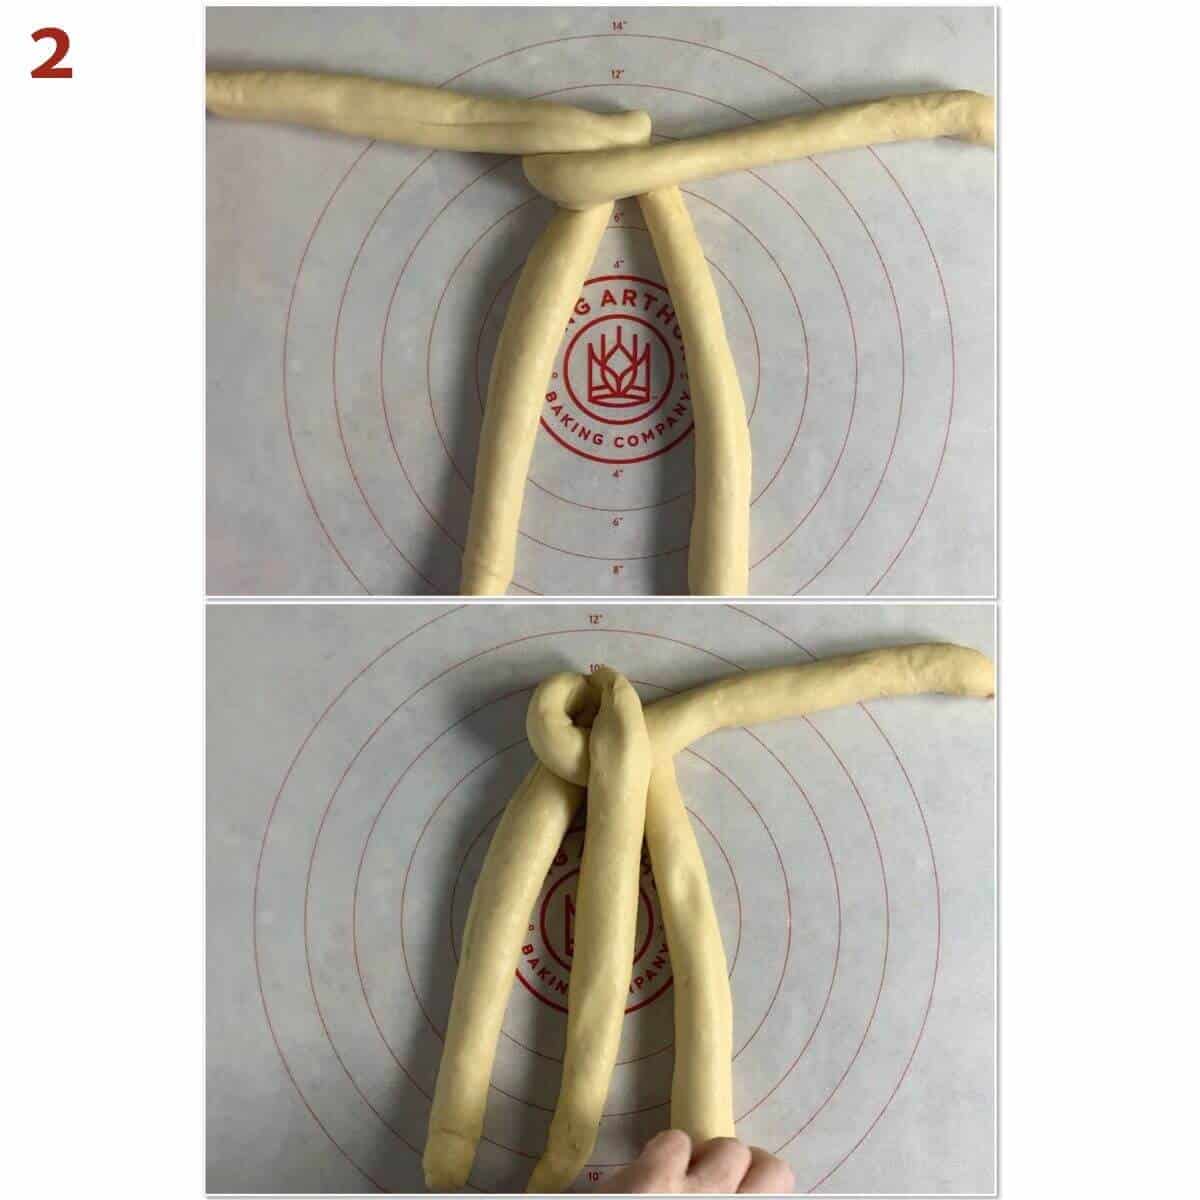
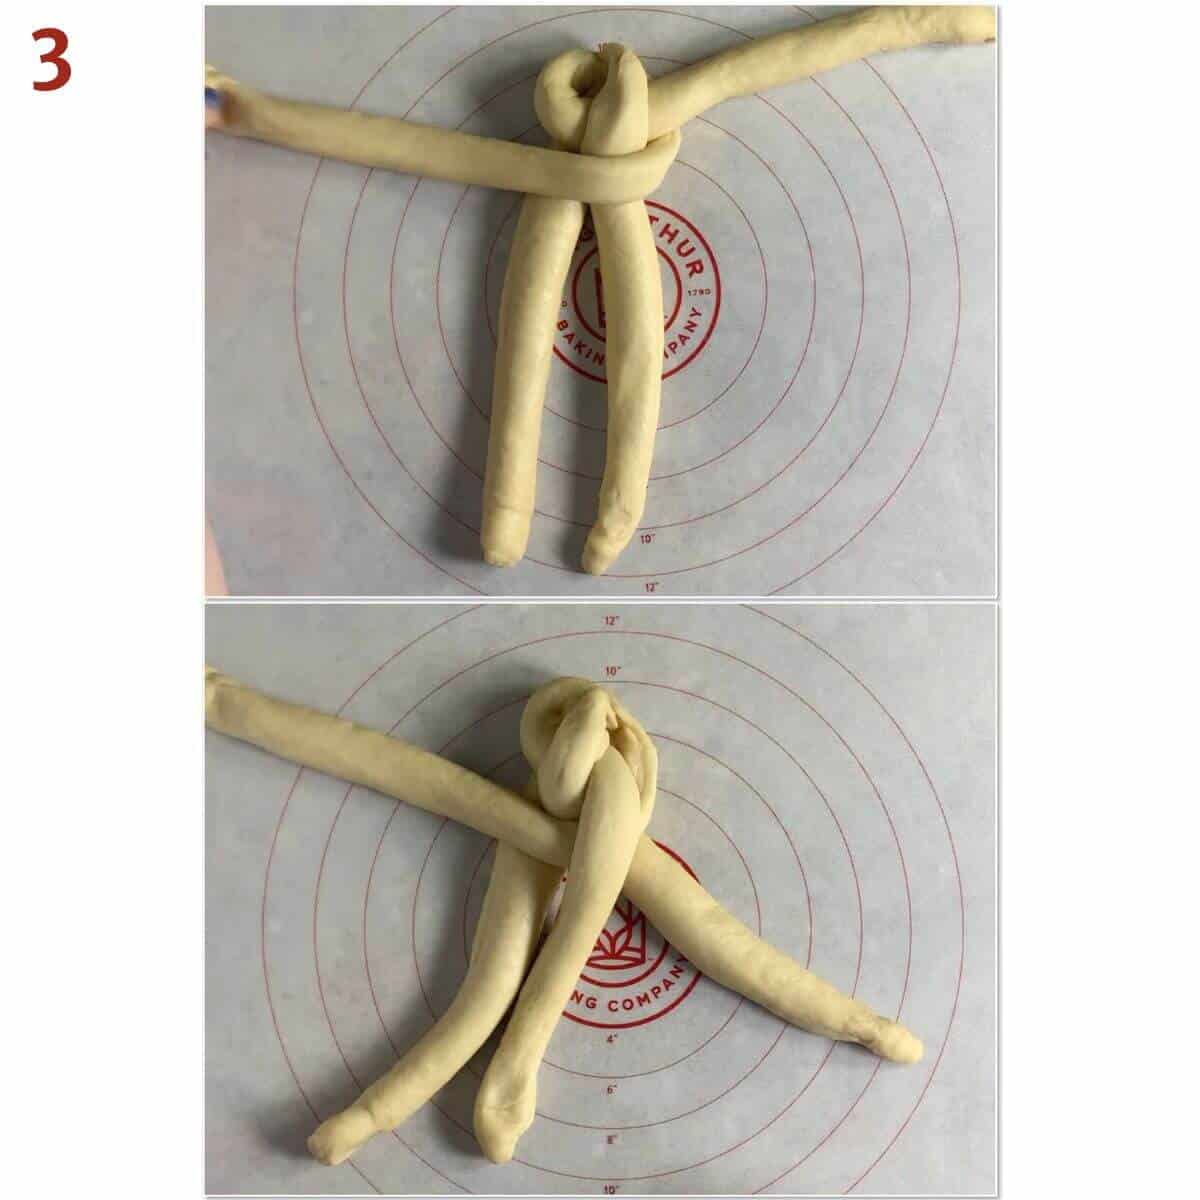
Step 3
Take the second from the top right strand and place it on the opposite side. Take the topmost right strand and place it in the middle of the two remaining strands (photo 3).
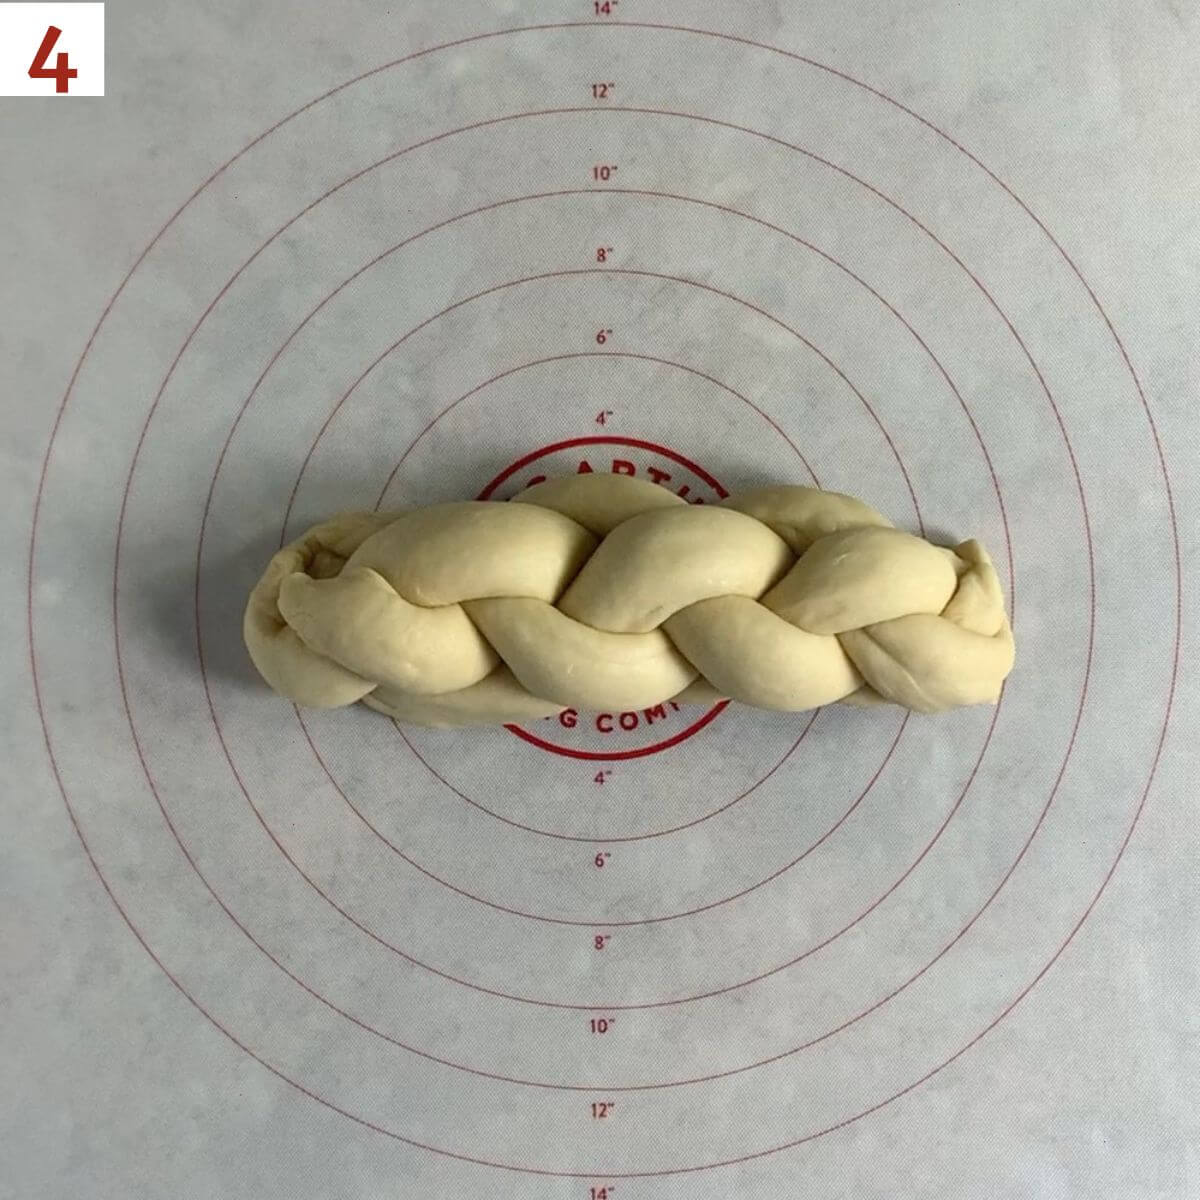
Step 4
Repeat steps 2 and 3 until all the dough is braided.
Tuck the ends of the loaf underneath on both ends to give a neat finish. Adjust the braid ends and sides with your hands to make everything even (photo 4).
How to weave a round four-strand challah
There are many ways to make a round challah. The easiest of course is to make a long rope, then coil it up. Easy, but not as pretty. The next option is to make a three-strand braid, then coil it up into a spiral.
But let's take our round challah to the next level with a four-strand woven round challah.
Round four-strand challah pattern (summary):
Arrange the dough in a cross, then weave by alternating counter-clockwise and clockwise passes, tucking the ends underneath to form a woven circle.
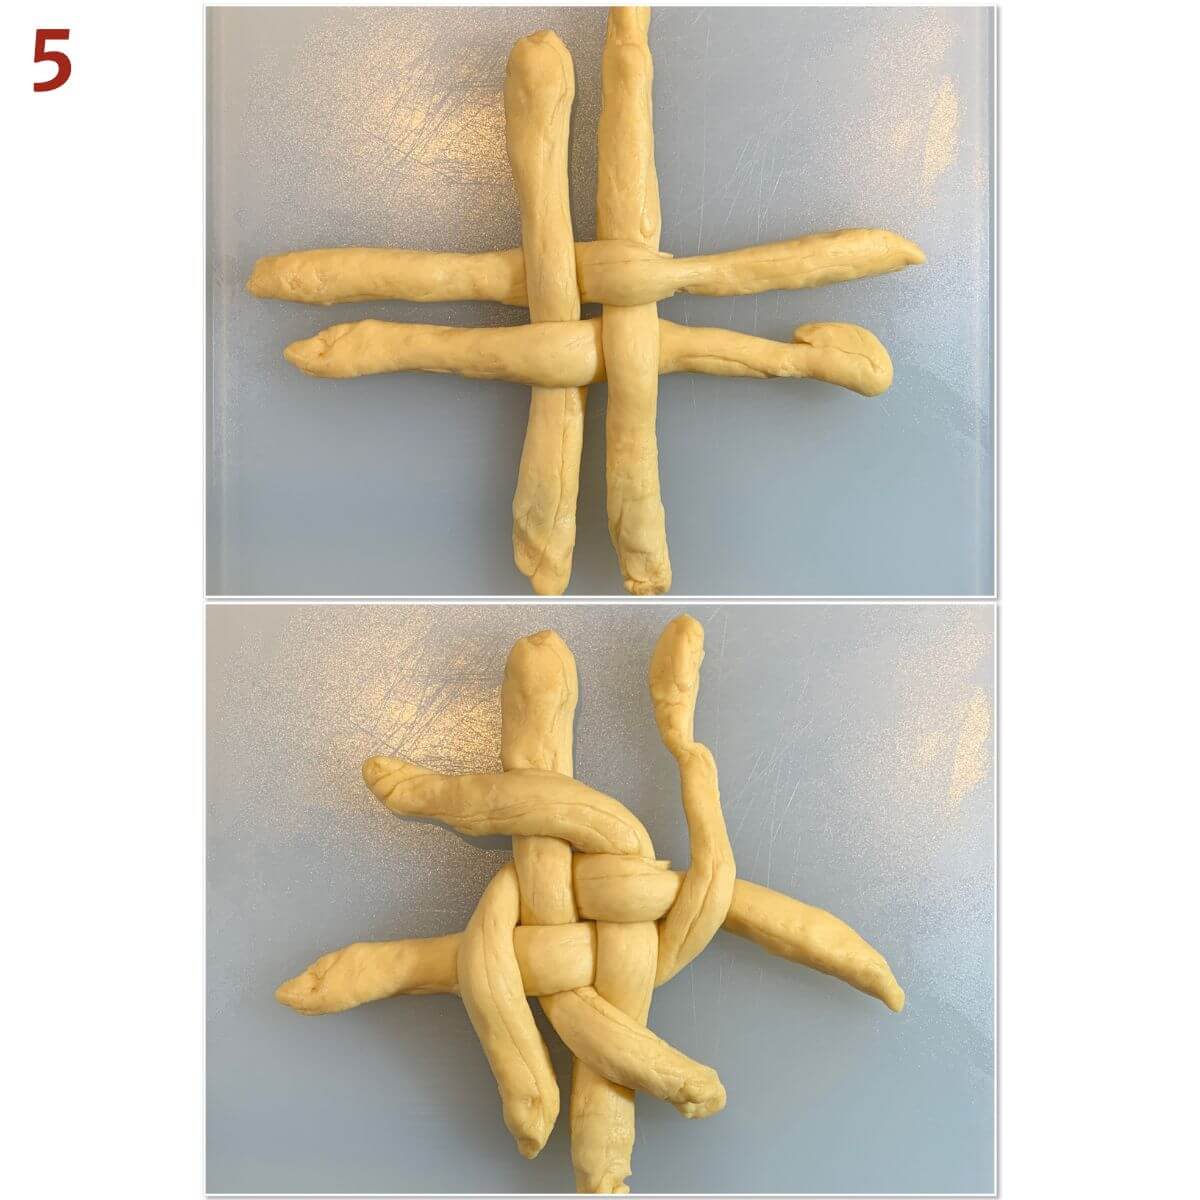
Step 1
Shape 4 dough portions into long ropes. Lay two strands next to each other horizontally. Lay the remaining two strands next to each other vertically on top of the first two.
Take the right vertical strand and weave it under the upper horizontal strand. Take the left vertical strand and weave it under the lower horizontal strand (you now have a pattern akin to a tic-tac-toe board). Push all the strands tightly together in the middle so there's no space between them, and separate the ends so you'll have room to start weaving.
Starting with the lower left vertical strand, place it over the strand next to it on the right. Repeat around the circle, going counter-clockwise a total of 4 times (photo 5).
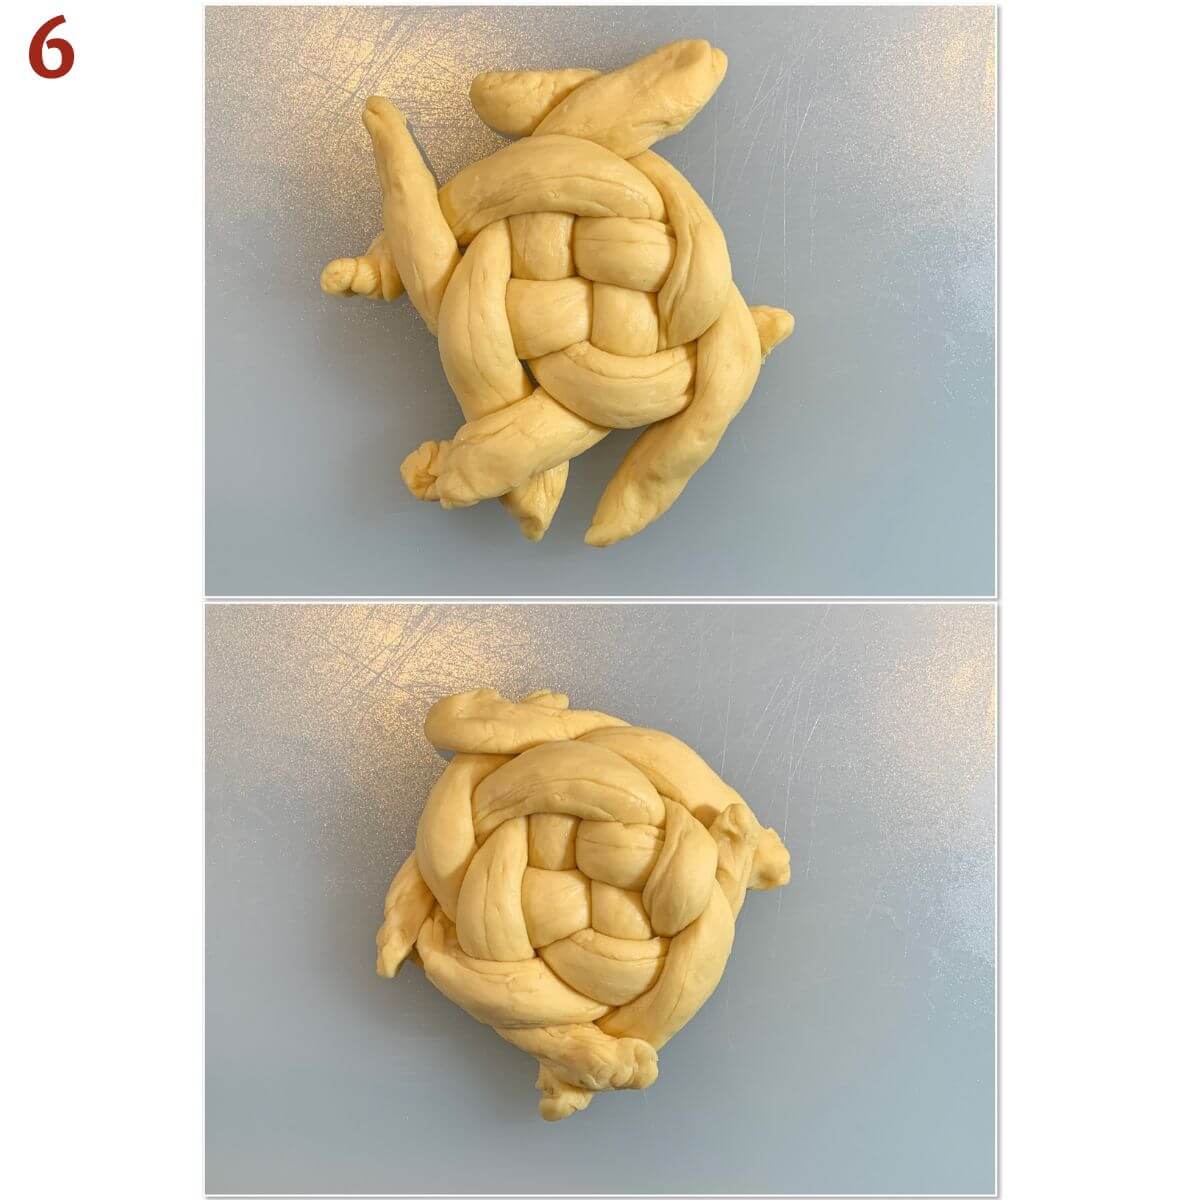
Step 2
Now do the same thing starting with the lower right vertical strand, placing the strand over its neighbor on the left, going around the circle clockwise.
Repeat steps 1 and 2, traveling counter-clockwise, then clockwise. By now the strands will be too short to continue. (photo 6).
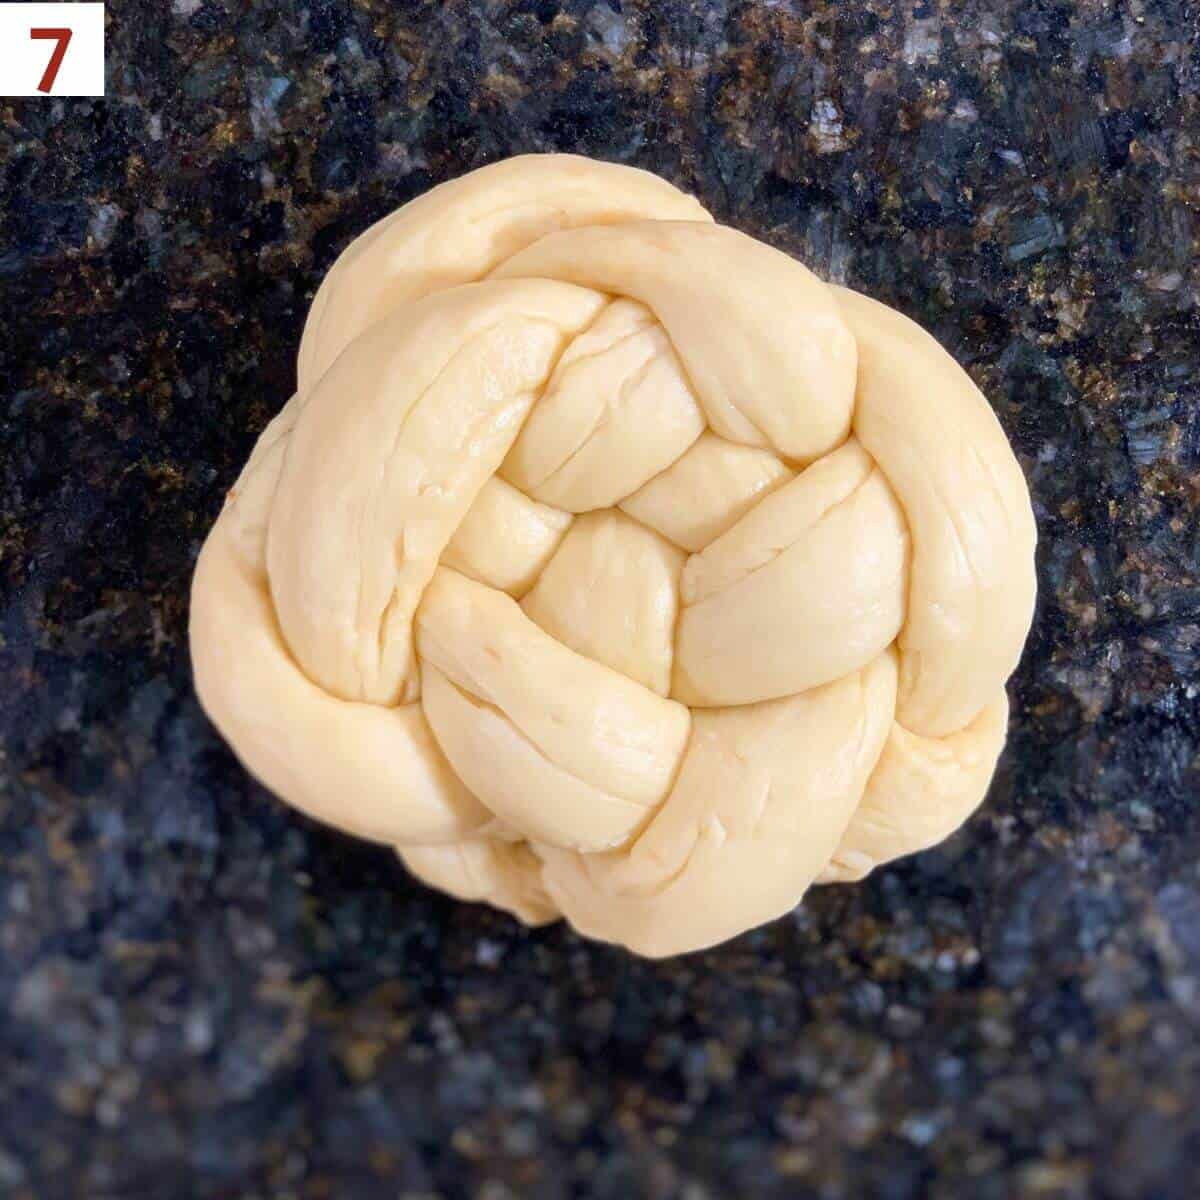
Step 3
Tuck the ends under and adjust the woven round mass into a circle (photo 7).
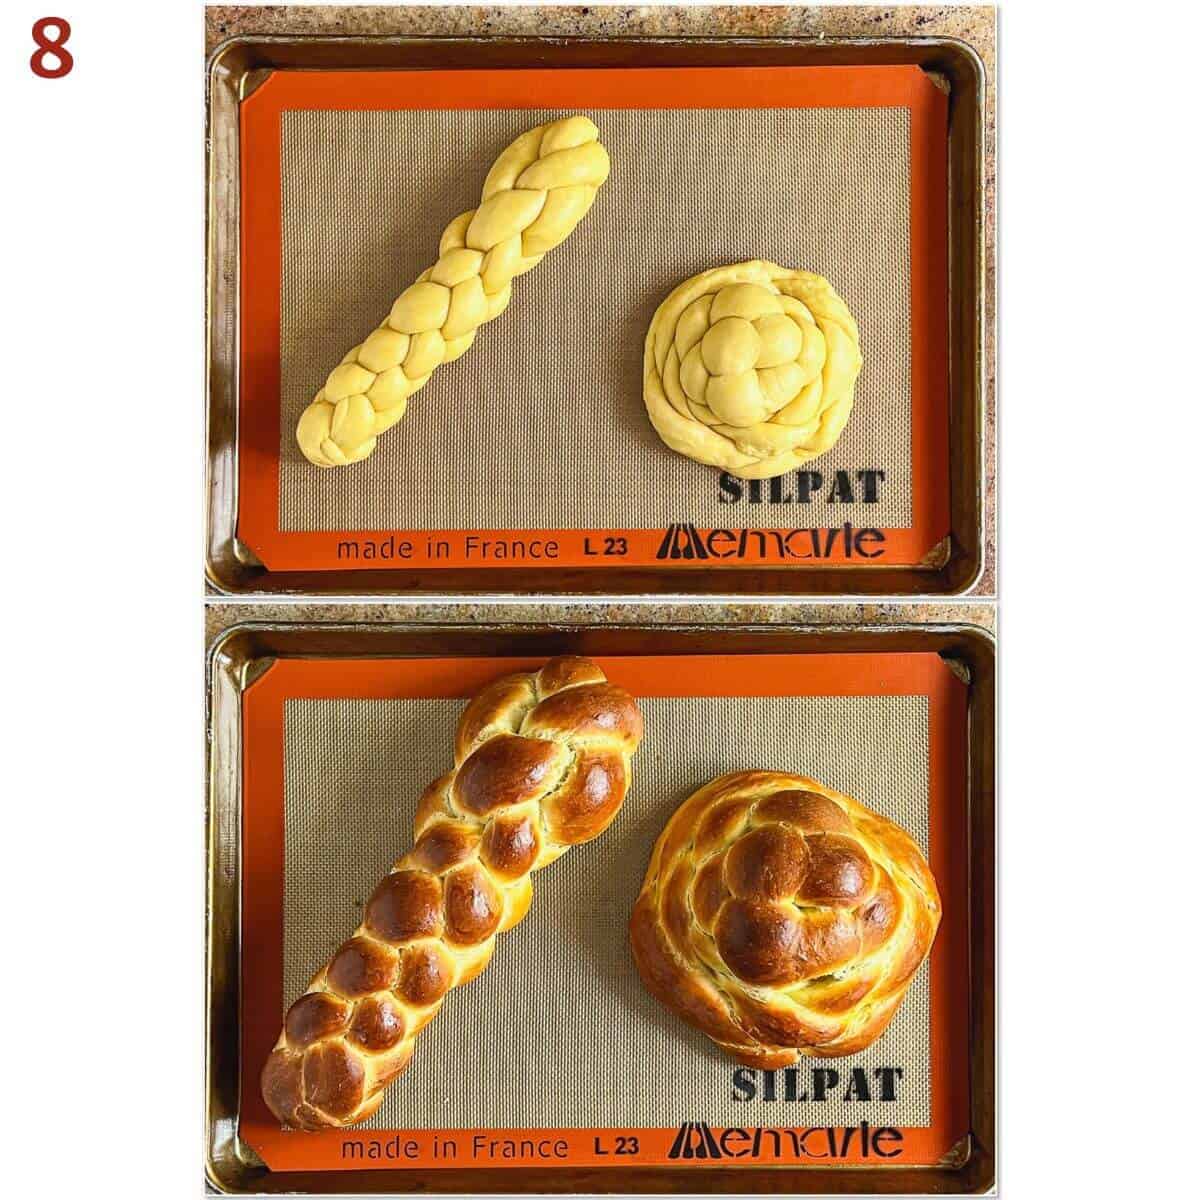
Rest and bake the challah
Continuing with the challah recipe (regardless of the shape), line a half sheet baking pan with a Silpat silicone mat or parchment paper. Transfer the shaped dough to the baking pan, then cover with greased plastic wrap. Let the shaped dough rise for 45 minutes in a warm place.
Brush the dough with an egg beaten with 1 tablespoon of water, then sprinkle on any desired toppings. Bake at 350˚F for 25 to 35 minutes, rotating the pan front to back halfway through the baking time.
When the loaf is golden brown and it sounds hollow when tapped on the bottom (or reads 190°F on a digital thermometer), remove it from the oven and cool on a wire rack (photo 8).
Storage instructions
Challah will last for several days on the counter in an airtight container. For longer term storage, freeze the loaf, well wrapped in plastic wrap and placed in an airtight container, for up to 4 to 6 months.
Troubleshooting challah that lost its shape after baking
You might find that your challah didn't hold it's shape when it has come out of the oven. There could be a few reasons for that:
- Under-tensioned strands: If the dough has been given enough time to proof during the first rise, then the rolled out strands won't have enough tension in them to hold their shape.
- Fix: Make sure the dough has doubled in size and pops back up when lightly pressed with a finger.
- Over-proofing after shaping: If you let the shaped challah rest for too long, the gluten network can become over-stretched and won't be able to maintain it's structure during baking.
- Fix: Allow the shaped loaf to rest for about 30 to 45 minutes while you pre-heat your oven.
- Too much egg wash pooling between strands: As fun as it is to paint on the egg wash, don't overdo it.
- Fix: Use a light hand. You don't want so much that it fills the crevices that you worked so hard to form while braiding.
There are many ways to shape challah
A braided challah, all shiny and golden brown, is a work of art as well as a delicious bread. Slice it neatly, or use the bumps from the braids to tear off a piece!
If you're ready to try more advanced shaping, these same techniques build naturally into three-strand (straight or round), six-strand (straight or flat), and eight-strand (straight or round) challah braids, each creating a different texture and visual effect. Have a go!
Questions asked and answered
Here are some questions you might have...
Used for Shabbat (the Jewish Sabbath), Rosh Hashanah (the Jewish New Year), or for special occasions, challah's special shape holds traditional meanings.
The internet abounds with websites explaining the many different reasons why braiding challah as an oblong shape is used on the Sabbath and other special occasions.
Those reasons vary based on how observant the individual is. Some sites go deep into Jewish law (having to do with the rituals of the ancient temple). Others look to a more biblical meaning (representing manna from heaven). Still others go for a more secular meaning (creating a shaped bread that can be distinguished from ordinary bread, thus making it safe to eat for the Shabbat meal).
In addition, the round challah used on Rosh Hashanah symbolizes the circular nature of time itself (one year ends, another starts), but even that simple explanation has deeper meanings for people.
When you start the braid, you tightly pinch the ends of the strands together. After you've come to the end of the strands, you also pinch them together, then tuck both ends under to keep them from coming apart while baking. You'll want to pay special attention to this step.
Sometimes despite your best efforts, the ends will come apart while the challah is baking. I call these lobster claws, and while the challah won't look quite as neat, it will still taste fantastic.
That's a resounding yes, using the technique for braiding a straight 4-strand challah described above. Like with the adaptation for a 6-strand challah, with an 8-strand challah when you place the strand in the middle, you will have 3 strands on either side instead of 1.
For a different look entirely, you can also use my instructions for braiding an 8-strand challah.
You can also make a round challah with eight strands for a double weave pattern, using the same technique as the four strand round challah described above. Here's an example of a double weave challah before and after baking.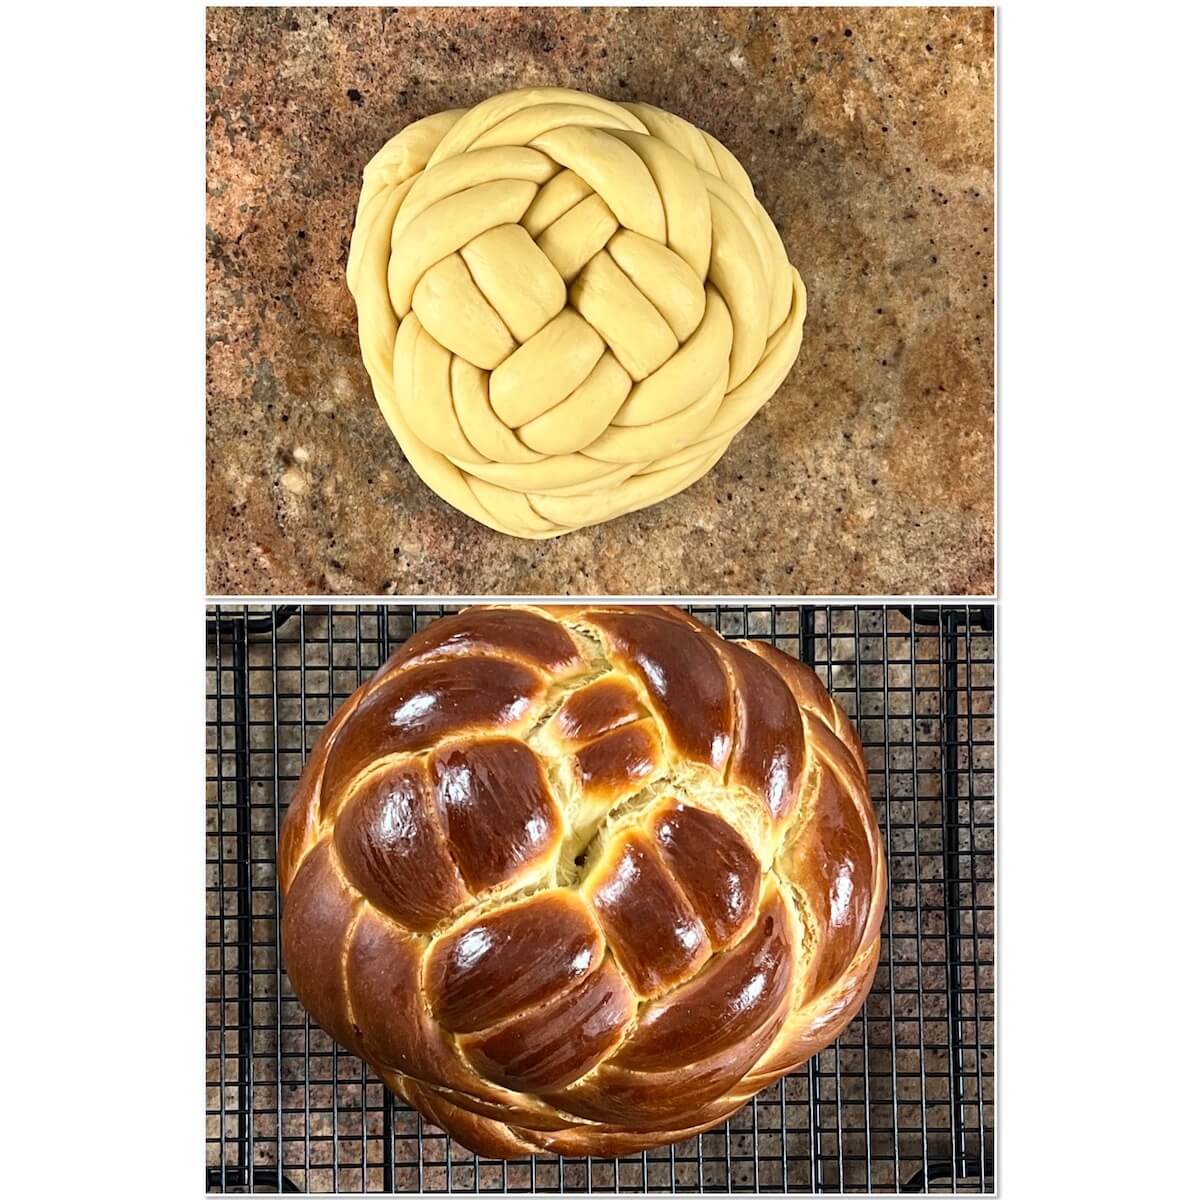
Sure! This braiding method is good for any well-kneaded and rested challah dough. The dough's hydration (which affects how dry the dough feels after resting) will affect how the dough will respond to braiding, not the patterning itself.
Didn't find the answer you're looking for?
Ask AI to answer for this specific recipe:
Disclaimer: I am not responsible for the quality of AI information

I hope you like this recipe! Let me know if you have any questions, and don't forget to leave a comment and rating. Thanks!
Slainté! L'chaim! Cheers!
- Tammy
More shaped bread recipes to try

Recipe
Four Strand Braided Challah (Straight and Round)
Equipment
Ingredients
- 1 recipe homemade challah dough
- 1 large egg, plus 1 tablespoon water, for egg wash
- toppings, optional, see Recipe Notes
Instructions
- Portion out 4 equal pieces of dough, cutting it with a bench scraper or knife (for the best accuracy, weigh the dough with a kitchen scale). Shape each piece into a long rope.
For a straight challah
- Step 1: Lay all the ropes side by side on a lightly floured surface and pinch them together at the top. Take the topmost right strand and place it on the opposite side. You're only going to do this step once.
- Step 2: Take the second from the top left strand and place it on the opposite side. Take the topmost left strand and place it in the middle of the two remaining strands. This is the first step of the repeating pattern.
- Step 3: Take the second from the top right strand and place it on the opposite side. Take the topmost right strand and place it in the middle of the two remaining strands. This is the second step of the repeating pattern.
- Repeat steps 2 and 3 until all the dough is braided.
- Tuck the ends of the loaf underneath on both ends to give a neat finish. Adjust the braid ends and sides with your hands to make everything even.
For a round challah
- Step 1: Lay two strands next to each other horizontally. Lay the remaining two strands next to each other vertically on top of the first two.
- Step 2: Take the right vertical strand and weave it under the upper horizontal strand. Take the left vertical strand and weave it under the lower horizontal strand (you now have a pattern akin to a tic-tac-toe board). Push all the strands tightly together in the middle so there's no space between them, and separate the ends so you'll have room to start weaving.
- Step 3: Starting with the lower left vertical strand, place it over the strand next to it on the right. Repeat around the circle, going counter-clockwise a total of 4 times.
- Step 4: Now do the same thing starting with the lower right vertical strand, placing the strand over its neighbor on the left, going around the circle clockwise.
- Repeat steps 3 and 4, traveling counter-clockwise, then clockwise. By now the strands will be too short to continue.
- Tuck the ends under and adjust the woven round mass into a circle.
Rest and bake the challah
- Line a half sheet baking pan with a Silpat silicone mat or parchment paper. Transfer the shaped dough to the baking pan, then cover with greased plastic wrap.
- Let the shaped dough rise for 45 minutes in a warm place. Preheat the oven to 350 °F.
- For the egg wash, whisk together the beaten egg with the water. Brush the dough with the egg wash, then sprinkle on any desired toppings.
- Bake the dough for 25 to 35 minutes, rotating the pan front to back halfway through the baking time. When the loaf is golden brown and it sounds hollow when tapped on the bottom (or reads 190 °F on a digital thermometer), remove it from the oven and cool on a wire rack.
- Slice (or tear), serve, and enjoy!
- Storage instructions: Challah will last for several days on the counter in an airtight container. For longer term storage, freeze the loaf, well wrapped in plastic wrap and placed in an airtight container, for up to 4 to 6 months.


Comments
No Comments