

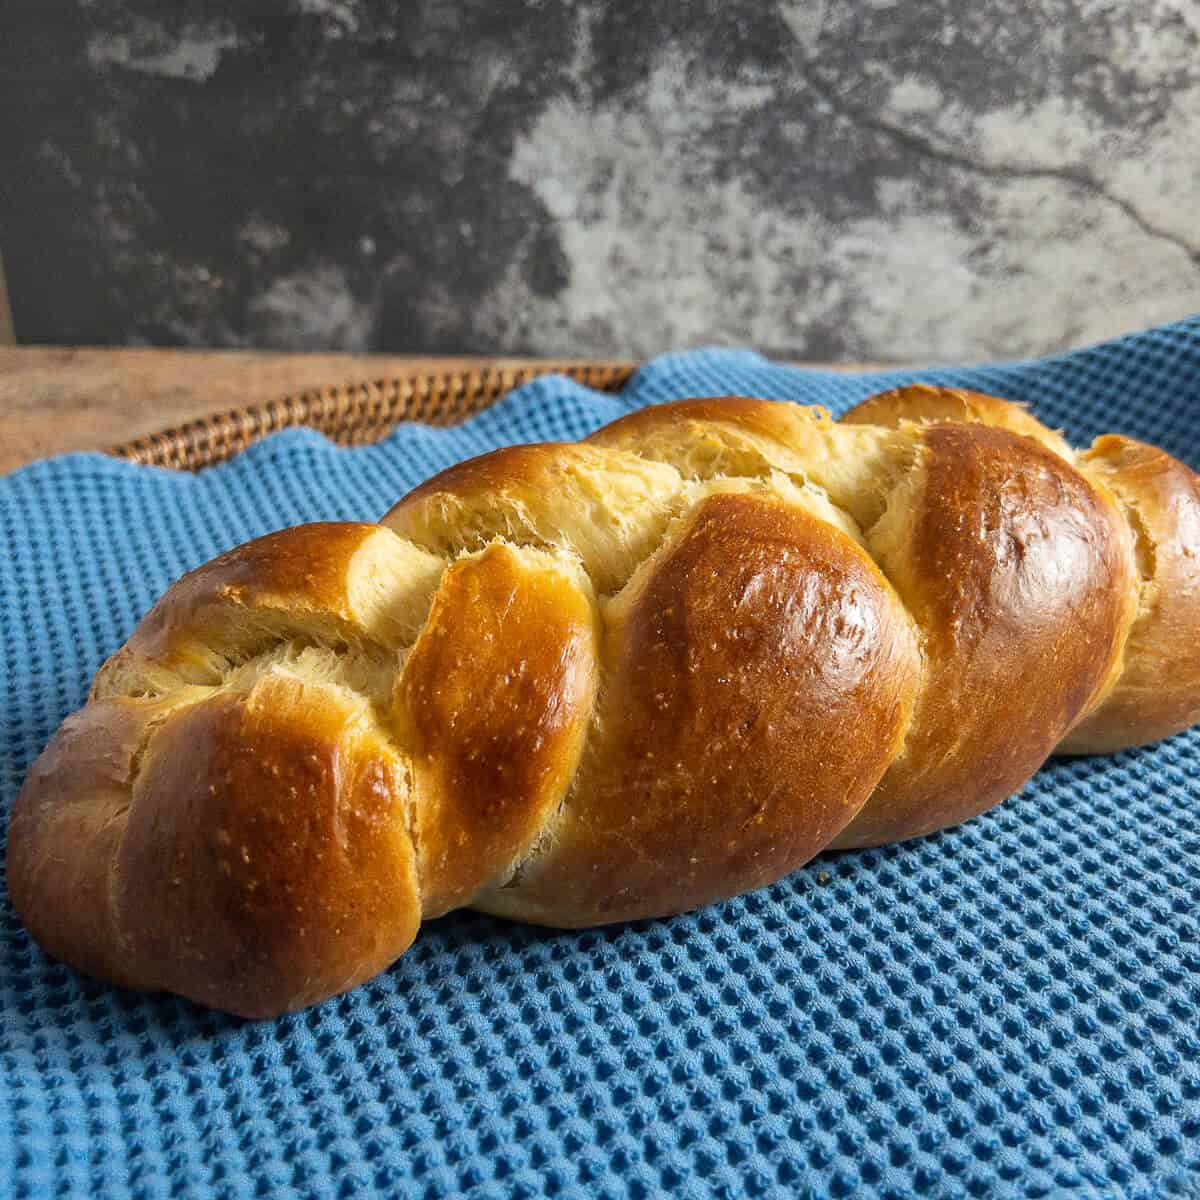
Braiding challah is much easier than it looks! Follow these simple three-strand braid instructions, along with step-by-step photos and a video, and you'll be shaping beautiful homemade loaves in no time. Whether it's for Shabbat, Rosh Hashanah, or a special family meal, you'll braid your challah with confidence!
Jump to:
- Quick Braiding Guide ✨
- Why these instructions work
- Before you start
- How to make the challah ropes
- How to braid a three-strand challah
- How to make an easy round challah
- Troubleshooting challah braiding
- Explore more challah braiding tutorials
- Questions asked and answered
- More shaped bread recipes to try
- Recipe
- Comments
Quick Braiding Guide ✨
Master a classic three-strand challah braid: Learn the easiest way to braid challah bread with beginner-friendly instructions, step-by-step photos, and a video demonstration.
More than just the braid: You'll also learn how to roll even dough ropes, shape an easy round challah for Rosh Hashanah, and bake a beautifully golden loaf with confidence.
Time to braid: About 10 to 15 minutes (after the dough has risen)
Difficulty Level: ⭐ Easy. If you can braid hair, you can braid challah!
Works with: Homemade or store-bought challah dough • Straight or round challah
👉 Follow the detailed photos, troubleshooting tips, and video below to create beautifully braided challah every time!
SUMMARIZE & SAVE THIS CONTENT ON
Why these instructions work
- Starts with well-shaped dough ropes for a smoother, more even braid
- Breaks the braiding pattern into simple, repeatable steps
- Helps you avoid common shaping mistakes before they happen
- Includes an easy round challah variation for Rosh Hashanah
- Gives you the confidence to braid beautiful challah every time
Whether it's straight, round, squared off, or in a wreath, bread comes in a variety of shapes.
Most types of bread aren't associated with a specific shape, but challah bread, a Jewish egg-enriched bread, definitely is one of those. Braided, either straight or round, that's the shape of challah. It's instantly recognizable.
Challah can be braided with three-strands, four-strands, six-strands, or even eight-strands, but the classic three-strand braid is the perfect place to start.
A three-strand challah braid is the easiest and most traditional way to shape challah bread. Simply braid three equal ropes of dough by alternately crossing each outside strand over the center until the loaf is complete.
Once you've mastered the long braid, you'll even be able to turn it into a beautiful round challah for Rosh Hashanah. And of course, it's great for making french toast!
Practice with patience and soon you'll master the patterns for shaping challah dough. And if your first braid isn't perfectly even, don't worry - every loaf gets easier, and even imperfectly braided challah tastes delicious.
Impress your family and friends, and have the satisfaction you plaited like a pro with a challah bread worthy of a bakery. Happy braiding!
Before you start
These braiding instructions work with any challah dough recipe. If you haven't made the dough yet, start with my Best Challah Bread recipe. Once the dough has completed its first rise, come back here to learn how to shape it into a beautiful three-strand braid.
How to make the challah ropes
Rolling the risen dough into smooth ropes is perhaps the most challenging part of the process, especially if you're braiding larger numbers of strands.
Before you start rolling, here are a few tips to keep in mind:
- Use lightly floured hands if the dough is sticking to them
- Don't over-flour the counter (you may not even need flour at all)
- Keep unshaped dough balls covered
- Aim for even rope thickness before tapering the ends
Make the ropes
- Divide the dough evenly by weight for uniform strands: Portion out the number of pieces you'll need for your braid, cutting it with a bench scraper or knife. For the best accuracy, weigh the total amount of your dough using a kitchen scale and divide that number by the number of strands you need. Then portion the pieces to that weight.
- Shape each portion into a ball, then roll into a short oval: As you go, roll each portion into a ball, then flatten and roll it up into an oval (about the size of a small potato).
- Rest the dough for 20 minutes to relax the gluten: Keep the balls covered with plastic wrap (to keep from drying out) and let them rest. This rest will help the gluten to relax so the final rope won't be as inclined to shrink back as you roll it out.
- Roll from the center outward, tapering the ends: Starting in the middle of the oval, start to roll and stretch the dough using both hands cupped over the rope. As the rope gets to your desired length, press down on the ends to taper them to a point.
The length of each strand will depend on the number of portions you have. Keep in mind that the thinner the strand, the longer (and thinner) the braided challah will be. Keeping the strands thicker will result in a shorter (and thicker) challah.
How to braid a three-strand challah
Three-strand braids are the easiest to master - it's just like braiding hair. To braid a three-strand challah, just place three equal ropes side by side, pinch them together at one end, then alternately cross the outside strand over the center until the loaf is fully braided.
Just remember to braid firmly enough to hold the shape together, but loosely enough that the dough still has room to expand during the final rise.
Step 1
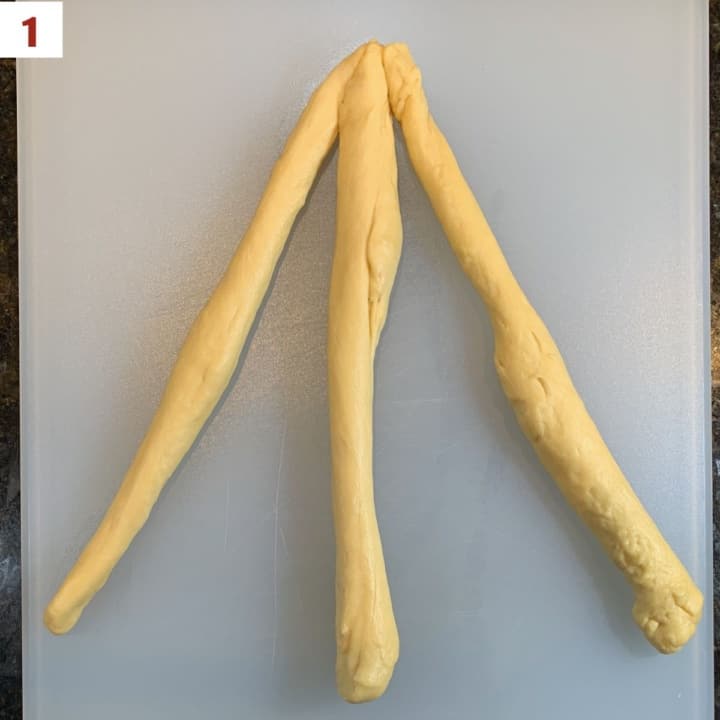
You'll need 3 equal pieces of dough. Lay all the ropes side by side on a lightly floured surface and pinch them together at the top (photo 1).
Step 2
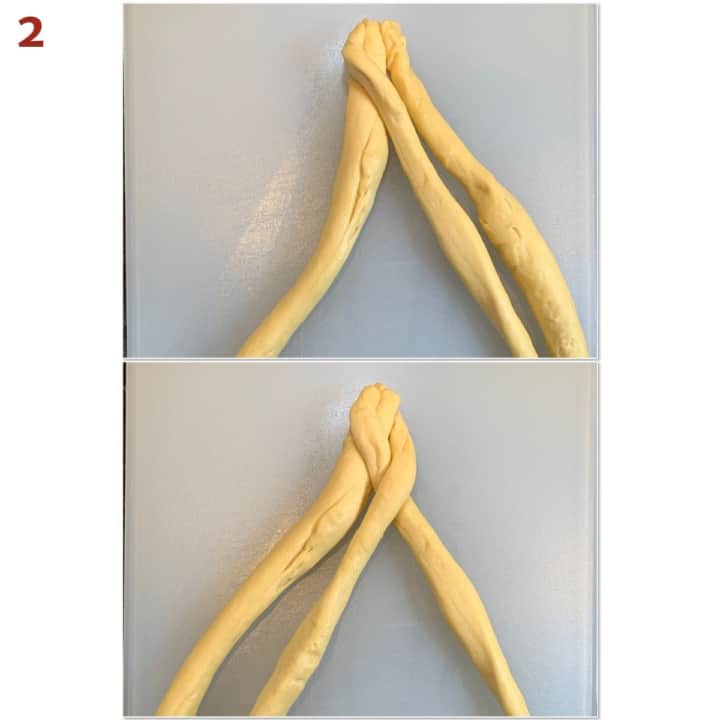
Take the left strand and have it jump over the middle strand. It's now the middle strand (photo 2).
Step 3
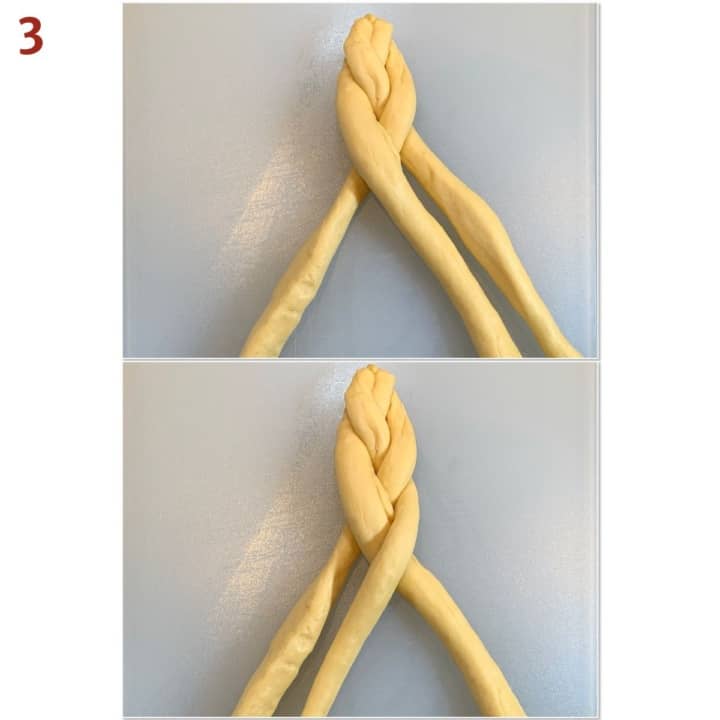
Take the right strand and have it jump over the middle strand. It's now the middle strand (photo 3).
Step 4
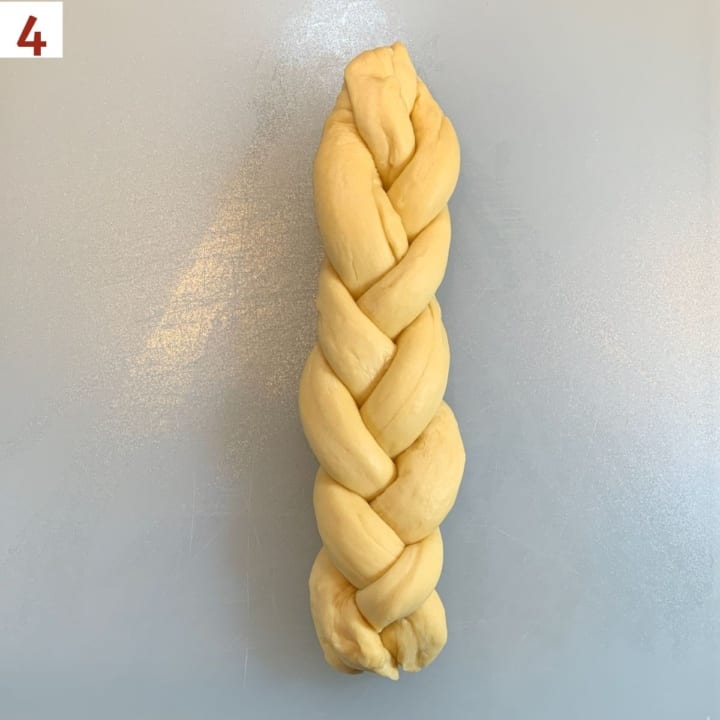
Continue the pattern, alternating between the left and right strands, until all the dough is braided. Tuck the ends of the loaf underneath on both ends to give a neat finish. Adjust the braid ends and sides with your hands to make everything even (photo 4).
Make sure the ends are secure
Pay special attention to pinching the ends of the strands together and tucking them under the finished braid. Sometimes despite your best efforts, the ends will come apart while the challah is baking. I call these lobster claws, and while the challah won't look quite as neat, it will still taste fantastic.
Rest and bake the challah
Once the challah is braided, line a half sheet baking pan with a Silpat silicone mat or parchment paper. Transfer the shaped dough to the baking pan, then cover with greased plastic wrap. Let the shaped dough rise for 45 minutes in a warm place.
Brush the dough with an egg beaten with 1 tablespoon of water, then sprinkle on any desired toppings. Bake at 350˚F for 25 to 35 minutes, rotating the pan front to back halfway through the baking time.
When the loaf is golden brown and it sounds hollow when tapped on the bottom (or reads 190°F on a digital thermometer), remove it from the oven and cool on a wire rack.
How to make an easy round challah
While most of the time challahs are oblong, you can find round challahs for the celebration of Rosh Hashanah, the Jewish New Year (usually in September or October, based on the Jewish lunar calendar).
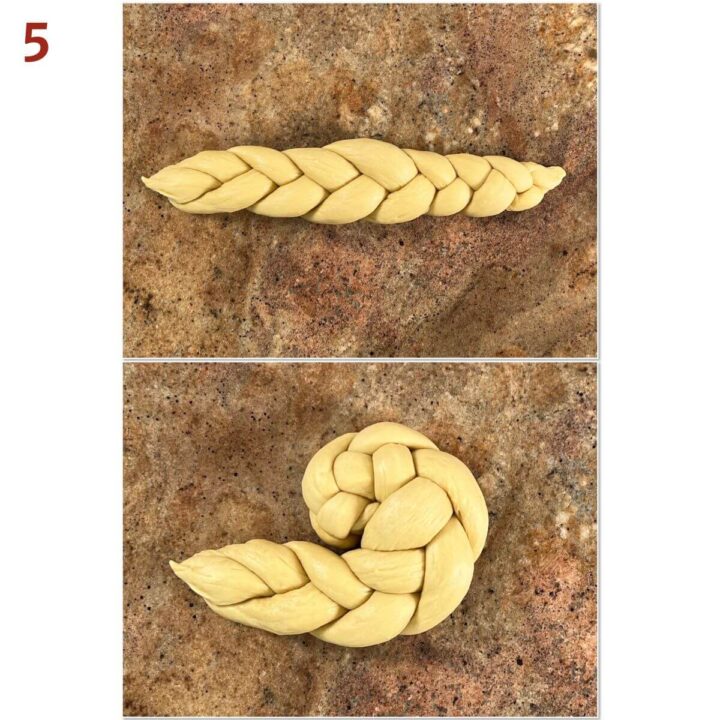
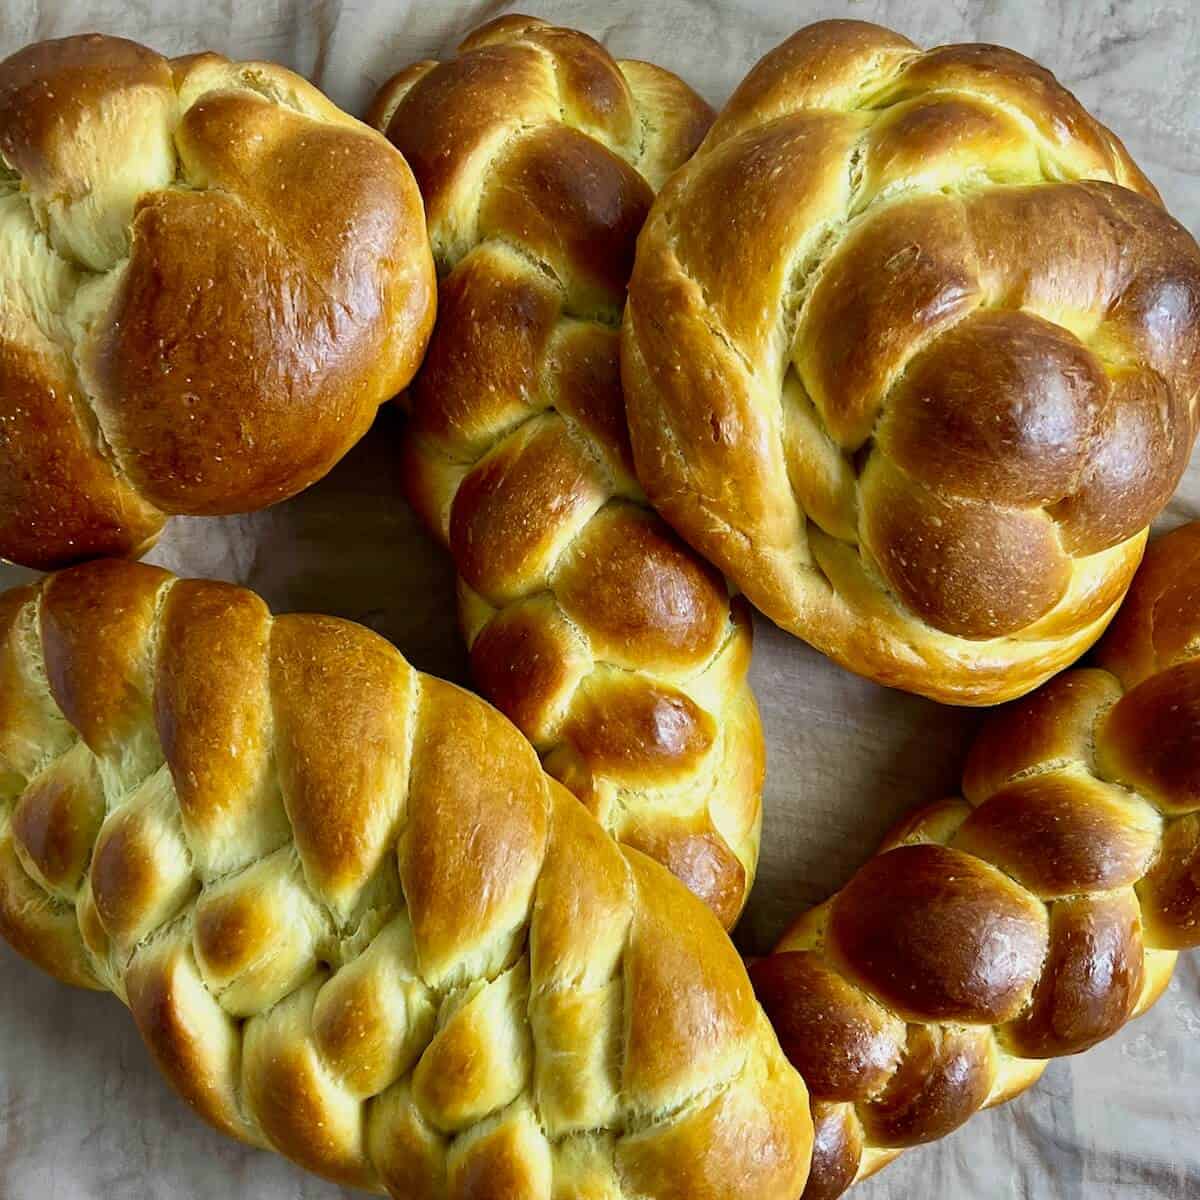
To make an easy round challah, just make a three-strand braid as you normally would, then coil it up into a spiral (photo 5).
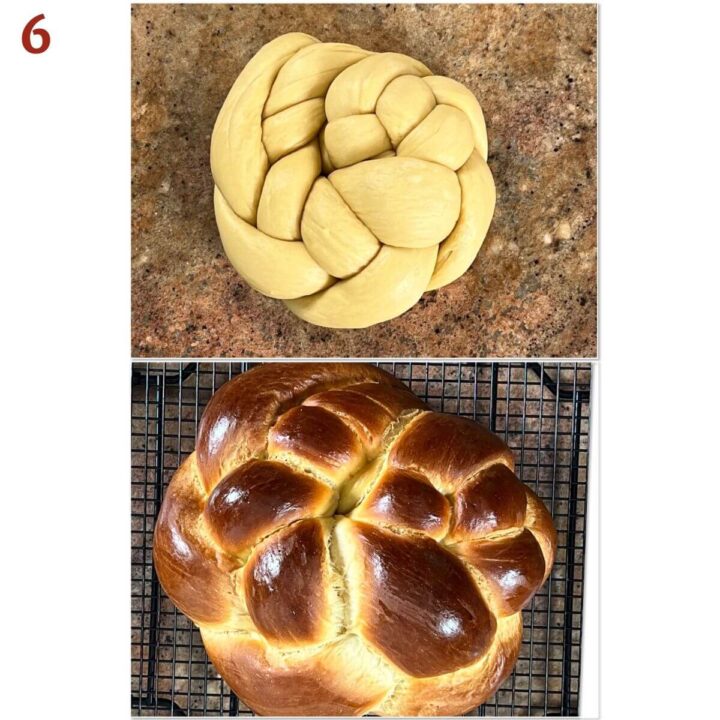
Tuck the ends underneath, let rest, then brush with an egg wash and bake as normal. The baking time will be extended by about 5 to 10 minutes (photo 6).
Troubleshooting challah braiding
If your challah didn't hold its beautiful braided shape, one of these common issues may be the culprit:
- The strands didn't have enough tension: If the dough wasn't fully proofed before shaping, the ropes can spring back as you roll them, making it harder for the braid to hold its definition.
👉 Fix: Let the dough complete its first rise until doubled in size. It should slowly spring back when lightly pressed with a fingertip. - The dough kept shrinking while you rolled the ropes: This usually means the gluten needs more time to relax.
👉 Fix: Cover the dough pieces and let them rest for another 10 to 15 minutes before rolling again. - The braid came apart during the second rise: If the ends aren't secured well, the strands can separate as the dough expands.
👉 Fix: Pinch the strands together firmly at both ends and tuck the ends underneath the loaf. - The challah over-proofed after shaping: If the shaped loaf rests too long, the gluten network becomes over-stretched and can't support the braid during baking.
👉 Fix: Let the braided loaf rise for about 30 to 45 minutes while the oven preheats. It should look puffy but not doubled in size. - Too much egg wash pooled between the strands: A heavy coating can soften the creases, making the braid less defined after baking.
👉 Fix: Brush on a thin, even coat, avoiding excess egg wash in the grooves.
Explore more challah braiding tutorials
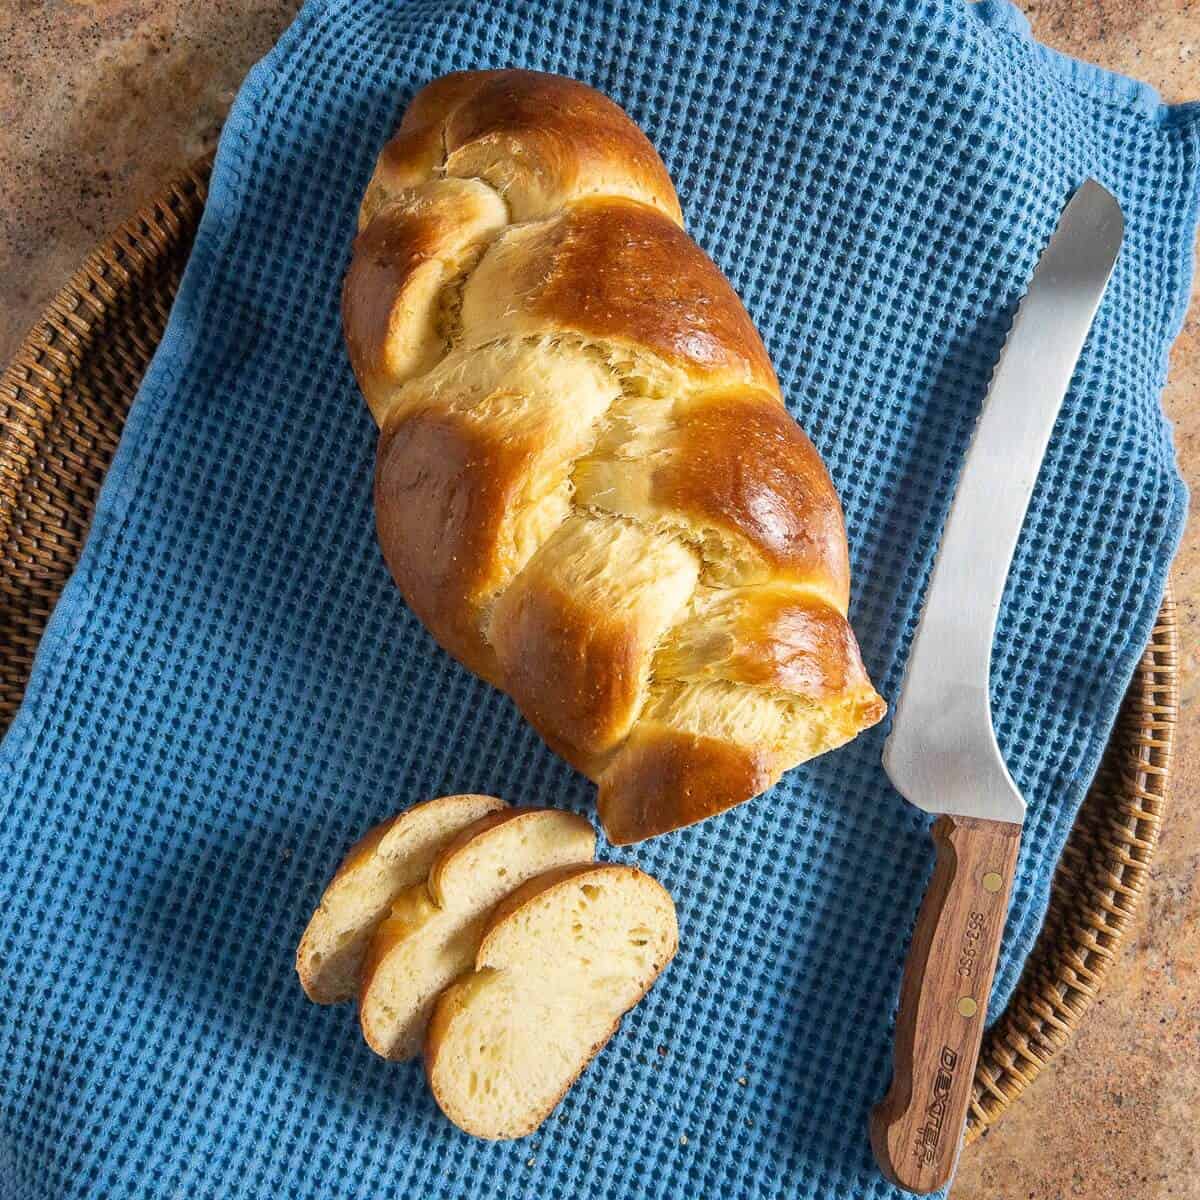
A braided challah, all shiny and golden brown, is a work of art as well as a delicious bread. Slice it neatly, or use the bumps from the braids to tear off a piece!
Ready to learn another challah braid? Here's a quick comparison to help you choose your next tutorial.
| Tutorial | Includes | Best For | Difficulty |
| 3-Strand Challah | Straight & Round | Everyday baking and learning the basics | ⭐ Easy |
| 4-Strand Challah | Straight & Round | Decorative loaves with a fuller braid | ⭐⭐ Medium |
| 6-Strand Challah | Straight & Flat | Traditional bakery-style challah | ⭐⭐⭐ Medium |
| 8-Strand Challah | Straight & Round | Special occasions and holiday centerpieces | ⭐⭐⭐⭐ Advanced |
Questions asked and answered
Here are some questions you might have...
Sure! This braiding method is good for any well-kneaded and rested challah dough. The dough's hydration (which affects how dry the dough feels after resting) will affect how the dough will respond to braiding, not the patterning itself.
It's hard to write how to pronounce the word challah. The beginning sound doesn't exist in English. The "ch" is the anglicized version for the Hebrew letter "chet" which represents the sound you make when you're trying to clear your throat, not the sound starting "cheese." That's why you'll see the Jewish December holiday of Hanukkah sometimes spelled "Chanukkah."
Used for Shabbat (the Jewish Sabbath), Rosh Hashanah (the Jewish New Year), or for special occasions, challah's special shape holds traditional meanings.
The internet abounds with websites explaining the many different reasons why braiding challah as an oblong shape is used on the Sabbath and other special occasions. If you delve deeper into the meaning of Shabbat and its traditions, this bread can hold even greater significance.
Those reasons vary based on how observant the individual is. Some sites go deep into Jewish law (having to do with the rituals of the ancient temple). Others look to a more biblical meaning (representing manna from heaven). Still others go for a more secular meaning (creating a shaped bread that can be distinguished from ordinary bread, thus making it safe to eat for the Shabbat meal).
In addition, the round challah used on Rosh Hashanah symbolizes the circular nature of time itself (one year ends, another starts), but even that simple explanation has deeper meanings for people.
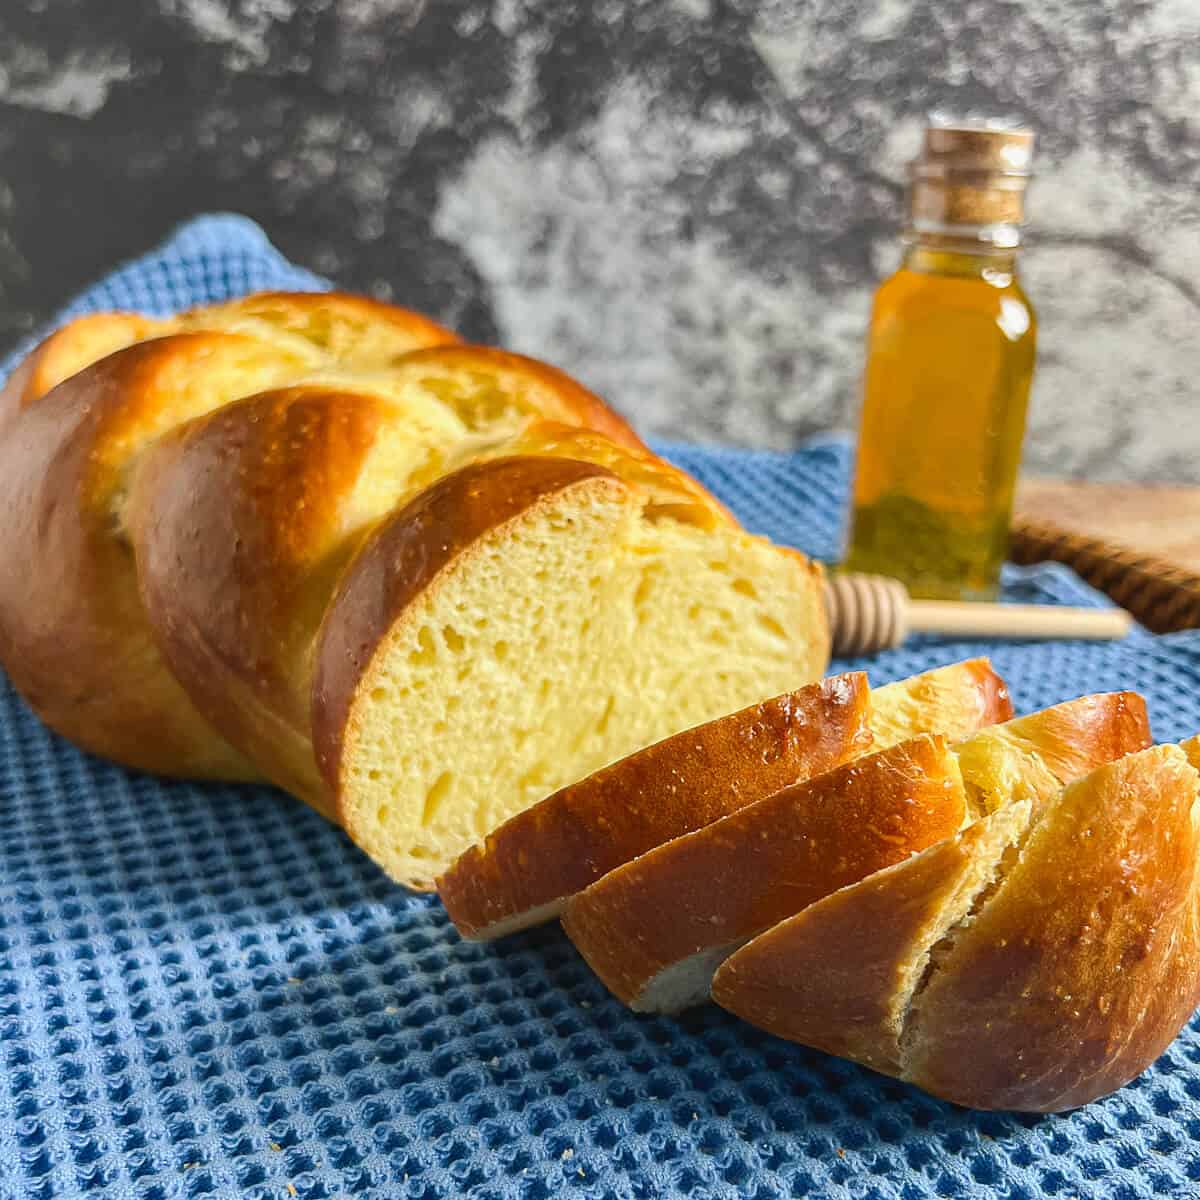
On a more practical level, braiding also creates a beautiful loaf with plenty of crust while helping the dough hold its shape during baking.
Didn't find the answer you're looking for?
Ask AI to answer for this specific recipe:
Disclaimer: I am not responsible for the quality of AI information

I hope you like this recipe! Let me know if you have any questions, and don't forget to leave a comment and rating. Thanks!
Slainté! L'chaim! Cheers!
- Tammy
More shaped bread recipes to try
Recipe
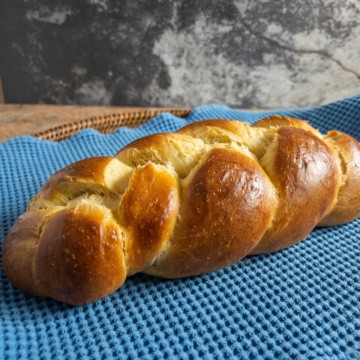
How to Braid Challah Bread (3-Strand Tutorial)
Equipment
- kitchen scale recommended
Ingredients
- 1 recipe homemade challah dough, after the first rise
- 1 large egg, plus 1 tablespoon water, for egg wash
- toppings, optional
Instructions
- These braiding instructions begin after your challah dough has completed its first rise. If you haven't made the dough yet, use your favorite challah recipe (or my Best Challah Bread) before starting the braid.
- Portion out 3 equal pieces, cutting it with a bench scraper or knife (for the best accuracy, weigh the dough with a kitchen scale). Shape each piece into a long rope. Lay all the ropes side by side on a lightly floured surface and pinch them together at the top.
- Take the left strand and have it jump over the middle strand. It's now the middle strand.
- Take the right strand and have it jump over the middle strand. It's now the middle strand.
- Continue the pattern, alternating between the left and right strands, until all the dough is braided. Tuck the ends of the loaf underneath on both ends to give a neat finish. Adjust the braid ends and sides with your hands to make everything even.
- Line a half sheet baking pan with a Silpat silicone mat or parchment paper. Transfer the shaped dough to the baking pan, then cover with greased plastic wrap.
- Let the shaped dough rise for 45 minutes in a warm place. Preheat the oven to 350 °F.
- For the egg wash, whisk together 1 large egg with 1 tablespoon water. Brush the dough with the egg wash, then sprinkle on any desired toppings.
- Bake the dough for 25 to 35 minutes, rotating the pan front to back halfway through the baking time. When the loaf is golden brown and it sounds hollow when tapped on the bottom (or reads 190 °F on a digital thermometer), remove it from the oven and cool on a wire rack.
- Let the challah cool slightly before slicing or tearing into it. Enjoy!



Cathy Lichtman says
Thanks for posting a clear 6 strand braid. When away from home I need to find one online. The videos are too fast and this one goes to the end. Usually they stop mid-braid but don’t say where to go back to. With a toddler in the background, I need clearing. One question though, why do you keep repeating the challah recipe? That’s a bit annoying
Tammy Spencer says
Hi Cathy, I'm glad you found my challah braiding instructions useful. To your question, the challah dough is listed in each set of instructions in order for search engines to classify them as recipes. It's a technicality I know, and it's not meant to be annoying. Thanks for the question.