
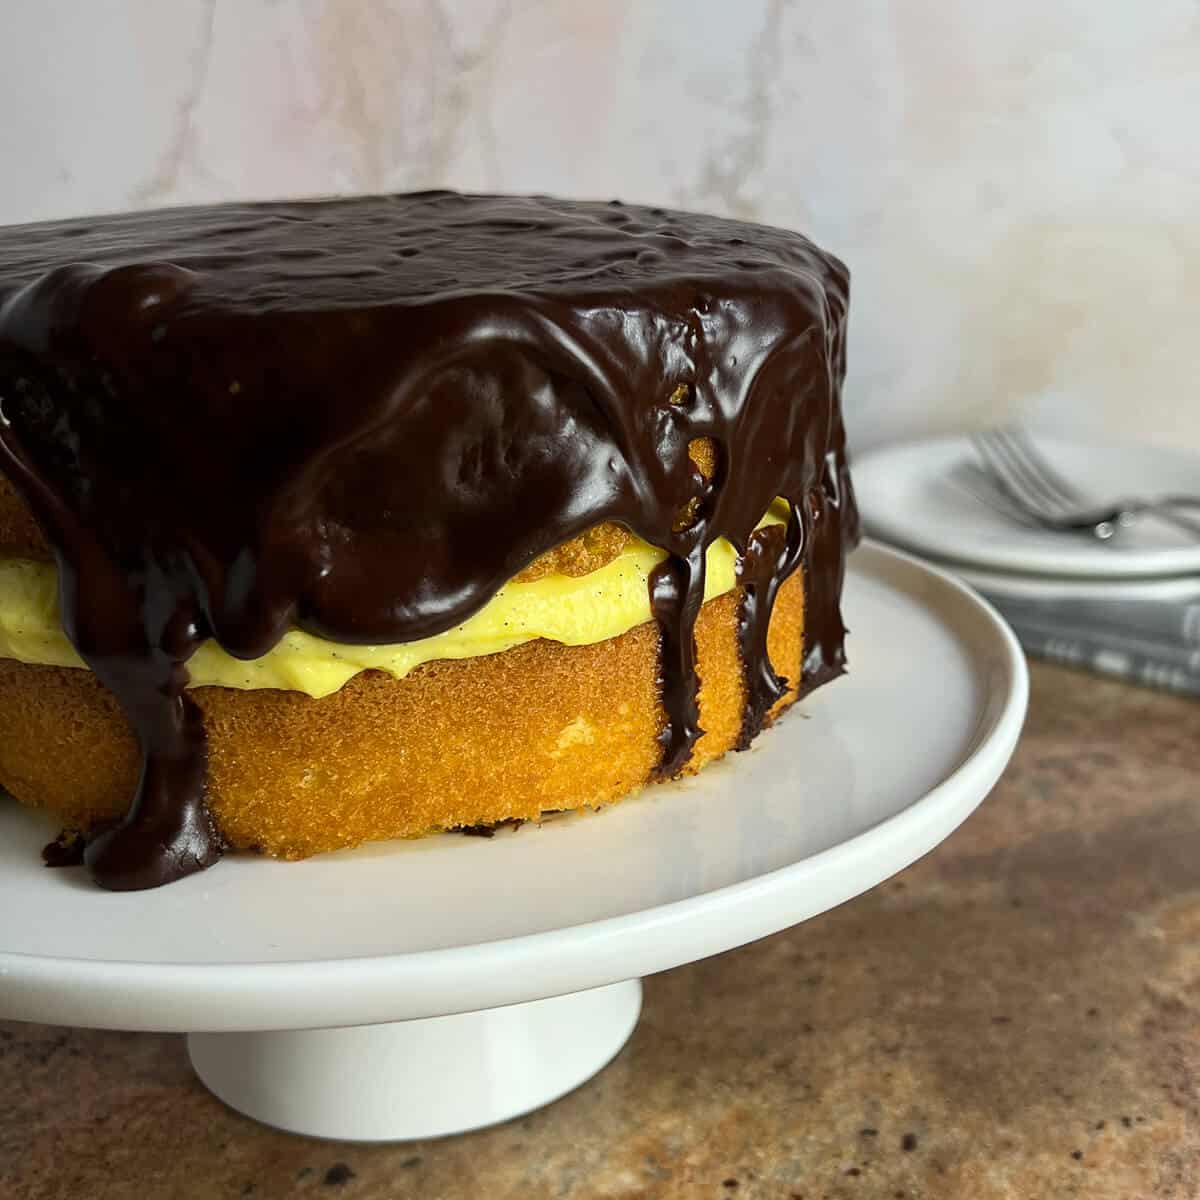
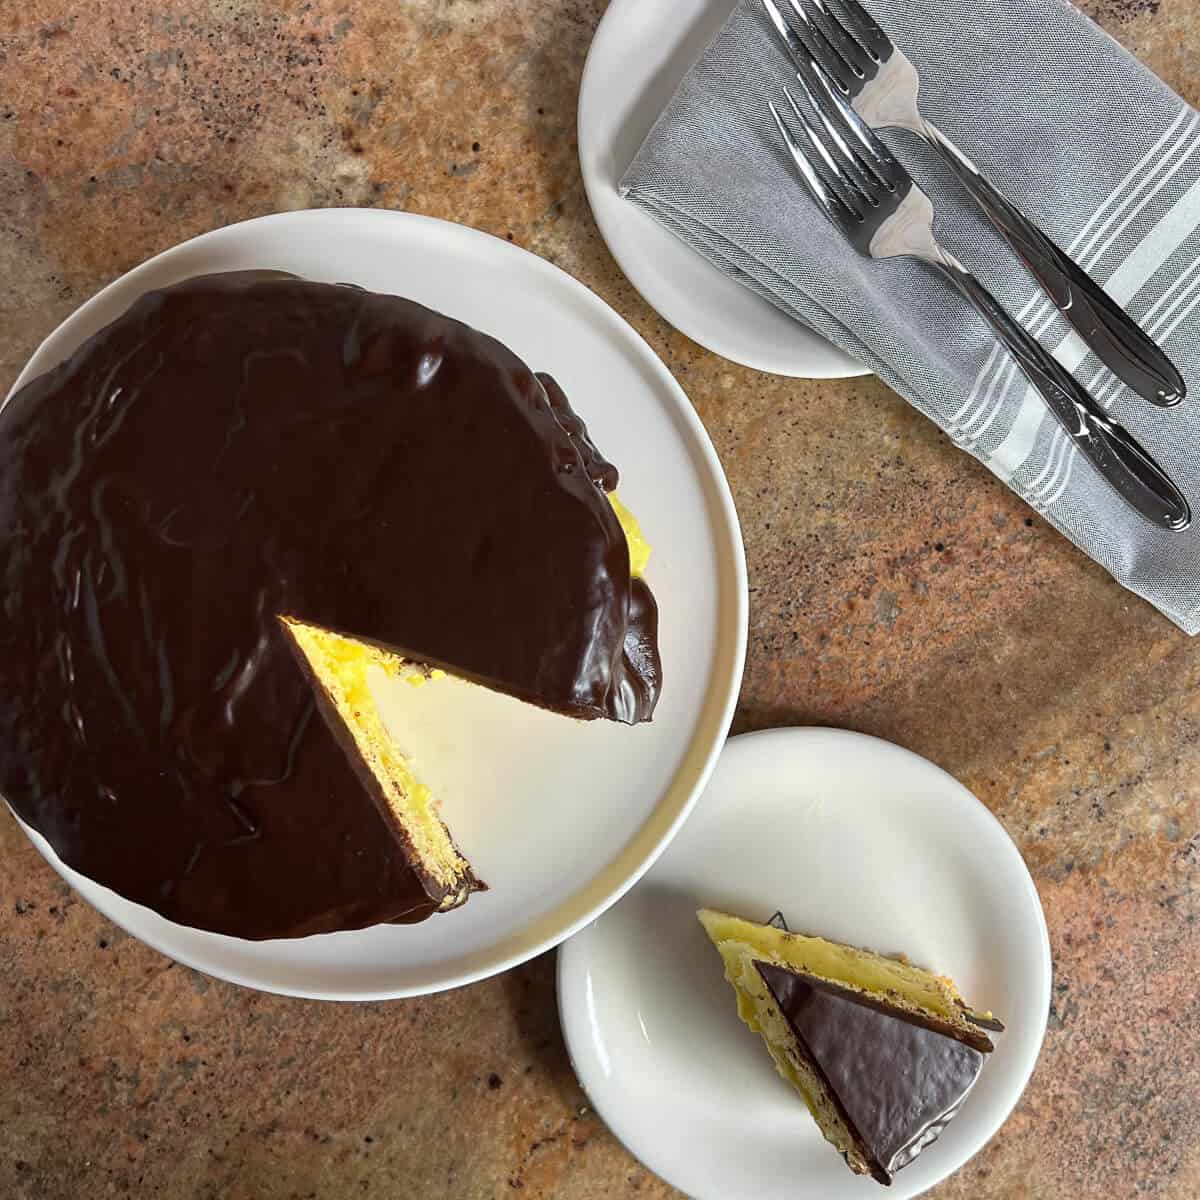
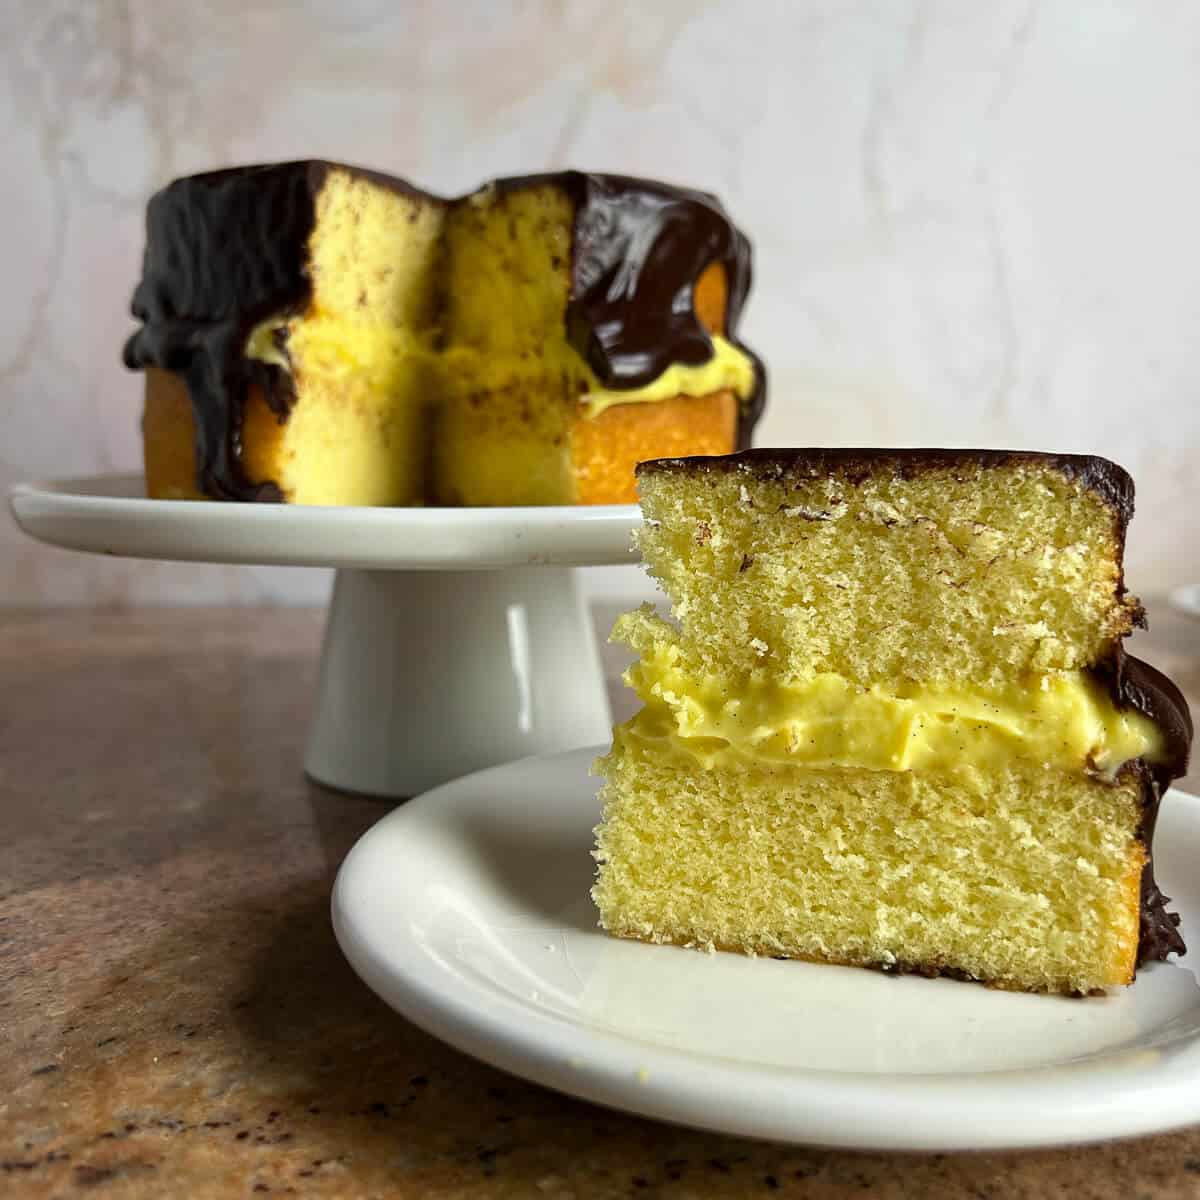
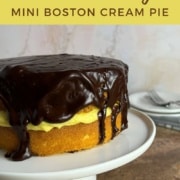
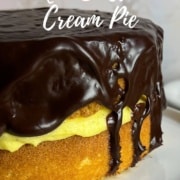
An American classic dessert, Boston Cream Pie is a moist and tender vanilla cake filled with a thick layer of rich pastry cream and draped with a glossy dark chocolate ganache. This decadent 6-inch mini Boston Cream Pie perfect for small gatherings!
Jump to:
Why this recipe works
- The moist and tender vanilla sponge cake is light and airy
- Rich pastry cream is flavored with specks of fresh vanilla bean seeds
- Dark chocolate ganache is a perfect counterpoint to the cake and pastry cream
Boston Cream Pie is a classic American dessert that epitomizes elegance and style.
Boston Cream Pie is one of those desserts that take a little time and patience to make, but the result is so incredible that it's well worth the effort.
The hot milk and butter cake is moist and light, and complemented by the rich vanilla bean pastry cream. The dark chocolate ganache adds a luxurious counterpoint that tempers the sweetness while adding body to the cake.
If you're celebrating a birthday, Valentine's Day, Christmas, New Year's Eve, or any other special moment, this is truly an elegant dessert to share with a special person or people in your life.
It'll make any day exceptional!
⭐⭐⭐⭐⭐
I'll take that ganache and pastry cream with a spoon please!
- Ella
Recipe Ingredients
There are three elements to a Boston Cream Pie recipe: vanilla cake, pastry cream filling, and chocolate ganache topping.
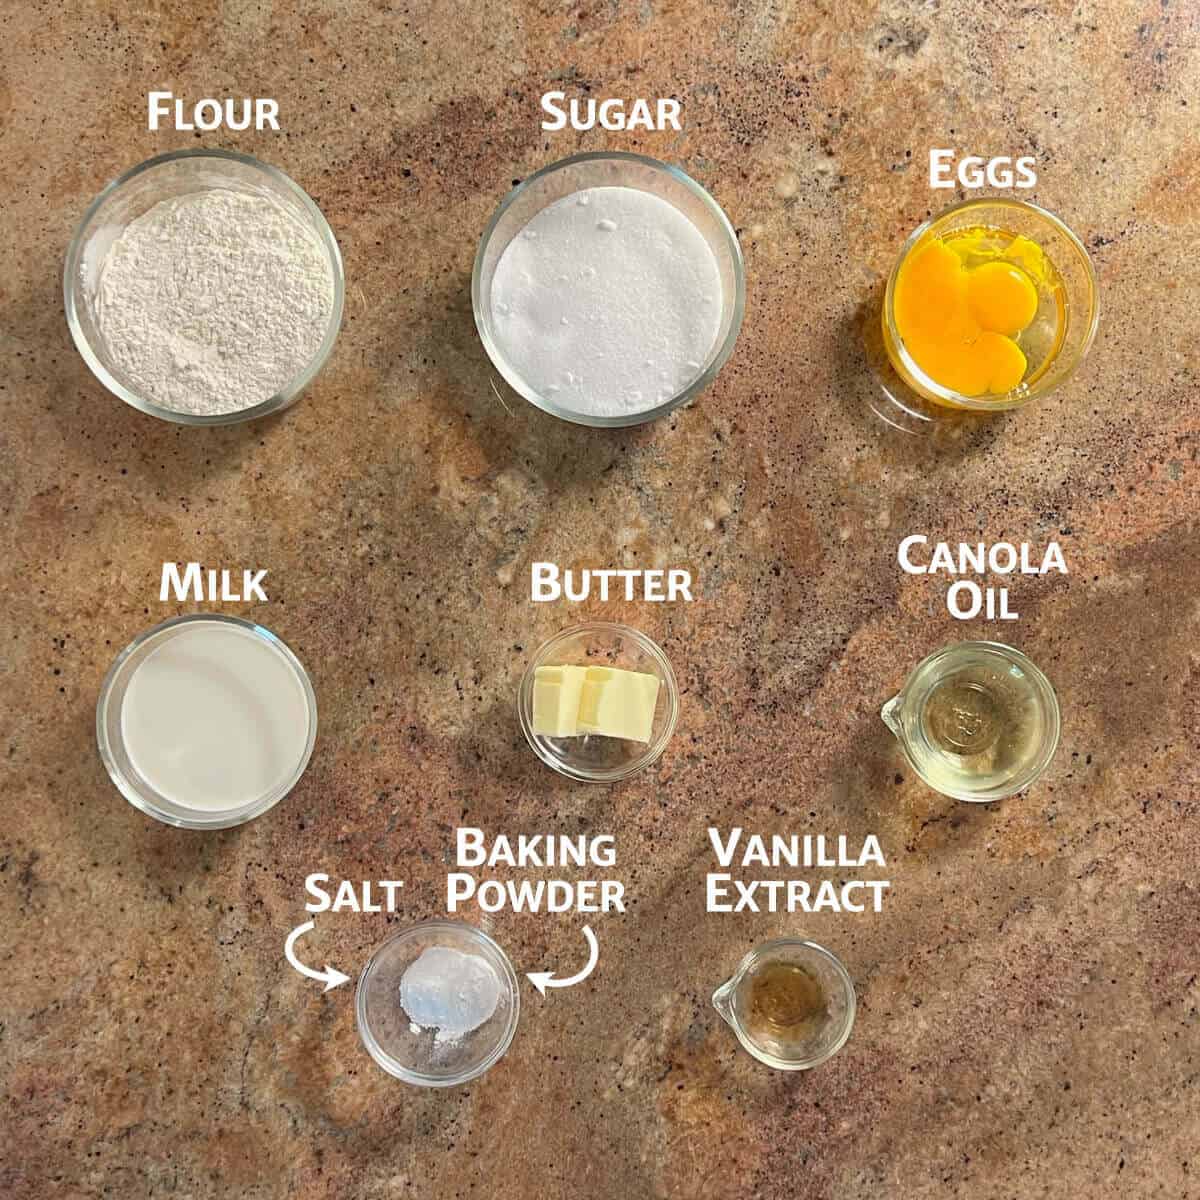
You'll need the following ingredients to make the vanilla cake recipe:
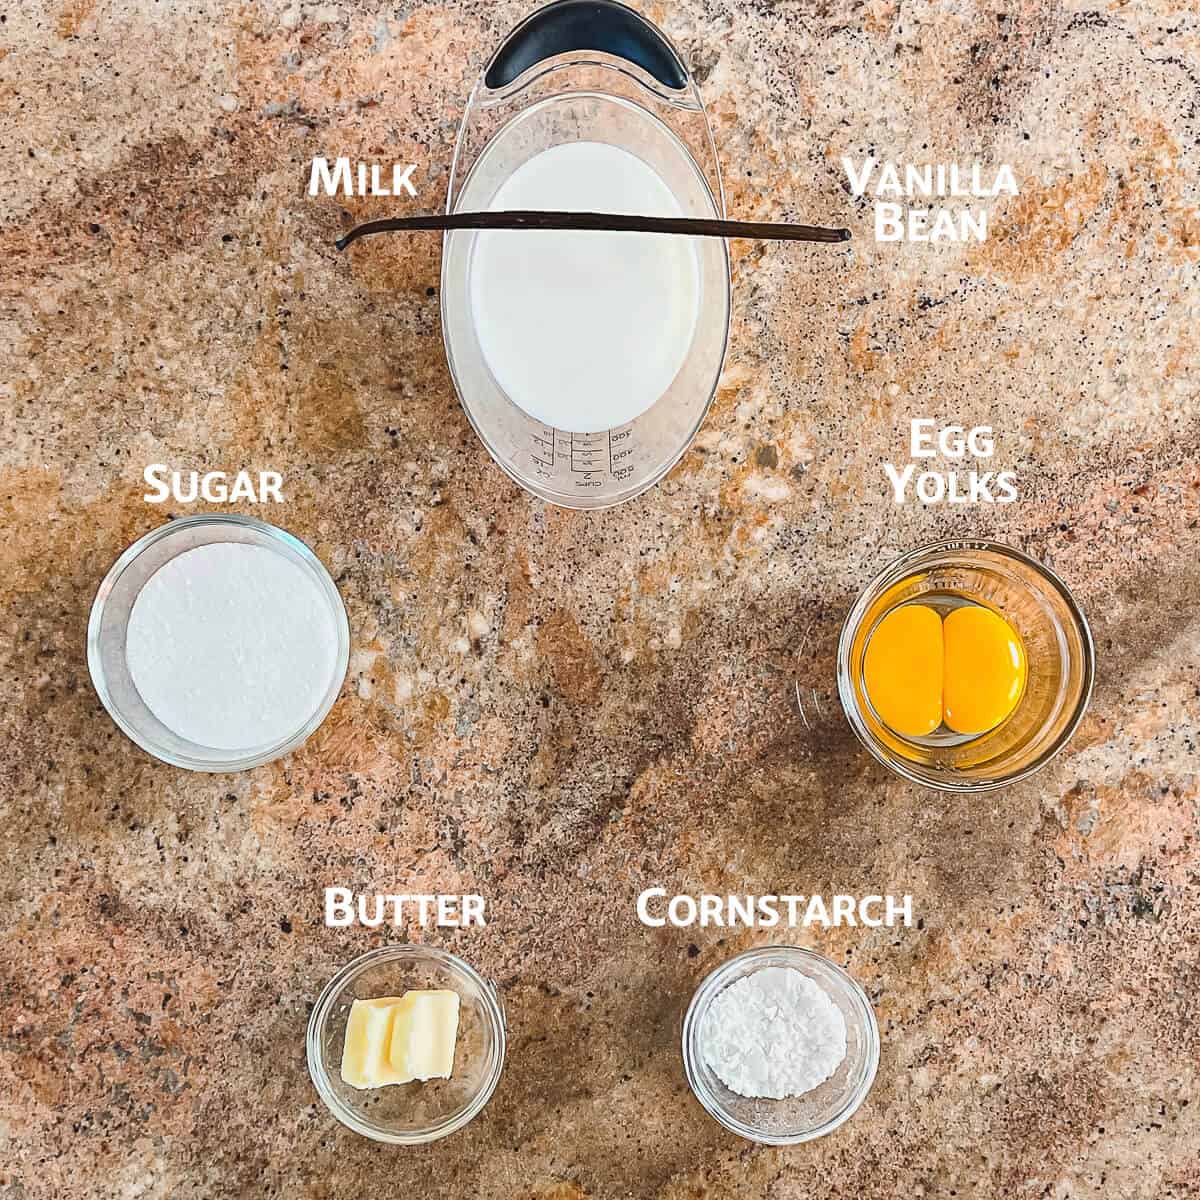
These ingredients are for the pastry cream filling:
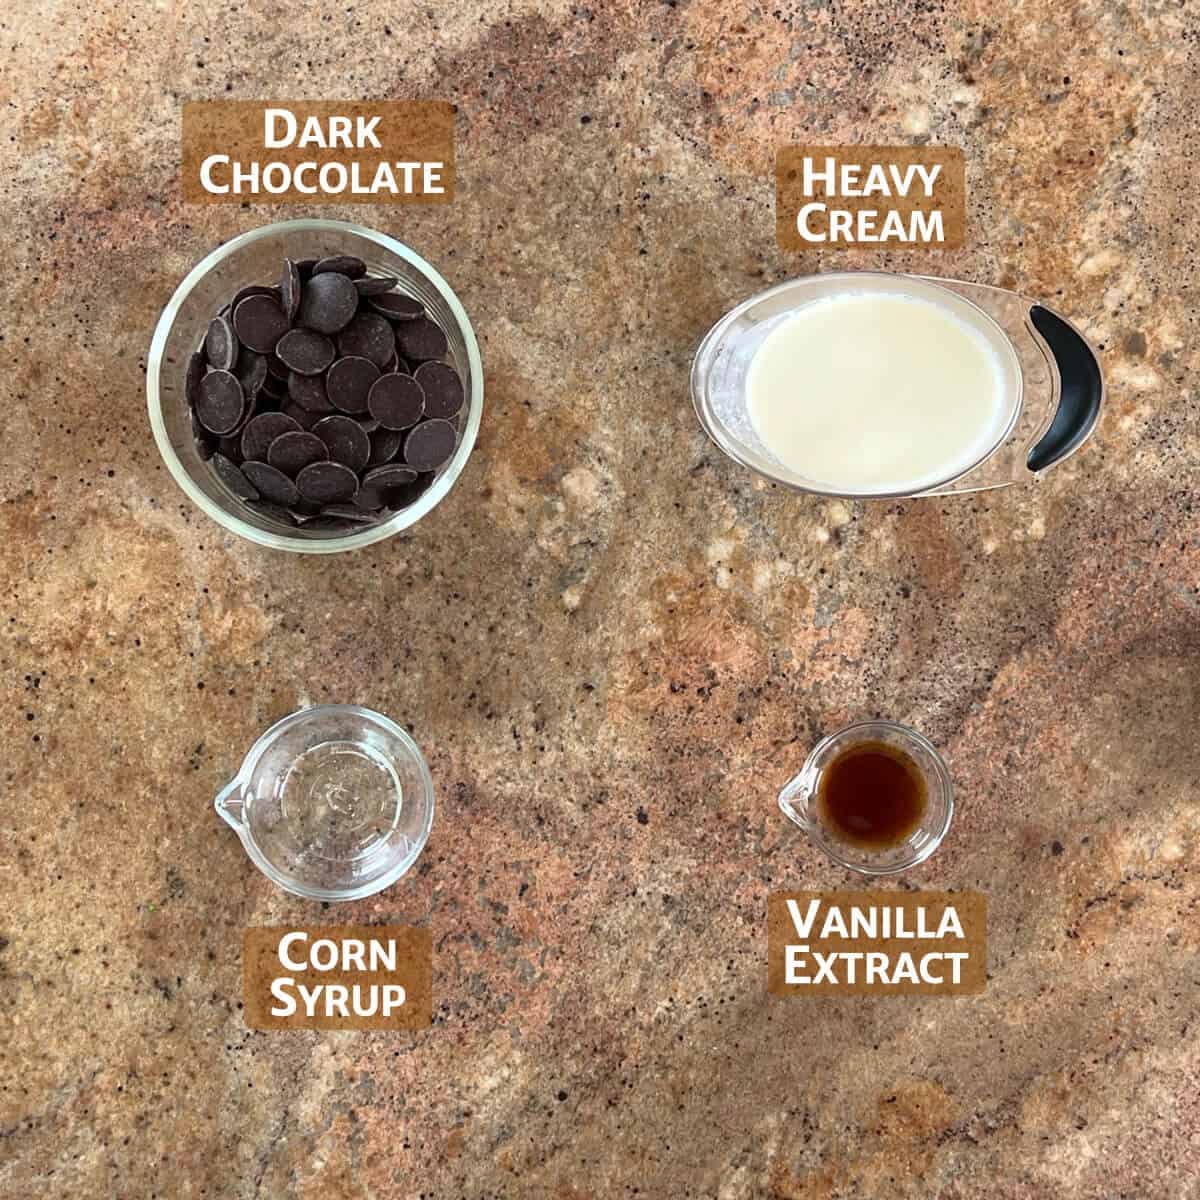
And the ingredients needed for the chocolate ganache topping :
Ingredient Notes
Vanilla cake: This light and airy yellow cake recipe is a Hot Milk and Butter Cake recipe, a richly flavored sponge that's finely grained, moist, and tall.
- Milk: Added to the batter steaming hot
- Butter: Added to the batter fully melted
Filling: The filling is a pastry cream custard (aka crème pâtissière if you want to get fancy). It's in the same family as ice cream, egg nog, bread pudding, and quiche.
- Milk: If you want an even richer pastry cream, you can substitute up to ½ cup of heavy cream for the milk.
- Cornstarch: Thickens the vanilla sauce (aka crème anglaise) into a custard
- Vanilla: It's best if you can use a fresh vanilla bean, but you can also use 1 teaspoon of vanilla bean paste (you'll still see those lovely vanilla bean seeds) or vanilla extract instead.
By the way, you can use this pastry cream recipe for vanilla pudding also - just reduce the cornstarch to two tablespoons. Alternatively, you can use this recipe for vanilla pudding without eggs or this no-egg chocolate pudding. Whichever method you choose, the pudding is guaranteed to be much better than anything you can get out of a box!
Topping: Chocolate ganache is, well, fudgy chocolate nirvana. It can be used to glaze cakes (as it is here) or as the filling for tarts and truffles.
- Chocolate: You can choose your favorite chocolate type: milk, semi sweet, or dark, depending on your preference. The best type of chocolate to use are chocolate wafers or a bar of chocolate. Candy melts (aka candy wafers, confectionery coating, compound coating, or compound chocolate) use cheaper ingredients than in pure chocolate, producing a lesser flavor profile, in my opinion. And save the chocolate chips for another day - they don't melt as smoothly.
- Vanilla extract: Added for extra richness
- Corn syrup: Helps to give the ganache stability and a beautiful sheen.
See the recipe card for a full list of ingredients and measurements.
How to make Boston Cream Pie
Element 1: Hot Milk and Butter Cake
The method for making the Hot Milk and Butter Cake recipe (aka Hot Milk Sponge Cake) is different than your typical cake method in than the butter is melted and added with the liquid rather than being creamed with the sugar.
Step 1: Make the batter
Beat the sugar and eggs together at medium-high speed until lightened, about 3 to 4 minutes (batter will fall from the paddle in thick ribbons). Mix in the canola oil on low speed (photo 1).
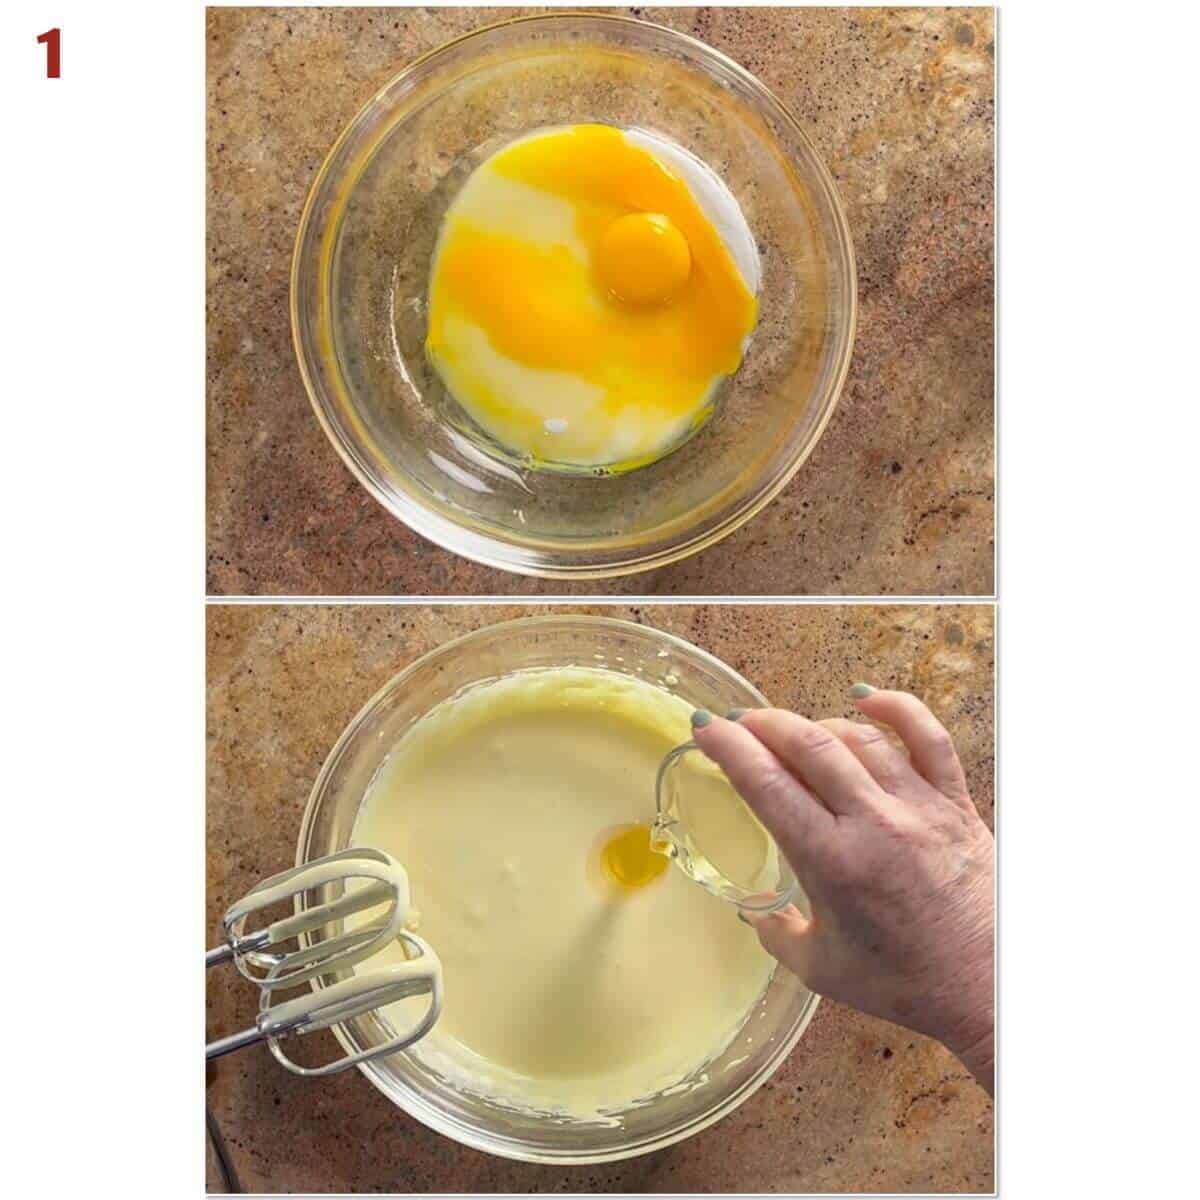
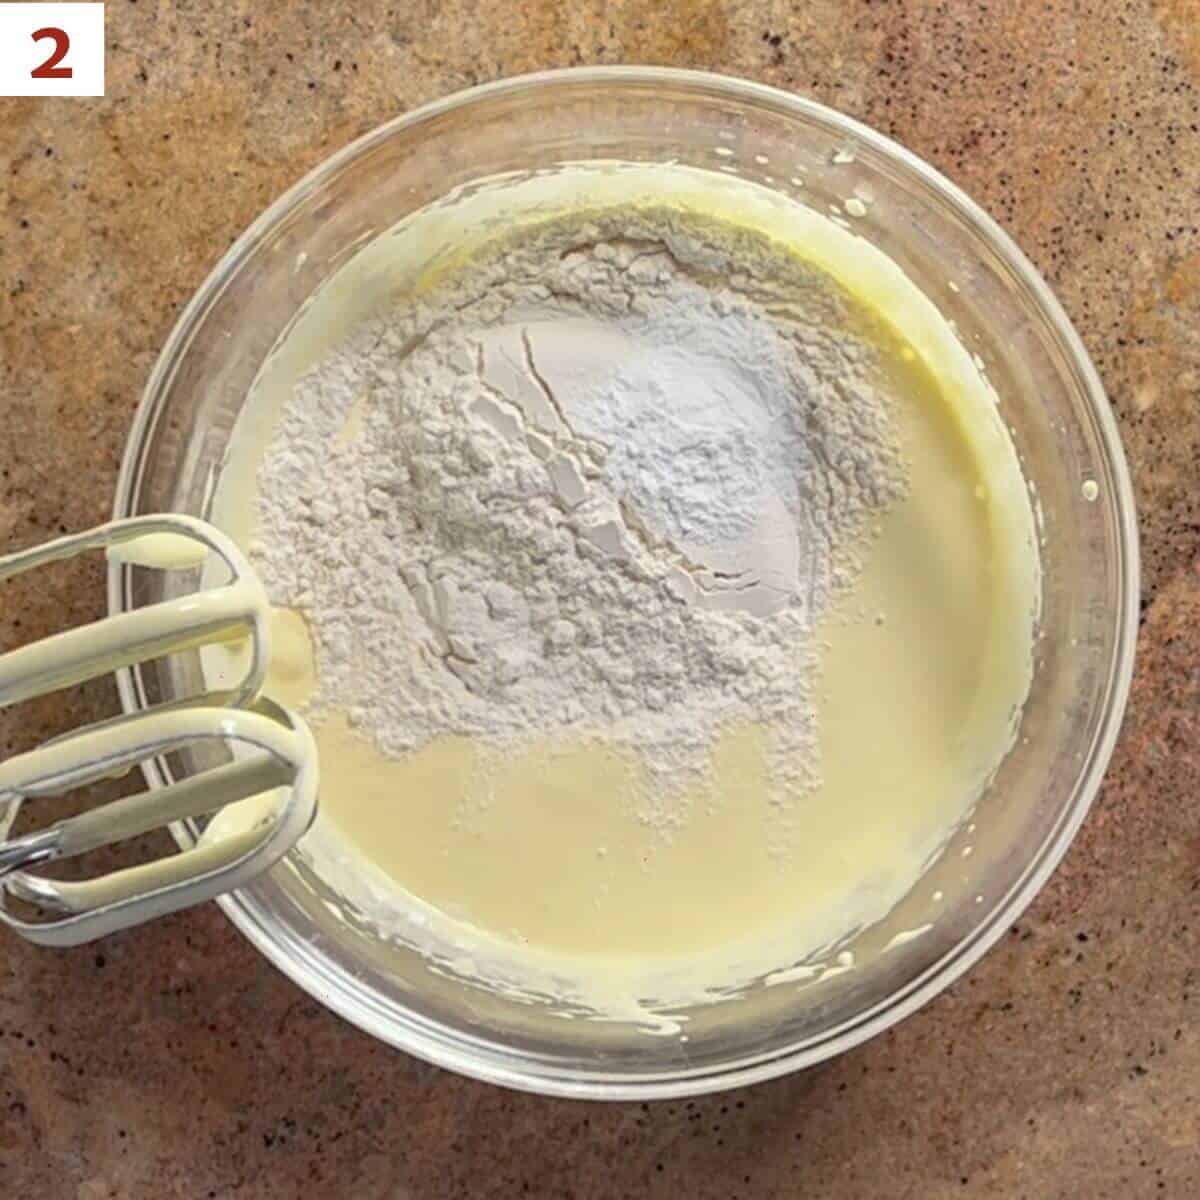
Add the flour, baking powder, and salt to the egg mixture and beat on low speed just until combined, about 1 minute (photo 2). Scrape the sides of the bowl and beat again briefly to fully incorporate the flour.
Step 2: Heat the milk
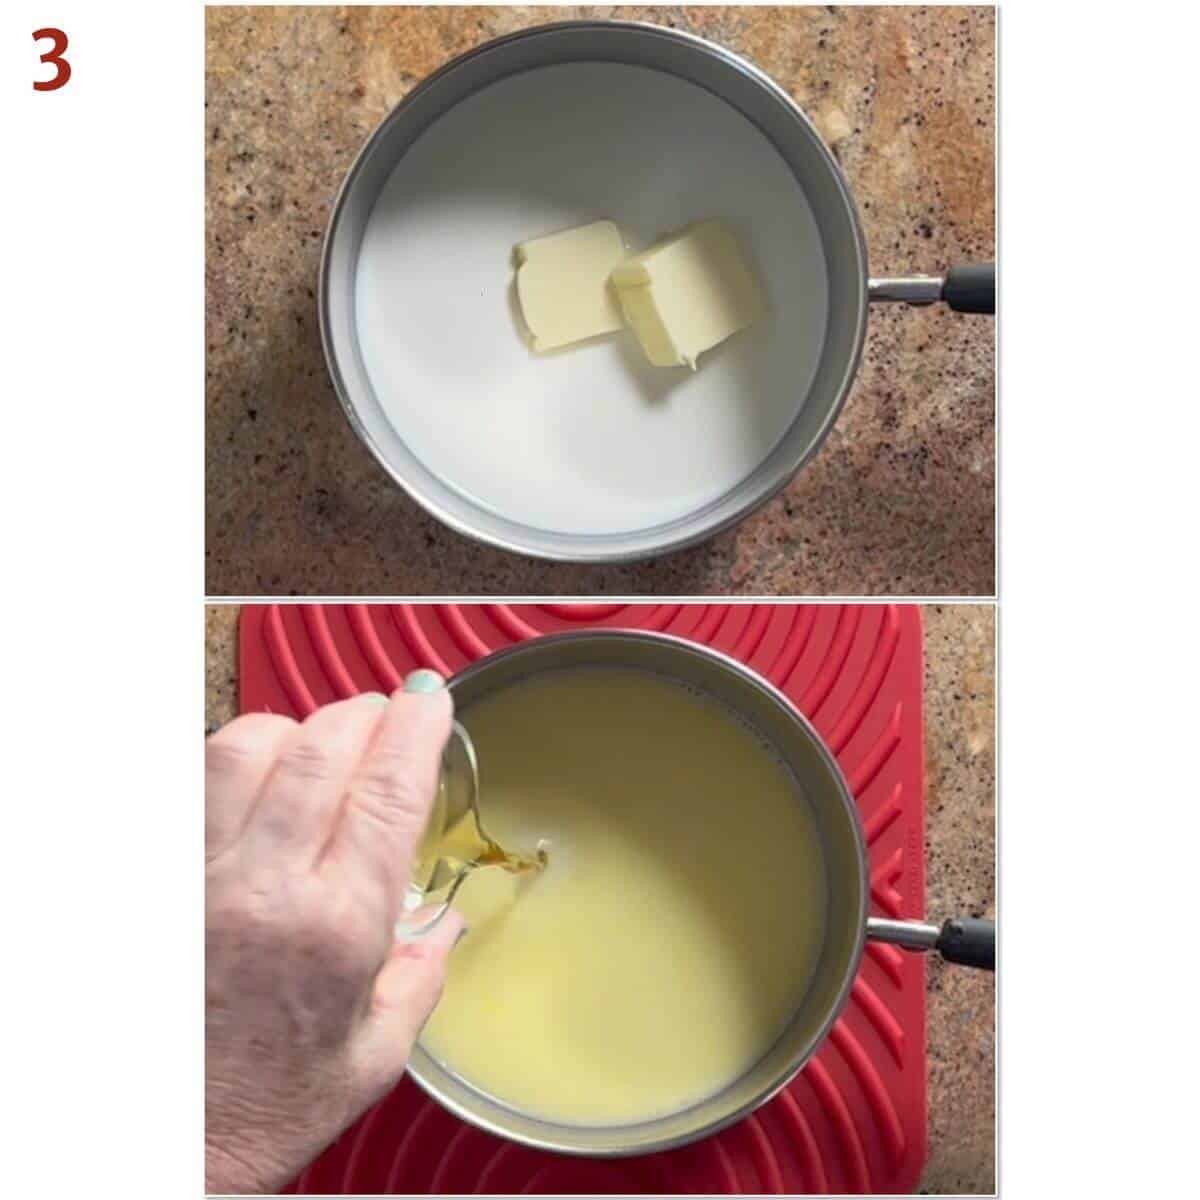
Heat the milk and butter in a saucepan set over medium heat until small bubbles form and the mixture is steaming. Remove the pan from the heat and stir until the butter is fully melted. Stir in the vanilla extract (photo 3).
Step 3: Add the milk mixture to the batter
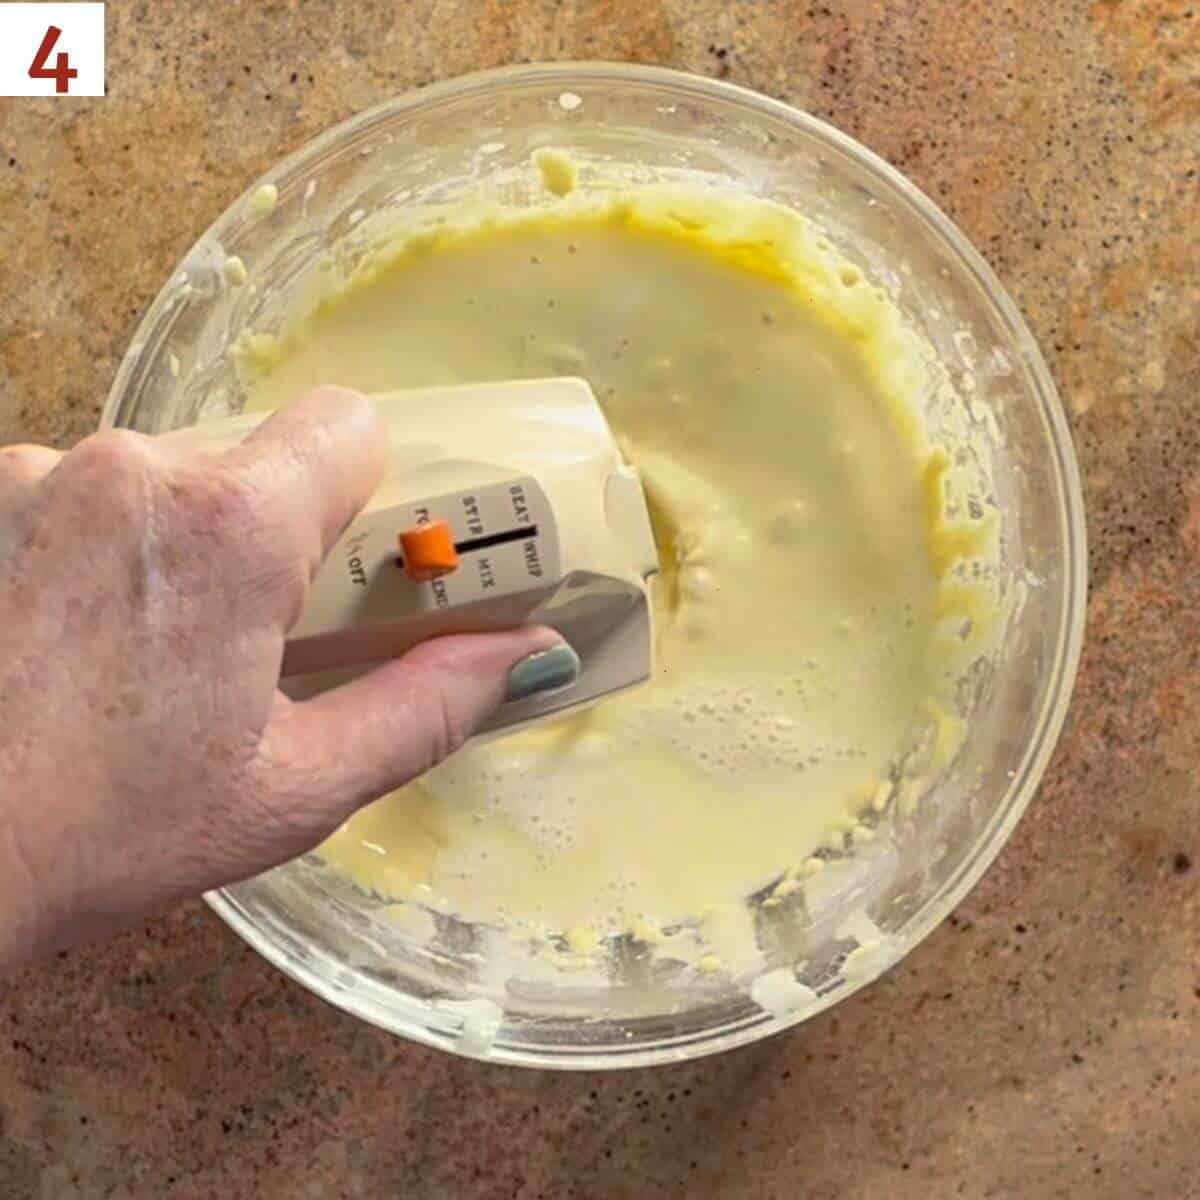
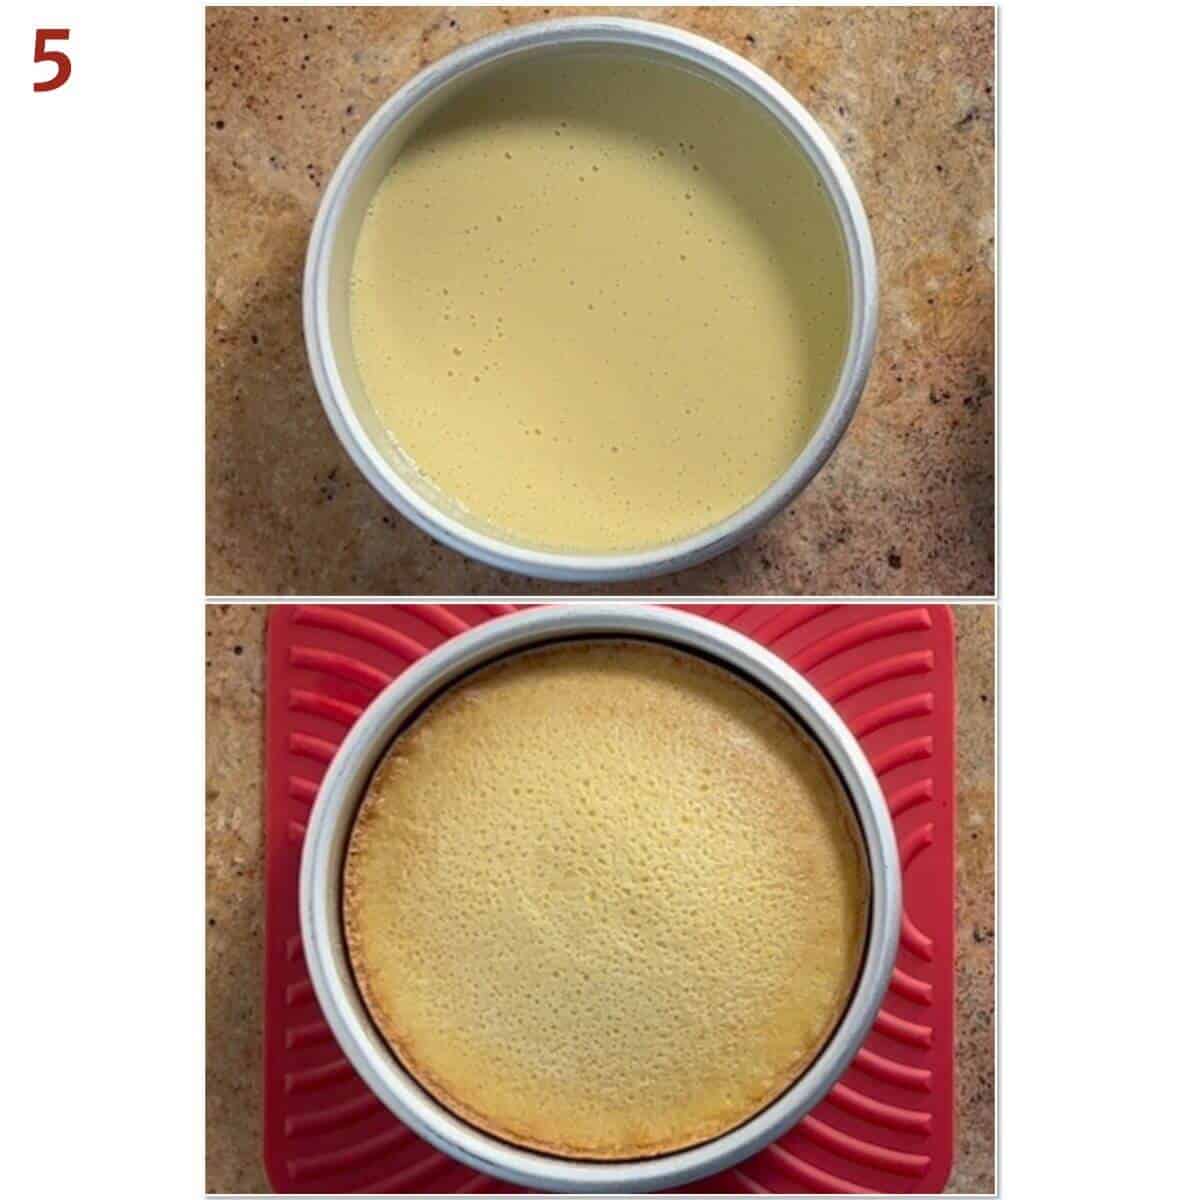
With the mixer going on low speed, slowly add the hot milk mixture to the cake batter, mixing until the batter is well combined. Scrape the bowl and mix briefly until the batter is smooth. It will be very thin (photo 4).
Step 4: Bake the cakes
Lightly spray two 6-inch round cake pans with baking spray, line with parchment paper, then spray the parchment. If you're using Bake-Even strips (see the Pro Tip below), soak two in water for 5 minutes, wring them out, then wrap the pans with them tightly (you won't need to level the cakes later if you use them).
Divide the batter evenly into the prepared cake pans. You can do this by eye, or you can weight the batter with a kitchen scale (I measured about 290 grams). Place the cake pans on the scale and measure out half the weight of batter per pan (about 145 grams).
Bake the cakes at 325˚F for 25 to 30 minutes, or until they're a deep golden brown and beginning to pull away from the sides of the pan (photo 5). A cake tester inserted into the center should come out clean.
Remove the cakes from the oven and cool them in the pans for 10 minutes. Turn them out onto a rack to cool completely.
Element 2: Vanilla Bean Pastry Cream
You'll want to make the pastry cream while the cakes are in the oven to give it plenty of time to chill before assembly.
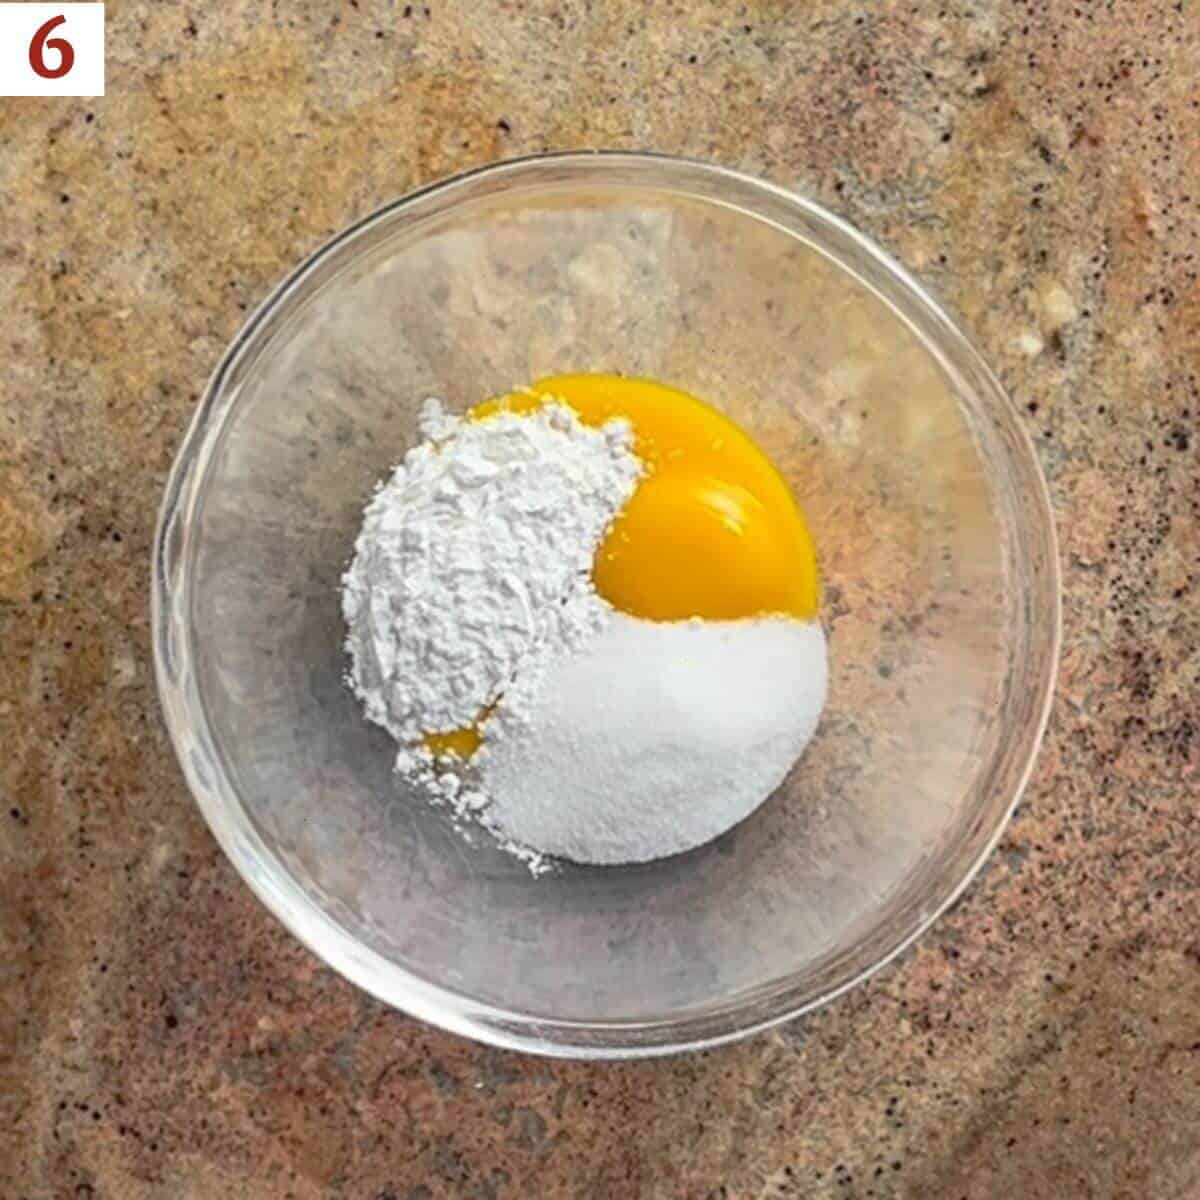
Step 5: Whisk the yolk mixture
Whisk the egg yolks briefly. Add half of the sugar and cornstarch and whisk to combine (photo 6). Set aside.
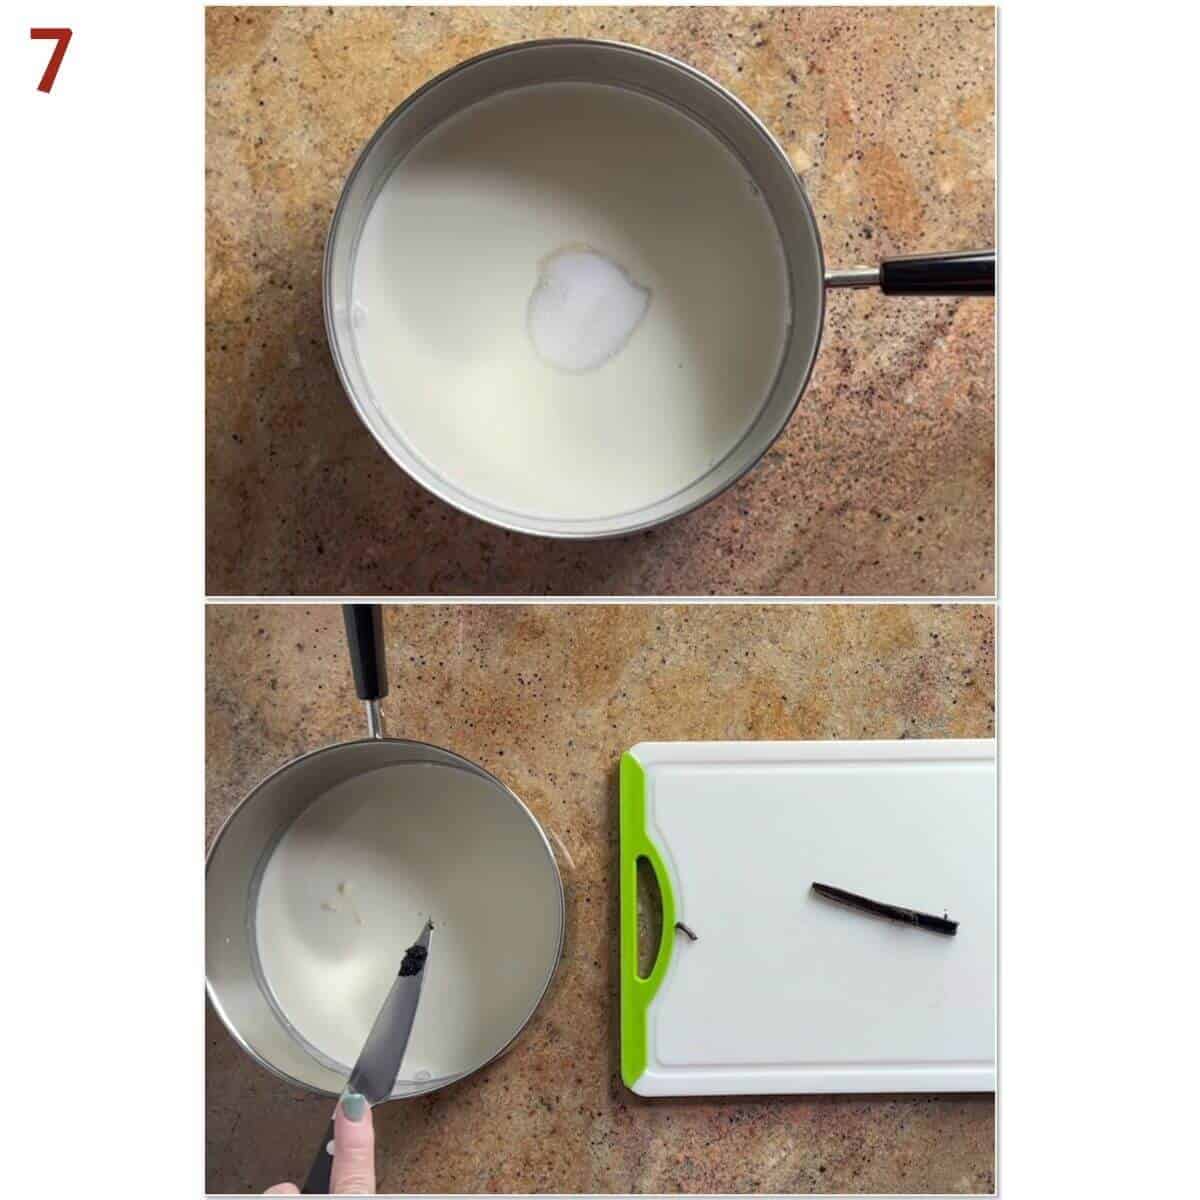
Step 6: Heat the milk mixture
This pastry cream is flavored with fresh vanilla bean seeds. Did I say vanilla bean seeds? No, flecks of flavor, more like! I don't always use a fresh vanilla bean in my baking, but I do when the vanilla will be showcased, like in Magic Custard Cake.
Whisk together the milk and the remaining sugar in a medium saucepan. Using the tip of a sharp knife, split the vanilla bean and scrape the seeds into the milk mixture, then add the vanilla bean (photo 7).
You can always substitute one teaspoon of vanilla bean paste or pure vanilla extract for the vanilla bean, if you wish. Just add it in with the butter after you've cooked the custard.
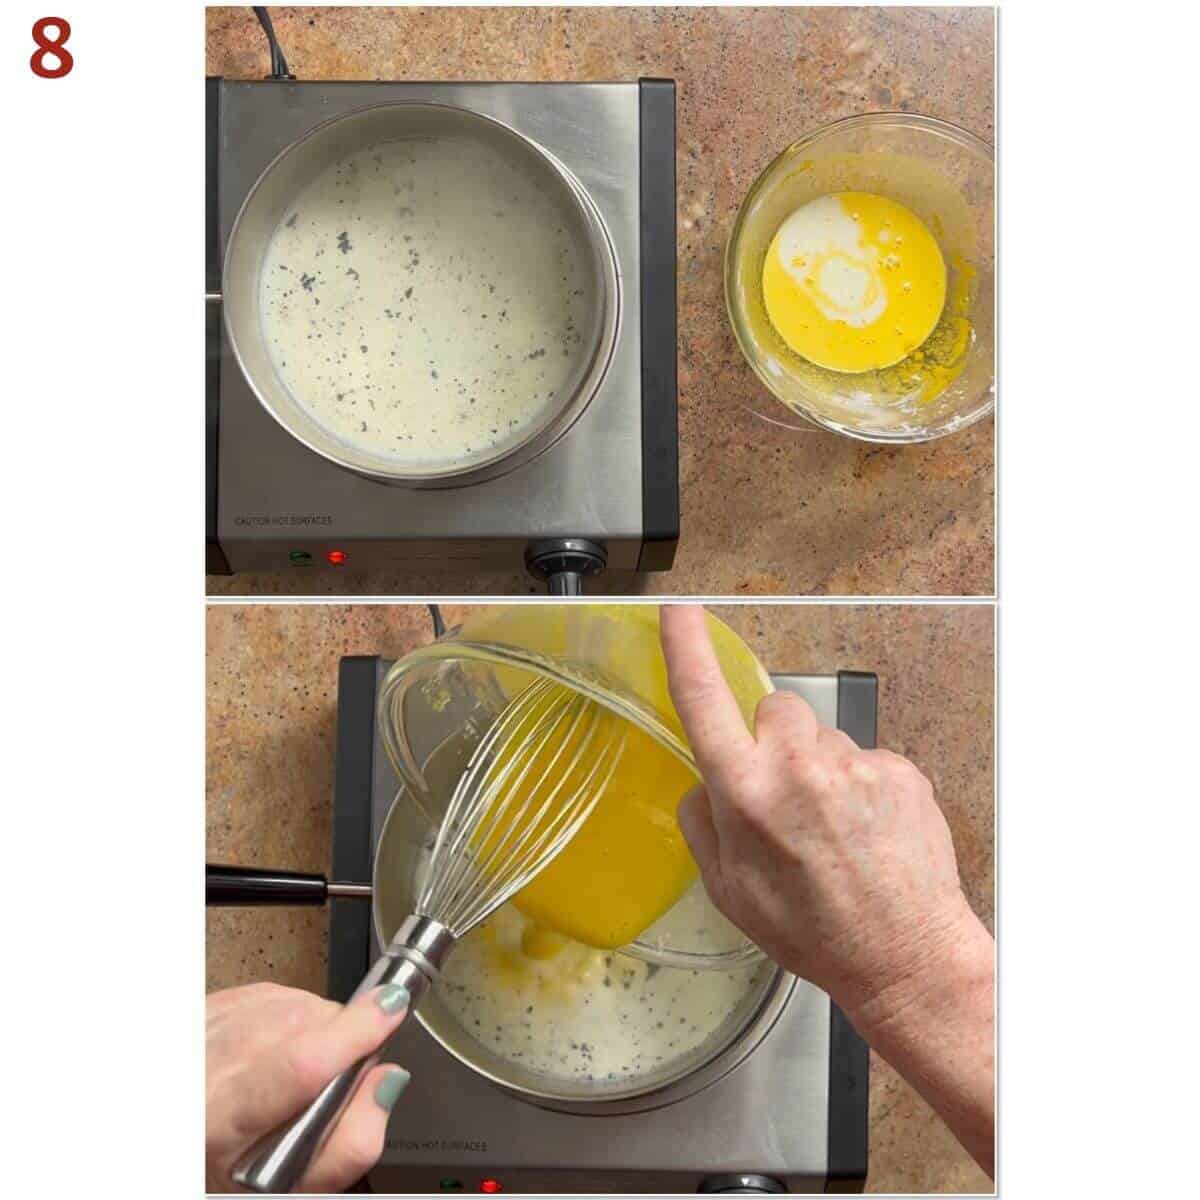
Step 7: Temper the egg mixture
Tempering eggs for custard isn't difficult, but what does tempering eggs mean?
Before you add the yolk mixture to the hot milk, it's important to gently warm the yolks first. This step helps avoid little pieces of cooked egg in your pastry cream. It's also helpful to start with room-temperature egg yolks.
Heat the milk mixture over medium heat, stirring occasionally, until small bubbles form and it starts to steam.
Gently heat the egg mixture by slowly adding ¼ cup of the warmed milk mixture to the yolk mixture while continuously whisking. Add another ¼ cup of the milk and whisk the yolk mixture again. When the eggs feel warm to the touch, you can add the yolk mixture to the pan (photo 8). This process is called tempering the eggs.
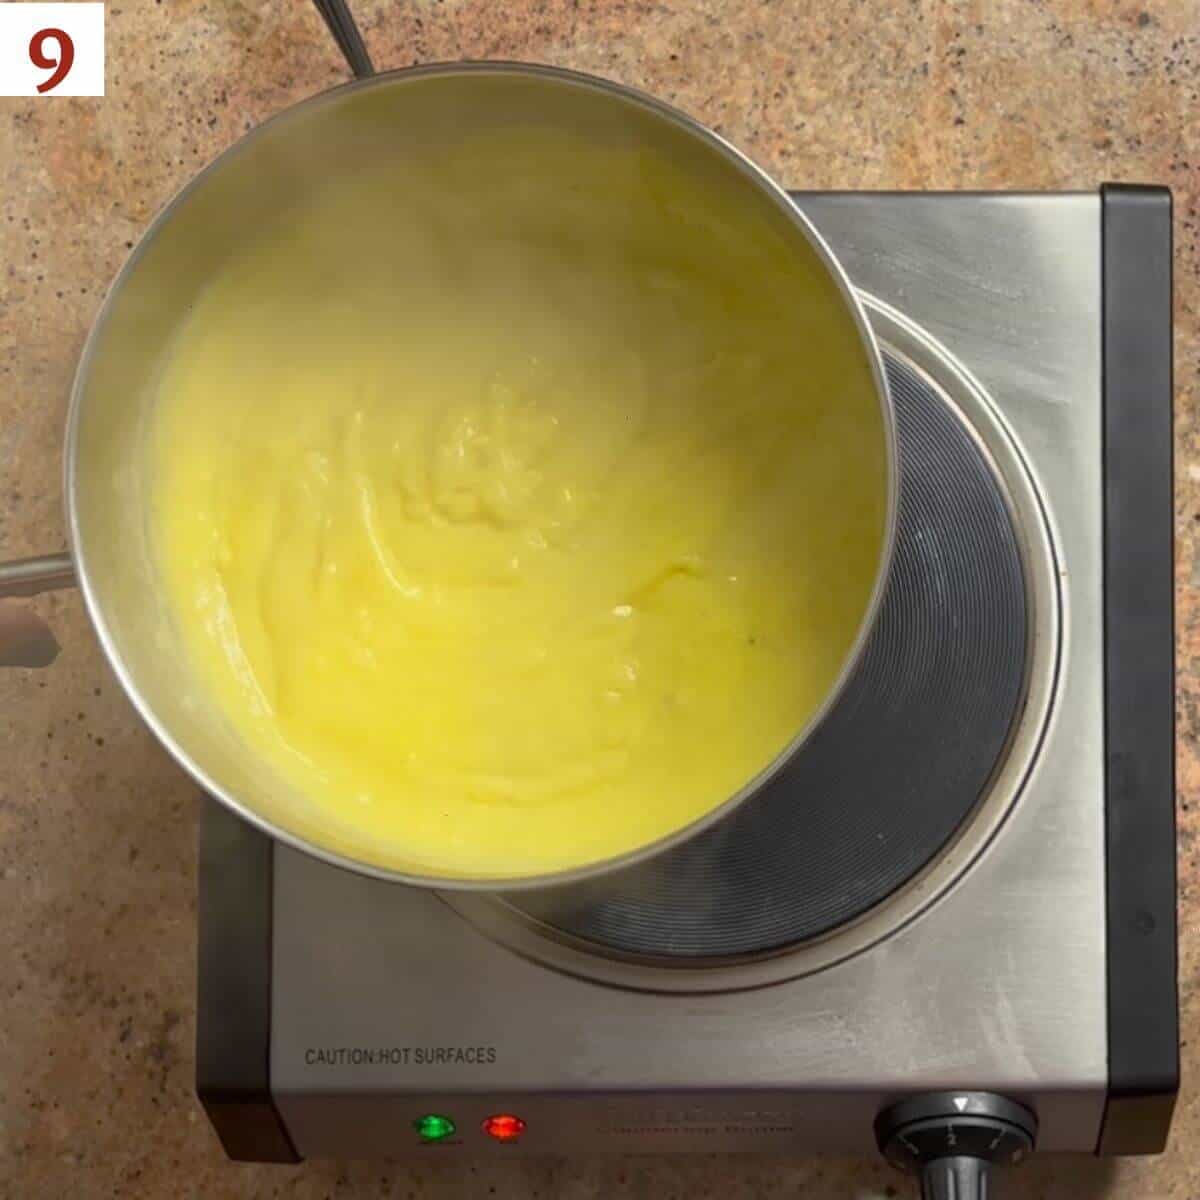
Step 8: Cook the pastry cream
Cook the custard, whisking constantly, until the pastry cream is bubbling and thickened. Allow it to boil approximately 1 minute longer, stirring constantly. Don't overcook the pastry cream to avoid overcooking the eggs. Remove the pastry cream from the heat (photo 9).
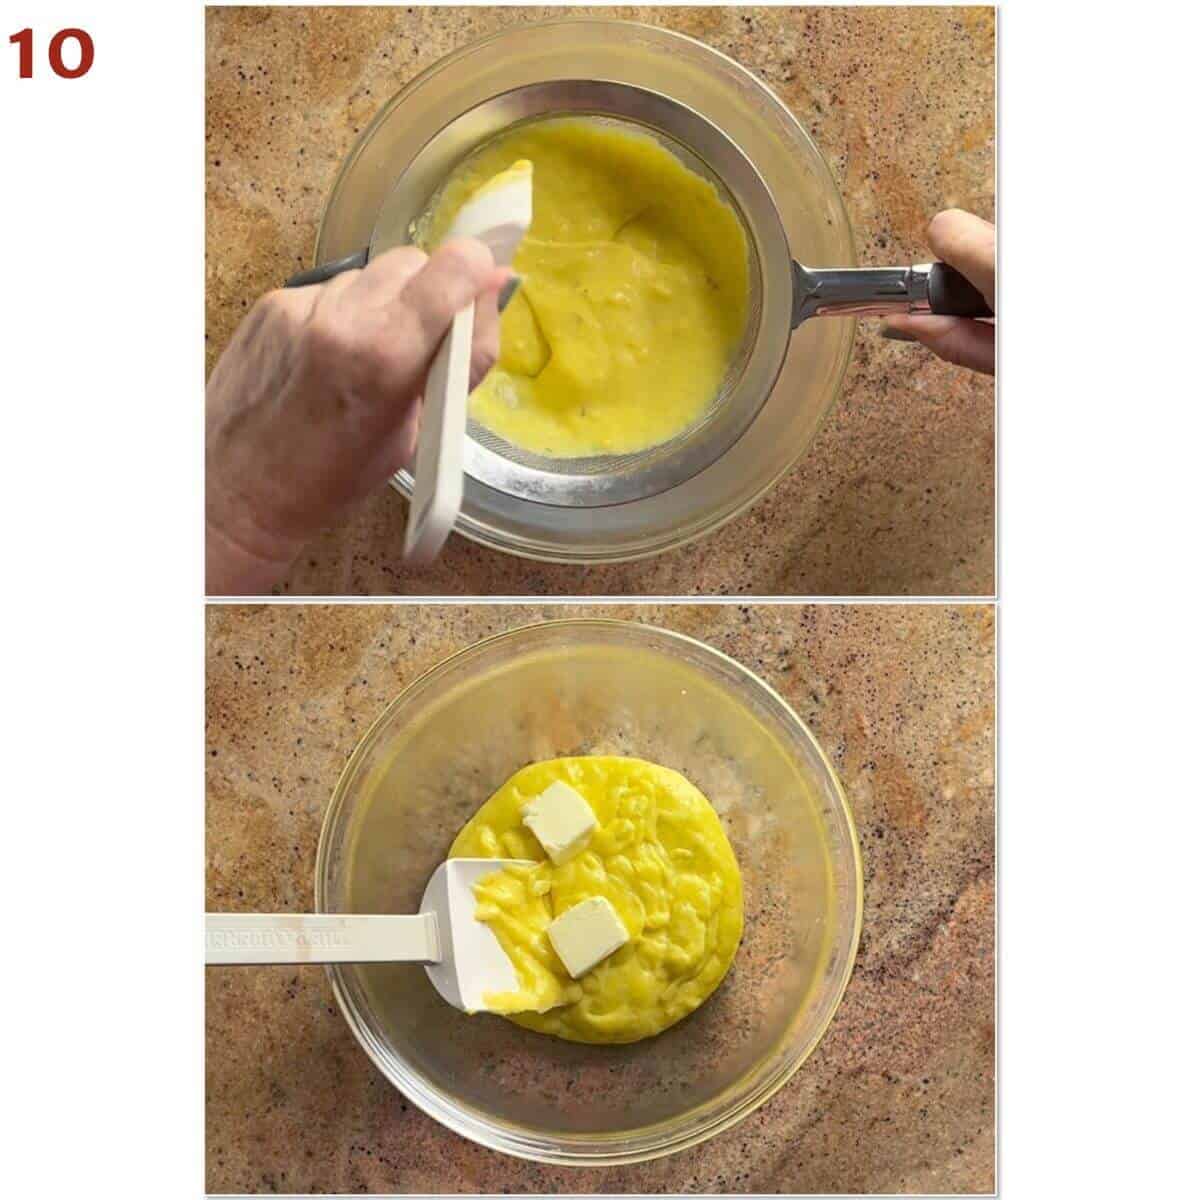
Step 9: Strain and chill the pastry cream
Strain the custard through a fine mesh strainer into a clean bowl, removing the spent vanilla bean. If the custard boiled during thickening, straining it out will help remove any curdled bits of egg.
Don't toss that vanilla bean - instead rinse the bean, then place it in a jar and cover with vodka to make your own vanilla extract. If you are using vanilla bean paste or vanilla extract instead of a vanilla bean, stir it in now.
Add the butter and stir until it melts, but don't over-mix, as this will thin the custard (photo 10).
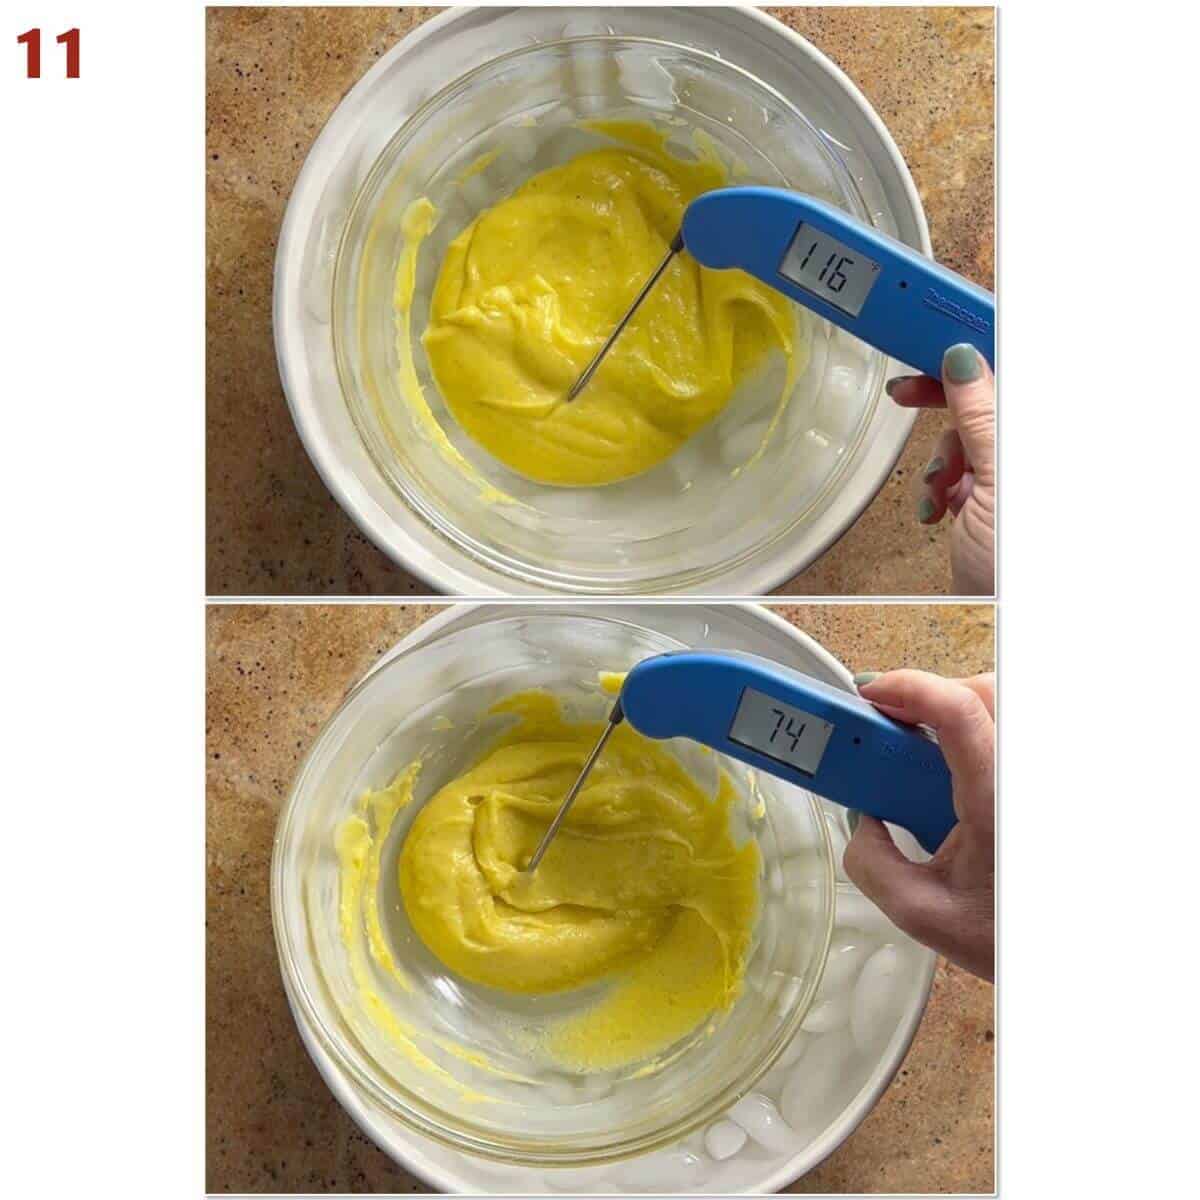
To help prevent bacteria growth while the pastry cream cools, chill it in an ice bath (½ ice cubes, ½ water, reaching halfway up the sides of the bowl). Stir the custard occasionally until it's cooled to room temperature - a digital thermometer should read about 80°F (photo 11). Place a piece of plastic wrap on the surface of the custard and refrigerate until needed.
Element 3: Chocolate Ganache
Chocolate ganache is made with equal parts chocolate and heavy cream, by weight. A kitchen scale is helpful here.
Chocolate chopping tip
Chop the chocolate with a serrated knife - it cuts it cleaner than a chef's knife.
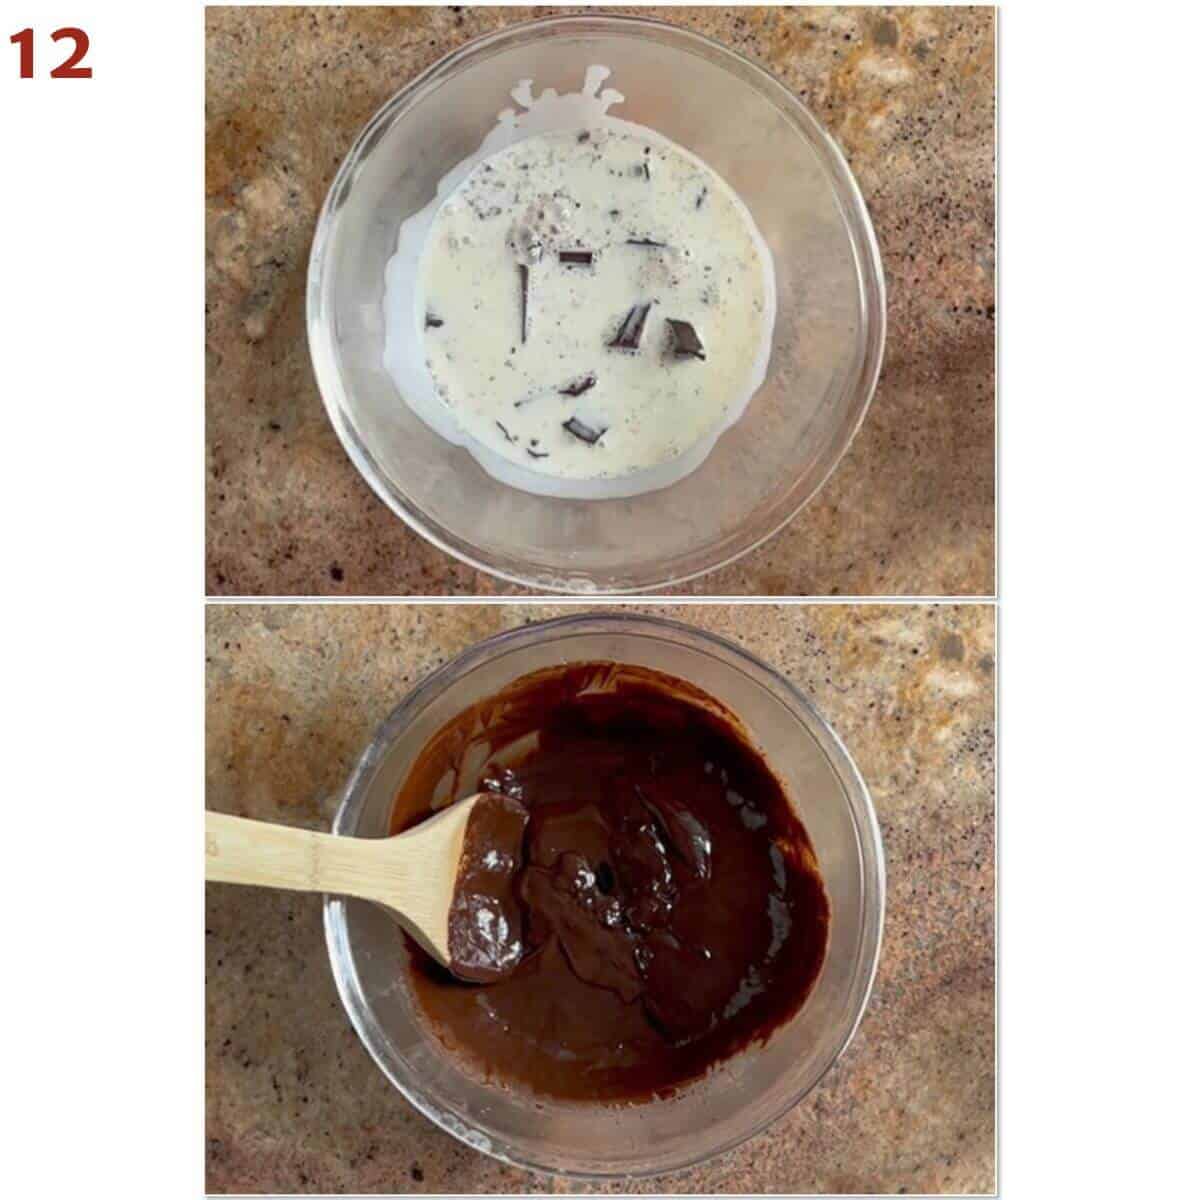
Step 10: Add heated cream to chopped chocolate
Place the chopped chocolate in a heat-proof bowl. Heat the cream to a simmer, either on the stove in a small saucepan or in the microwave.
Pour the cream onto the chocolate, cover, and let sit for 2 to 3 minutes, then start stirring. At first it will look grainy, but keep stirring until the mixture is smooth.
Add the corn syrup (if using) and vanilla extract and stir well (photo 12).
Step 11: Assemble the Boston Cream Pie
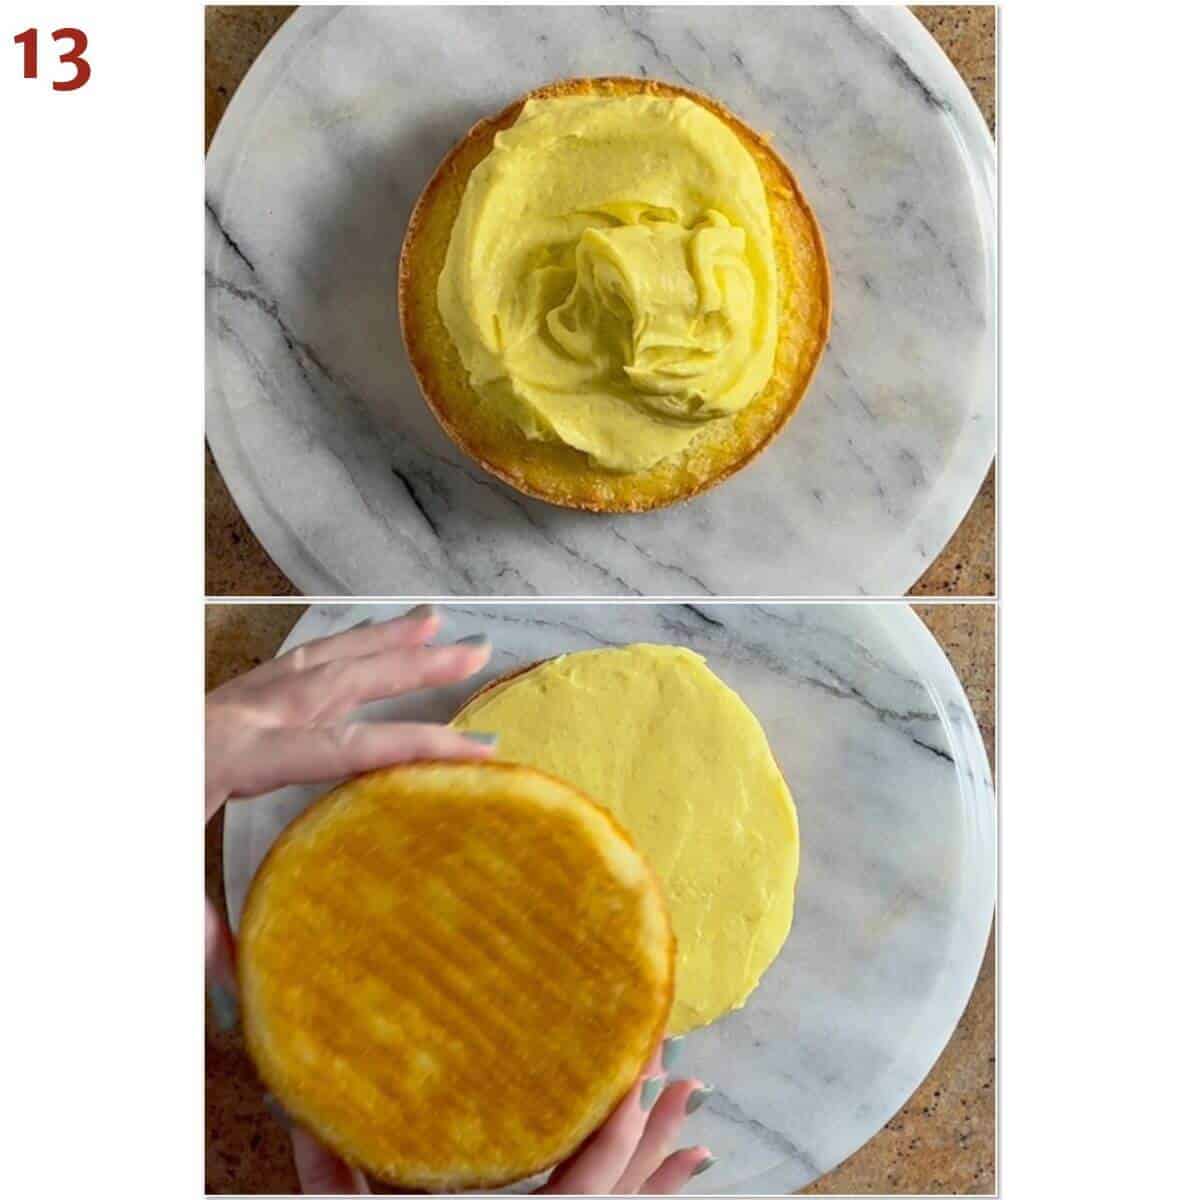
Level the cakes (if needed). Place one of the cakes, right side up, on a cake plate. Top with the pastry cream, spreading it right to the edges (you want at least ½-inch of filling inside when the cake is assembled).
Place the top layer, upside down, on the filling (photo 13).
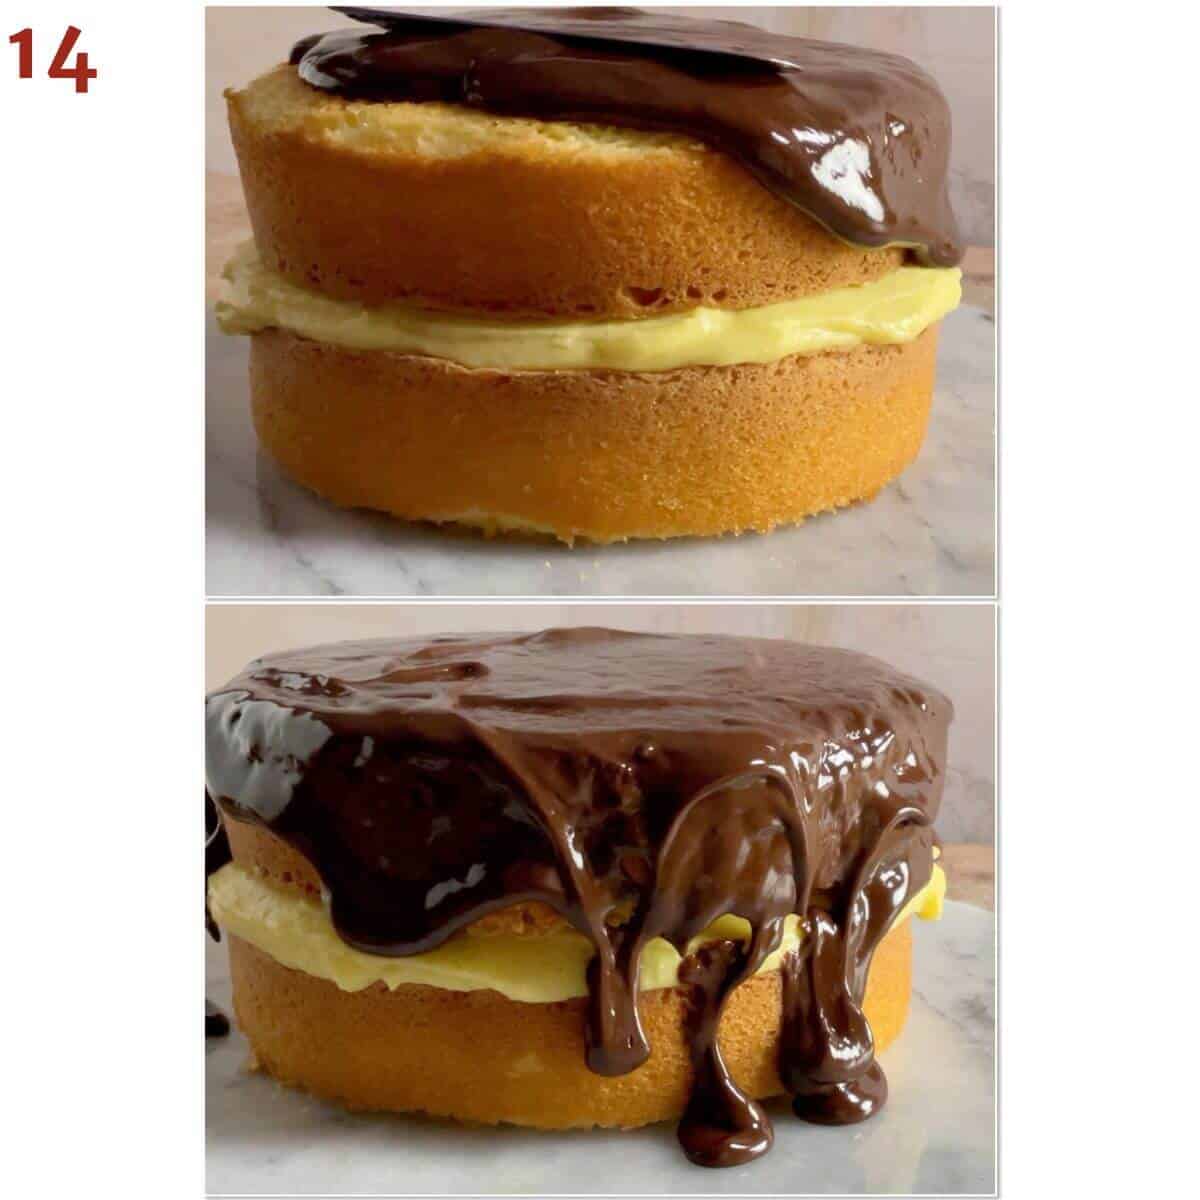
Pour the ganache over the filled cake, spreading it with a small offset spatula to the edges to spill over the sides (photo 14). Let the ganache set for a few minutes before serving.
Storage and make-ahead instructions
Storage instructions: Boston Cream Pie should be kept in the refrigerator, covered loosely with foil or plastic wrap. It will stay fresh for 3 to 4 days.
Make-ahead instructions: The cakes can be made a day ahead and chilled, wrapped in plastic wrap. Bring it to room temperature before assembly. The pastry cream can be kept in the refrigerator for several days, with plastic wrap pressed onto the surface. It's best to make the ganache right before assembly.
Yield Notes
This is a rich dessert, so a 6-inch cake will serve 6 to 8 people. For a full-sized cake, just double all the ingredients. Bake the cake in two 9-inch round cake pans for 30 to 35 minutes. You can easily get 10 to 12 slices from the full-sized version.
How to bake flat topped cakes
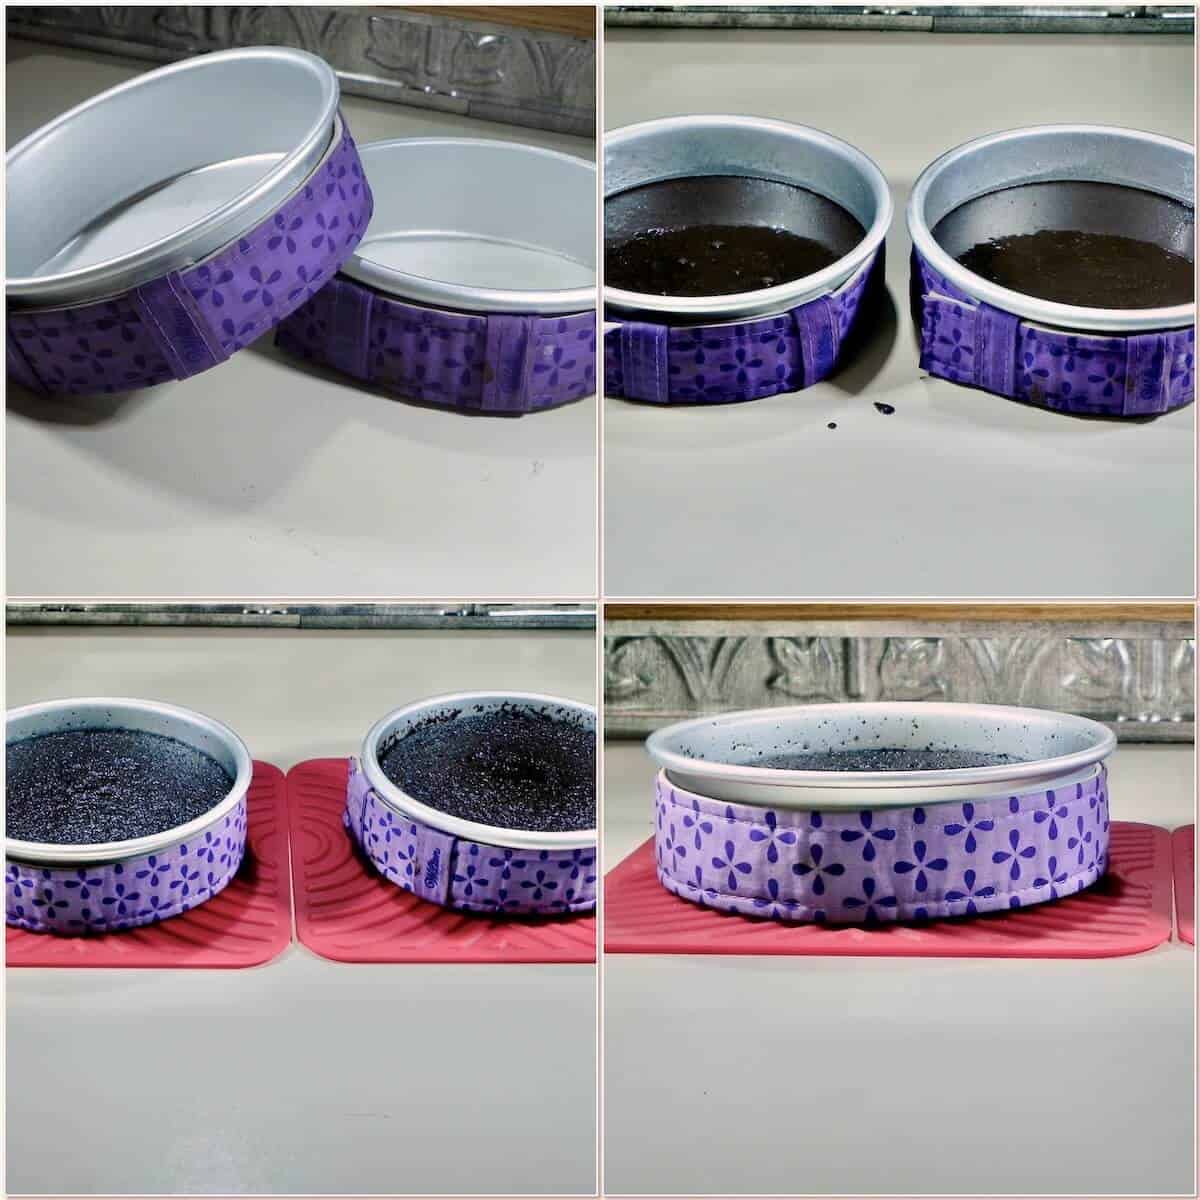
One trick to ensure the cake layers will be even is to use damp Bake-Even strips wrapped snugly around a cake pan. They insulate the outside part of the cake pan, allowing the center of the batter to bake…well…evenly with the outer edges. What you get is a flat-topped layer cake that then doesn't have to be trimmed.
Check out this Port Wine Chocolate Cake recipe to see the Bake-Even strips in action. No leveling needed! Here's one of the layers before and after baking. See how even it looks? There's no cracked dome on top.
Questions asked and answered
Here are some questions you might have...
As you may have already guessed by now, Boston Cream Pie isn't pie at all, but a layer cake. Also called Boston Cream Cake, this dessert is a descendant of earlier desserts called American pudding-cake pies when both cakes and pies were cooked in the same pans, and the names were often interchanged.
The cake became associated with Boston because this particular combination of cake, pastry cream, and ganache was created at the Parker House Hotel in Boston in the late 19th century.
This light and airy yellow cake recipe is Hot Milk and Butter Cake, so called because you use…uhm…hot milk and melted butter in the batter. It also contains flour, sugar, eggs, canola oil, baking powder, vanilla extract, and salt. There's no creaming required, and the ingredients don't necessarily have to be at room temperature to make the batter.
Didn't find the answer you're looking for?
Ask AI to answer for this specific recipe:
Disclaimer: I am not responsible for the quality of AI information

I hope you like this recipe! Let me know if you have any questions, and don't forget to leave a comment and rating. Thanks!
Slainté! L'chaim! Cheers!
- Tammy
More scaled down recipes to try
Recipe

Mini Boston Cream Pie
Equipment
Ingredients
For the cake
- 1 cup granulated sugar
- 2 large eggs, at room temperature
- 2 tablespoons canola oil
- 1 cup all-purpose flour
- 1 teaspoon baking powder
- ½ teaspoon kosher salt
- ½ cup milk
- 2 tablespoons unsalted butter, softened
- 1 teaspoon pure vanilla extract
For the pastry cream
- 2 large egg yolks, at room temperature
- ⅓ cup granulated sugar, divided
- 1½ tablespoons cornstarch
- 1 cup milk, see Recipe Notes
- ½ fresh vanilla bean, split (or 1 teaspoon vanilla bean paste or vanilla extract)
- 1½ tablespoons unsalted butter
For the ganache topping
- 3 ounces dark chocolate wafers, or solid dark chocolate, chopped (½ cup), see Recipe Notes
- ⅓ cup heavy cream
- ¾ teaspoon light corn syrup, for shine, optional
- ½ teaspoon pure vanilla extract
Instructions
- Preheat the oven to 325 °F. Lightly spray two 6-inch round cake pans with baking spray, line with parchment paper, then spray the parchment. If you're using Bake-Even strips, soak two in cold water for 5 minutes, wring them out, then wrap the pans with them tightly (you won't need to level the cakes later if you use them).
- Make the cake: In the bowl of a stand mixer fitted with a paddle attachment (or a large bowl for a hand mixer), beat together 1 cup granulated sugar and 2 large eggs at medium-high speed until lightened, about 3 to 4 minutes (batter will fall from the paddle in thick ribbons). Mix in 2 tablespoons canola oil on low speed.
- Add 1 cup all-purpose flour, 1 teaspoon baking powder, and ½ teaspoon kosher salt to the egg mixture and beat on low speed just until combined, about 1 minute. Scrape the sides of the bowl and beat again briefly to fully incorporate the flour.
- Heat ½ cup milk and 2 tablespoons unsalted butter in a saucepan set over medium heat until small bubbles form and the mixture is steaming. Remove the pan from the heat and stir until the butter is fully melted. Stir in the 1 teaspoon pure vanilla extract.
- With the mixer going on low speed, slowly add the hot milk mixture to the cake batter, mixing until the batter is well combined. Scrape the bowl and mix briefly until the batter is smooth (it will be very thin).
- Wrap the cake pans with the wet Bake-Even strips. Divide the batter evenly into the prepared pans. Measuring the batter with a kitchen scale helps the accuracy.
- Bake the cakes for 25 to 30 minutes, or until they're a deep golden brown and beginning to pull away from the sides of the pan. A cake tester inserted into the center should come out clean.
- Remove the cakes from the oven and cool them in the pans for 10 minutes. Turn them out onto a rack to cool completely.
- Make the pastry cream: In a small bowl, whisk 2 large egg yolks briefly. Add half of the ⅓ cup granulated sugar and 1½ tablespoons cornstarch and whisk to combine. Set aside.
- Whisk together the 1 cup milk and the remaining sugar in a medium saucepan. Using the tip of a sharp knife, split the ½ fresh vanilla bean and scrape the seeds into the milk mixture, then add the vanilla bean pod.
- Heat the milk mixture over medium heat, stirring occasionally, until small bubbles form and it starts to steam.
- Gently heat the yolk mixture by slowly adding ¼ cup of the warmed milk mixture to the yolk mixture while continuously whisking. Add another ¼ cup of the milk and whisk again. This process is called tempering the eggs, and its purpose is to prevent the yolks from curdling while the custard cooks.
- Add the yolk mixture to the pan and cook, whisking constantly, until the pastry cream is bubbling and thickened. Allow it to boil approximately 1 minute longer, stirring constantly. Don't overcook the pastry cream to avoid overcooking the eggs.
- Remove the pastry cream from the heat and strain through a fine mesh strainer into a clean bowl, removing the spent vanilla bean. If the custard boiled during thickening, straining it out will help remove any curdled bits of egg. Don't toss that vanilla bean - instead rinse the bean, then place it in a jar and cover with vodka to make your own vanilla extract.
- If you are using vanilla bean paste or vanilla extract instead of a vanilla bean, stir it in now along with 1½ tablespoons unsalted butter. Stir until the butter melts, but don't over-mix, as this will thin the custard.
- Cool the custard using an ice bath (½ ice cubes, ½ water, reaching halfway up the sides of the bowl). Stir the custard occasionally until it's cooled to room temperature (a digital thermometer should read about 80 °F).
- Place a piece of plastic wrap on the surface of the custard and refrigerate until needed.
- Make the ganache topping: Place 3 ounces dark chocolate wafers in a heat-proof bowl. Heat ⅓ cup heavy cream to a simmer, either on the stove in a small saucepan or in the microwave.
- Pour the heavy cream onto the chocolate, cover, and let sit for 2 to 3 minutes, then start stirring. At first it will look grainy, but keep stirring until the mixture is smooth. Add ¾ teaspoon light corn syrup (if using) and ½ teaspoon pure vanilla extract and stir well.
- Assemble the cake: Level the cakes (if needed). Place one of the cakes, right side up, on a cake plate. Top with the pastry cream, spreading it right to the edges (you want at least ½-inch of filling inside when the cake is assembled). Place the top layer, upside down, on the filling.
- Pour the ganache over the filled cake, spreading it with a small offset spatula to the edges to spill over the sides. Let the ganache set for a few minutes before serving.
- Storage instructions: Boston Cream Pie should be kept in the refrigerator, covered loosely with foil or plastic wrap. It will stay fresh for 3 to 4 days.
- Make-ahead instructions: The cakes can be made a day ahead and chilled, wrapped in plastic wrap. Bring it to room temperature before assembly. The pastry cream can be kept in the refrigerator for several days, with plastic wrap pressed onto the surface. It's best to make the ganache right before assembly.

Alisha says
It was good, but I ended up with about 1 1/2” layer of crème patisserie. I followed the measurements, so why was there so much?
Tammy Spencer says
Hi Alisha, The crème pat recipe may make a little more that you need, but that’s ok! Just use the amount that’s right for you, and enjoy a treat on the side. Good luck, and happy baking 😉
Ella says
I'll take that ganache and pastry cream with a spoon please!