
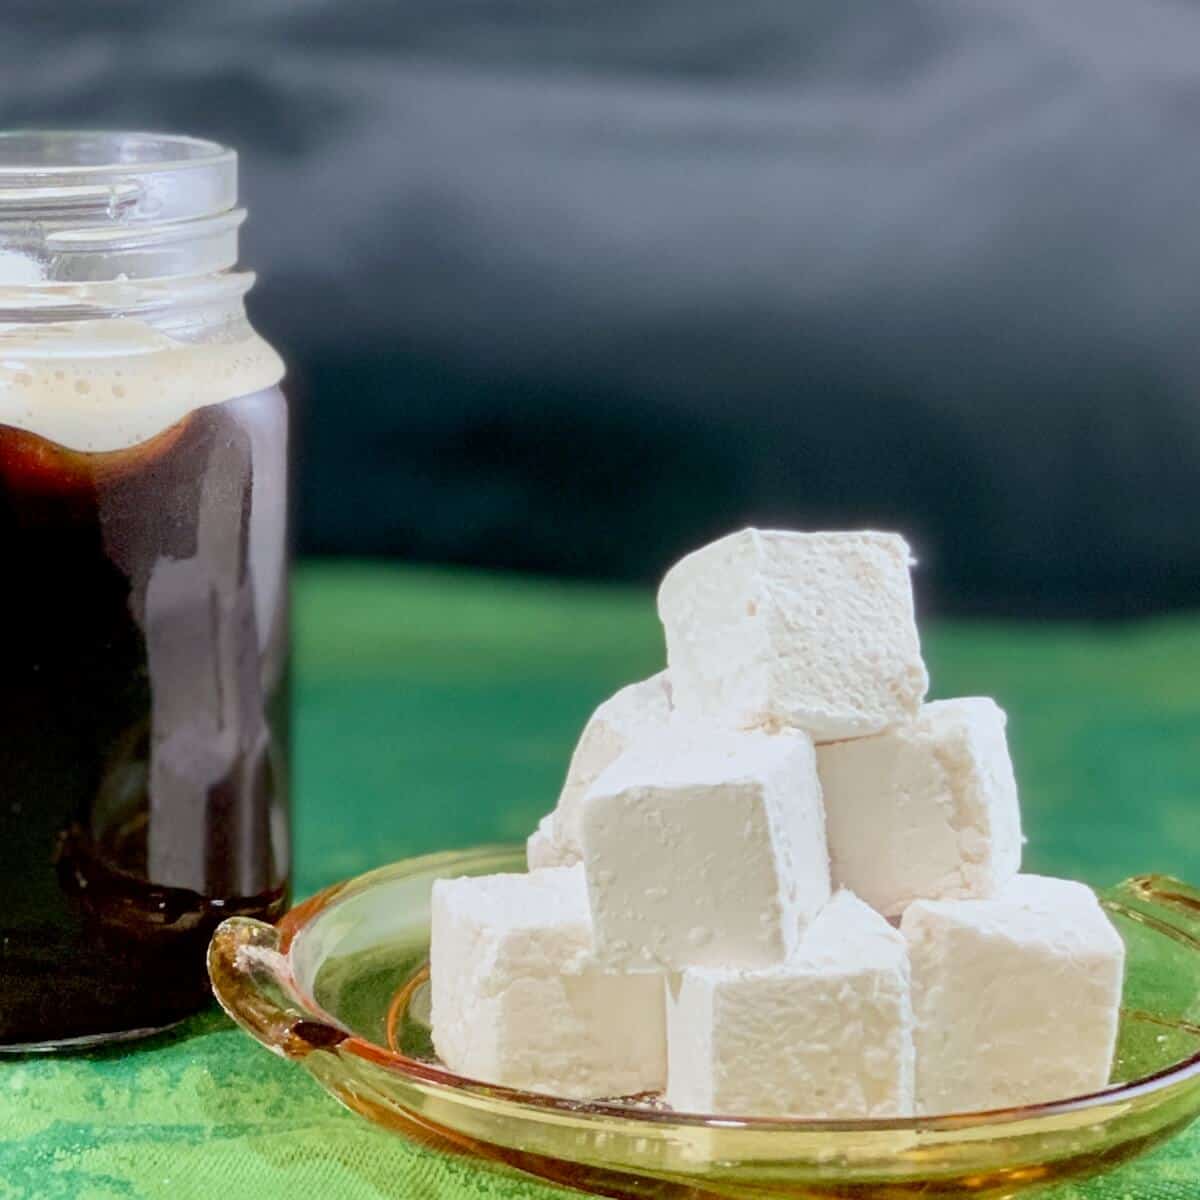
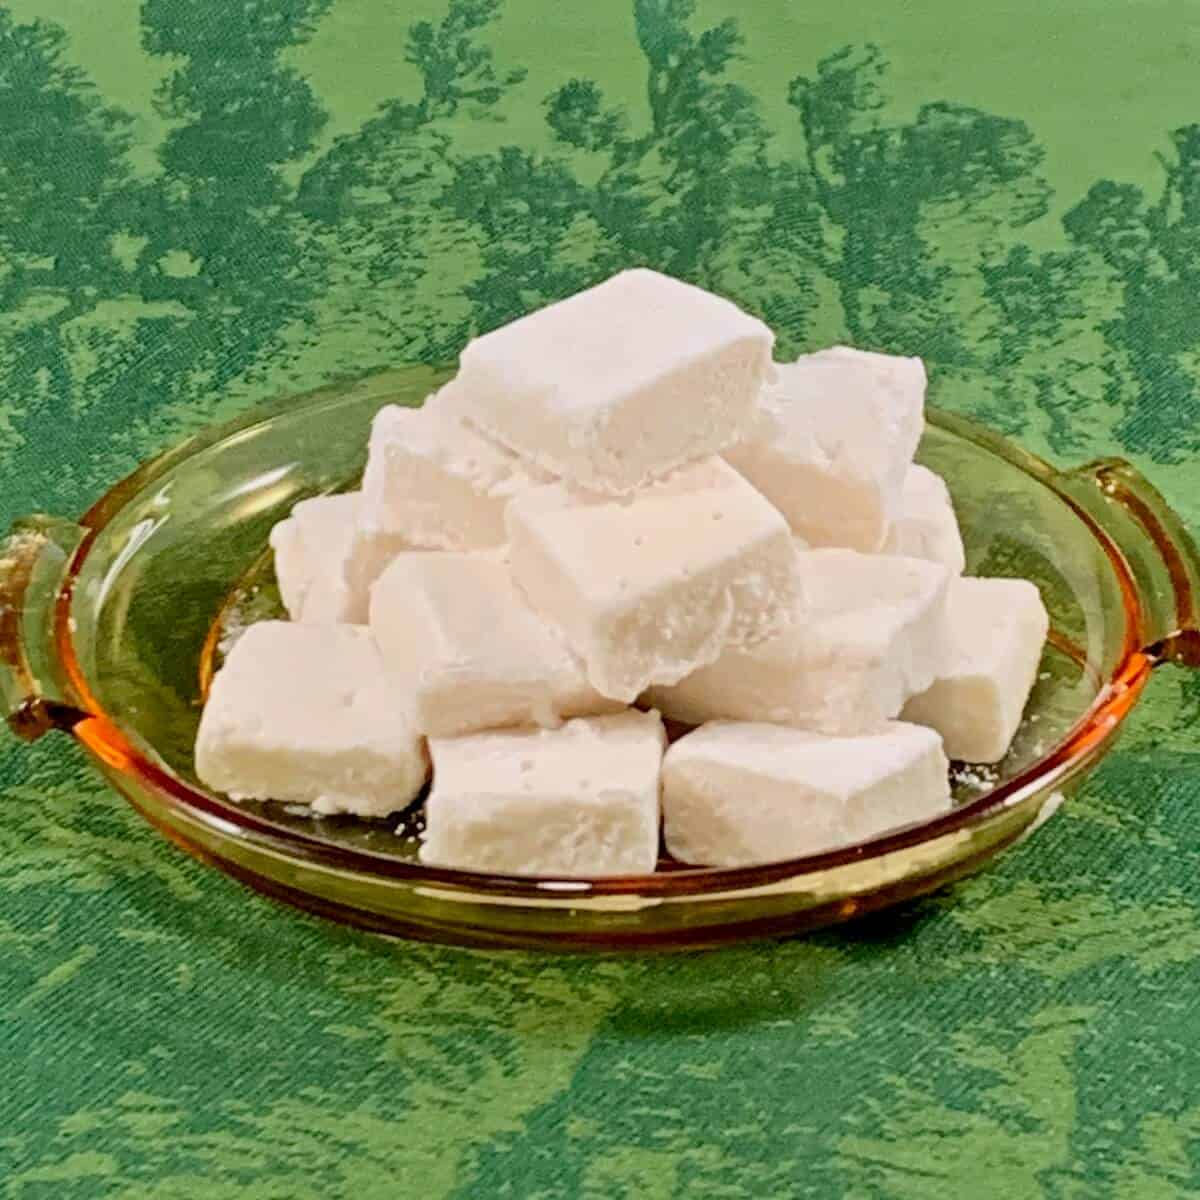
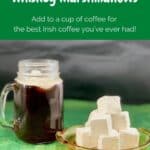
Light and fluffy, homemade marshmallows are easy to make, and these Irish Whiskey Marshmallows are a grown-up treat with a kick. Add a couple to a cup of coffee for the best Irish coffee you've ever had!
Jump to:
Quick Recipe Summary ✨
Irish Whiskey Marshmallows: Light, fluffy homemade marshmallows infused with smooth Irish whiskey for a grown-up treat with a gentle (or bold!) kick. Perfect for Irish coffee, gifting, or celebrating St. Patrick's Day.
Balanced flavor & texture: Blooming the gelatin with whiskey ensures even flavor throughout, while cooking the syrup to 238°F and whipping fully creates that soft, cloud-like texture. Includes step-by-step instructions, tips, and troubleshooting guidance for success.
Active Time: about 30 minutes • Dry Time: at least 4 hours (or overnight) • Total Time: about 4½ hours
Difficulty Level: ⭐⭐⭐ Medium. Candy thermometer required, but the process is straightforward with clear visual cues.
Yield: About 64 (1-inch) marshmallows • Gluten-free: Naturally • Storage: 1 month airtight at room temp or freeze up to 3 months.
👉 Follow the detailed instructions and troubleshooting tips below to make perfectly fluffy Irish Whiskey Marshmallows every time. 🥃✨
SUMMARIZE & SAVE THIS CONTENT ON
Why this recipe works
- Homemade marshmallows are light and fluffy when fully whipped
- You can control the alcohol level from a subtle warmth to a bold kick
- Irish Whiskey is added directly to the gelatin so the flavor is evenly distributed, imparting lots of flavor to the marshmallows
- Simple ingredients mean clean flavor and better texture than store-bought
Homemade marshmallows are one of those candy confections that would seem hard to make, but is actually quite easy, like tahini halva or pecan pralines.
How easy is it to make homemade marshmallows? Easier than you think! At its essence, marshmallows are just a sugar syrup firmed up with gelatin.
Ok, maybe there's a bit more to it than that.
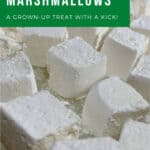
These Irish whiskey marshmallows are light, fluffy, and pack a punch. They're for adults-only (the non-expecting kind).
I'll be making more marshmallows now that I know how easy they are, and I hope you will, too!
⭐⭐⭐⭐⭐
5 gold stars!
- Shira
Recipe Ingredients
You'll need the following ingredients to make this whiskey-spiked homemade marshmallows recipe:
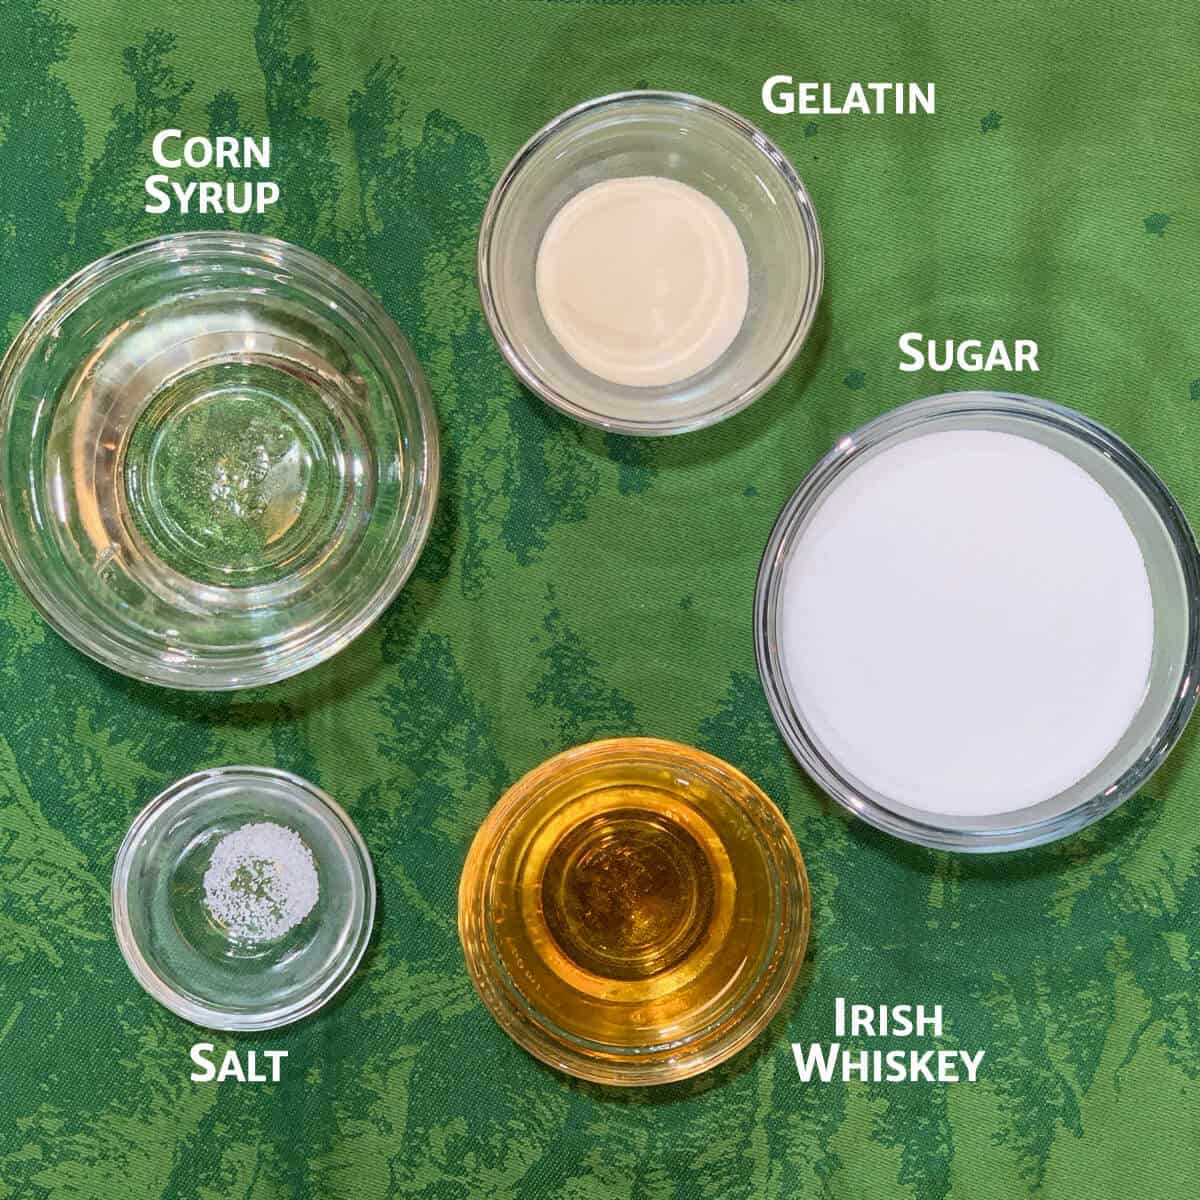
Ingredient Notes
Whiskey: Since the Irish whiskey will be prominent (as will its kick!), use what you like to drink. You're not using a lot of whiskey, so you can experiment with higher end brands, like Kilbeggan, for more flavor. Or, use your favorite scotch, whiskey, bourbon or liqueur instead.
You can adjust the amount of whiskey you use up or down to suit your taste as long as you adjust the amount of water by the same amount. If you want kid-friendly homemade marshmallows, substitute juice or water for the spirits. Flavor the marshmallows with 1 teaspoon of vanilla extract or ¼ teaspoon of another extract flavor after all the whipping is done.
Gelatin: Makes the sugar syrup set up. I use Knox unflavored gelatine.
Corn syrup: In addition to adding more sweetness, corn syrup helps to stabilize the sugar as it's being heated. Can you make marshmallows without corn syrup? Check out my comments in the FAQs.
You can substitute honey, maple syrup, or golden syrup for the corn syrup. Each will leave its subtle flavor on the finished product, and you can use it to enhance the whiskey's flavor profile.
Powdered sugar: The powdered sugar isn't so much for sweetness as it's to help keep the cut marshmallows from sticking to each other...the counter...your fingers. Since you'll be eating it, it's better to dust with powdered sugar than flour in this instance, wouldn't you agree?
See the recipe card for a full list of ingredients and measurements.
Whiskey pairing guide for marshmallows
Not all whiskeys taste the same. While I'm using Irish Whiskey for this recipe, the type of spirit you choose will flavor your marshmallows differently. Here's an overview of different whiskey characteristics and how best to use them, and you can click the links to read my tasting notes for individual expressions:
- Irish Whiskey: Smooth & mellow; Typically can have light vanilla, honey, and soft grain notes.
👉 Best for classic Irish coffee and crowd-pleasing flavor. - Single Malt Scotch: Rich & layered; Depending on the Scottish distillery region, you can get sweet, heather, and floral flavors to a more marine influence.
👉 Ideal if you want the whiskey flavor to stand out more boldly. - Bourbon: Sweet & caramel-forward; Broadly speaking, you can have brown sugar sweetness and toasted oak with other grains peeking out.
👉 Makes marshmallows taste almost crème brûlée-like, wonderful in hot chocolate. - Rye Whiskey: Spicy & lively; Rye adds peppery and caraway notes, while the other grains used in the blend can present their individual flavors, slightly dry finish.
👉 Great for balancing sweetness and adding a subtle kick. - Peated Scotch & Whiskey: Smoky & dramatic; If you love peat, then using this smoky, earthy, campfire vibes (from the beach or from the forest) will add lots of flavor.
👉 For adventurous palates, amazing toasted over a flame or melted into coffee.
How to make homemade marshmallows
There are four easy steps to making a homemade marshmallow recipe.
The hardest part is having the patience to let the sugar syrup get to temperature, whipping the mixture for enough time, and letting the marshmallows dry completely.
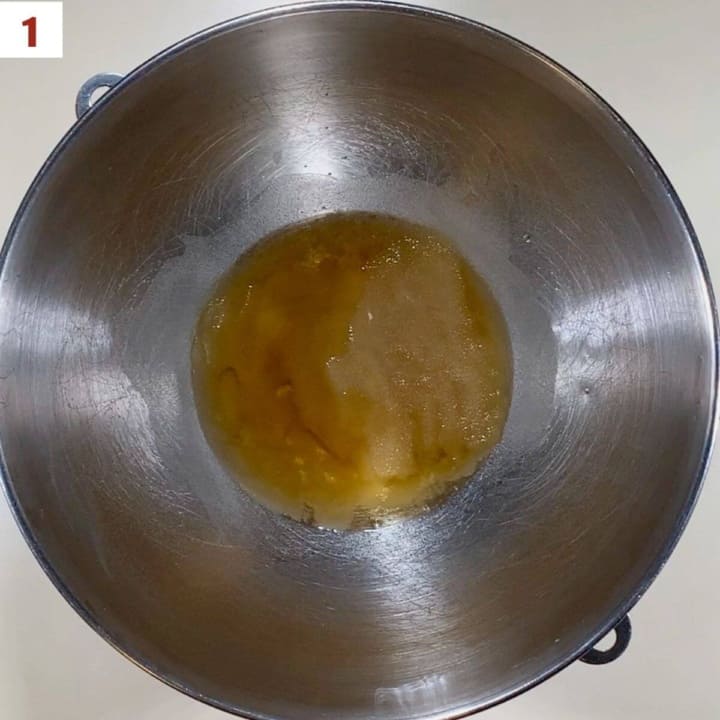
Step 1: Bloom the gelatin
All this means is to let the unflavored gelatin get thoroughly hydrated. Just sprinkle it over a liquid, in this case a 50/50 mix of water and Irish whiskey (photo 1). Make sure all the gelatin gets wet (you don't want a dry gelatin "island" floating around).
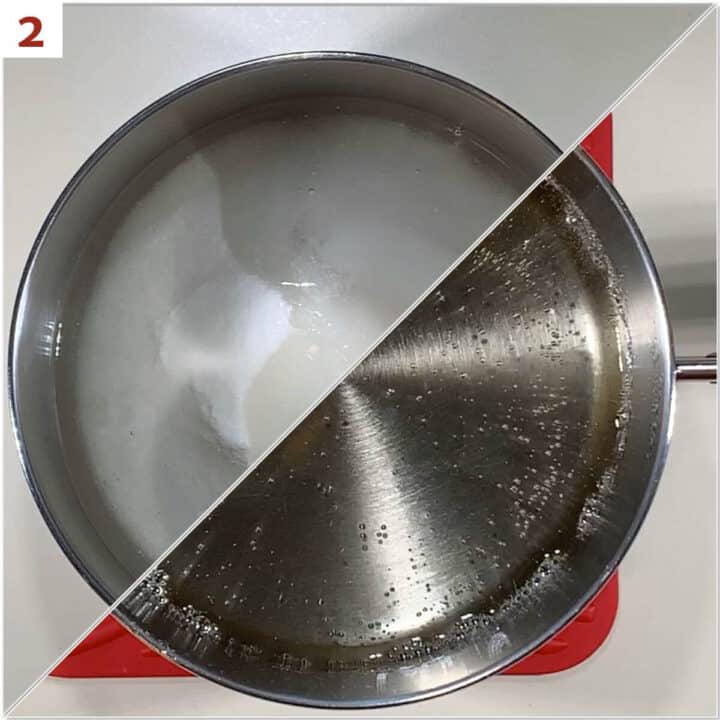
Step 2: Make the sugar syrup
In a 3-quart saucepan, heat the remaining ½ cup water, sugar, corn syrup, and salt over medium-high heat and stir until the sugar is dissolved (photo 2).
Using a digital thermometer (or a candy thermometer), bring the syrup to a boil without stirring until it reaches 238 °F (soft-ball stage).
It takes about 20 minutes to get to the proper temperature. Remove from heat.
How to avoid the sugar crystalizing
DO NOT STIR the sugar mixture while you're caramelizing the sugar! You don't want to introduce any impurities that can cause the mixture to crystalize (that is, seize up and harden). Instead, washing down the sides of the pan with a wet pastry brush also helps to minimize that risk.
If the sugar does end up crystalizing during the melting stage, add some water with 1 to 2 tablespoons of corn syrup to soften the sugar crystals, then cook the mixture again until it reaches the correct temperature.
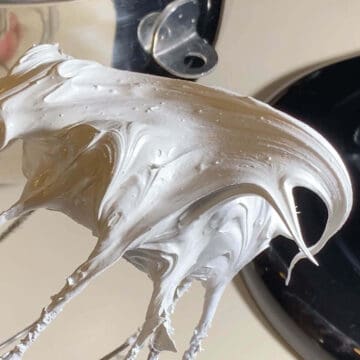
Step 3: Whip syrup and gelatin mixture
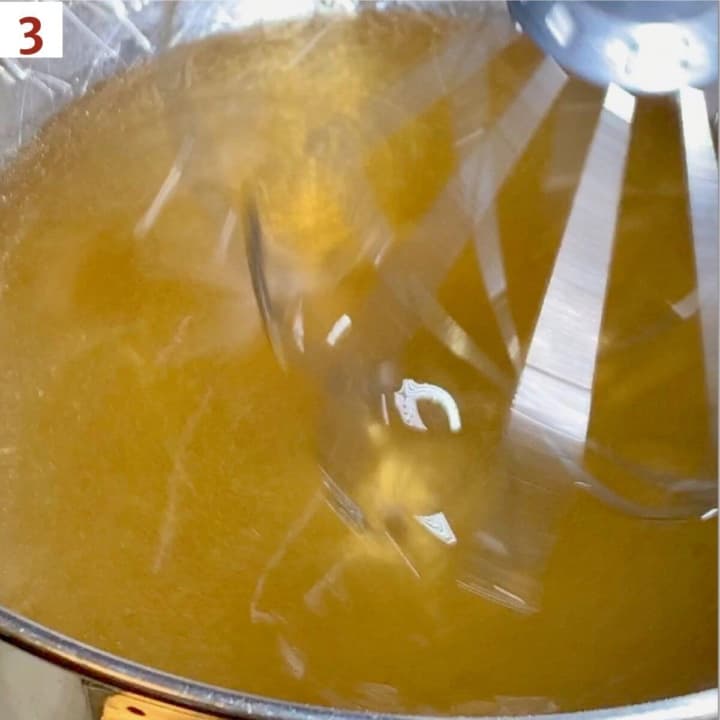
Turn on the mixer to low to mix the gelatin for a few seconds. With the mixer running, slowly pour the hot sugar syrup in a thin stream down the side of the bowl (photo 3).
Be careful - you don't want to have any splashes. This is a good time to use a splash guard if you have one.
Whip the sugar syrup into the gelatin/liquid mixture until it's really fluffy, about 10 to 12 minutes. When properly whipped, the mixture will be thick and will slowly slump back into the bowl when the beater is lifted (photo 4).
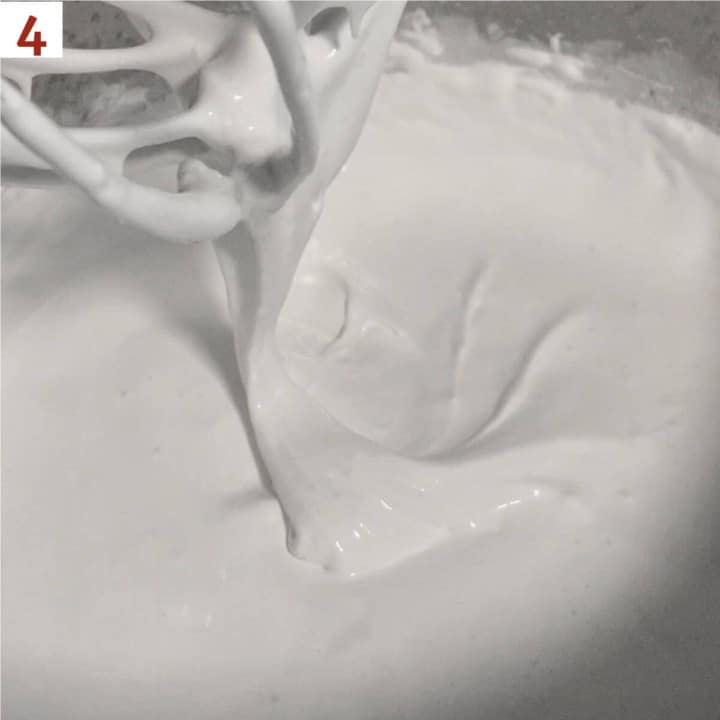
Whip the marshmallows thoroughly
Don't be tempted to stop the whipping early - whip for the full 10 to 12 minutes! There are consequences, as I discovered.
Step 4: Dry and cut the marshmallows
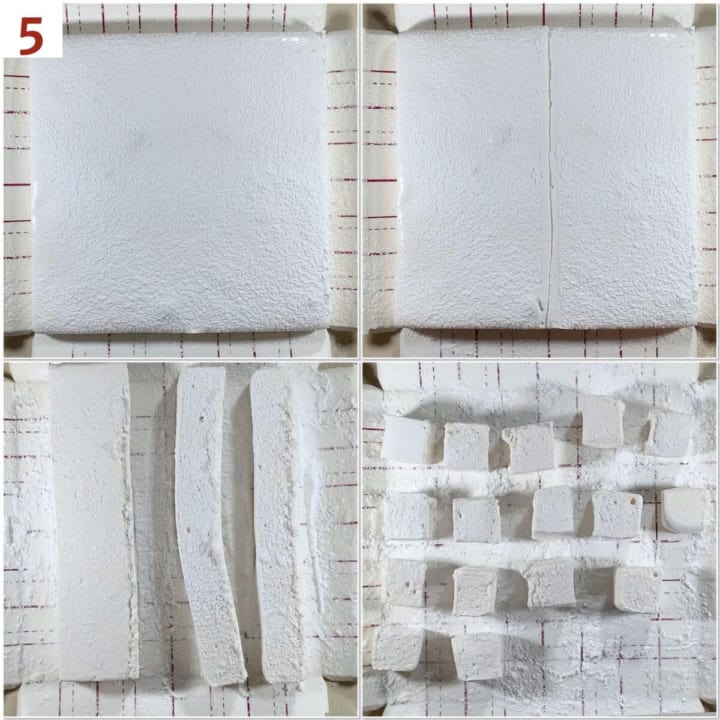
Pour the mixture into an 8- x 8-inch collapsible pan that's been sprayed with canola oil spray (or brushed on using a pastry brush) and dusted generously with powdered sugar. You can smooth the surface with a small offset spatula. Sift a generous layer of powdered sugar on top.
Allow the marshmallow to dry on the counter, uncovered, for at least 4 hours. You want it to pull away cleanly from the sides of the pan when you gently tug it with your fingers. If you have the time, allow the marshmallows to dry overnight.
Make marshmallows in the pan you have
If you don't have an 8- x 8-inch collapsible pan, line an 8- x 8-inch baking pan with parchment paper, leaving a 2-inch overhang. Spray lightly with canola oil spray (or brush on using a pastry brush), then sift generously with powdered sugar. When you're ready to cut the marshmallow block, lift it from the pan using the parchment overhang and place on a cutting board dusted with powdered sugar.
When you're ready to cut the marshmallows, open the sides of the collapsible pan. Use the guides on the pan to cut the block into 1-inch squares with a plastic pizza cutter (mine came with the pan), a regular pizza cutter, or a chef's knife (photo 5).
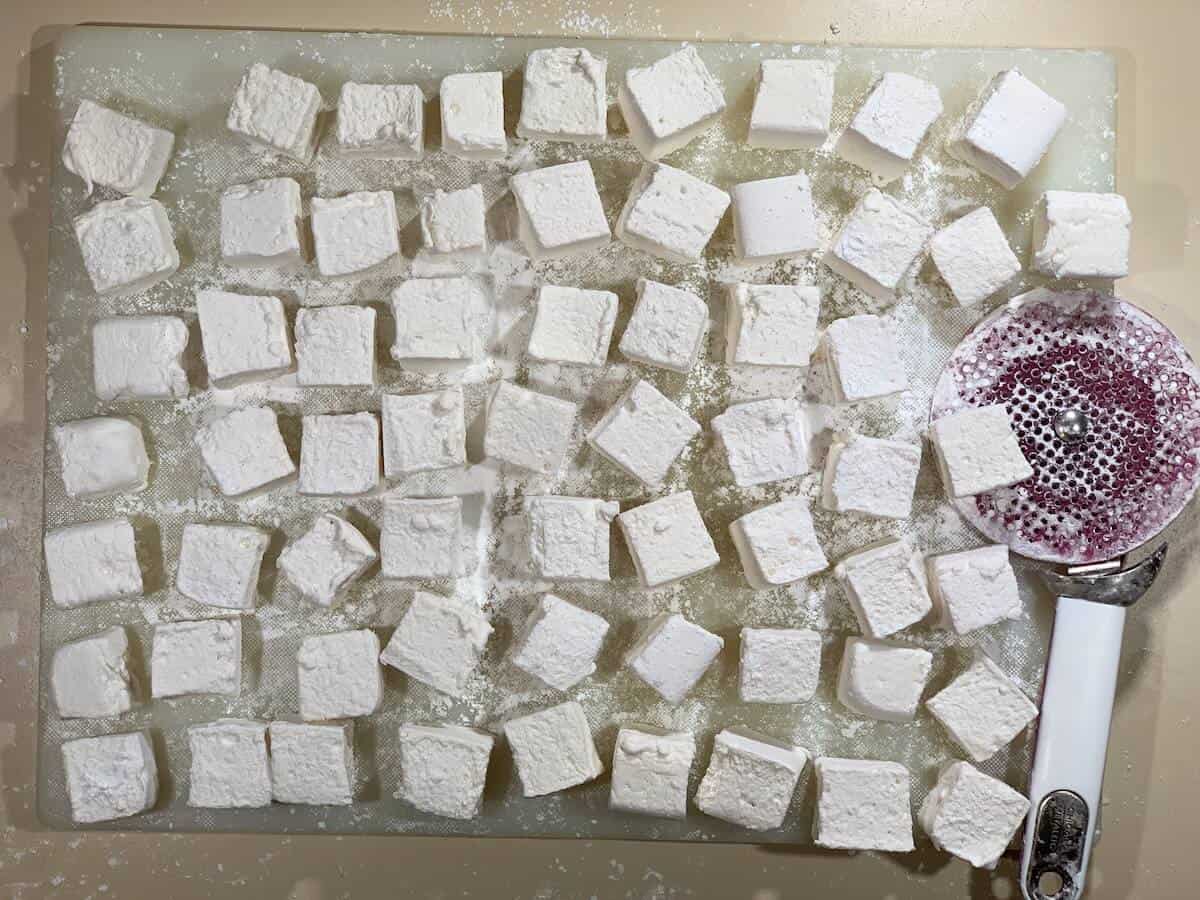
If you're using a metal cutter or knife, wipe it with canola oil and dust it with powdered sugar repeating as necessary to keep it from sticking to the marshmallow block as it's being cut.
Storage instructions
Marshmallows can be stored layered between sheets of wax paper or parchment in an airtight container in a dry place at cool room temperature, for 1 month. They can also be frozen for up to 3 months.
Marshmallow troubleshooting guide
Improperly cooking the sugar syrup and not whipping the marshmallow base are the most likely ways that you can go wrong:
- Marshmallows are flat and dense or too chewy: The base wasn't whipped long enough. Make sure to whip for 10 to 12 minutes until it's thick, glossy, and slowly slumping off the beater.
- Mixture won't set: The sugar syrup didn't reach 238°F (soft-ball stage). Use a digital or candy thermometer and pay attention to cooking syrup to exactly 238°F.
- Grainy texture: The sugar crystallized during cooking. DO NOT STIR the syrup while it's cooking, and wash down the sides of the pot to eliminate possible contaminants.
Uses for Irish Whiskey marshmallows
There are lots of reasons to make these marshmallows. Here are a few ideas:
- Eat these adult-only treats out of hand
- Make them into rice krispy treats
- Make them into brownies
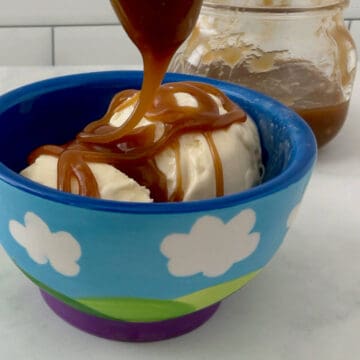
- Put a couple Irish whiskey marshmallows in a cup of coffee for the best Irish coffee you've ever had. It's the best way to celebrate St. Patrick's Day!
- Naturally gluten-free, homemade Irish whiskey marshmallows are perfect for the Spring holidays of Easter and Passover (maybe strawberry flavored?)
- Have fun with shapes and flavors!
Questions asked and answered
Here are some questions that you might have...
Yes, there are many recipes for making vegan marshmallows, like this one from Taste of Home. Since gelatin is an animal derivative, Agar powder is used instead. However, I readily admit that I'm not vegan (say it ain't so!), so I haven't tried it myself. If you do go that route, please let me know how it goes in the comments below.
First, let me say that corn syrup and high fructose corn syrup are not the same thing, as this article from The Kitchn says.
The reason for including corn syrup is to help stabilize the sugar as it's being heated to the soft-ball stage temperature (238°F). It's the same reason for including it when making caramel sauce and as a way to recover sugar syrup that has crystalized during heating.
That being said, you can substitute honey, maple syrup, or golden syrup for the corn syrup. Each will leave its subtle flavor on the finished product, and you can use it to enhance the whiskey's flavor profile.
You can adjust the amount of whiskey you use in the marshmallows up or down to suit your taste, as long as you adjust the amount of water by the same amount. If you want to make these homemade marshmallows kid-friendly (or you're avoiding alcohol), I've got you covered - just substitute juice or water for the spirits. Flavor the marshmallows with 1 teaspoon of vanilla extract or ¼ teaspoon of another extract flavor after all the whipping is done.
You want to make sure you whip enough air into your whiskey marshmallows, otherwise they come out more chewy than fluffy. On my first attempt I only whipped the mixture for 6 minutes, and they came out flat. Be patient - whip, whip, and whip some more!
Didn't find the answer you're looking for?
Ask AI to answer for this specific recipe:
Disclaimer: I am not responsible for the quality of AI information

I hope you like this recipe! Let me know if you have any questions, and don't forget to leave a comment and rating. Thanks!
Slainté! L'chaim! Cheers!
- Tammy
More recipes with spirits to try
Recipe

Homemade Irish Whiskey Marshmallows
Equipment
Ingredients
- ¼ cup Irish whiskey, see Recipe Notes
- ¾ cup water, cold, divided
- 3 ¼-ounce envelopes unflavored gelatin powder
- 1½ cups sugar
- 1 cup light corn syrup
- ⅛ teaspoon kosher salt
- powdered sugar, as needed for dusting
Instructions
- Lightly grease an 8- x 8-inch collapsible pan with canola oil spray (or brush on using a pastry brush), then use a sifter to dust generously with powdered sugar, shaking off the excess. Set aside.
- In the bowl of a stand mixer fitted with the whisk attachment, combine ¼ cup Irish whiskey and ¼ cup water. Sprinkle 3 ¼-ounce envelopes unflavored gelatin powder over the liquid and let it sit while you make the sugar syrup. Make sure all the gelatin gets wet (you don't want a dry gelatin "island" floating around).
- In a 3-quart saucepan, heat the remaining ½ cup water, 1½ cups sugar, 1 cup light corn syrup, and ⅛ teaspoon kosher salt over medium-high heat and stir until the sugar is dissolved. Using a digital thermometer (or a candy thermometer), bring the syrup to a boil without stirring until it reaches 238 °F (soft-ball stage). It might foam up, so lower the heat if necessary. It takes about 20 minutes to get to the proper temperature. Remove from heat.
- Turn on the mixer to low to mix the gelatin for a few seconds. With the mixer running, slowly pour the hot sugar syrup in a thin stream down the side of the bowl. Be careful - you don't want to have any splashes. This is a good time to use a splash guard if you have one.
- Once all the syrup has been added to the bowl, gradually turn the mixer up to High, and whip for 12 minutes. Don't be tempted to whip for less time - you need a lot of air whipped into the mixture to achieve that lofty marshmallow texture. When properly whipped, the mixture will be thick, and will slowly slump back into the bowl when the beater is lifted.
- Pour the mixture into the prepared pan. You can smooth the surface with a small offset spatula. Sift a generous layer of powdered sugar on top.
- Allow the marshmallow to dry on the counter, uncovered, for at least 4 hours. You want it to pull away cleanly from the sides of the pan when you gently tug it with your fingers. If you have the time, allow the marshmallows to dry overnight.
- When you're ready to cut the marshmallows, open the sides of the collapsible pan. Use the guides on the pan to cut the block into 1-inch squares with a plastic pizza cutter (mine came with the pan), a regular pizza cutter, or a chef's knife. If you're using a metal cutter or knife, wipe it with canola oil and dust it with powdered sugar repeating as necessary to keep it from sticking to the marshmallow block as it's being cut.
- Cut the block lengthwise into 8 strips, then crosswise into 8 pieces, to form a total of 64 squares. (For larger marshmallows, cut lengthwise into 6 strips, then crosswise into 6 pieces, to form a total of 36 squares. Or you can make fun shapes with cookie cutters dusted with powdered sugar.) Dust the cut sides of the marshmallows with additional powdered sugar as you go. All the sides should be well coated and not sticky.
- Eat these adult-only marshmallows out of hand, made into S'mores, baked into brownies, or put a couple in a cup of coffee for the best Irish coffee you've ever had. Enjoy!
- Storage instructions: Marshmallows can be stored layered between sheets of wax paper or parchment in an airtight container in a dry place at cool room temperature, for 1 month. They can also be frozen for up to 3 months.


CLARKE SIMM says
I tried the recipe using Clan Fraser reserve Scotch Whisky instead of Irish. Quite tasty but not so good in coffee. We made another batch using Jamisons which was outstanding. Imagine passed out with crumbs on our faces! Bottom line, stay with the Irish.
Tammy says
Hi Clarke, I appreciate you giving the recipe a couple of tries! I'm glad you liked your results. Thanks for sharing! 🙂
Emily Jelassi says
These marshmallows are very similar to my recipe! Yes! I don't understand why people think making marshmallows at home is difficult. As long as you have a stand mixer or hand whisk, it's one of the easiest things that I make every year! Because I can't have corn, I use Lyle's golden syrup whenever a recipe calls for corn syrup. And I also primarily use vanilla paste; it just has an extra vanilla kick from the seeds and extract. Thank you for the great idea of adding a liqueur to the marshmallows... I wouldn't have ever thought of that!
Shira says
5 gold stars!