
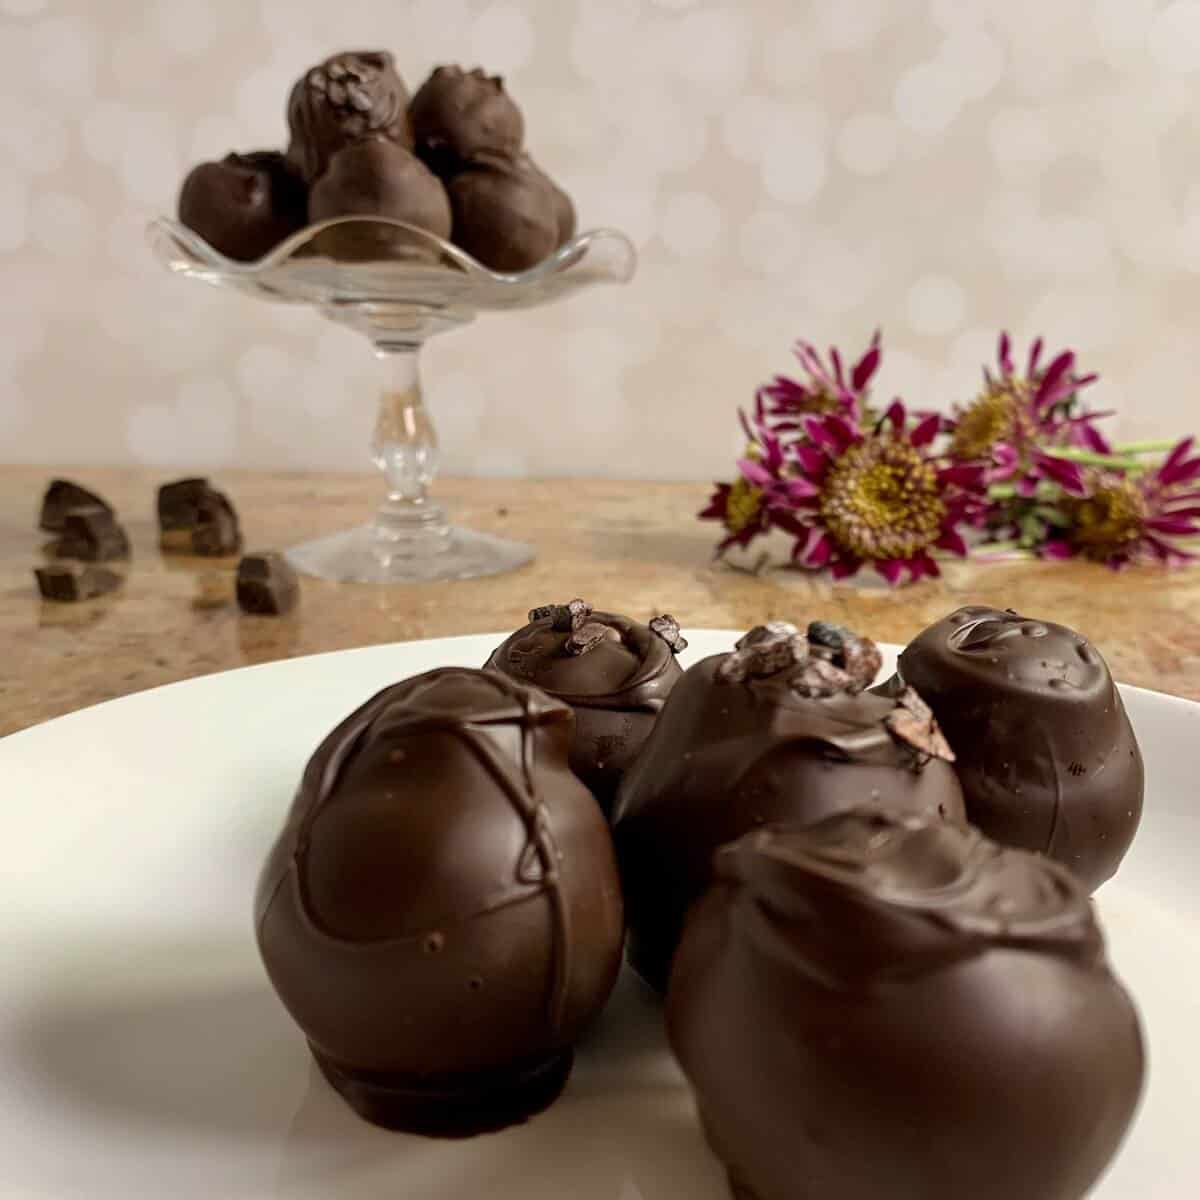
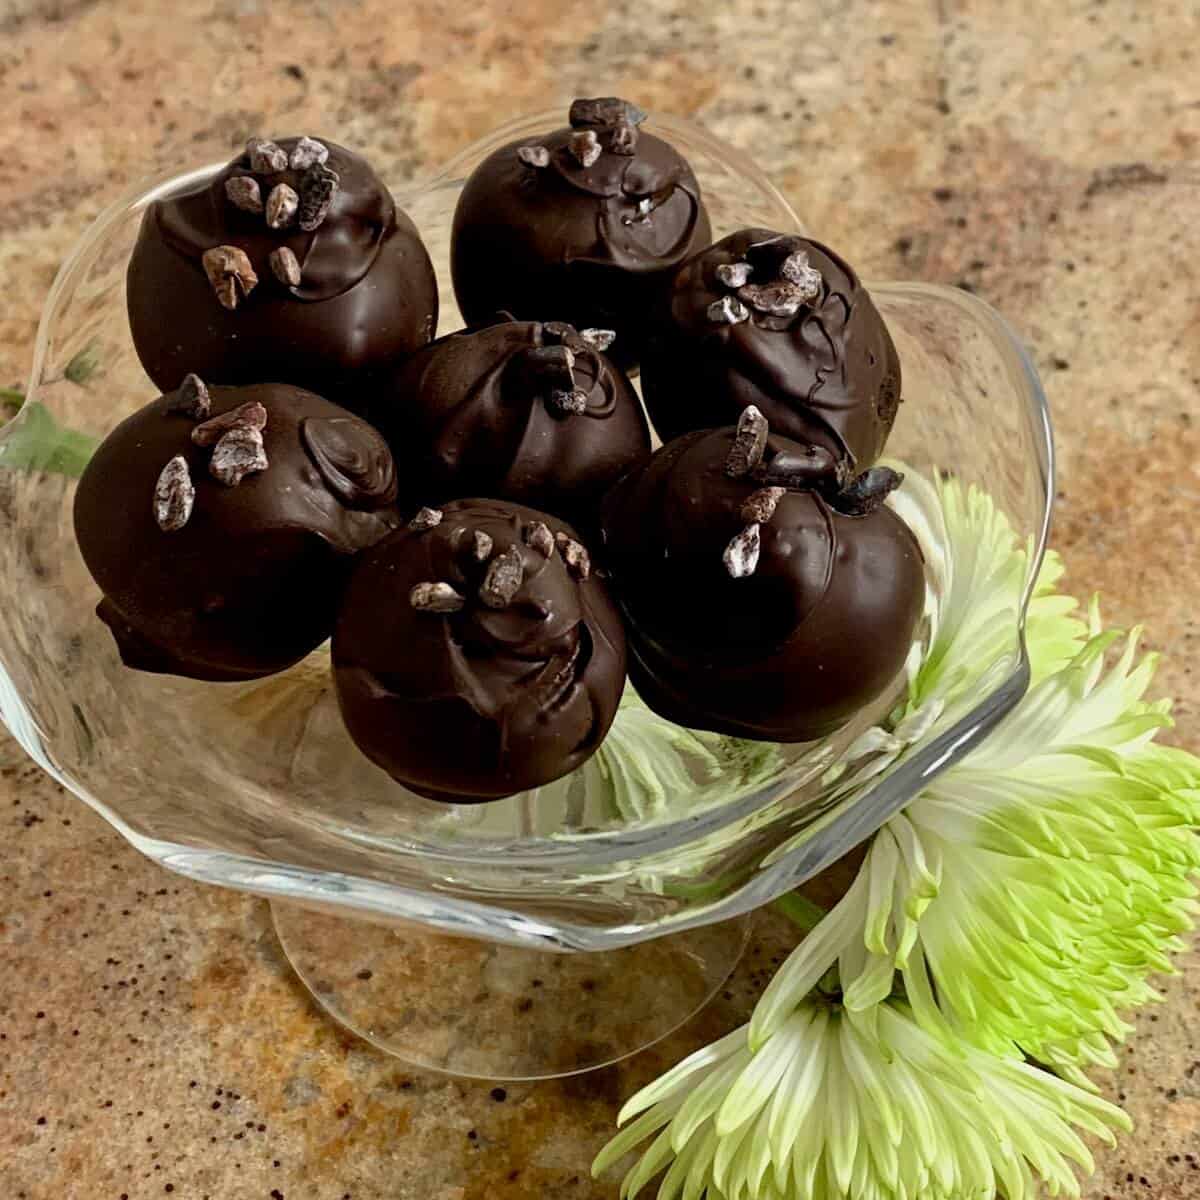
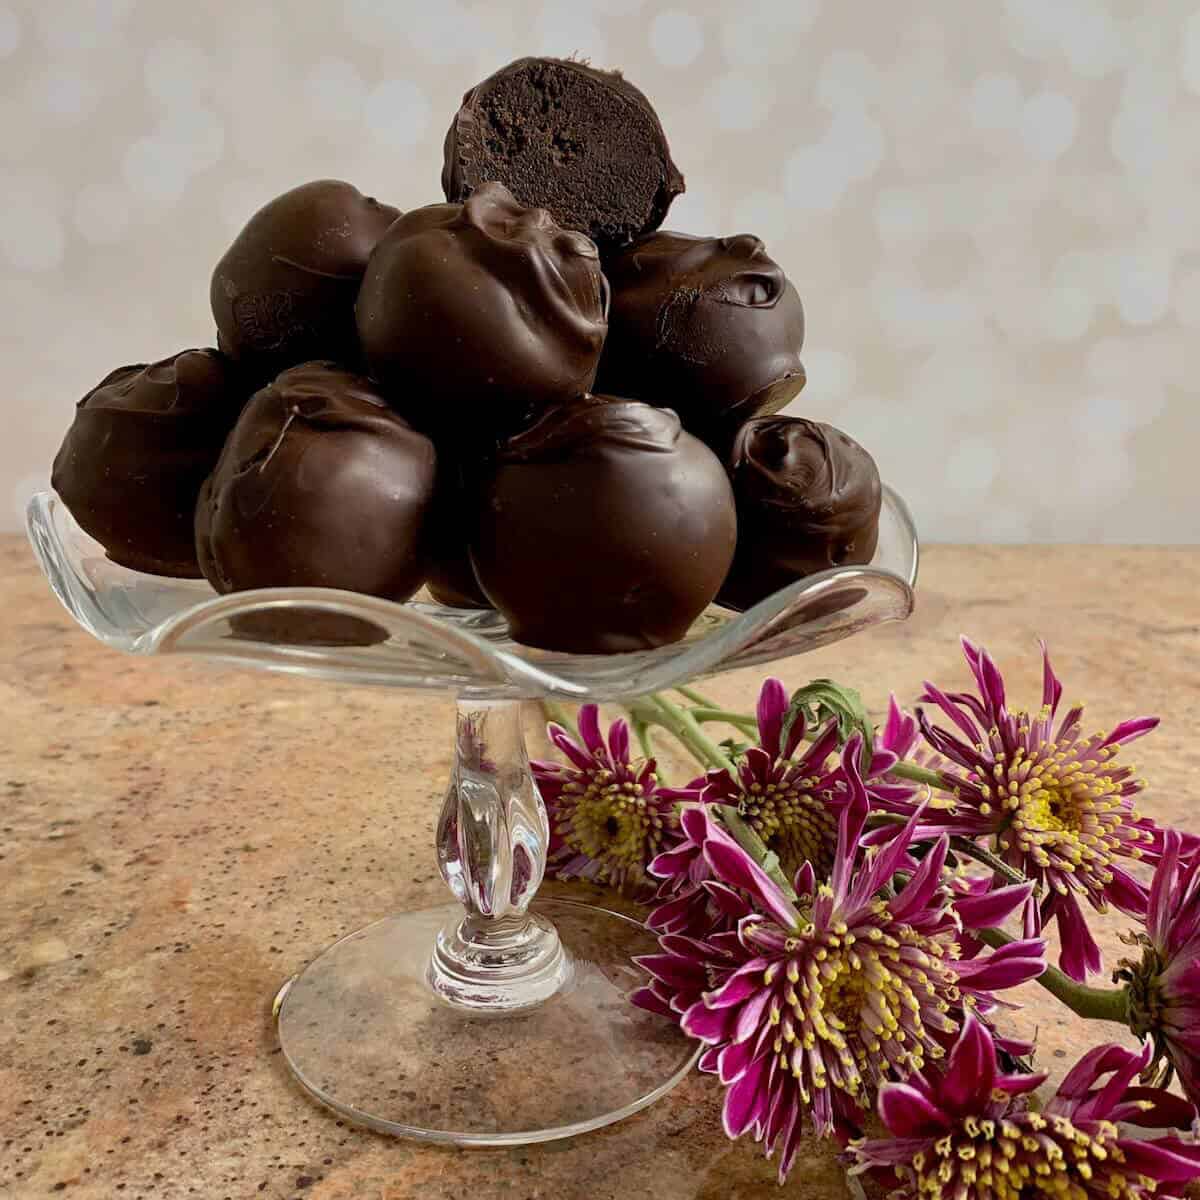
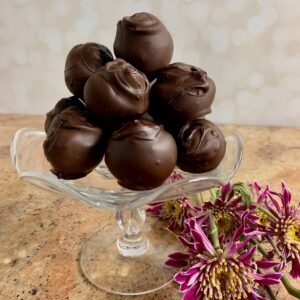
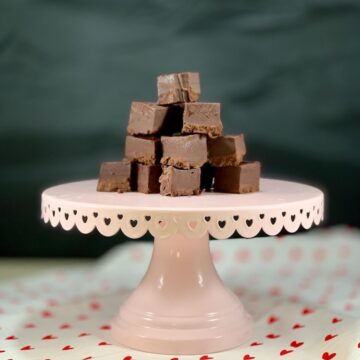
Chocolate Cake Truffles are rich, bite-sized bits of chocolate cake mixed with chocolate buttercream frosting and drenched in pure chocolate. These truffles are perfect for Valentine's Day, Date Night, or any special celebration, and can be made into Chocolate Cake Pops, too!

Jump to:
[December, 2021: I've reworked the recipe and updated this post with all new pictures. Enjoy!]
Why this recipe works
- Easy to make chocolate cake and chocolate buttercream frosting
- The filling is moist and rich, not dry or oily
- Tempering the dark chocolate coating insures professional-level results
What do you get when you mix chocolate cake with chocolate buttercream frosting, then dip the result into melted dark chocolate?
Delicious, rich, bite-sized bits of chocolate goodness, Chocolate Cake Truffles. And if you add a stick, you have Chocolate Cake Pops!
These truffles have a rich chocolate filling surrounded by a satisfying dark chocolate shell. The center is softer than a traditional chocolate truffle made from chocolate ganache.
The chocolate filling's flavor will really be intense if you use dark chocolate cocoa powder in the cake batter and buttercream (as I've done in the ones pictured).
A small bite of chocolate goodness, these truffles are perfect for Valentine's Day, Date Night, Bridal and Baby Showers, or really any special celebration. They're rich, moist, and delicious!
⭐⭐⭐⭐⭐
Yummy!
- Shira
Recipe Ingredients
You'll need the following ingredients to make this chocolate cake truffle recipe:
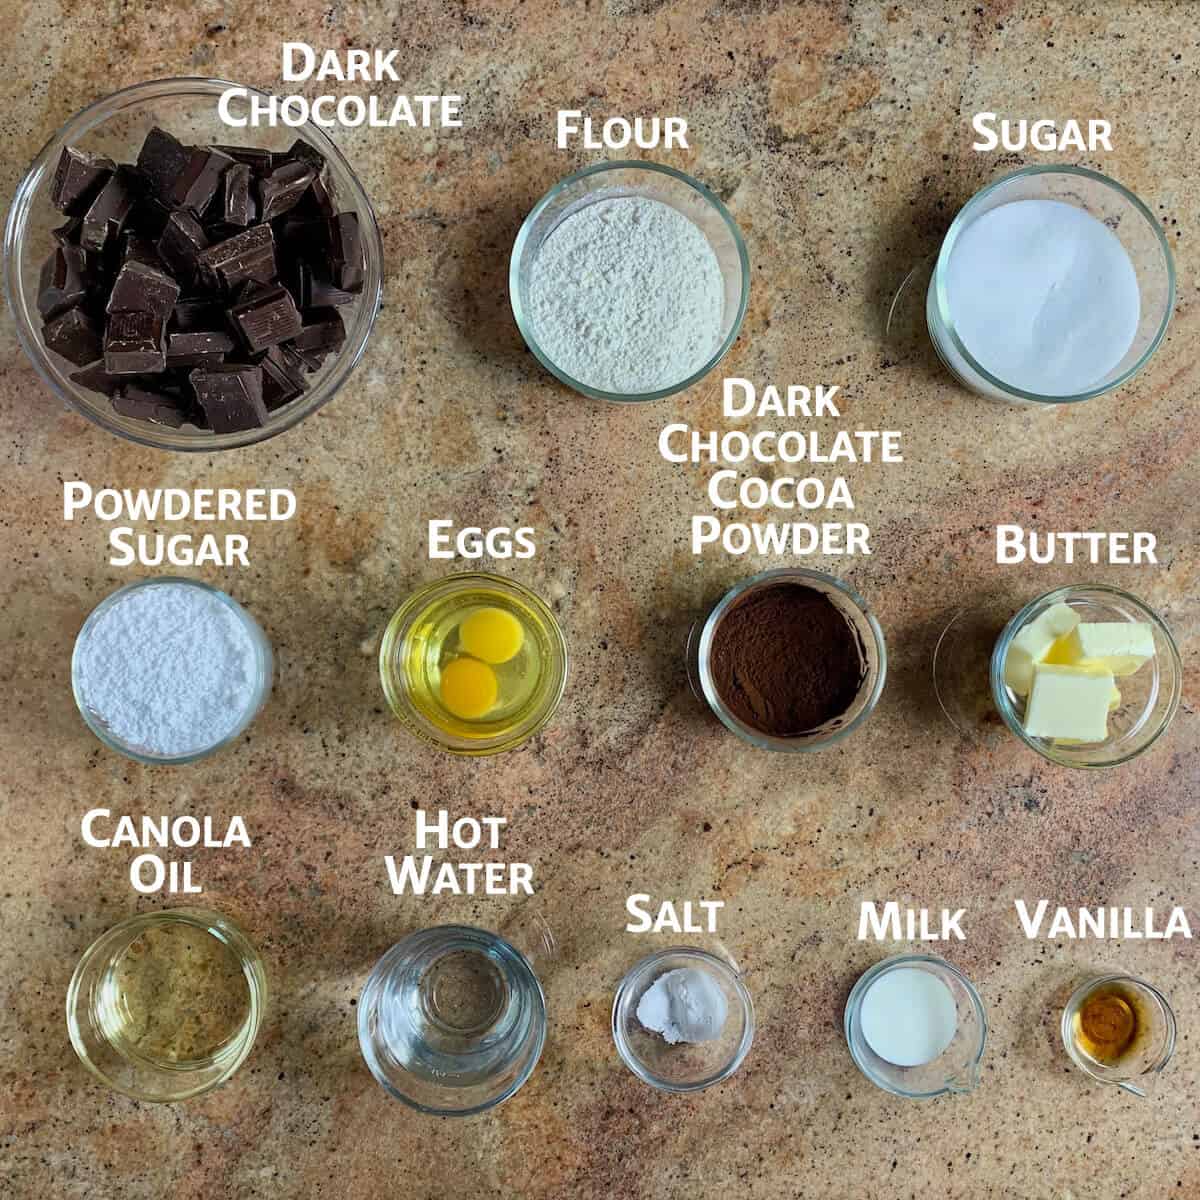
Ingredient Notes
Cocoa powder: You can use any type of cocoa powder you have, natural or Dutch-process (see the discussion below about cocoa powder types and uses). Using dark chocolate cocoa powder intensifies the chocolate flavor of the filling. The hot water helps to "bloom" the cocoa powder, allowing it to dissolve fully in the cake batter.
Chocolate: You can use pure dark, semisweet, or milk, or even white chocolate to coat the cake balls. It's best to temper the chocolate for the coating to get that nice "snap". For a quicker process, you can melt the chocolate down with ½ teaspoon vegetable oil to thin out so it's easier to use as a coating. And for a real shortcut, you can use a candy coating or candy melts (although it won't be in temper).
See the recipe card for a full list of ingredients and measurements.
How to make Chocolate Cake Truffles
A recipe for chocolate cake truffles consists of chocolate cake, chocolate buttercream frosting, and melted (preferably tempered) chocolate.
The actual process is pretty straightforward:
- Make a single layer of chocolate cake
- Make just enough chocolate buttercream frosting so the filling won't be too oily
- Crumble the cake into the buttercream to make the filling
- Form the filling into cake balls
- Dip the chilled cake balls in the chocolate
Sounds simple, right?
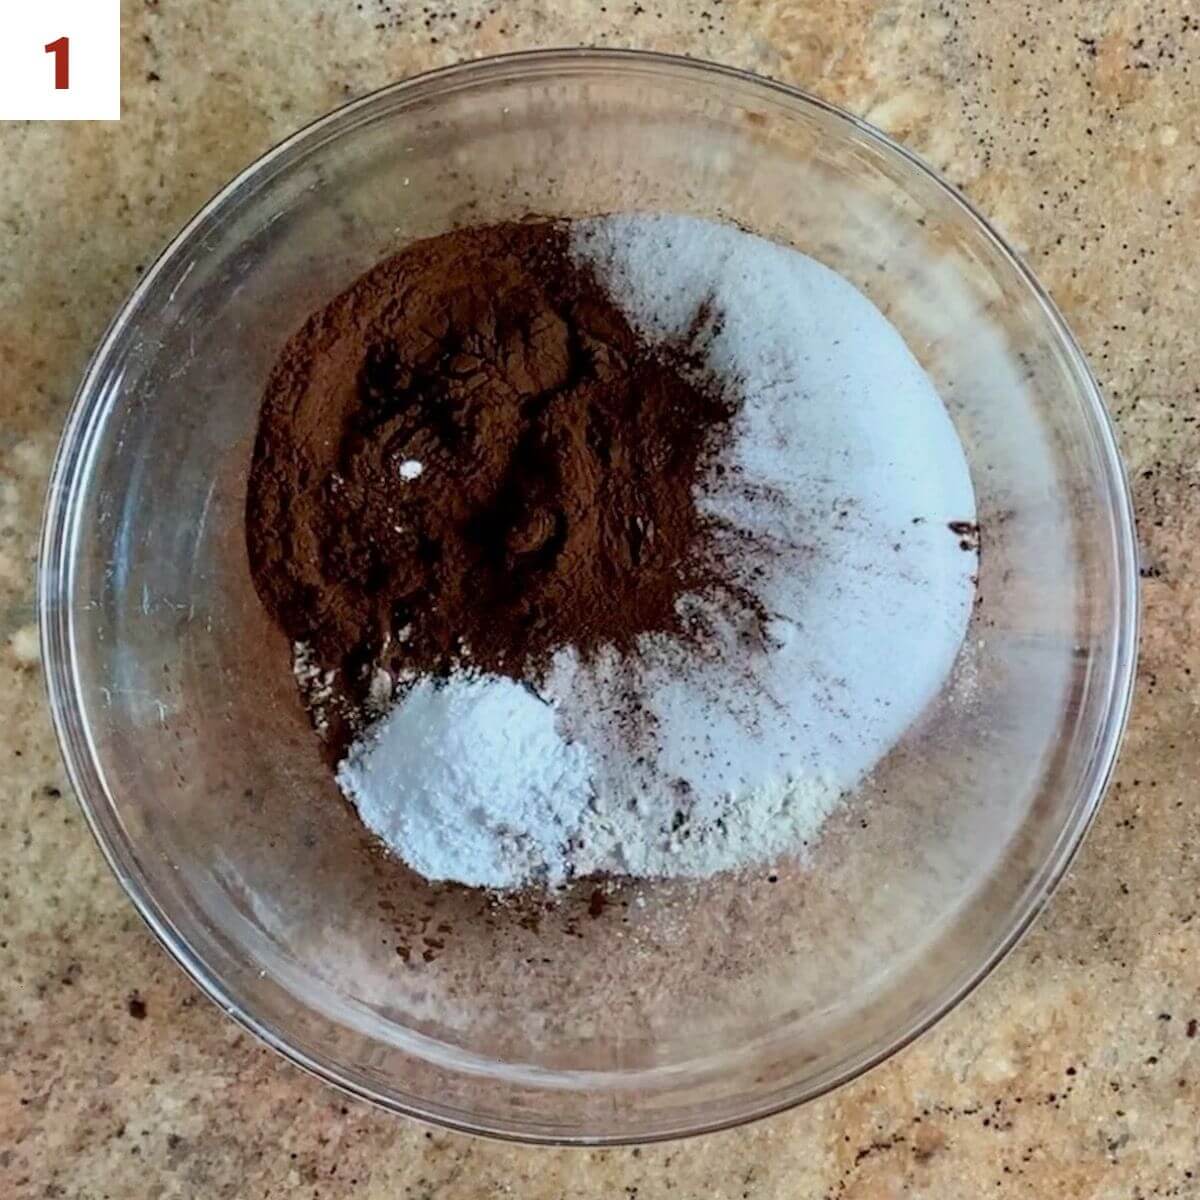
Step 1: Make the cake batter
In a large bowl, whisk together the flour, sugar, cocoa powder, baking powder, and salt (photo 1).
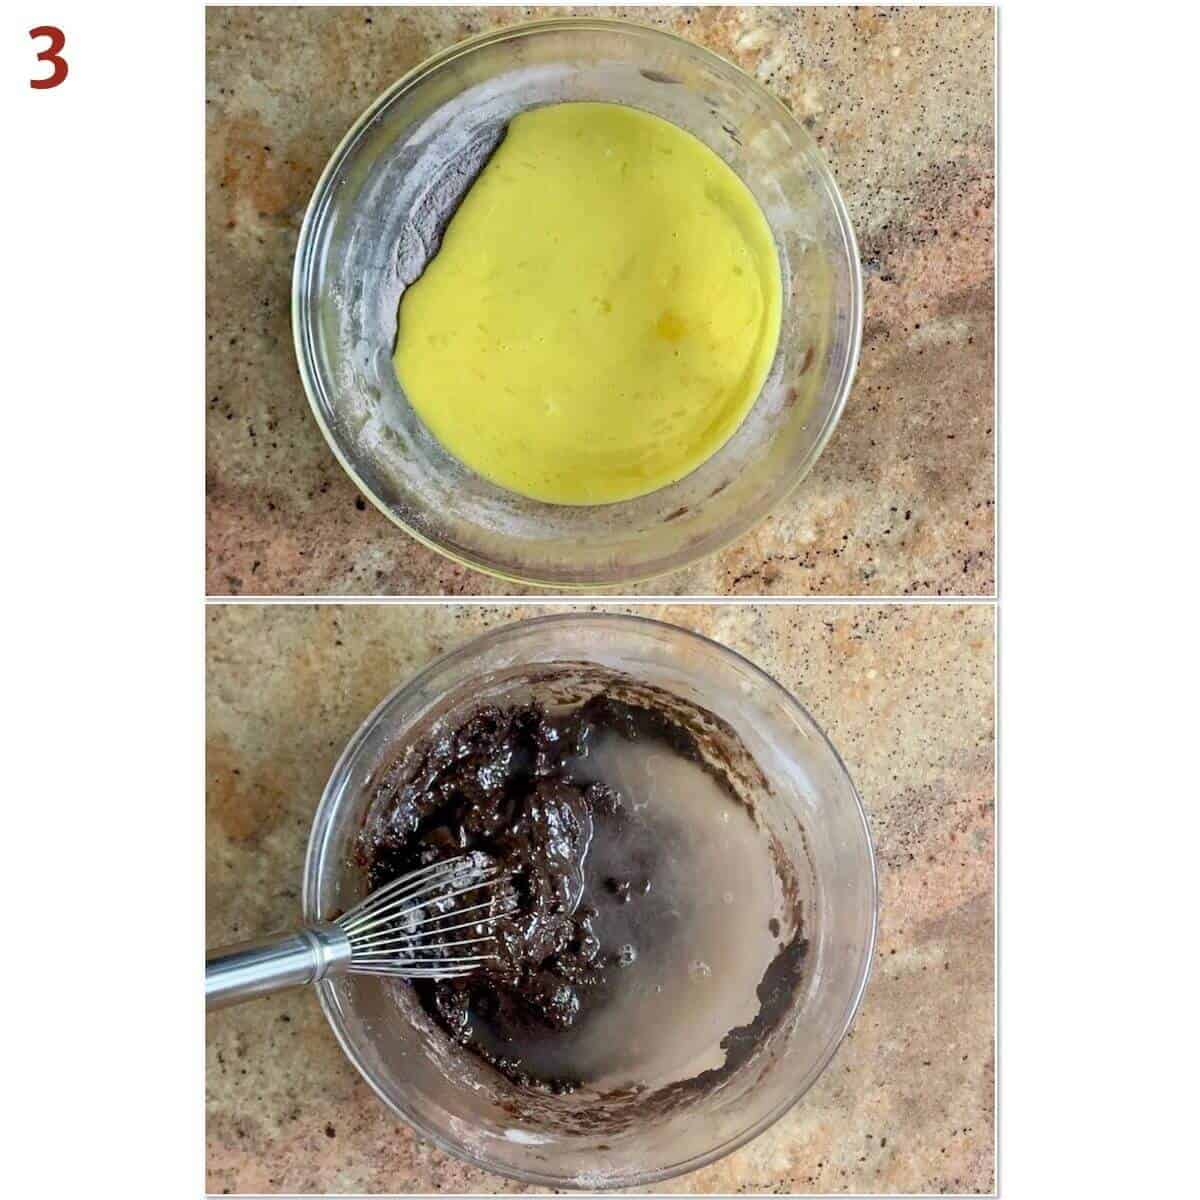
In a medium bowl, whisk together the canola oil, eggs, and vanilla extract (photo 2).

Add the wet ingredients into the dry ingredients and mix well. The batter will be very thick. Add the hot water and whisk again until everything is well combined (photo 3).
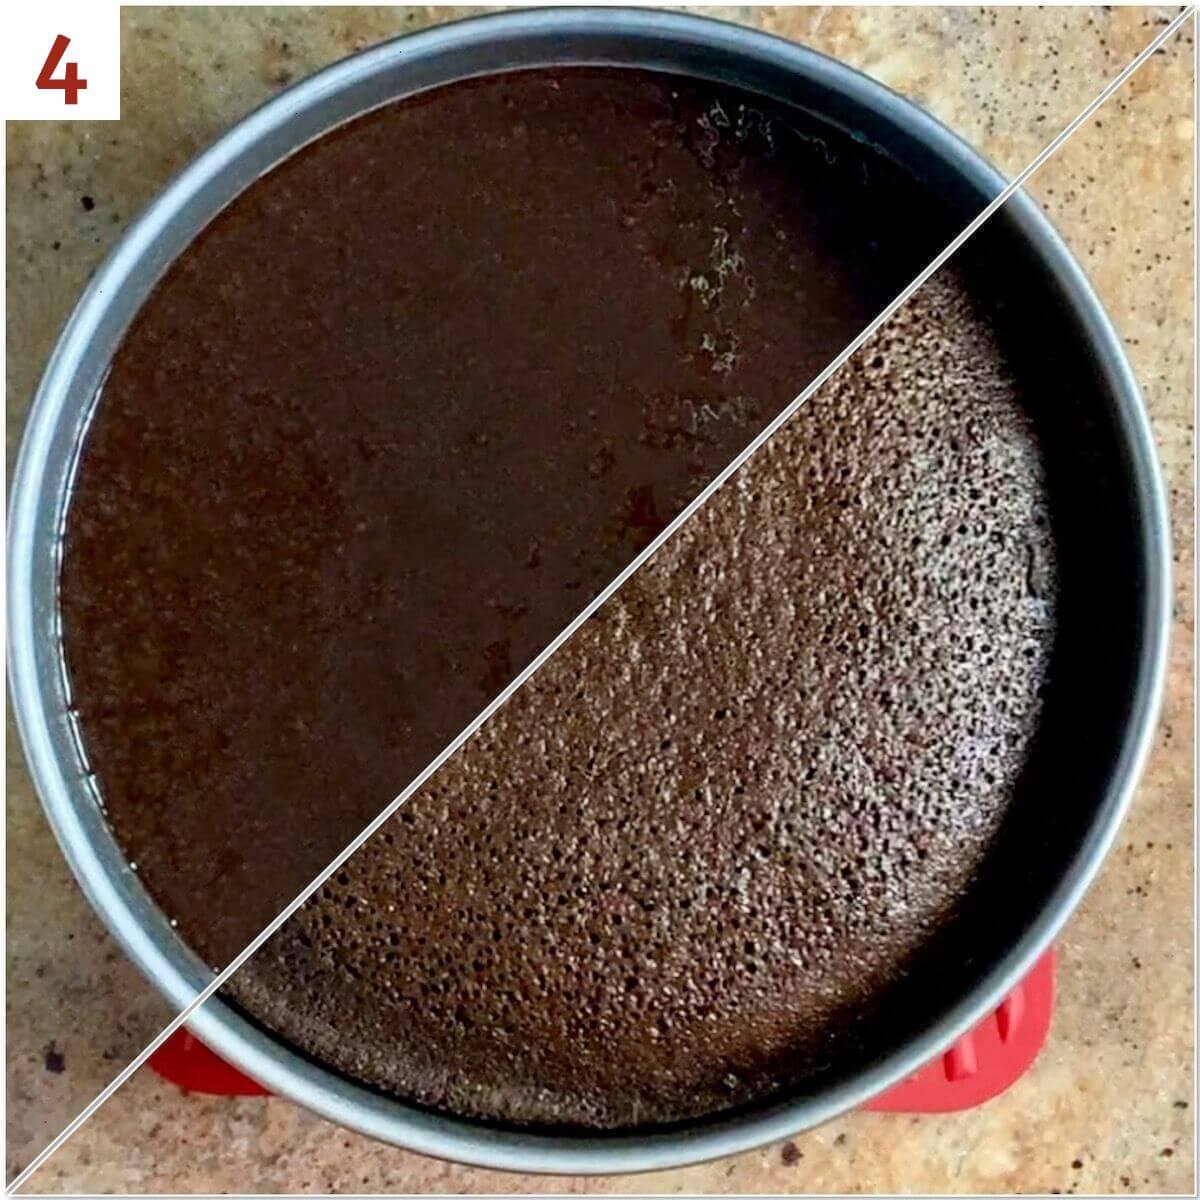
Step 2: Bake the chocolate cake
Pour the batter into a 9-inch round cake pan sprayed with baking spray. Tap the pan on the counter to release any bubbles. You can use also use a 9- x 9-inch baking pan or 9-inch round springform pan if that's what you have on hand.
Bake at 350°F for 25 to 27 minutes or until a toothpick inserted in the center comes out clean (photo 4).
Allow the cake to cool completely while you make the chocolate buttercream frosting (photo 5). A digital thermometer can help.

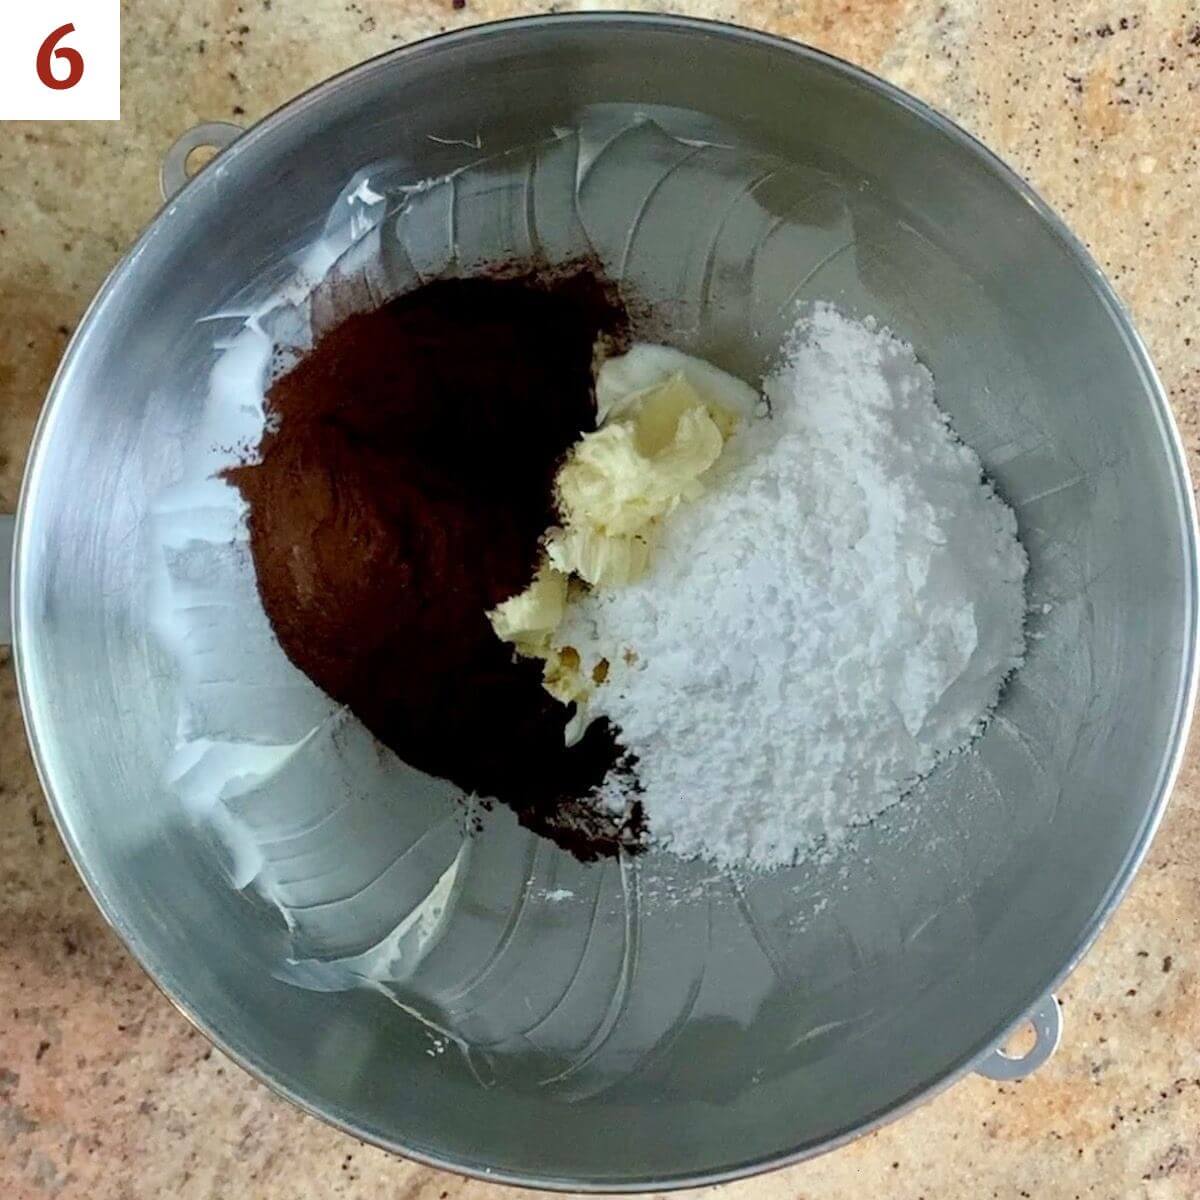
Step 3: Make the chocolate buttercream frosting
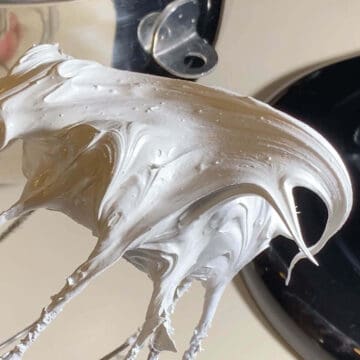
Beat the butter on medium speed until creamy, about 2 minutes. Scrape down the sides of the bowl.
Add the powdered sugar, cocoa powder, 2 teaspoons of milk, and vanilla extract (photo 6). Beat on high speed for 3 minutes until the frosting comes together. Add more milk in 1 teaspoon increments if the frosting looks too thick.
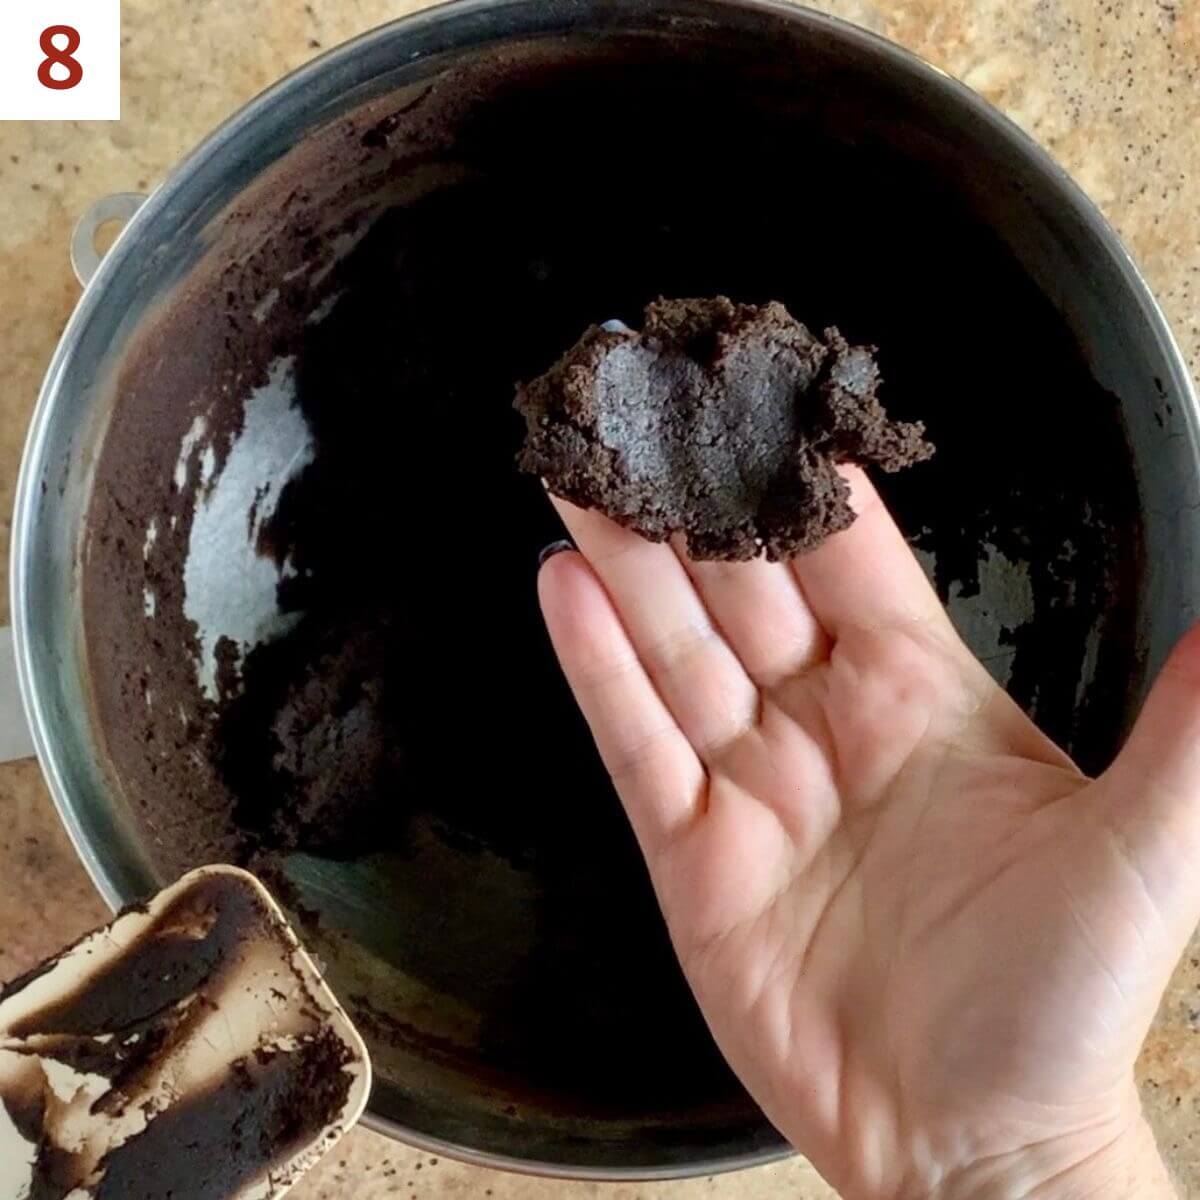
Step 4: Make the cake ball filling
Crumble the cooled cake into the frosting, making sure there are no large cake lumps. Turn the mixer to low and mix the frosting and cake crumbs together until everything is well combined (photo 7).
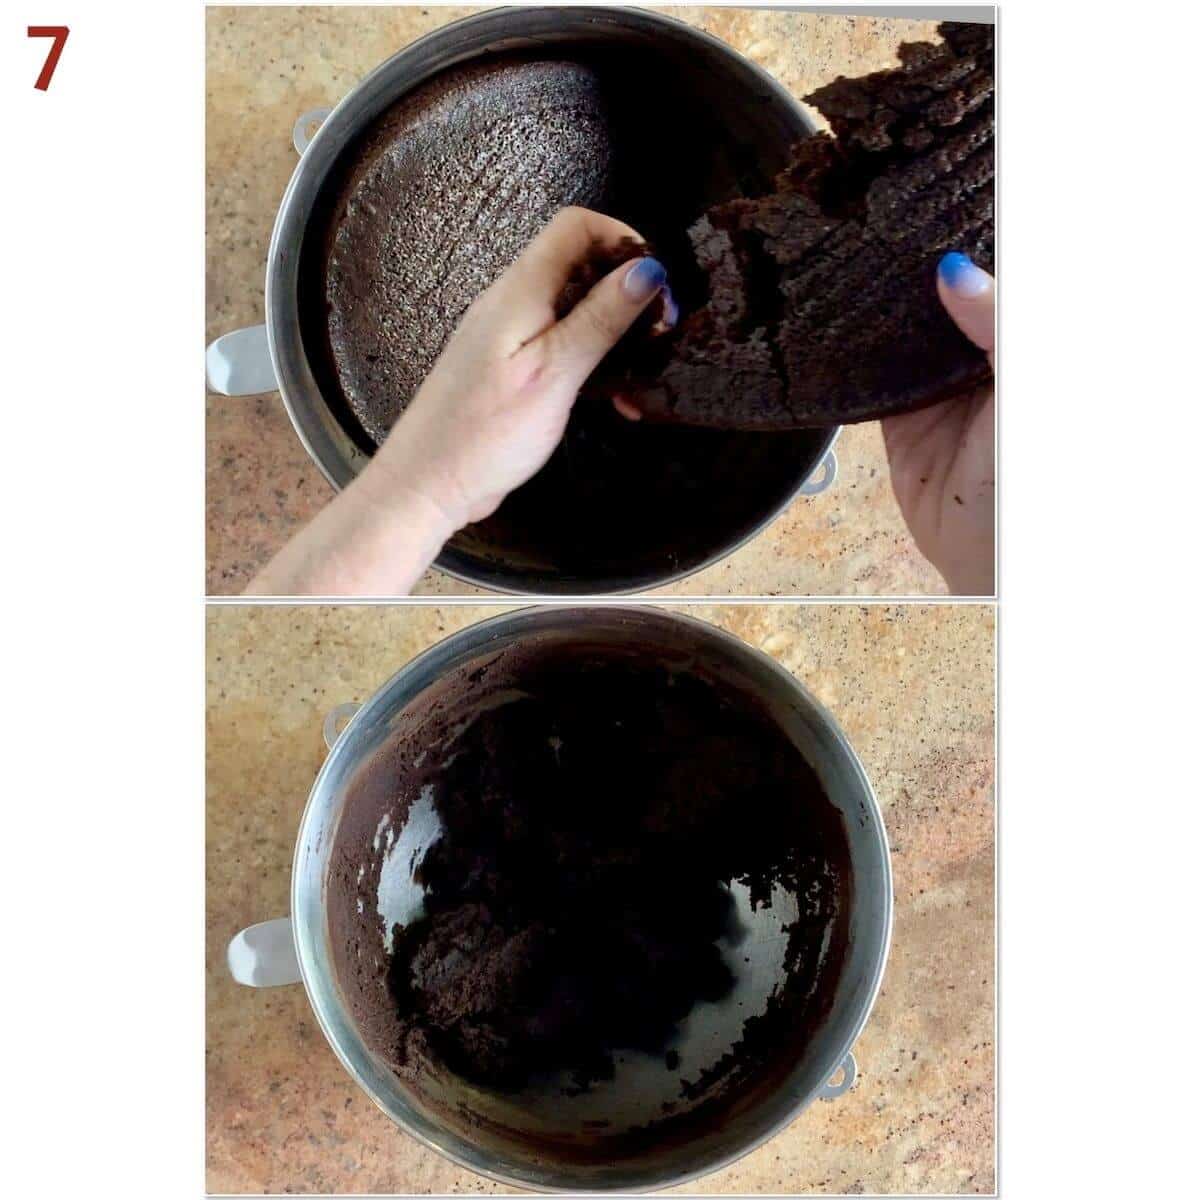
The texture should be moist and pliable (photo 8).
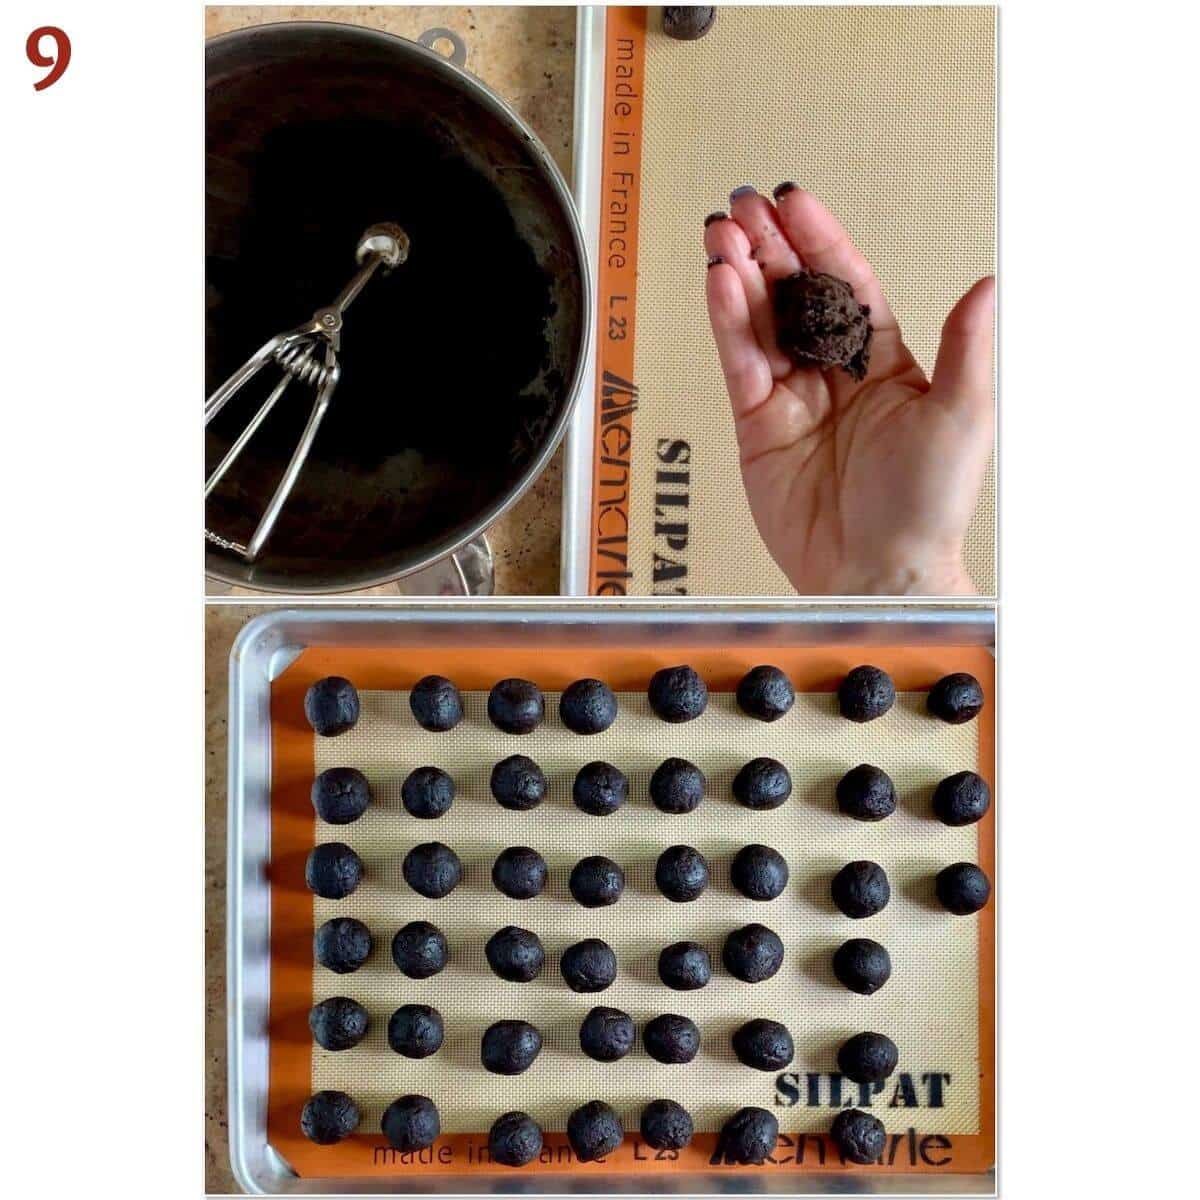
Step 5: Roll the cake balls
Using a small cookie scoop, roll 1 tablespoon of the cake mixture into a ball. Place the balls on a half sheet baking pan lined with a Silpat silicone mat or parchment paper (photo 9).
Chill the balls for at least 2 hours or freeze for 1 hour. Transfer the cake balls to a plate and keep in the refrigerator until you're ready to dip them in chocolate. You'll need the sheet pan for the dipped truffles to dry.
Step 6: Dip the truffles
Melt the chocolate in a microwave-safe bowl or in the top of a double boiler. Temper the chocolate for best results. If you're using a candy coating, let it cool down for a few minutes before you begin dipping (if it's too hot when you dip, the coating will crack).
Remove 2 to 3 cake balls from the refrigerator at a time, keeping the rest cold. Dip the cake balls in the chocolate one at a time using a dipping tool to remove it from the bowl. Gently tap the truffle on the side of the bowl to allow excess chocolate to drip off (photo 10).
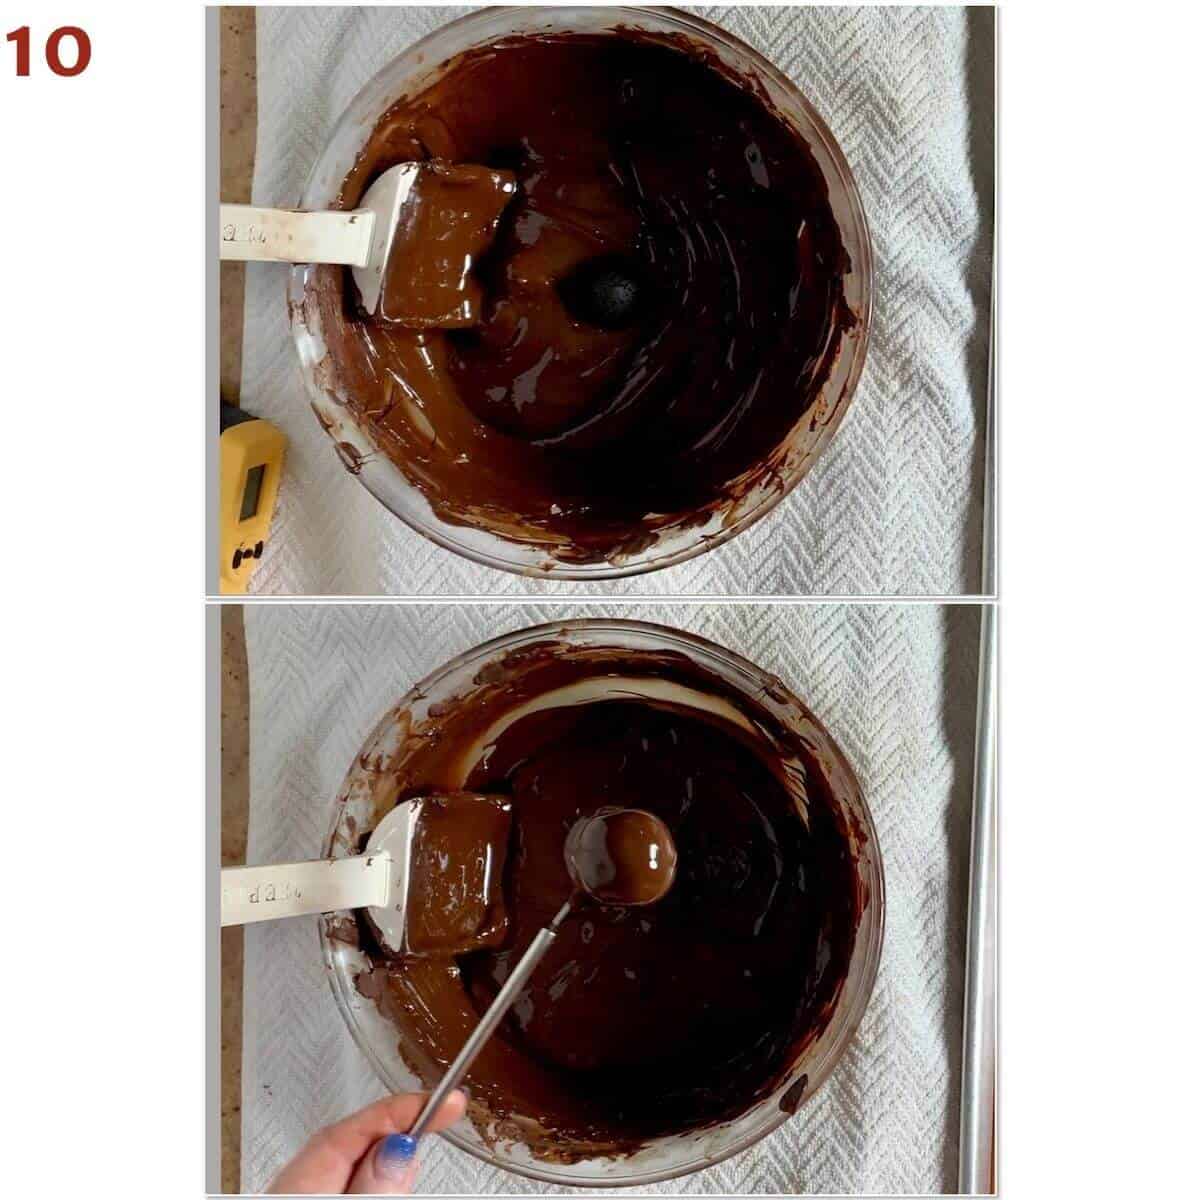
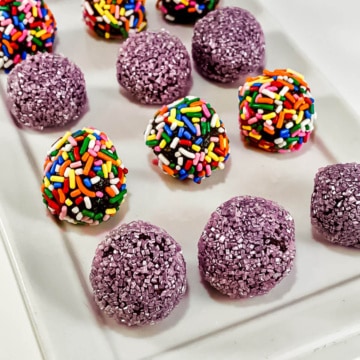
Transfer the truffle to the baking pan, turning it upside down and gently swirling it off the dipping tool. Top the truffle with any decorations while the coating is still wet (photo 11). Periodically clean the dipping tool so the truffles release easily.
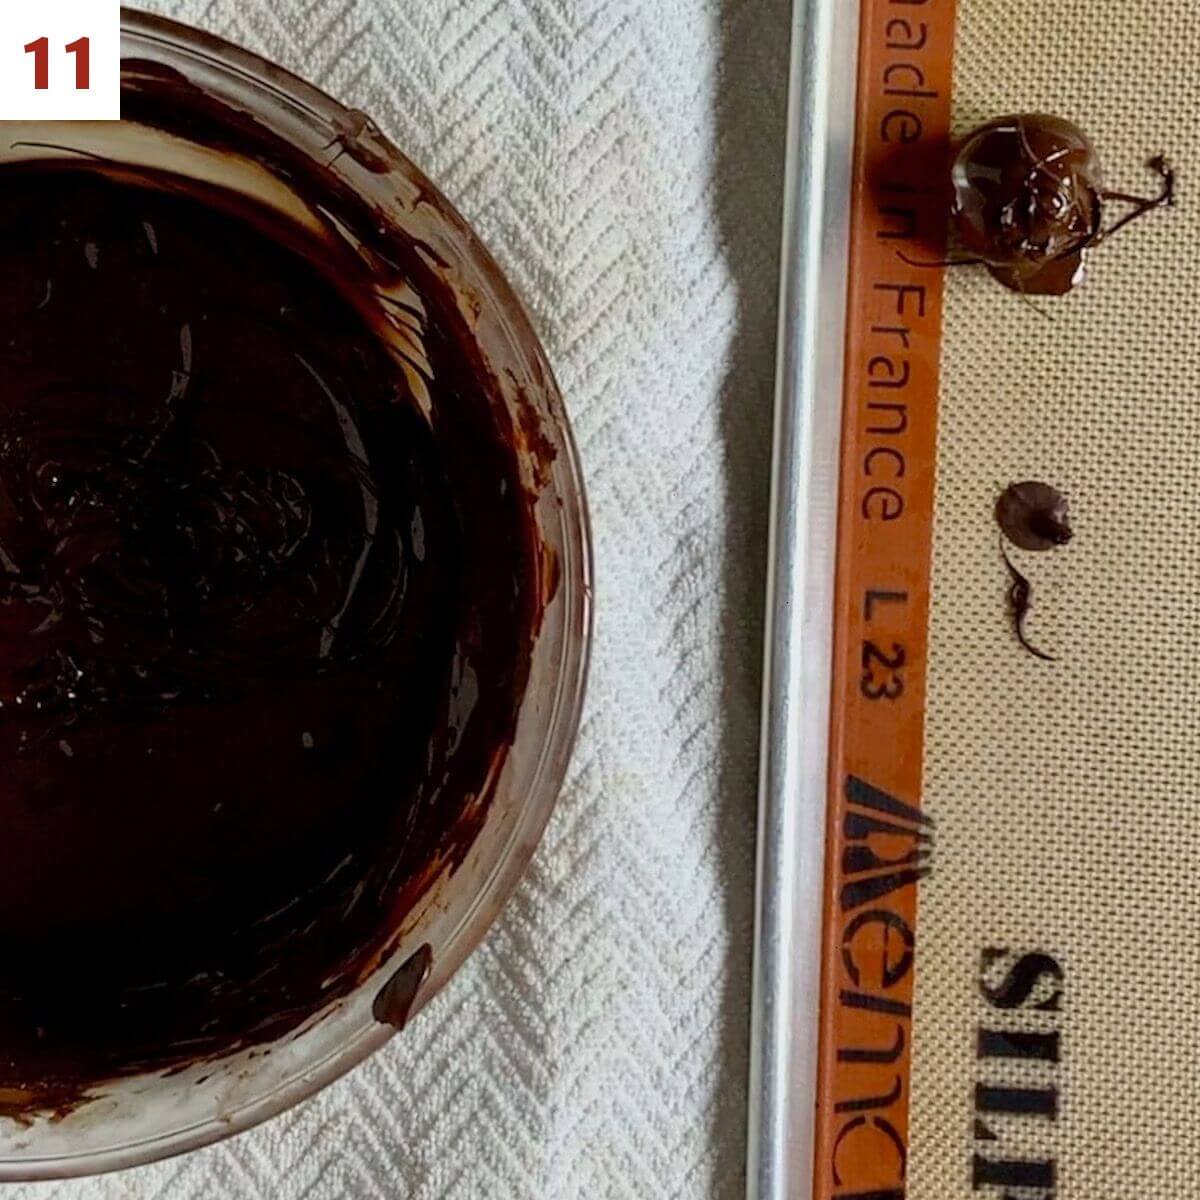
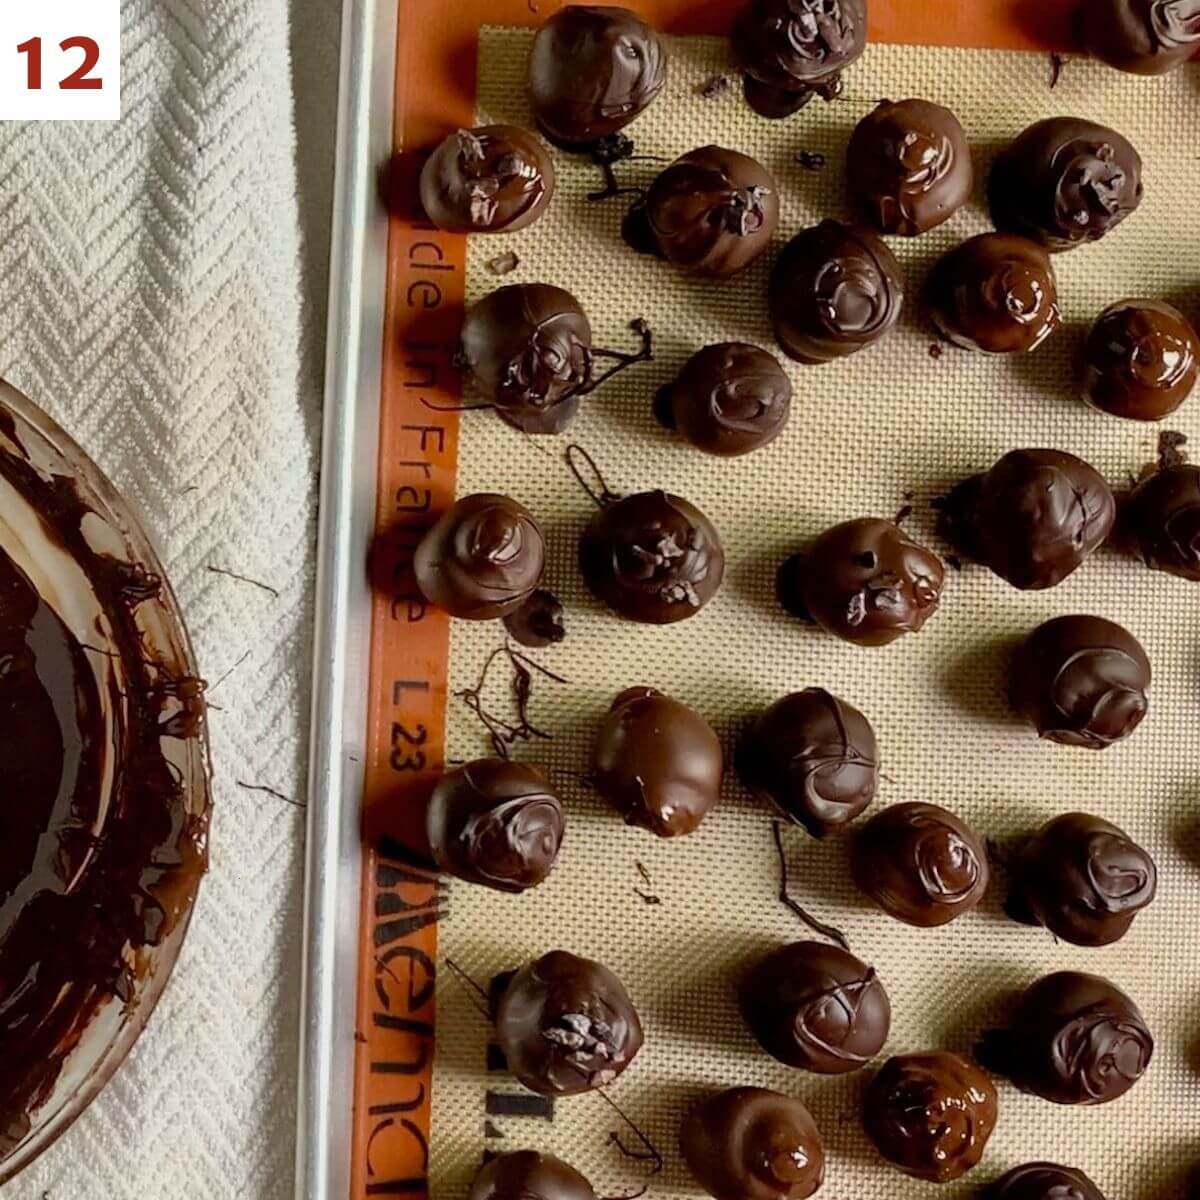
Repeat the dipping process with the remaining cake balls, working with 2 to 3 at a time (photo 12). The candy coating will set within an hour, and chocolate sooner than that.
Storage and make-ahead instructions
Storage instructions: Store the dry truffles in the refrigerator for up to 1 week. You can also freeze them for up to 6 weeks once the coating has fully set. Thaw overnight in the refrigerator.
Make-ahead instructions: You can make the cake a day ahead of time. Just cover and keep it at room temperature. You can also make the frosting a day ahead. Store it covered and keep it in the refrigerator, then take it out and let it come to room temperature for about an hour before use.
Use the right type of cocoa powder for your recipe
You may or may not know that cocoa powder comes in two types, natural and Dutch-process. Do you know what the difference between the two are? When to use which type? Can you substitute Dutch-process cocoa for natural cocoa or vice versa? Read on to learn more!
The difference between natural and Dutch-processed cocoa
Let's tackle the first question first. Natural cocoa powder is simply unsweetened chocolate ground into powdered form. Some of the cocoa butter may be present, and will contain the natural acids found in chocolate. It's the most common type on grocery store shelves, and will be lighter in color and taste than Dutch process cocoa powder.
When you treat the acid in cocoa powder with an alkalizing agent, it's said to be "Dutched." Lessening the acidity allows the cocoa powder's flavor and color to deepen. Dutch-processed cocoa powder will state that on the label.
When to use natural and Dutch-processed cocoa
Which cocoa powder to choose depends on your recipe, specifically if you need the cocoa powder to help leaven a baked good. Remember, baking soda is a base (the opposite of acid), while baking powder is neutral (baking soda mixed with cream of tarter, an acid). When leavening a baked good, say, a cake, you need an acid to react with the base or the cake will be a flat hockey puck instead of light and airy.
Simply stated, if there is baking soda in the recipe without any additional acid (like sour cream, lemon juice, or vinegar), then use natural cocoa powder so its acid can react with the baking soda.
If the recipe calls for baking powder (or predominantly baking powder, with perhaps a lesser amount of soda) or doesn't need leavening at all (the cocoa powder is there for flavor), you can use either type of cocoa powder.
How to substitute natural cocoa in recipes calling for Dutch-processed
Since the cocoa powder isn't being relied on for leavening, you can use natural cocoa powder in the same amount, no adjustment is needed. Just know that the product will be lighter in color. The acidity in the cocoa powder might leave a slight bitterness since it's not being neutralized by the rest of the ingredients.
How to substitute Dutch-processed cocoa in recipes calling for natural
You can use Dutch-process cocoa powder instead of natural depending on the other ingredients. If the recipe calls for baking powder and baking soda, or if it calls for vinegar or another acidic ingredient, there's no need to change anything when substituting the cocoa.
If there isn't another acid present, you can still make the switch with a minor adjustment to the ingredients list. Just replace the baking soda with twice the amount of baking powder. The color and flavor of the finished product will be deeper, and it will rise just fine.
For a more about natural vs. Dutch-processed cocoa powder, King Arthur Baking has an excellent in-depth discussion on the topic.
Questions asked and answered
Here are some questions you might have...
Tempering chocolate is when you heat and cool melted chocolate to specific temperatures (based on the type of chocolate you're using) in order to get the cocoa crystals to align properly.
Why do you need to temper chocolate? Because untempered chocolate has a dull finish, doesn't snap (it breaks feebly or bends instead), and can develop a whitish powdery substance on the surface (called blooming). It's fine, but not great.
In other words, just melting chocolate and sticking stuff into it just won't cut it if you want a quality product. Tempering the chocolate gives you a coating that will have a satisfying snap when broken (or bitten into), and the coating is shiny and attractive. That's pro-level results!
In untempered melted chocolate, the fat crystals (specifically the beta crystals) have not been aligned, leading to some undesirable qualities. When that chocolate is used for dipping, say, a truffle, you get a dull finish, a wimpy, bendy bite, and a general air of "I-just-melted-some-chocolate-to-dip-stuff-in-leave-me-alone" hanging about.
Tempering the chocolate brings those fat crystals into line, and the heavens open and the angels sing. Those chocolate dipped truffles are show-worthy, glossy, smooth, with a sharp mouth-pleasing snap when bitten. Tempering gets you professional-level results.
You might be tempted to use chocolate chips instead of chopping a block of chocolate but try to avoid that impulse. Many types of chocolate chips have ingredients (stabilizers and preservatives) that interfere with tempering. Best to stick with high quality baking chocolate and leave the chips in the pantry this time.
You can use the same cake ball filling to make dipped cake pops. It's basically the same as the truffle, only using a lollipop stick to dip the cake balls instead of the dipping tools.
First, using a 2-cup measuring cup to hold the melted chocolate, dip a lollipop stick about ½-inch into the coating, then insert it into the center of the cake ball. Only push it about ½ to ¾ through.
Next, dip the cake ball into the coating until it is completely covered. Make sure the coating covers the base of the cake ball where it meets the lollipop stick. Very gently tap the stick against the edge of the measuring cup to allow excess coating to drop off.
Finally, top the cake pop with any decorations while the coating is still wet. The best way to allow the coating to dry and set (without ruining the perfectly round cake pop) is to place them right side up in a large styrofoam block.
Didn't find the answer you're looking for?
Ask AI to answer for this specific recipe:
Disclaimer: I am not responsible for the quality of AI information

I hope you like this recipe! Let me know if you have any questions, and don't forget to leave a comment and rating. Thanks!
Slainté! L'chaim! Cheers!
- Tammy

Recipe
Chocolate Cake Truffles (Cake Pops)
Equipment
Ingredients
For the cake
- 1 cup all-purpose flour
- 1 cup granulated sugar
- 6 tablespoons cocoa powder, regular or dark chocolate, see Recipe Notes
- 1 teaspoon baking powder
- ¼ teaspoon kosher salt
- ½ cup canola oil
- 2 large eggs, at room temperature
- 1 teaspoon pure vanilla extract
- ½ cup hot water
For the frosting
- 6 tablespoons unsalted butter, at room temperature
- ¾ cup powdered sugar
- ½ cup cocoa powder, regular or dark chocolate, see Recipe Notes
- 2 teaspoons milk, plus more to thin frosting as needed
- ½ teaspoon pure vanilla extract
For the chocolate coating
- 30 ounces chocolate, dark or semi-sweet, chopped and preferably tempered (5 cups), see Recipe Notes
- decorations, like cocoa nibs, sprinkles, etc
Instructions
- Make the cake: Preheat oven to 350 °F. Spray a 9-inch round cake pan with baking spray.
- In a large bowl, whisk together 1 cup all-purpose flour, 1 cup granulated sugar, 6 tablespoons cocoa powder, 1 teaspoon baking powder, and ¼ teaspoon kosher salt. Set aside.In a medium bowl, whisk together ½ cup canola oil, 2 large eggs, and 1 teaspoon pure vanilla extract.
- Add the wet ingredients into the dry ingredients and mix well. The batter will be very thick. Add ½ cup hot water and whisk again until everything is well combined.
- Pour the batter into the prepared pan. Tap the pan on the counter to release any bubbles, then bake for 25 to 27 minutes or until a cake tester inserted in the center comes out clean.
- Transfer the pan to a wire rack and allow the cake to cool completely.
- Make the frosting: Using a stand mixer fitted with a paddle attachment or hand mixer, beat 6 tablespoons unsalted butter on medium speed until creamy, about 2 minutes. Scrape down the sides of the bowl with a rubber spatula.
- Add ¾ cup powdered sugar, ½ cup cocoa powder, 2 teaspoons milk, and ½ teaspoon pure vanilla extract. Beat on high speed for 3 minutes until the frosting comes together. Add more milk in 1 teaspoon increments if the frosting looks too thick.
- Assemble the cake balls: Crumble the cooled cake into the frosting, making sure there are no large cake lumps. Turn the mixer to low and mix the frosting and cake crumbs together until everything is well combined.
- Using a small cookie scoop, roll 1 tablespoon of the cake mixture into a ball. Place the balls on a half sheet baking pan lined with a Silpat silicone mat or parchment paper.
- Chill the balls for at least 2 hours or freeze for 1 hour. Transfer the cake balls to a plate and keep in the refrigerator until you're ready to dip them in chocolate. You'll need the sheet pan for the dipped truffles to dry.
- Coat the truffles: Melt 30 ounces chocolate (or candy coating, if using) in a microwave-safe bowl or in the top of a double boiler. If you're using pure chocolate, temper the chocolate for best results. If you're using candy coating, let it cool down for a few minutes before you begin dipping (if it's too hot when you dip, the coating will crack).
- Remove 2 to 3 cake balls from the refrigerator at a time, keeping the rest cold. Dip the cake balls in the chocolate one at a time using a dipping tool to remove it from the bowl. Gently tap the truffle on the side of the bowl to allow excess chocolate to drip off.
- Transfer the truffle to the baking pan, turning it upside down and gently swirling it off the dipping tool. Top the truffle with any decorations while the coating is still wet. Periodically clean the dipping tool so the truffles release easily.
- Repeat the dipping process with the remaining cake balls, working with 2 to 3 at a time. The candy coating will set within an hour, and chocolate sooner than that.
- Storage instructions: Store the dry truffles in the refrigerator for up to 1 week. You can also freeze them for up to 6 weeks once the coating has fully set. Thaw overnight in the refrigerator.
- Make-ahead instructions: You can make the cake a day ahead of time. Just cover and keep it at room temperature. You can also make the frosting a day ahead. Store it covered and keep it in the refrigerator, then take it out and let it come to room temperature for about an hour before use.
Notes
- Using a 2-cup measuring cup to hold the melted chocolate, dip a lollipop stick about ½-inch into the coating, then insert it into the center of the cake ball. Only push it about ½ to ¾ through.
- Dip the cake ball into the coating until it is completely covered. Make sure the coating covers the base of the cake ball where it meets the lollipop stick. Very gently tap the stick against the edge of the measuring cup to allow excess coating to drop off.
- Top the cake pop with any decorations while the coating is still wet. The best way to allow the coating to dry and set (without ruining the perfectly round cake pop) is to place them right side up in a large styrofoam block.


Shira says
Yummy!
Sadaf says
Hi there. Do you have to add oil to thin out the chocolate at all? Will adding oil ruin the temper?
Tammy Spencer says
Hi Sadaf, Thanks for your great question. I usually will temper pure chocolate without oil to get that pure "snap" that only tempering provides. However, adding oil will thin melted chocolate, creating a "quick-tempered" mixture so you don't have to go through the whole tempering process. This mixture will work fine if the dipped item will be eaten within a few days. For more about the topic, check out Oil Aids in Tempering Chocolate. Happy baking! 😉