
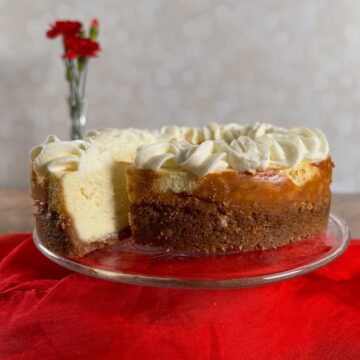
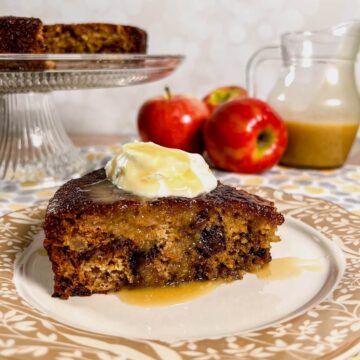
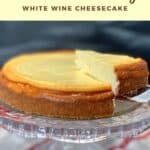
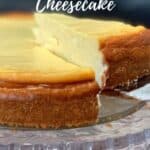
Elevate a classic cheesecake recipe with the subtle notes of white wine. Smooth, creamy, rich, and dense, this luxurious White Wine Cheesecake will make any occasion special!

Jump to:
- Why this recipe works
- Recipe Ingredients
- Make a mini baked cheesecake with wine
- How to make homemade cheesecake with wine
- Don't overmix the cheesecake filling!
- How to use a water bath when baking cheesecake
- Storage and make-ahead instructions
- Questions asked and answered
- More custard & sauce recipes to try
- Recipe
- Comments
[June, 2024: I've reworked the recipe and updated this post with all new pictures. Enjoy!]
Why this recipe works
- This baked cheesecake is smooth, creamy, with a dense mouthfeel
- White wine adds subtle fruity undertones for additional layers of flavor
- Serve it plain or with toppings like jams, fruit, and/or whipped cream
White wine is more than just for drinking. Its delicate notes can add subtle undertones to baked goods.
Making a homemade cheesecake with wine adds the wine's flavor characteristics to a classic cheesecake recipe, and this White Wine Cheesecake is the result. There's lots of flavor to be had here!
Since this is a baked cheesecake, the alcohol bakes out so it's safe for everyone to enjoy. You can also adapt it to make a keto cheesecake (one that's lower in sugar and gluten-free).
White wine cheesecake is smooth and creamy, with a hint of the flavors from your favorite white wine. Your guests may not detect the subtle flavors - they'll just know this dense and rich cheesecake is delicious. You'll know the secret, and it's up to you whether you'll share it or not.
Improve your basic baked cheesecake recipe into something incredible. It will make any occasion special!
Recipe Ingredients
You'll need the following ingredients to make this baked cheesecake recipe:
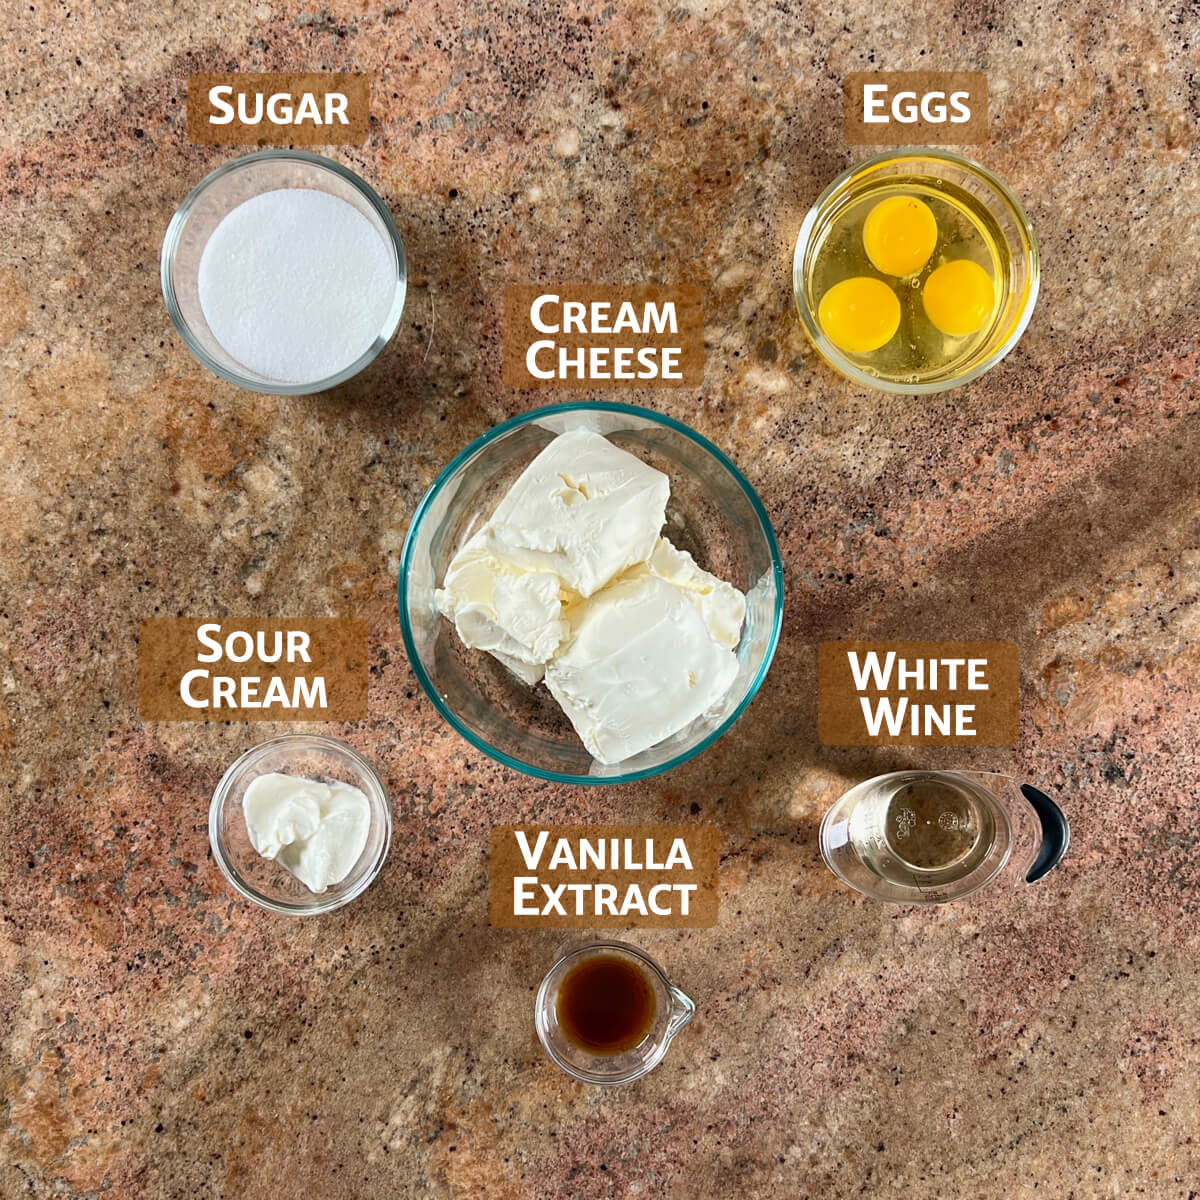
Ingredient Notes
It's important to have the cream cheese, sour cream, and eggs at room temperature before beginning. They'll combine quickly and evenly so you won't risk over-mixing the batter. Beating cold ingredients together will result in a chunky cheesecake batter. Who wants that?
Full fat cream cheese: Now isn't the time for reduced fat or nonfat cream cheese. They contain fillers that might prevent the cheesecake from setting properly. Also, never substitute whipped cream cheese for the solid block - you don't want that extra air.
Sour cream: Use full fat sour cream this time to give a rich and creamy mouthfeel to the cheesecake.
Eggs: Don't over-beat them when mixing them in - again, you don't want extra air in the batter.
Flavorings: Vanilla extract is standard, but don't limit yourself to just that. Here we're including white wine for subtle fruity undertones. Choose a white wine you like to drink.
See the recipe card for a full list of ingredients and measurements.
Make a mini baked cheesecake with wine
The updated pictures and video for this post show me making a mini white wine cheesecake. All you have to do is halve the all ingredients (using 3 eggs) and bake the cheesecake in a 6-inch springform pan at 325˚F (163˚C) for 45 to 55 minutes or until the center is just set.
This smaller cheesecake still has big flavor!
How to make homemade cheesecake with wine
There are 2 main components to a classic cheesecake recipe: the crust and the batter.
Step 1: Make the crust
A graham cracker crust is standard for homemade cheesecake recipes, and it's quick to make. Plus, baking the graham cracker crust sets it and keeps it from getting soggy or shifting when the cheesecake batter is added.
Press the graham cracker mixture firmly on the bottoms and sides of a springform pan (in this case a 6-inch springform pan), then bake it for 10 minutes. That will insure your crust will hold together.
Let the crust cool while you make the cheesecake batter
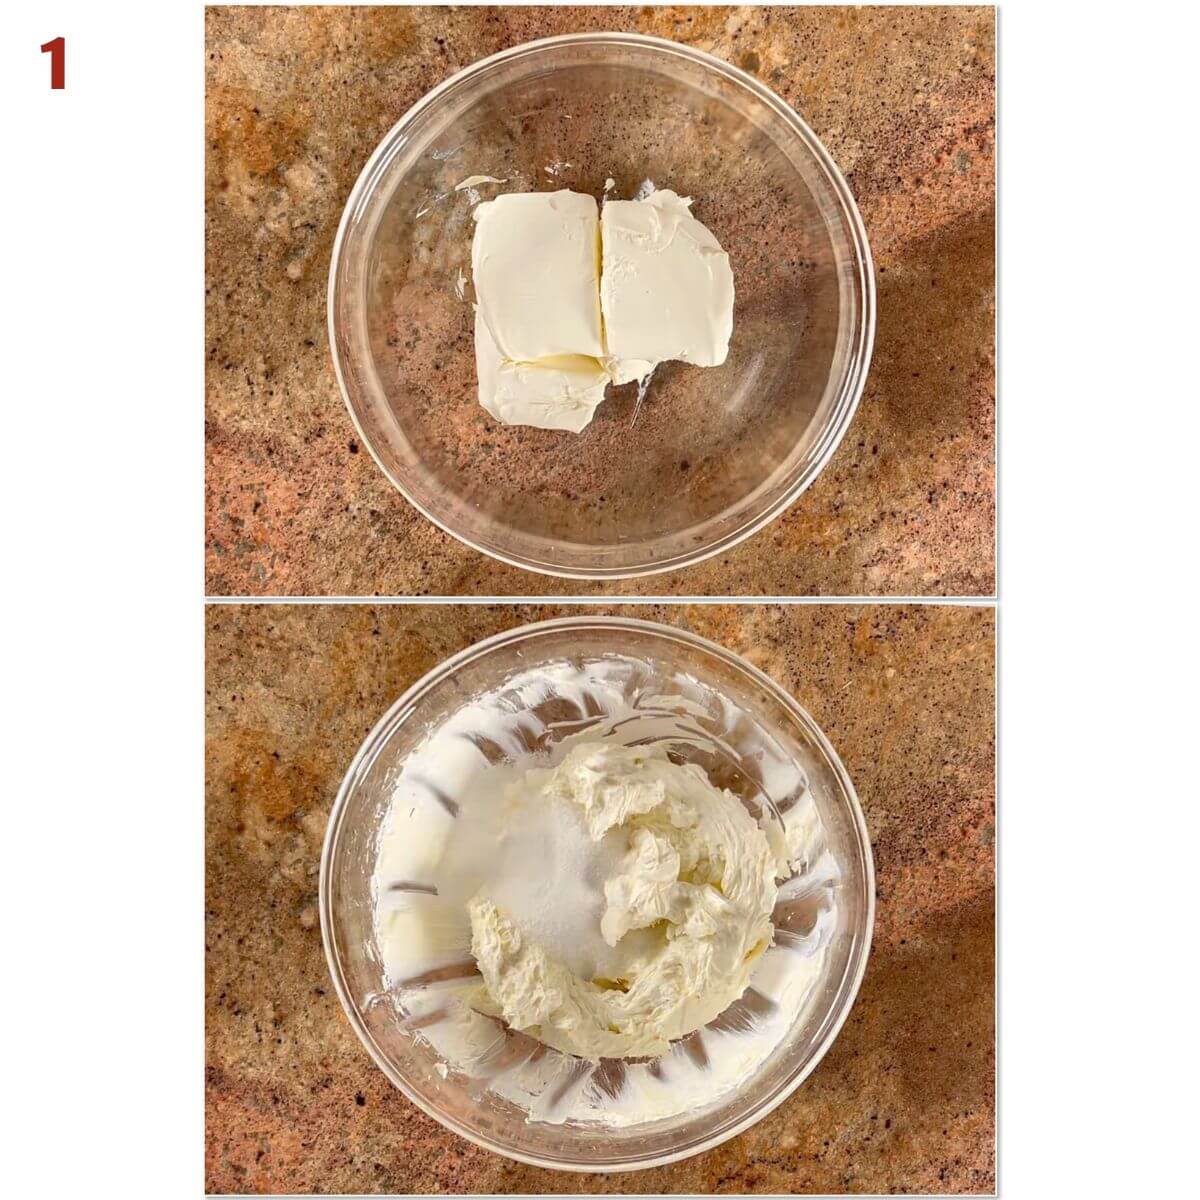
Step 2: Make the cheesecake batter
Beat the cream cheese until it's light and fluffy. Add the granulated sugar and beat on medium-high speed until the mixture is smooth and creamy, about 2 minutes (photo 1).
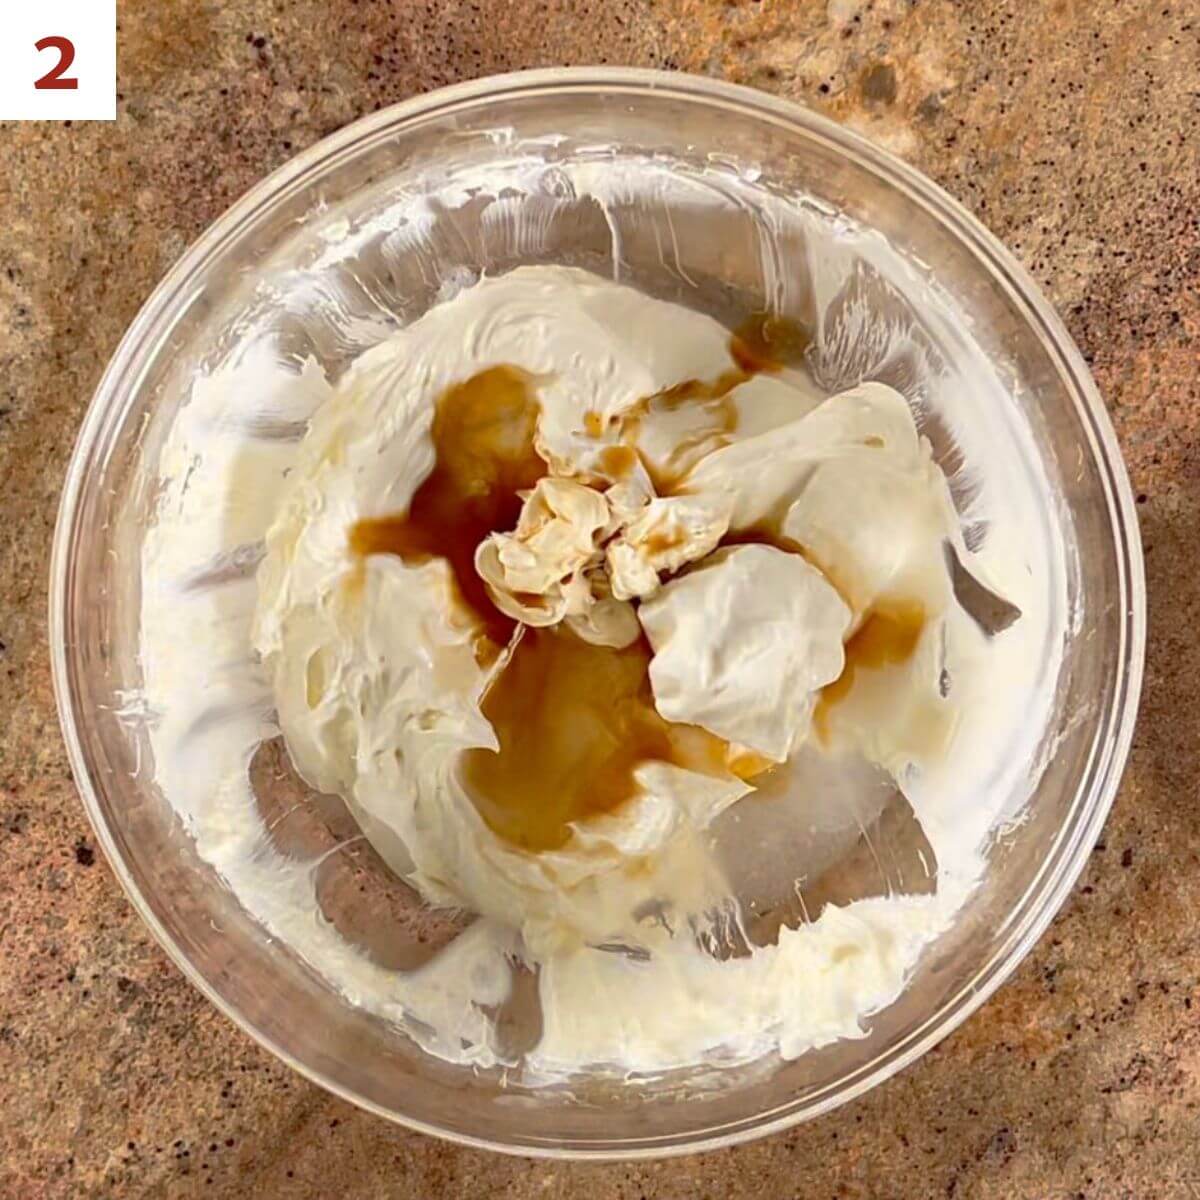
Add the sour cream, white wine, and vanilla extract and beat on low speed until fully combined (photo 2).
On medium speed, add the eggs one at a time, beating after each addition until just blended. The idea is to incorporate the eggs without adding too much air (photo 3).
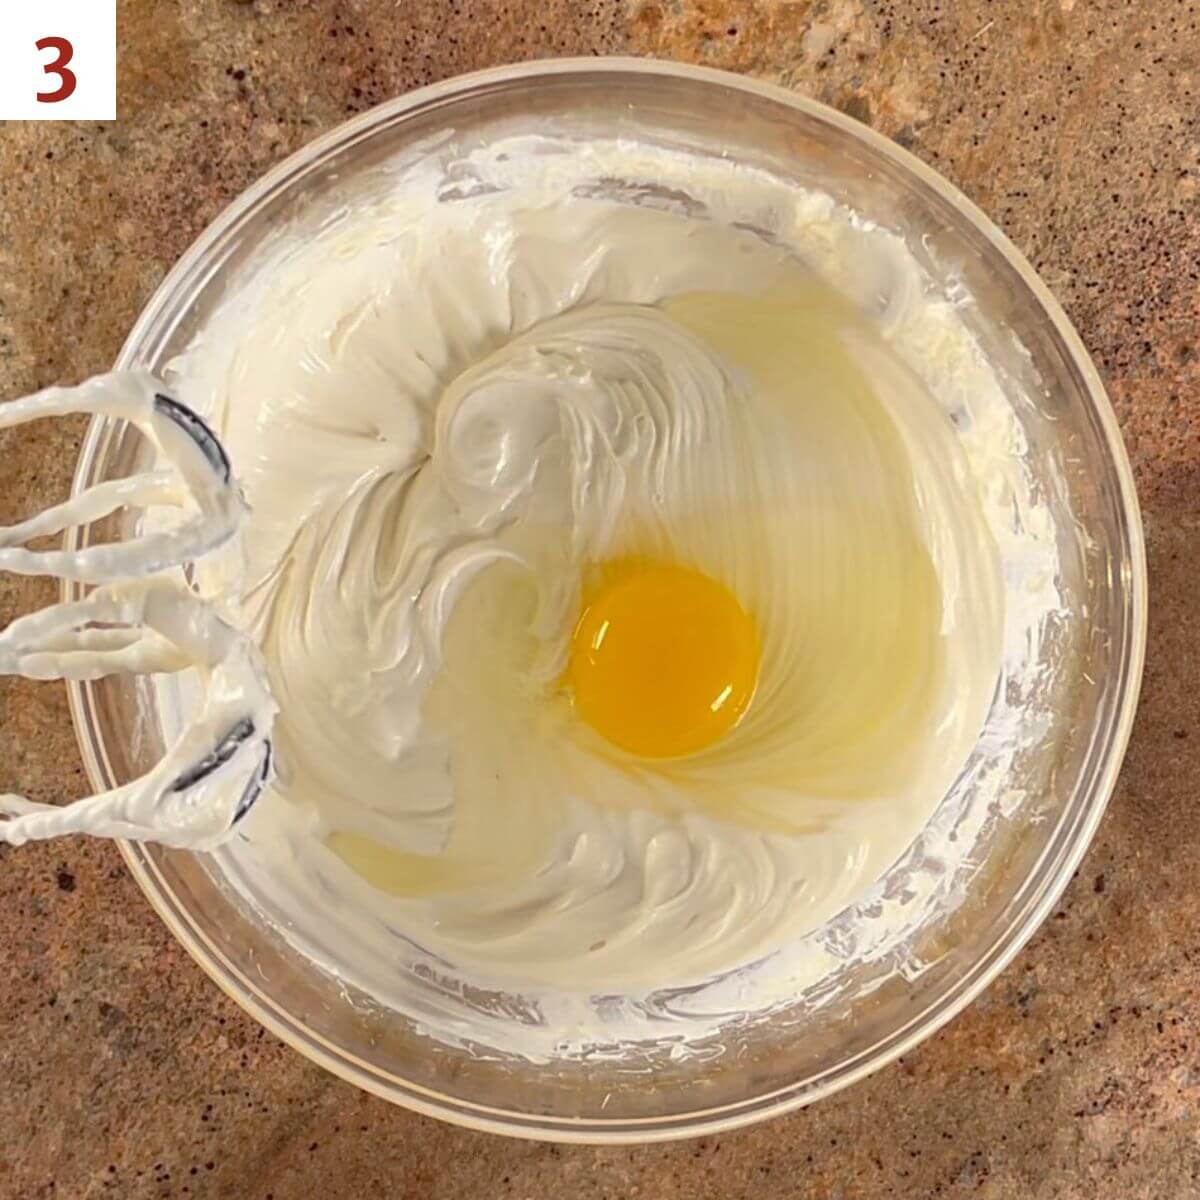
Don't overmix the cheesecake filling!
The most important tip to remember when making a cheesecake filling is to mix only until the ingredients are incorporated, especially when adding in the eggs. After the final egg is incorporated into the batter, stop mixing! You don't want to add air into the mix or the filling will crack or bubble during baking.
Step 3: Bake the cheesecake
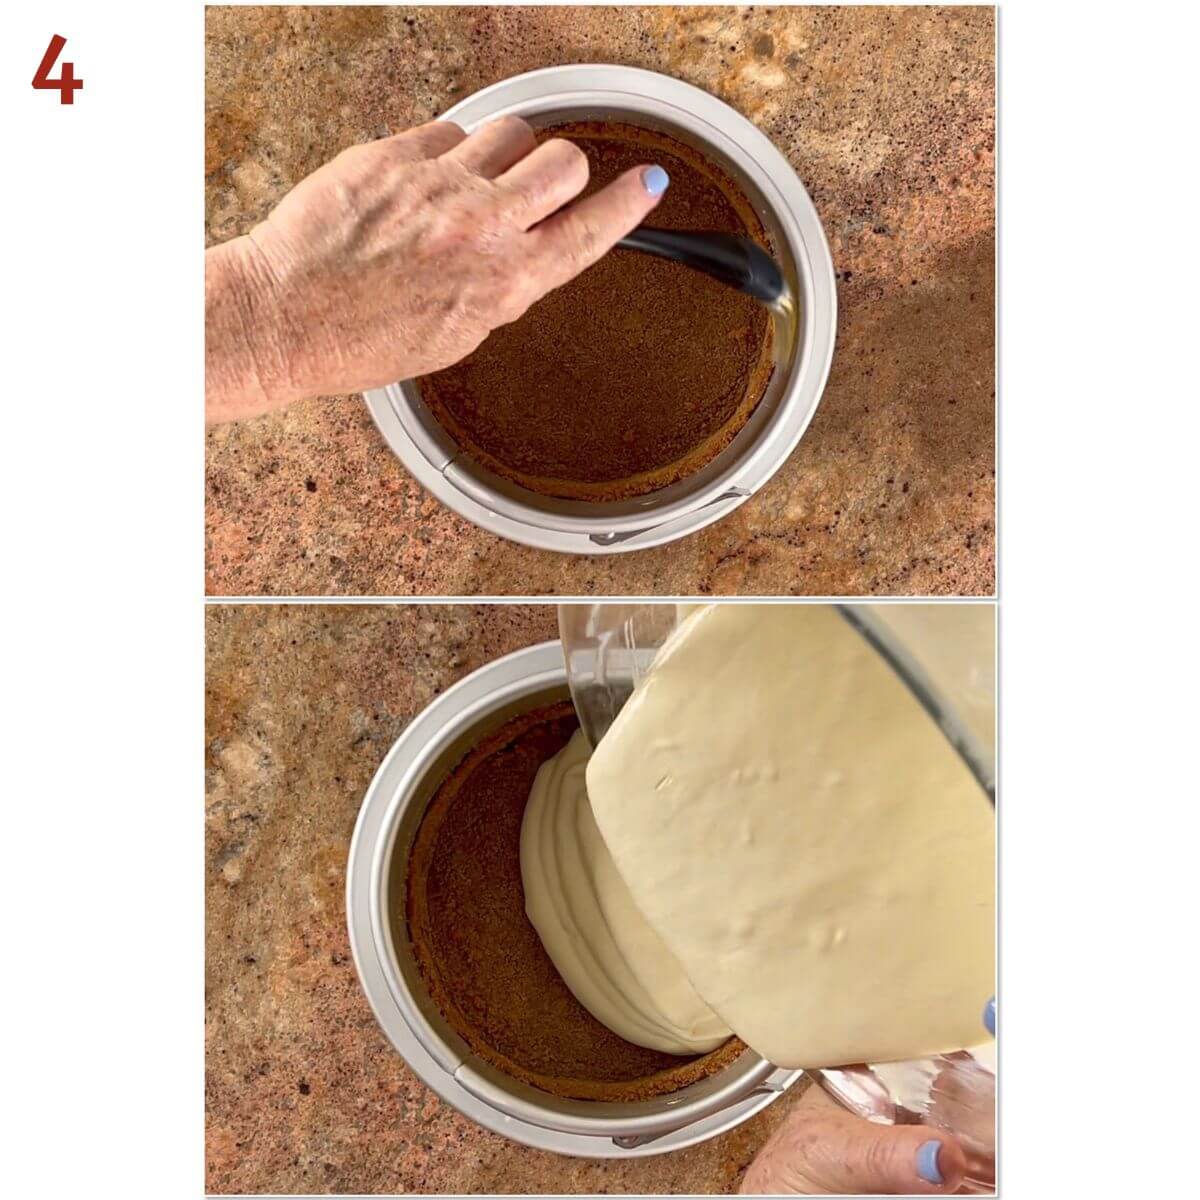
Before adding the cheesecake batter to the cooled crust, use a pastry brush to spread melted butter on the inside of the pan from the top of the crust to the top edge. This helps keep any batter that rises above the crust from sticking to the pan.
Pour the cheesecake batter into the cooled crust. Use a small offset spatula or spoon to smooth it into an even layer (photo 4). Tap the pan gently on the counter to release any trapped air bubbles.
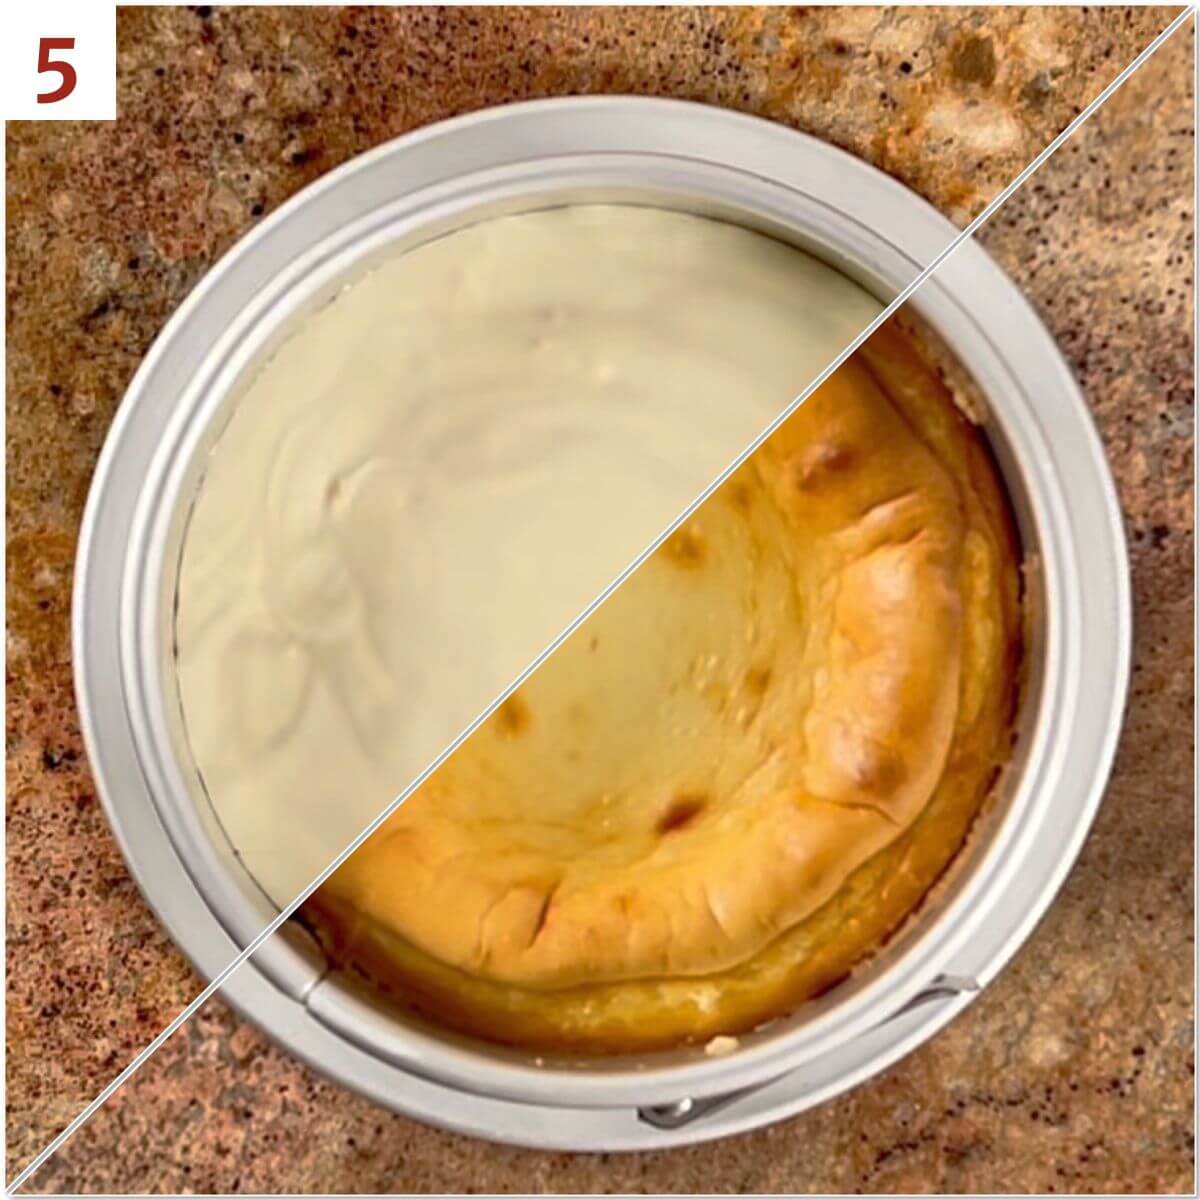
Bake the cheesecake in a water bath at 350°F for 55 to 70 minutes or until the center is almost set (photo 5). If you notice the cheesecake browning too quickly on top, tent it with aluminum foil halfway through baking.
When it's done, the center of the cheesecake will slightly wobble if you gently shake the pan.
How to use a water bath when baking cheesecake
There are 2 ways to make a water bath, and they depend on the size of your springform pan:
Method 1: Springform pan fits in a larger pan
If you have a roasting pan large enough to fit your springform pan, wrap the outside of the springform pan in a double layer of foil, covering the bottom and extending all the way to the top. Although a good crust keeps filling from leaking out, the foil helps protect against water leaking in.
Set the wrapped cheesecake in a large roasting pan, and pour hot water into the roasting pan until it reaches halfway up the sides of the springform pan.
Method 2: Springform pan doesn't fit in a larger pan
I don't have a roasting pan large enough to fit my springform pan. Instead, I use a substitute trick by placing a 9- x 13-inch baking pan of water on a lower rack in the oven to create steam. By placing the cheesecake directly above this pan in the oven, enough steam is created to insulate the cheesecake.
For either method, if you don't fill the pan with enough water, the sides of the cheesecake can get over-browned. Be warned.
Step 4: Cool the cheesecake gently
It's important to cool the cheesecake gradually to avoid cracks. Turn the oven off and open the oven door slightly. Let the cheesecake sit in the oven (with the water bath) as it cools down for 1 hour. This allows the cheesecake to avoid sudden temperature changes, again keeping it from cracking.
Remove the cheesecake from the oven, then cool it completely at room temperature.
Refrigerate the cheesecake for at least 4 hours or overnight. Use a knife to loosen the chilled cheesecake from the rim of the springform pan, then remove the rim. If there is a ridge on the cheesecake, you can use a sharp knife to trim it away to make the top appear smooth.
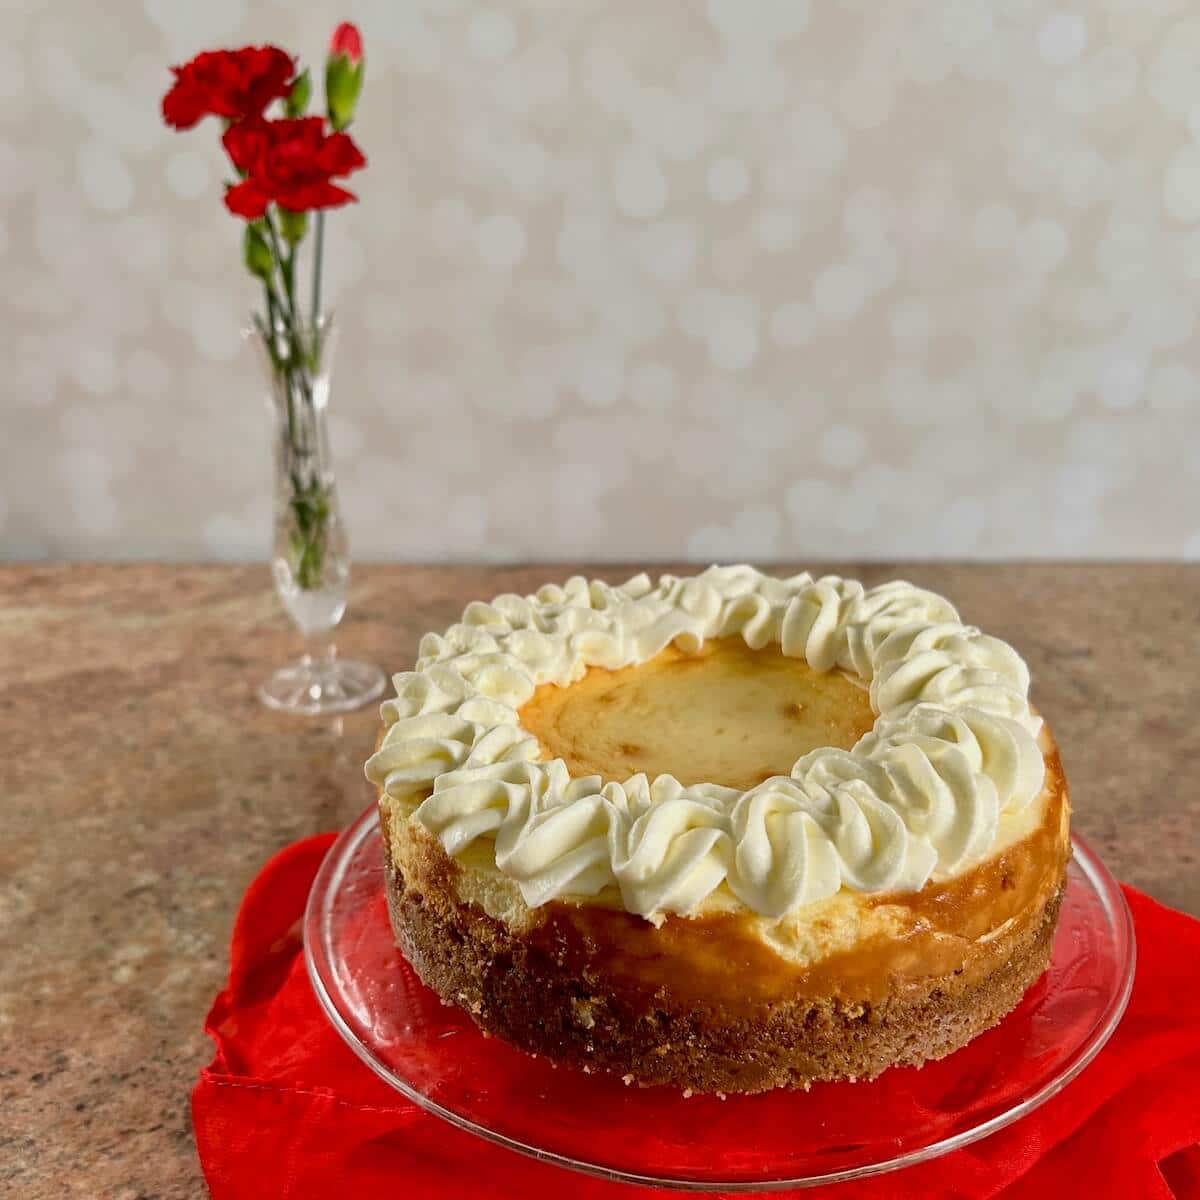
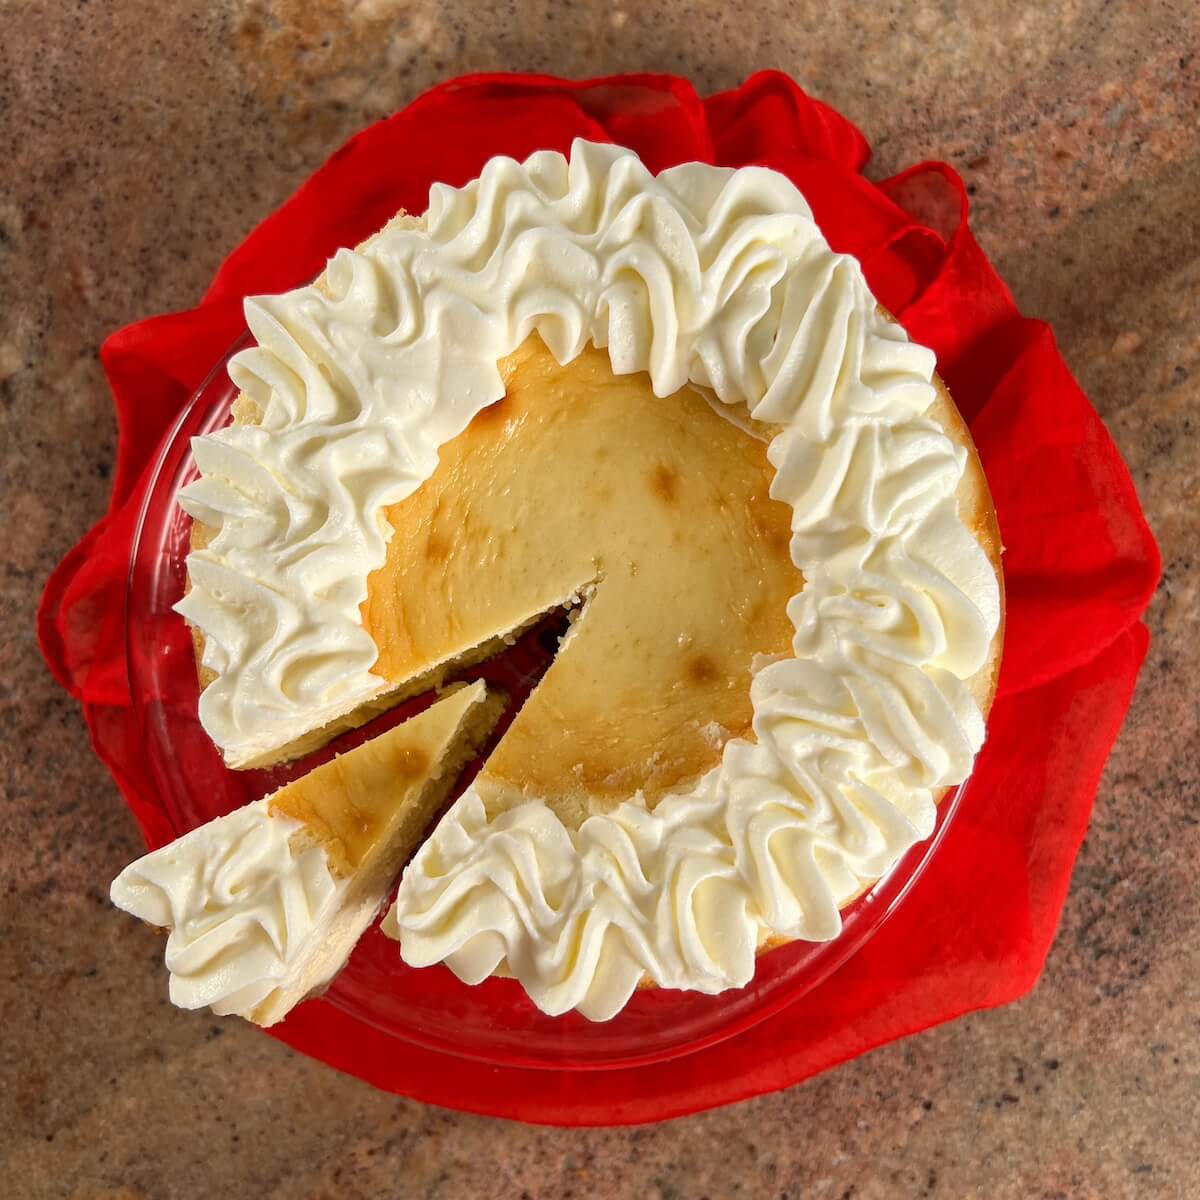
Cut the cheesecake into slices with a sharp knife, wiping the knife and dipping it into warm water between each cut to get nice, neat slices. Serve with any desired toppings, like jam, fruit, and/or whipped cream.
Storage and make-ahead instructions
Storage instructions: Cheesecake can be stored, tightly covered, in the refrigerator for up to 5 days.
Make-ahead instructions: This cheesecake is best made the day before you want to serve it since it has to chill for quite some time.
Another way to make this cheesecake ahead of time is to freeze it - it can be frozen for up to 3 months. Here's a helpful tutorial for freezing cheesecakes. When you're ready to serve, thaw it overnight in the refrigerator before serving.
Questions asked and answered
Here are some questions you might have...
Yes, because they'll combine quickly and evenly, so you won't risk over-mixing the batter. Beating cold ingredients together will result in a chunky cheesecake batter. Who wants that?
Now isn't the time for reduced fat or nonfat cream cheese. They contain fillers that might prevent the cheesecake from setting properly. Also, never substitute whipped cream cheese for the solid block. Again, you don't want that extra air.
To help prevent the cheesecake from deflating and cracking as it cools, avoid over-mixing the batter as best you can, especially when adding in the eggs. You don't want air beaten into the eggs because it causes them to inflate while baking, then deflate when cooled. This can crack the cheesecake or form bubbles on the surface.
Didn't find the answer you're looking for?
Ask AI to answer for this specific recipe:
Disclaimer: I am not responsible for the quality of AI information


I hope you like this recipe! Let me know if you have any questions, and don't forget to leave a comment and rating. Thanks!
Slainté! L'chaim! Cheers!
- Tammy
More custard & sauce recipes to try

Recipe
White Wine Cheesecake
Equipment
- large roasting pan or 9- x 13-inch baking pan
Ingredients
For the crust
- 1 graham cracker pie crust, see Recipe Notes
For the filling
- 4 cups cream cheese, full fat (4 blocks), at room temperature, see Recipe Notes
- ¾ cup granulated sugar
- ¼ cup sour cream, full fat, at room temperature, see Recipe Notes
- ⅓ cup white wine
- 1½ teaspoons pure vanilla extract
- 5 large eggs, at room temperature
- 1 tablespoon unsalted butter, melted
- toppings, like jam, fruit, and/or whipped cream, optional
Instructions
- Adjust the oven rack to the lower third position and preheat the oven to 350 °F.
- Check to see if your springform pan fits in a large roasting pan (to use for the water bath). Don't worry if your roasting pan isn't big enough - you can use a 9- x 13-in roasting pan to create steam instead (see water bath instructions below).
- Make the crust: Prepare 1 graham cracker pie crust and press into a 9-inch round springform pan (you don't have to grease the pan first). Use a pastry tart tamper, the bottom of a measuring cup, or a straight sided glass tumbler to pack the crust down tightly.
- Bake the crust for 10 minutes, then remove it from the oven to cool completely.
- Make the filling: Using a stand mixer with paddle attachment or a hand mixer, beat 4 cups cream cheese until it's light and fluffy. Add ¾ cup granulated sugar and beat on medium-high speed until the mixture is smooth and creamy, about 2 minutes. Add ¼ cup sour cream, ⅓ cup white wine, and 1½ teaspoons pure vanilla extract and beat on low speed until fully combined.
- On medium speed, add 5 large eggs, one at a time, beating after each addition until just blended. After the final egg is incorporated into the batter, stop mixing. The idea is to incorporate the eggs without adding too much air to prevent cracks later.
- Before adding the cheesecake batter to the cooled crust, use a pastry brush to spread 1 tablespoon unsalted butter (melted) on the inside of the pan from the top of the crust to the top edge. This helps keep any batter that rises above the crust from sticking to the pan.
- Pour the cheesecake batter into the prepared crust. Use a small offset spatula or spoon to smooth it into an even layer. Tap the pan gently on the counter to release any trapped air bubbles.
- Prepare the water bath: If you have a roasting pan large enough to fit your springform pan, wrap outside of the springform pan in a double layer of foil, covering the bottom and extending all the way to the top (although a good crust keeps filling from leaking out, the foil helps protect against water leaking in). Set the wrapped cheesecake in the roasting pan, and pour hot water into the roasting pan until it reaches halfway up the sides of the cheesecake (about 2 inches). Carefully transfer the roasting pan on the lower third rack in the oven.
- If you don't have a roasting pan large enough to fit your springform pan, place a 9- x 13-inch baking pan at the bottom of the oven. Pour in enough hot water to reach halfway up the sides of the pan. This creates steam to simulate the water bath. Put the cheesecake on the lower-third rack directly above the water-filled pan.
- Continuing: Bake the cheesecake for 55 to 70 minutes or until the center is almost set. If you notice the cheesecake browning too quickly on top, tent it with aluminum foil halfway through baking.When it's done, the center of the cheesecake will slightly wobble if you gently shake the pan.
- Turn the oven off and open the oven door slightly. Let the cheesecake sit in the oven (with the water bath) as it cools down for 1 hour. This allows the cheesecake to avoid sudden temperature changes, again keeping it from cracking. Remove the cheesecake from the oven, then cool it completely at room temperature.
- Refrigerate the cheesecake for at least 4 hours or overnight. Use a knife to loosen the chilled cheesecake from the rim of the springform pan, then remove the rim.If there is a ridge on the cheesecake, you can use a sharp knife to trim it away to make the top appear smooth.
- Cut the cheesecake into slices with a sharp knife, wiping the knife and dipping it into warm water between each cut to get nice, neat slices. Serve with any desired toppings, like jam, fruit, and/or whipped cream.
- Storage instructions: Cheesecake can be stored, tightly covered, in the refrigerator for up to 5 days.
- Make-ahead instructions: This cheesecake is best made the day before you want to serve it since it has to chill for quite some time.Another way to make this cheesecake ahead of time is to freeze it - it can be frozen for up to 3 months. Here's a helpful tutorial for freezing cheesecakes. When you're ready to serve, thaw it overnight in the refrigerator before serving.

Comments
No Comments