
A checkerboard cake is as impressive as it is tasty, and really easy to make. Bake a cake to celebrate a holiday, your favorite team, or just that special someone with these complete step-by-step assembly instructions!
Jump to:
[May, 2021: I've reworked the recipe and updated this post with all new pictures. Enjoy!]
Why this recipe works
- The component cakes are really easy to bake
- You can customize the flavors/colors to suit your needs
- You don't need a special pan. Just use two different cookie cutters or make your own templates.
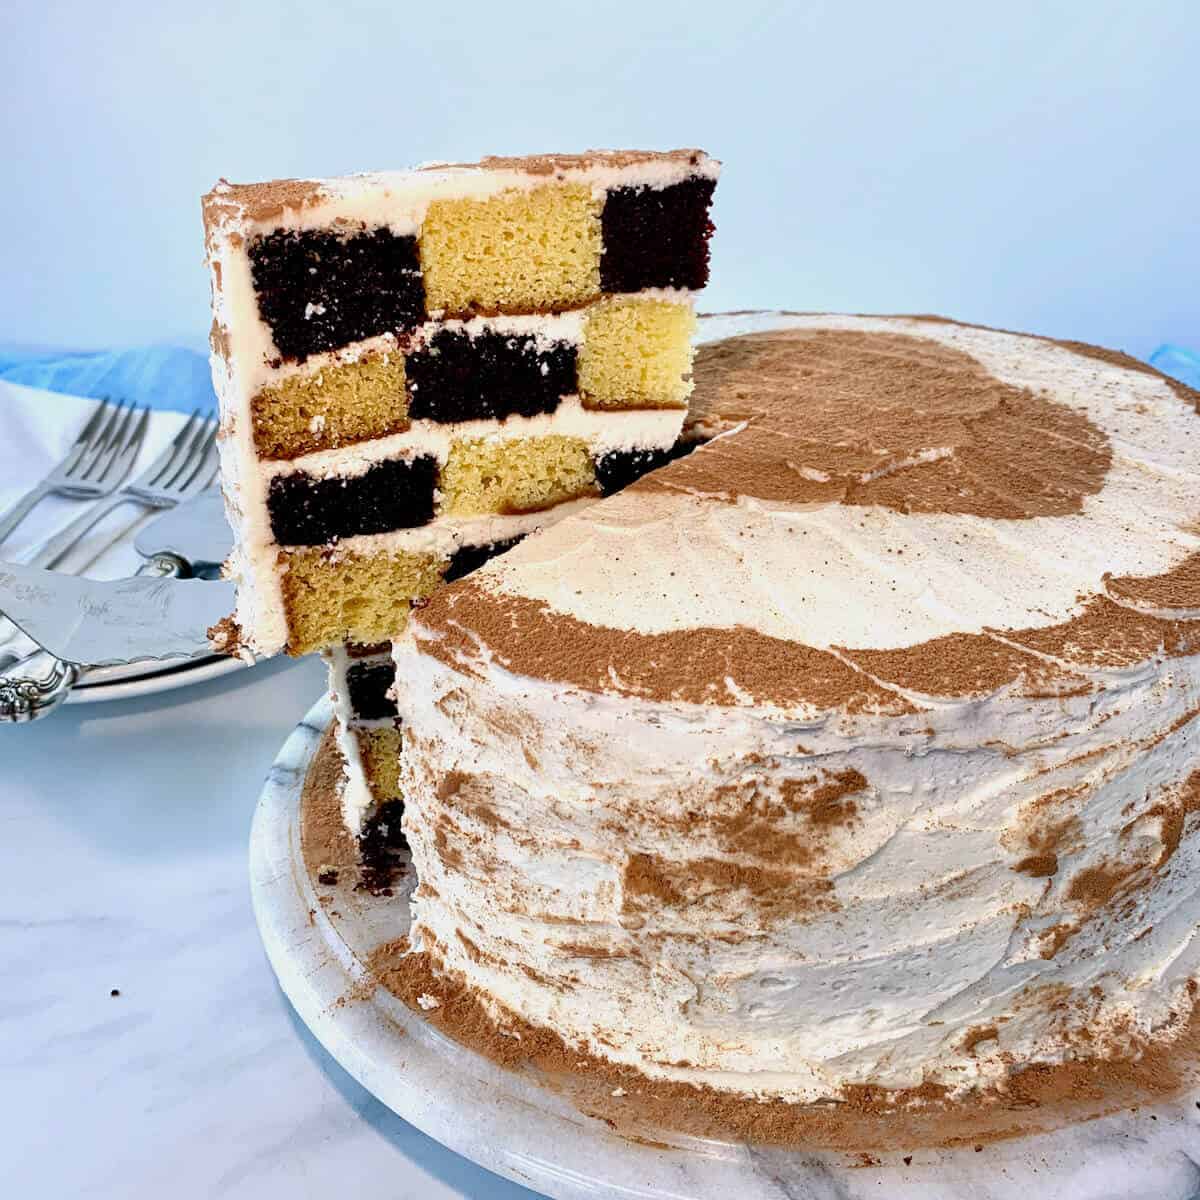
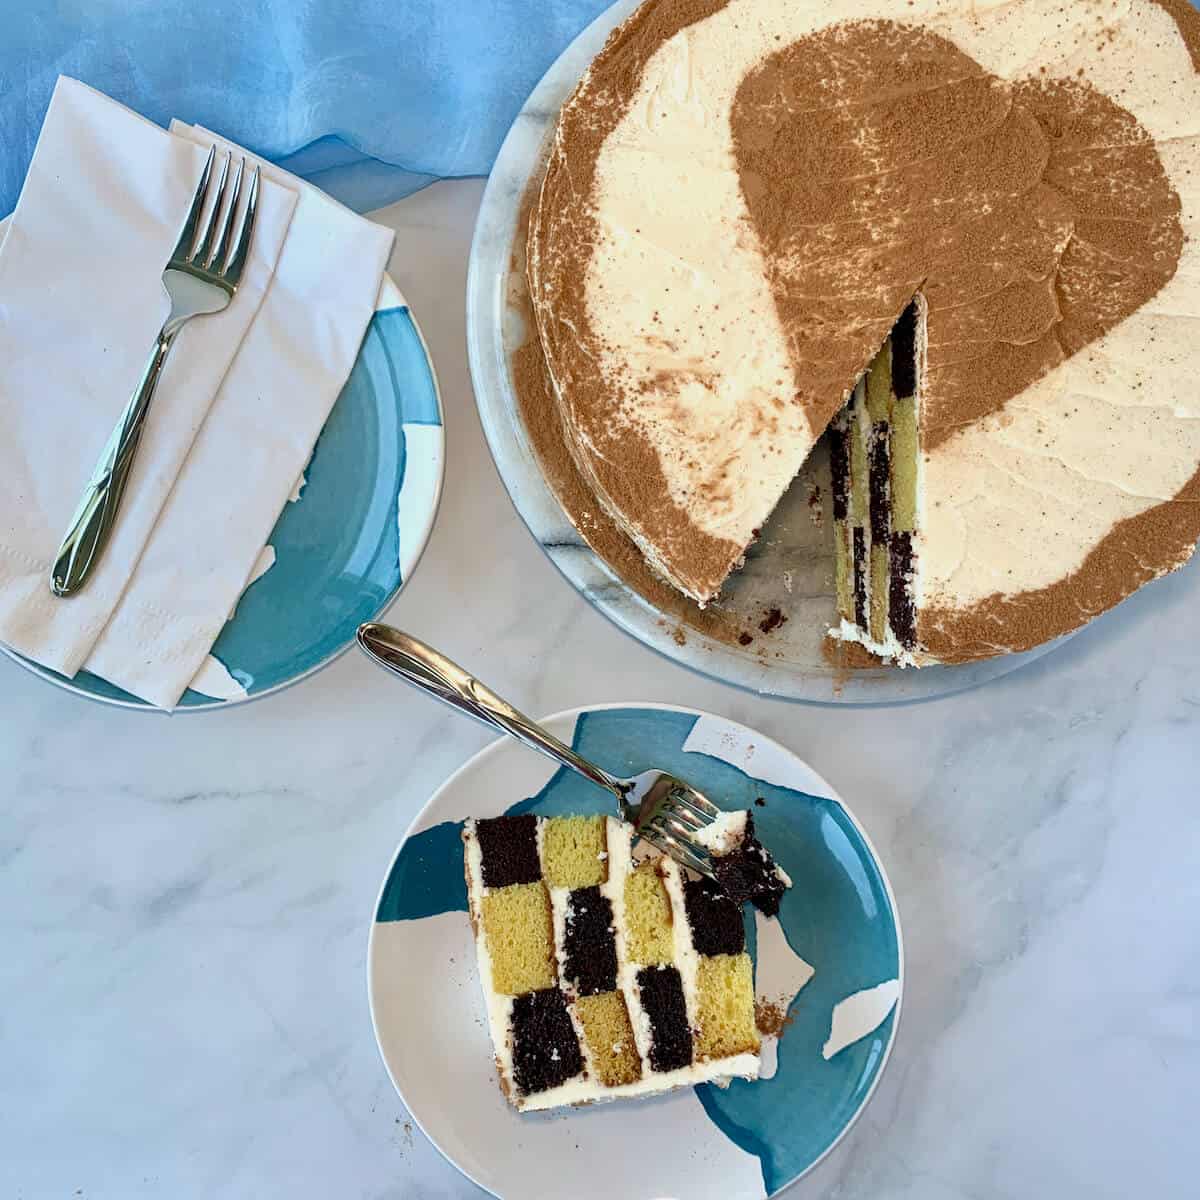
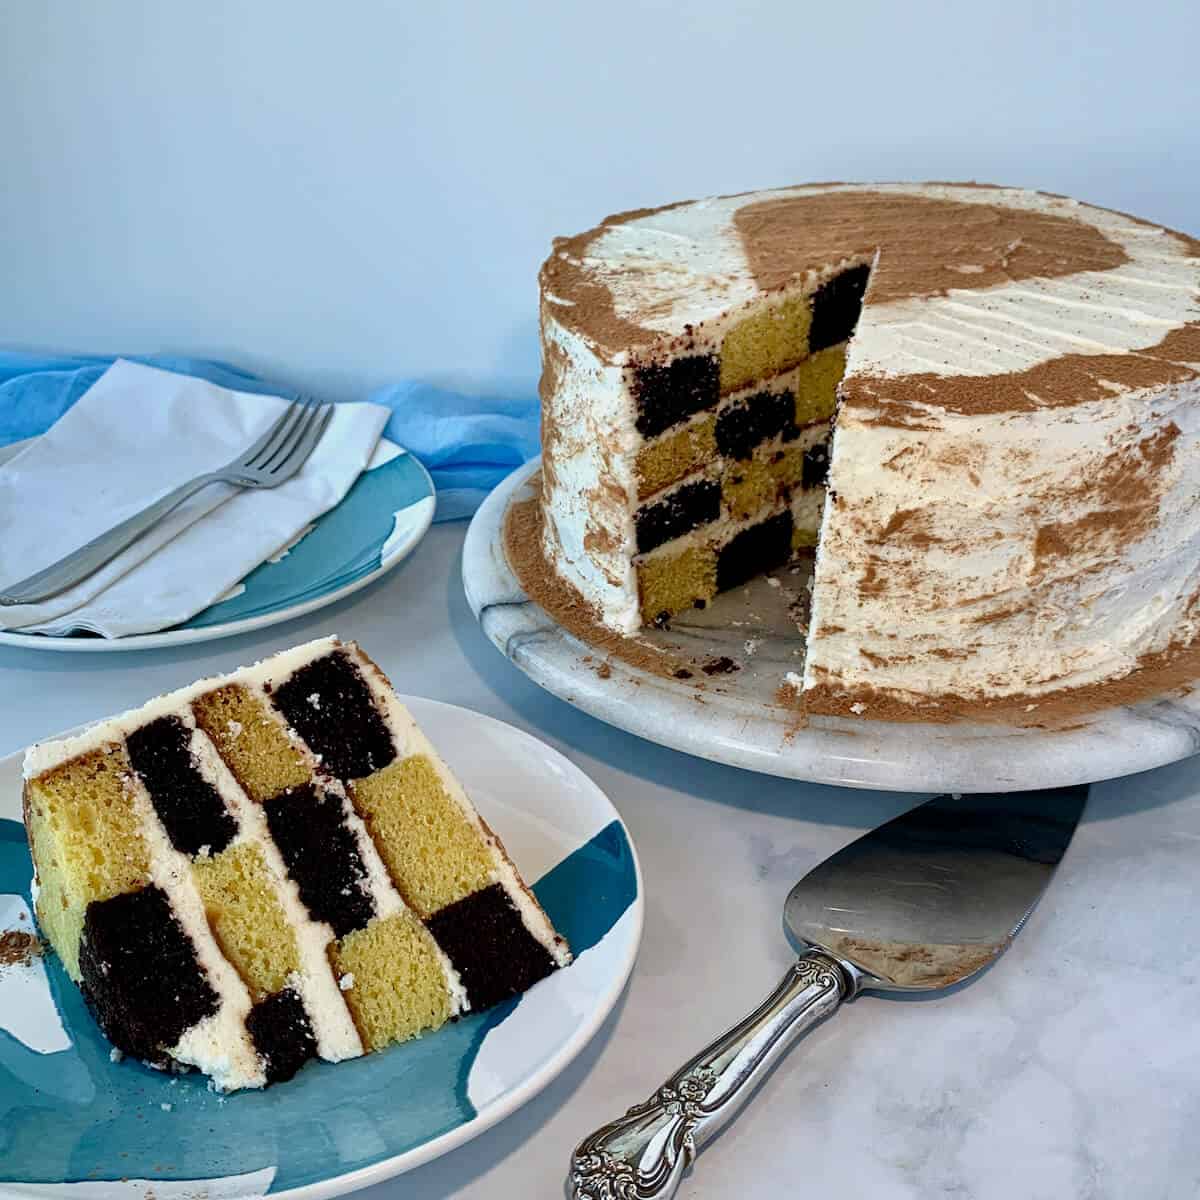
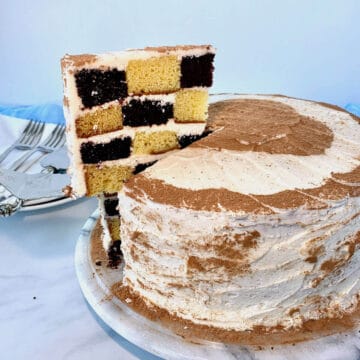
A checkerboard cake is a cake layered in a bull's-eye of alternating cake colors with the pattern reverse for each layer. When sliced, the bull's eye layers form that checkerboard pattern.
You will need two different cake colors to make it work. Here I'm using a chocolate and vanilla cake. You can also make two vanilla cakes, coloring each a separate color.
The trick is to make the concentric rings of equal widths from the cake layers. When they're stacked, the checkerboard will come out looking even (more or less, depending on how tall the cake layers rise).
This cake is as impressive to look at as it is tasty. Both cake flavors are rich and moist, and the buttercream isn't too sweet.
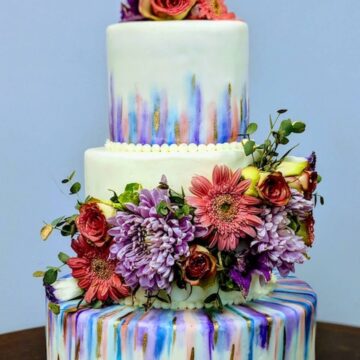
A checkerboard cake is a great way to show you're a fan of a sports team, a school, a house in Harry Potter (my favorite is Ravenclaw)...anything that has official colors.
Or celebrate a holiday in a new way. Make red and blue cake layers for a patriotic spin, orange and black for Halloween, pink and white for Valentines Day, or red and green for a cute Christmas cake.
And, you can use different flavors of buttercream to complement your chosen cake flavors (like Chocolate Buttercream Frosting) or make a less sweet version with Italian Meringue Buttercream Frosting.
Let your creative juices flow!
⭐⭐⭐⭐⭐
This is so cool! I've always wondered how they made these cakes, now I know 🙂
- Kelly
Recipe Ingredients
For this example, you'll be making a vanilla cake, a chocolate cake, and vanilla buttercream icing to bring it all together. You'll need the following ingredients to make the vanilla cake recipe:
These ingredients are for the chocolate cake recipe:

And these ingredients make the vanilla buttercream frosting recipe:
Ingredient Notes
The chocolate cake recipe is adapted from my Chocolate Port Wine Cake. You'll need flour, sugar, eggs, milk, canola oil, baking powder, baking soda, vanilla extract, and salt.
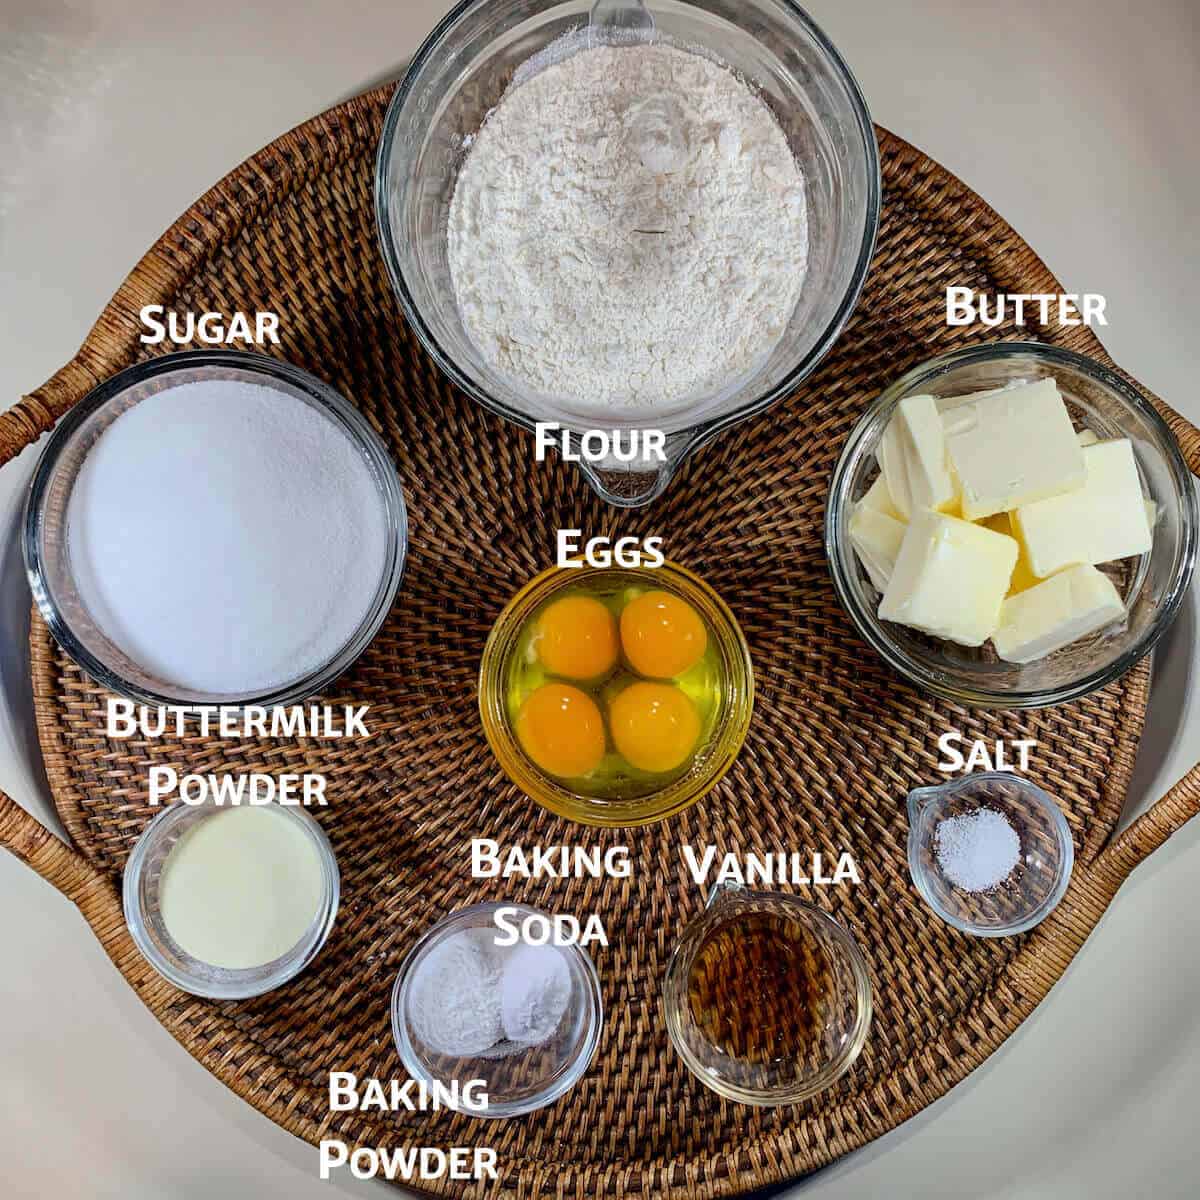
For the vanilla cake, the ingredients are similar to the chocolate cake: flour, sugar, eggs, butter, baking powder, baking soda, vanilla extract, and salt.
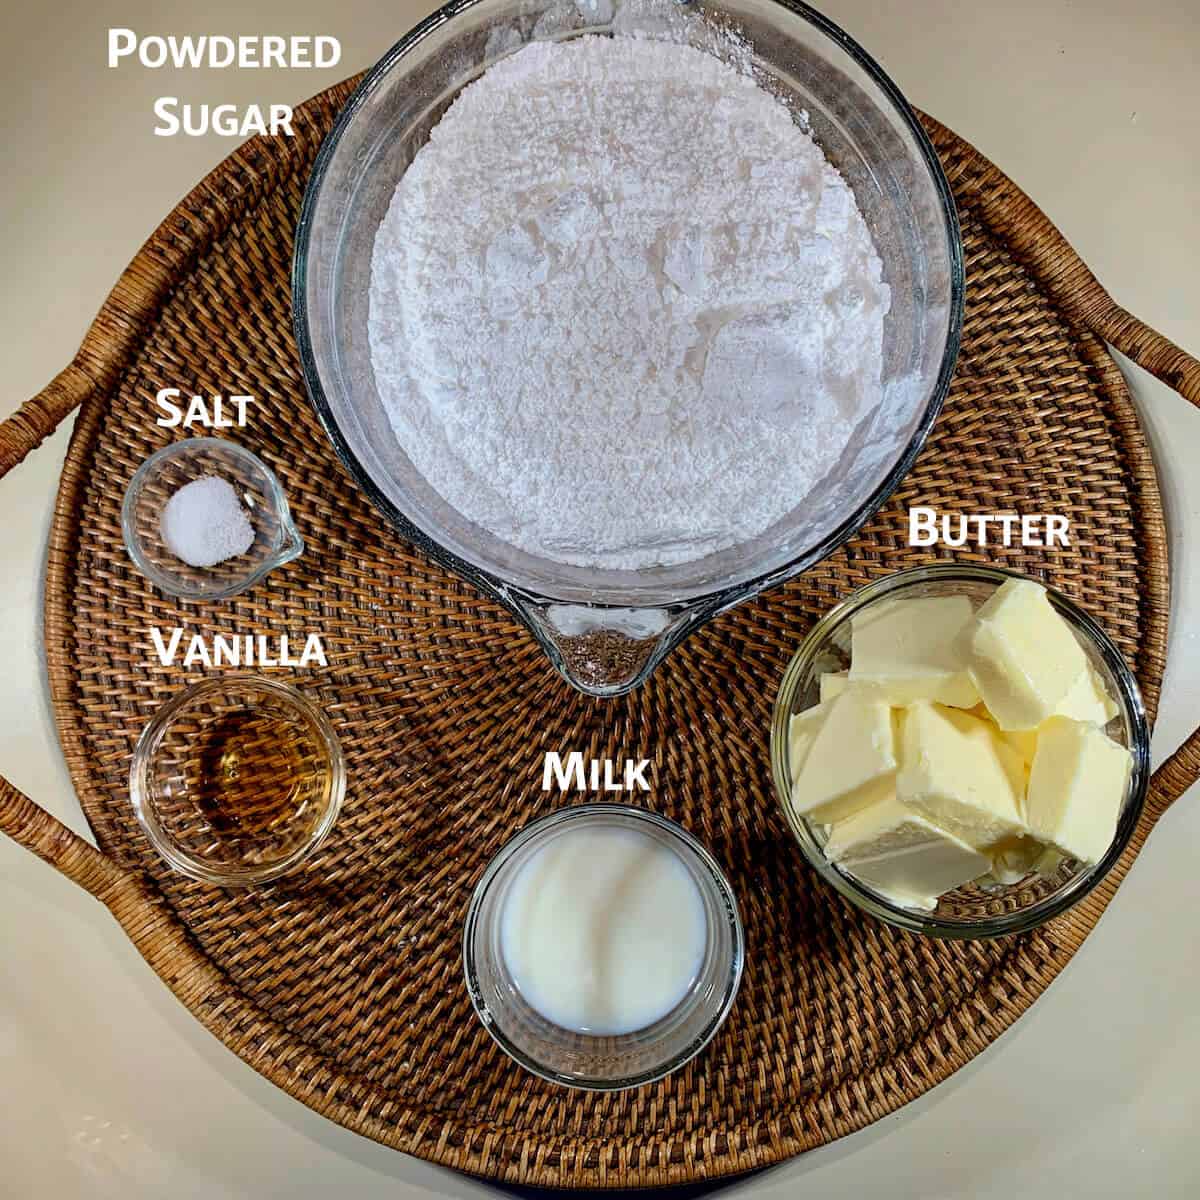
The vanilla buttercream frosting ingredients are just powdered sugar, butter, milk, and flavorings. Nothing fancy required.
Cocoa powder: For even deeper chocolate flavor, use dark chocolate cocoa powder.
Espresso powder: Enhances the chocolate flavor. It's not strictly necessary, but recommended. If you don't have espresso powder, you can replace the boiling water with hot coffee instead.
Buttermilk: You need buttermilk to react with the baking soda for both cakes. I use buttermilk powder (and the equivalent amount of water) because it's shelf-stable and keeps indefinitely. If neither are available, you can stir together ½ cup each water and sour cream (or plain Greek yogurt) instead. Or, take 1 cup of milk, remove 1 teaspoon, and stir in 1 teaspoon lemon juice or white vinegar. Let this mixture sit for 5 minutes before using.
Vanilla: For the buttercream frosting, you can use a fresh vanilla bean to see the seeds scattered throughout for a real homemade look.
Coloring: If you want to color your vanilla cake or buttercream frosting, gel food coloring works best because it won't thin the product. And, sprinkles add a colorful festive touch to the vanilla cake, and you can color coordinate them to your theme.
See the recipe card for a full list of ingredients and measurements.
How to make a checkerboard cake
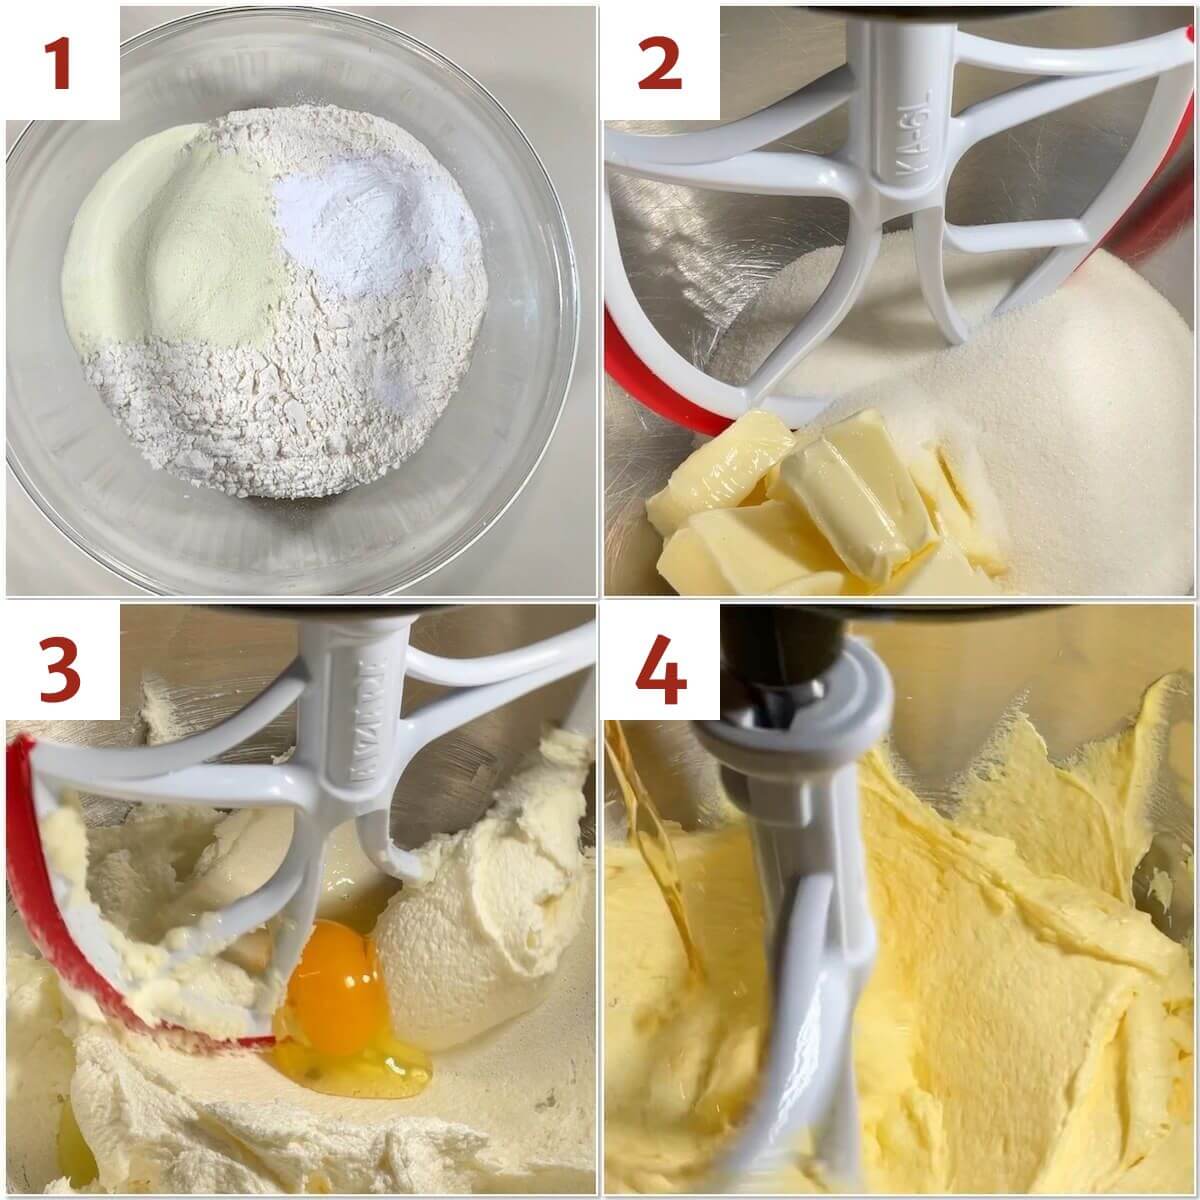
Step 1: Make the vanilla cake
Sift the flour, buttermilk powder, baking powder, baking soda, and salt (photo 1).
Beat the butter and sugar together until creamy (photo 2), then add the eggs in, one at a time (photo 3) before adding in the vanilla extract (photo 4).
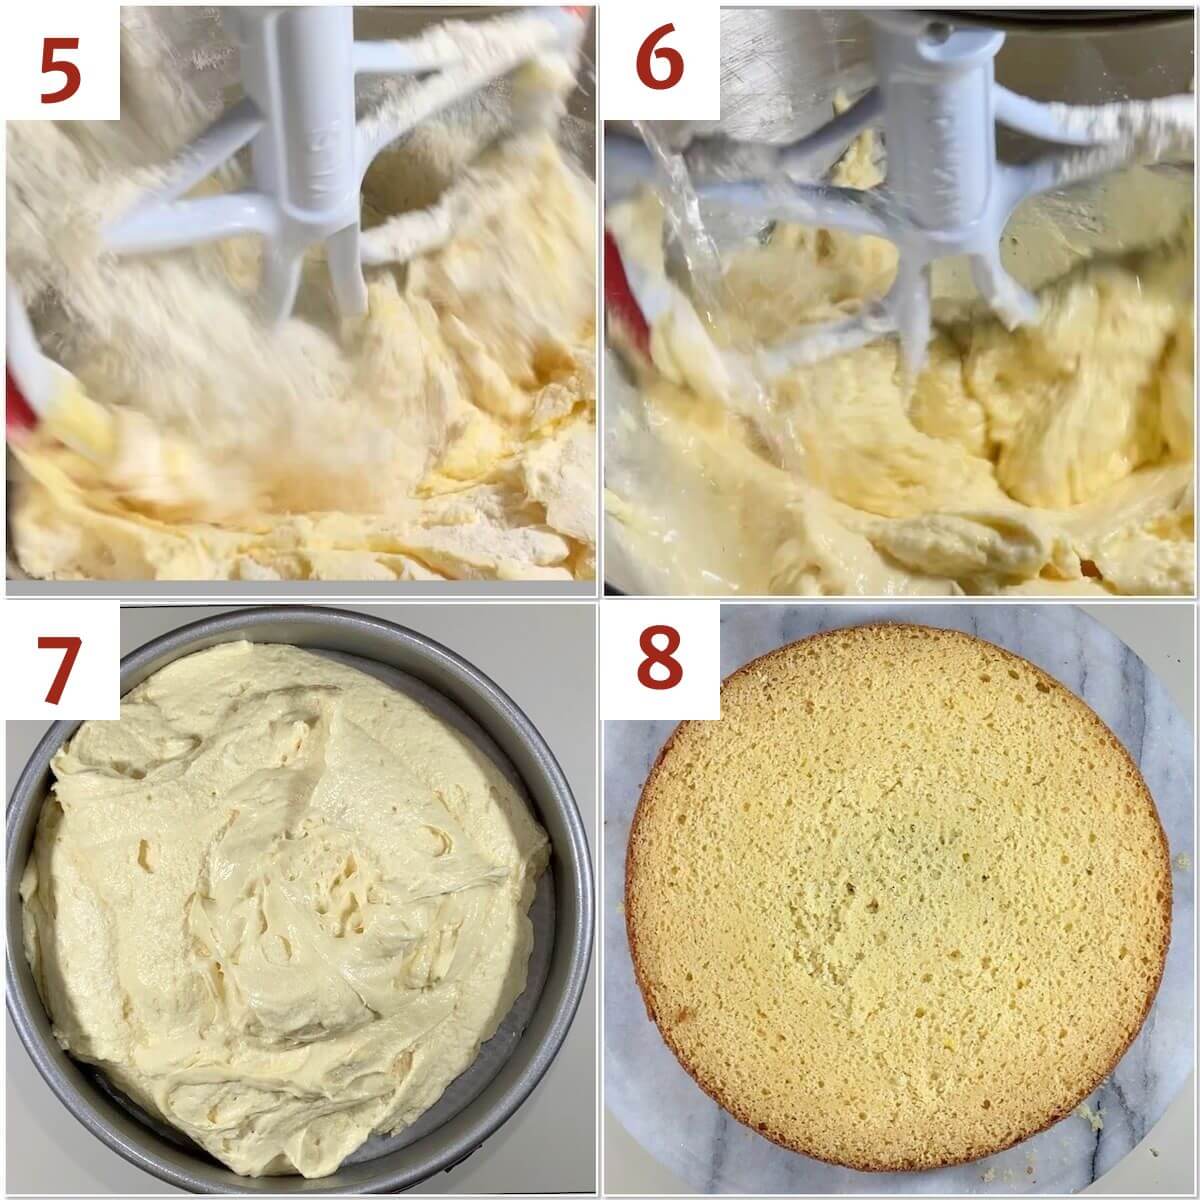
Alternate adding ⅓ of the flour mixture (photo 5) with ½ of the water (photo 6), mixing after each addition until the batter is just incorporated. Try not to over-mix the batter so you keep the cake nice and tender. Add food coloring and/or sprinkles, if desired.
The batter will be smooth and thick, so use a small offset spatula to smooth out the top after pouring into the two 9-inch round cake pans lined with parchment paper rounds (photo 7). Bake until a cake tester comes out clean, about 25 to 30 minutes.
If the top of the cake has a dome on it, level it off with a serrated knife (photo 8). You'll need even layers to keep the checkerboard pattern from drooping.
Step 2: Make the chocolate cake
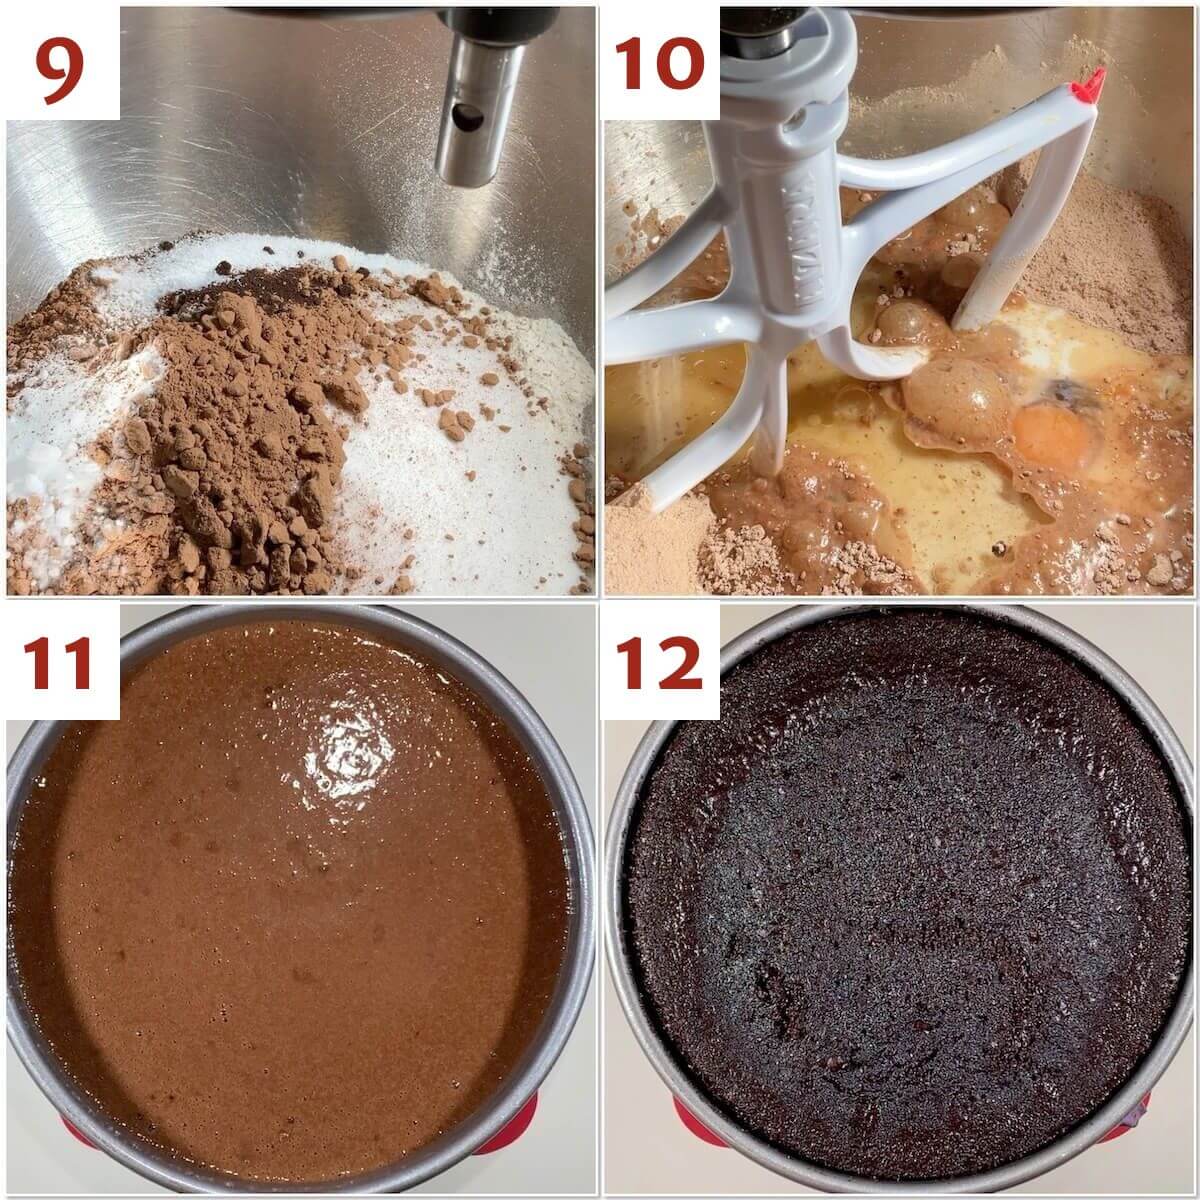
Stir together the flour, sugar, cocoa powder, baking soda, baking powder, espresso powder (if using), and salt (photo 9).
Mix in the eggs, milk, canola oil, and vanilla extract, then slowly add the boiling water (photo 10). Stir on low speed, again until just combined.
This batter will be thinner than the vanilla batter, so tap out the air bubbles after dividing the batter between the two cake pans (photo 11). The cake is fudgy, so it's ok if a cake tester comes out with a few crumbs (photo 12). You don't want to over-bake the layers.
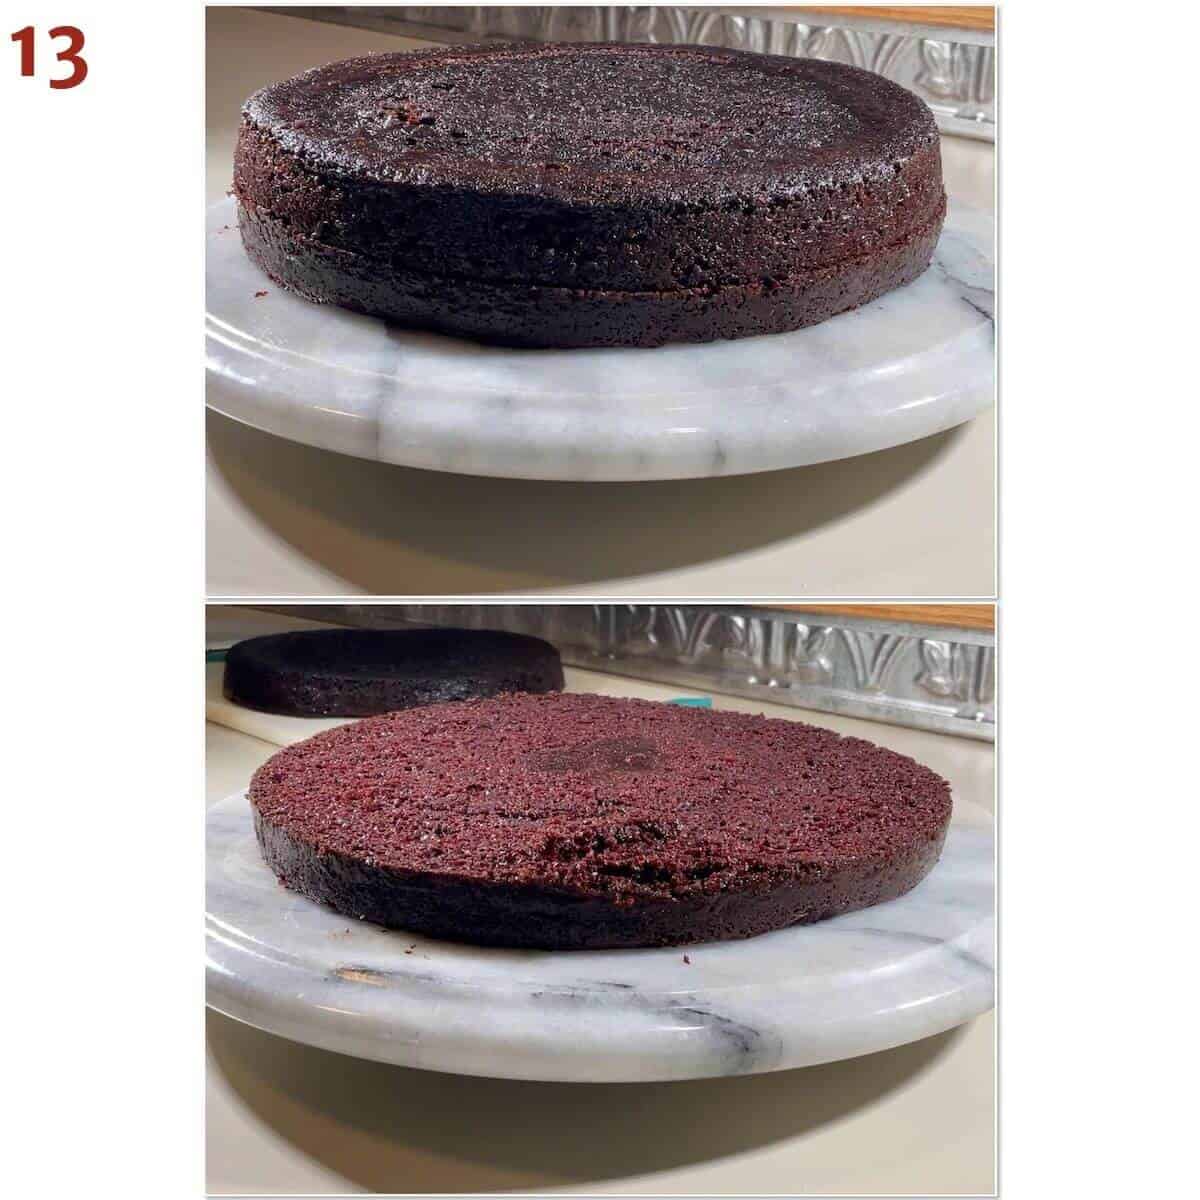
I love to use Bake-Even strips when I bake cakes. They insulate the outside part of the cake pan, allowing the center of the batter to bake…well…evenly with the outer edges. What you get is a flat-topped layer cake that then doesn't have to be trimmed. You can see how flat the top of the chocolate cake is when I use them.
Here I split the cake into two layers because I baked the cake in one round baking pan instead of two - see how in the tips for cake success below (photo 13).
Step 3: Make the buttercream
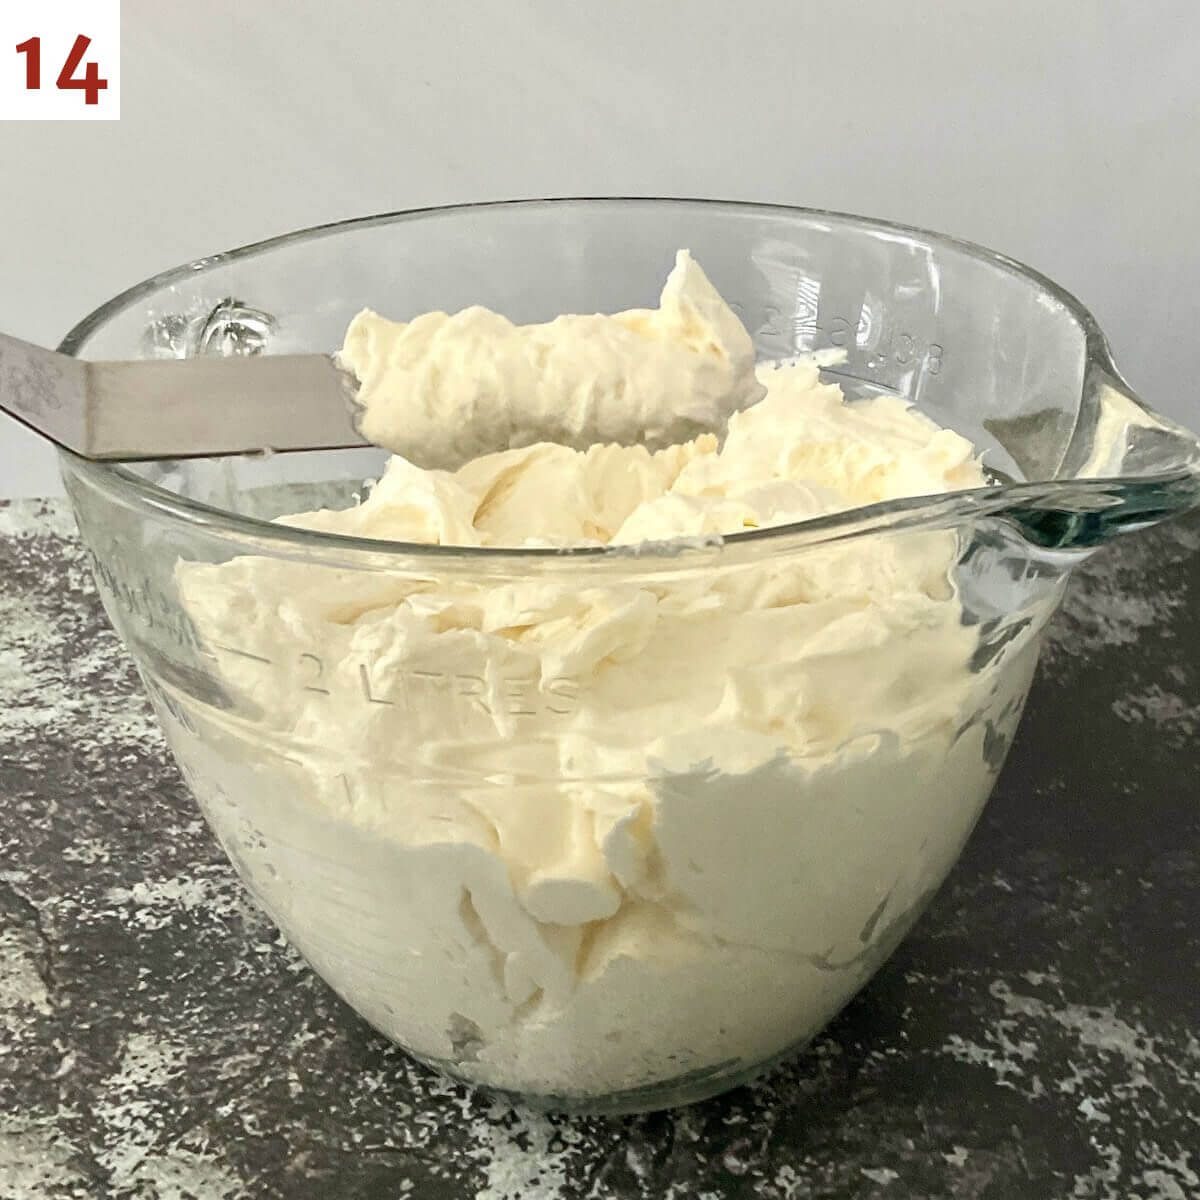
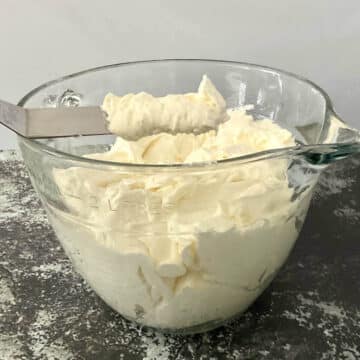
The vanilla buttercream frosting is easy to make. Beat the butter until it's creamy, the add the powdered sugar, heavy cream, vanilla extract, and salt and beat at high speed until the buttercream is light and fluffy (photo 14).
How to assemble the cake
Step 4: Cut the cake layers into rings
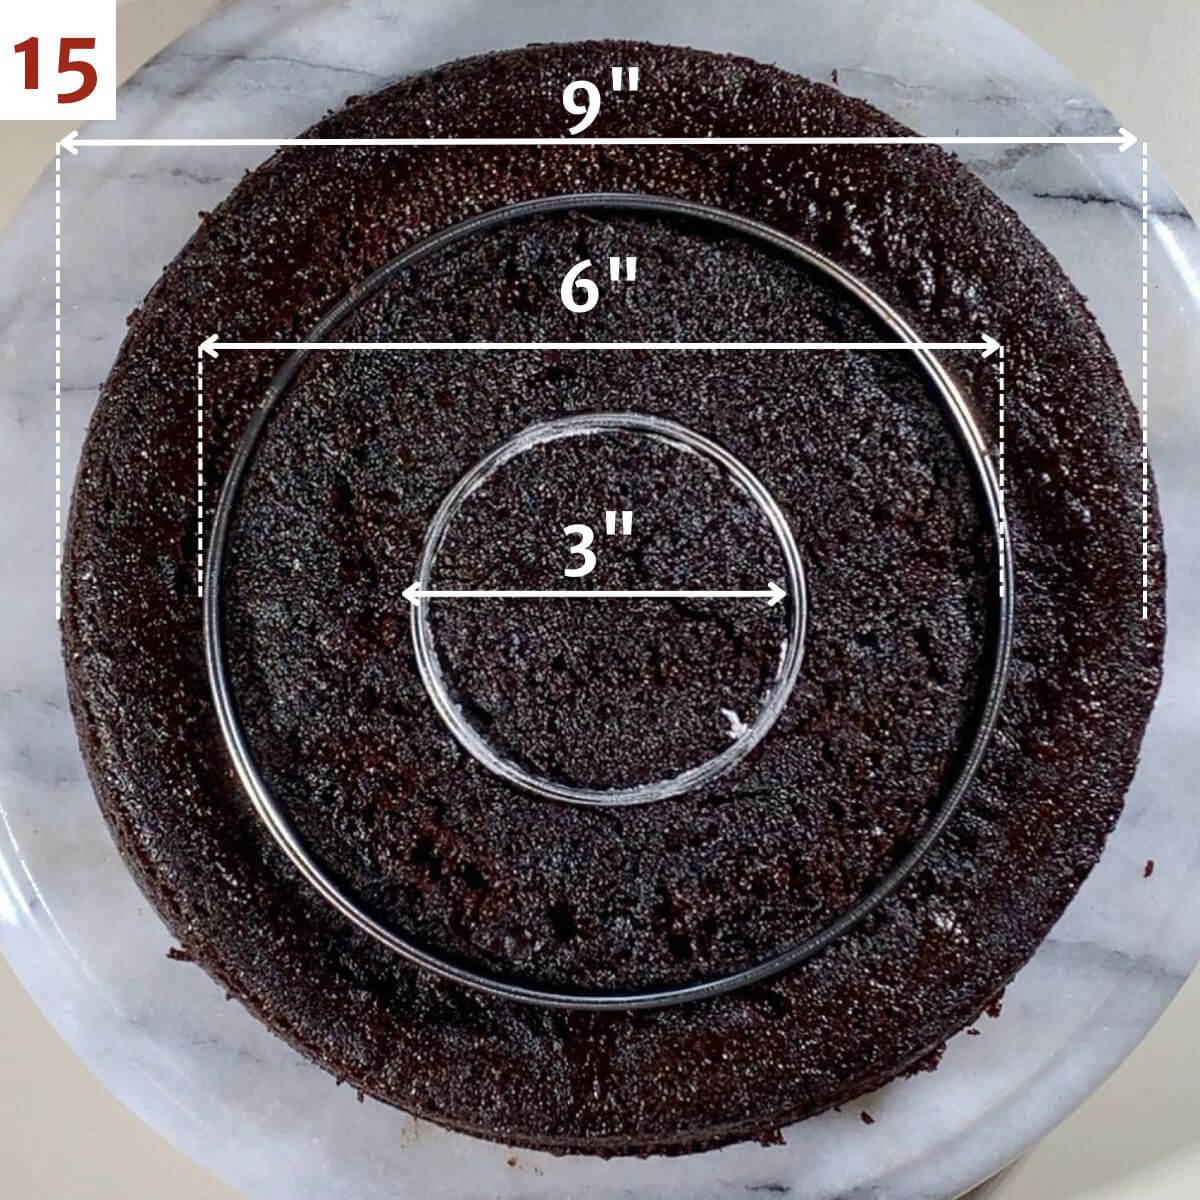
You'll need to cut each cake layer so that you'll have 3 even concentric circles: the outer ring, a middle ring that's ⅔ the diameter of the layer, and an inner circle that's ⅓ the diameter of the layer - this will insure the checkerboard squares are even. That means for 9-inch cake, you'll be cutting each layer into 6-inch and 3-inch circles (photo 15).
See the FAQs for suggestion on what to use to cut your layers (without a special checker cake pan), and how to make a smaller 6-inch cake.
Step 5: Alternate the rings in a layer
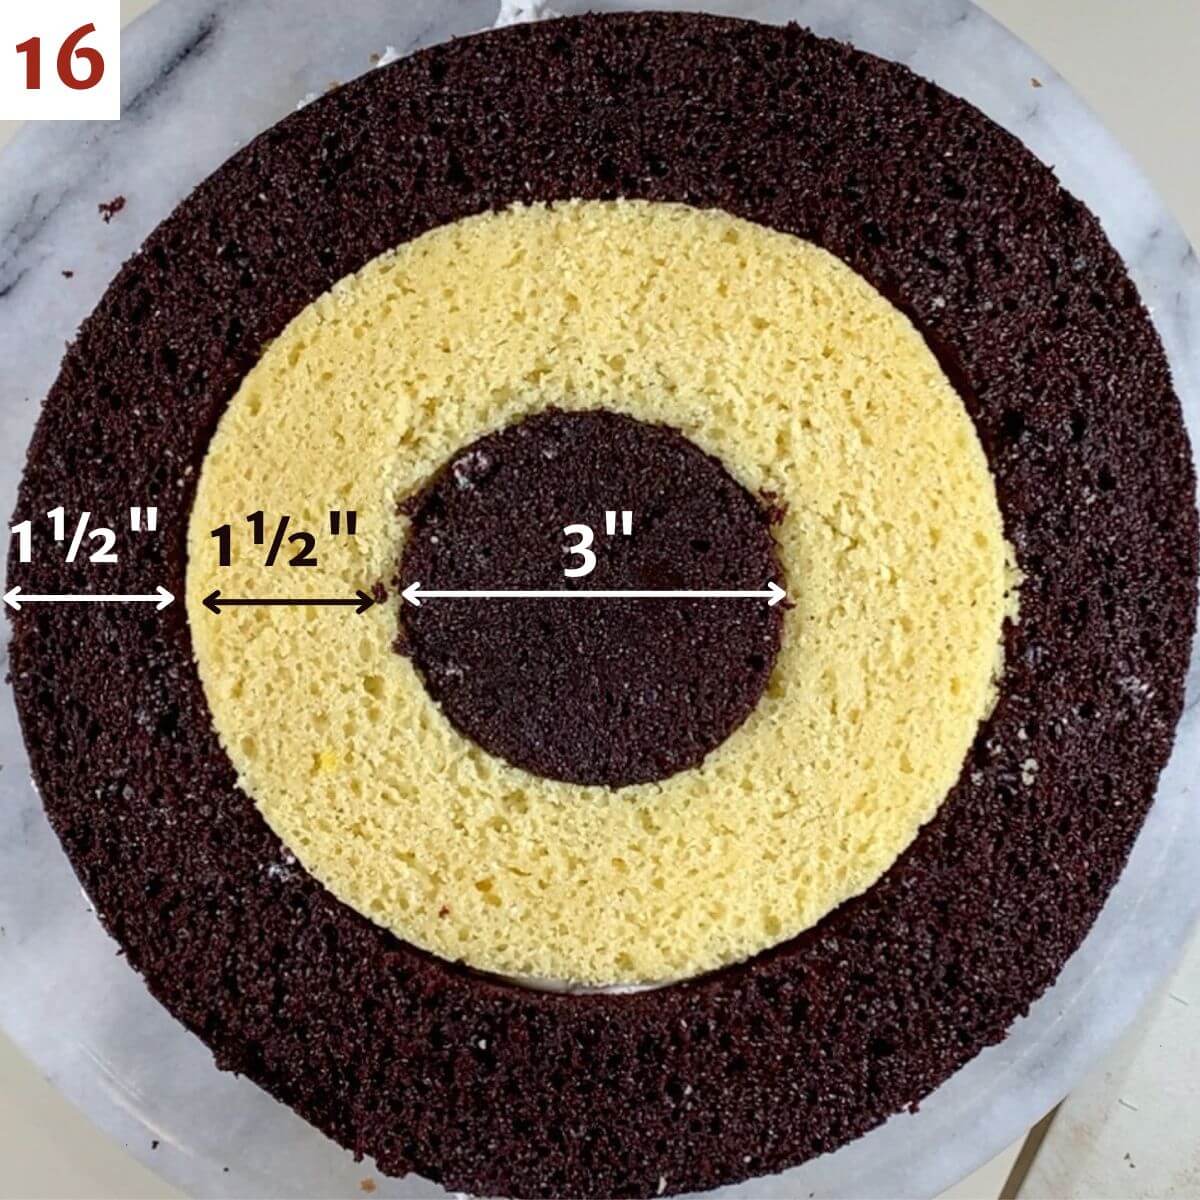
Carefully separate the cake circles and put the middle ring from one color inside the outermost ring of the other color with center circle matching the outer ring. You'll have an outer ring and middle that are both 1½ inches wide, and the center will be 3 inches in diameter (photo 16). Frost the layer with the buttercream.
When you stack the next layer, use the opposite color rings. Repeat the pattern two more times, frosting between each layer with the buttercream.
Step 6: Decorate the cake
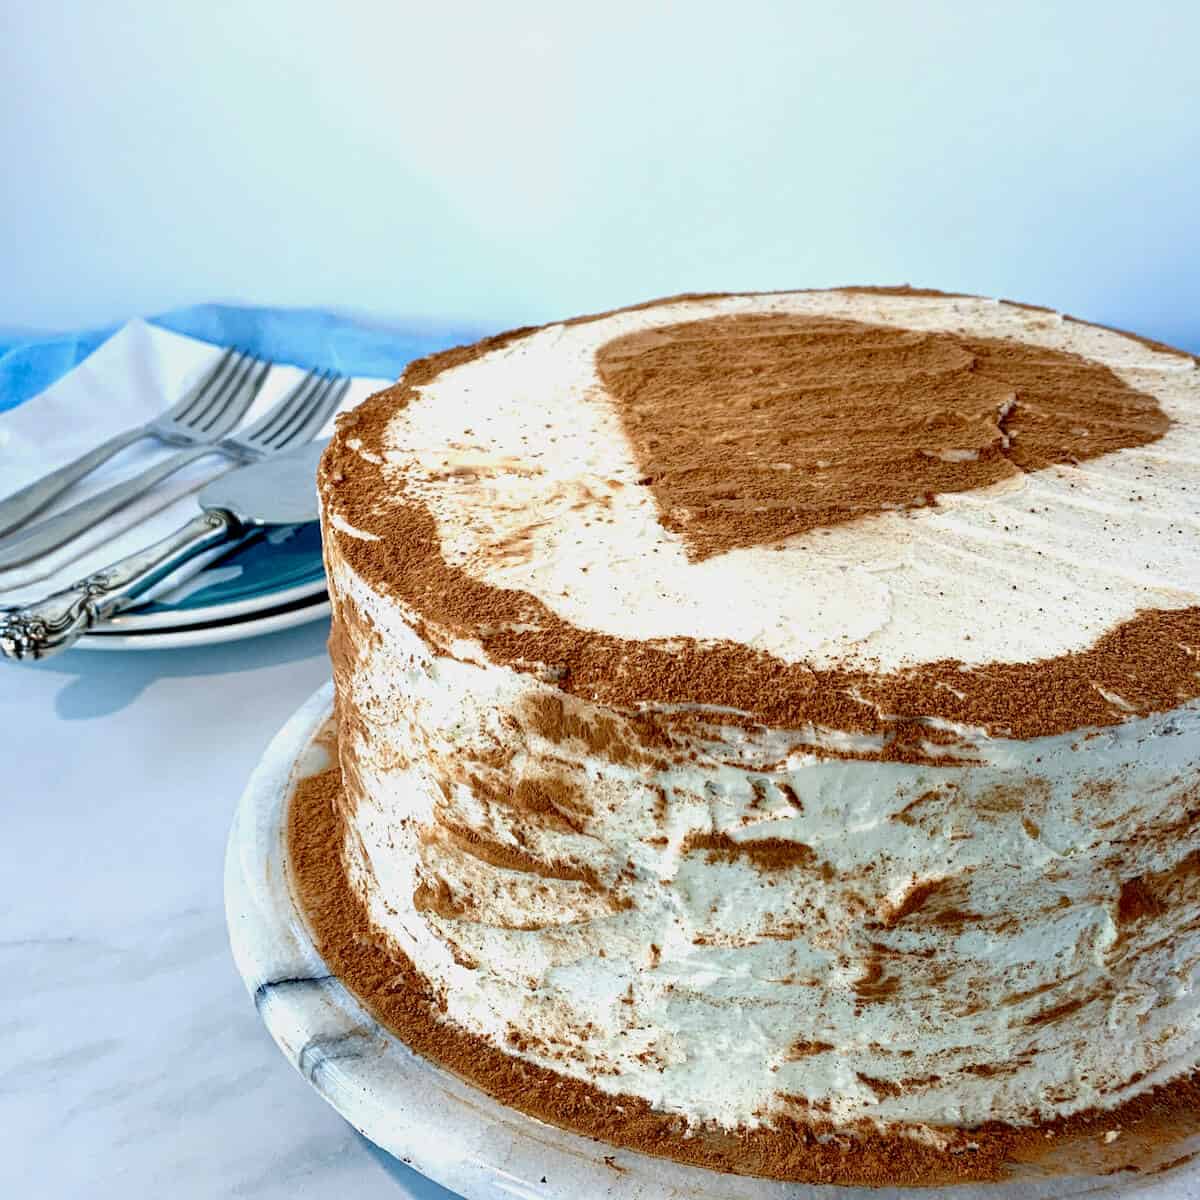
Apply thin layer of frosting to crumb coat the cake, then chill until the frosting is firm. Use the remaining buttercream frost the top and the sides of the cake, then decorate as desired. I created a stencil for a heart cutout and a scalloped edge from paper, then dusted with cocoa powder.
This is a four layer cake, so you don't need to go overboard with the decorations. The surprise is on the inside!
Storage and make-ahead instructions
Storage instructions: The chocolate and vanilla cake layers can be stored at room temperature for 1 to 2 days, or well covered in the refrigerator for up to a week.
Make-ahead instructions: Bake the cakes and let them cool, then wrap the layers individually with plastic wrap and refrigerate or freeze until you're ready to assemble. Let the cakes defrost in the refrigerator before using.
Store the vanilla buttercream in an airtight container in the refrigerator for up to 2 weeks. Allow the buttercream to sit on the counter for an hour or so to get to room temperature. Stir it well to get it nice and fluffy again.
Tips for cake success
Here are a few tips to make sure your checkerboard cake is successful:
- Baking layers with one cake pan: If you only have one 9-inch round cake pan, fill it ⅔ full so it doesn't overflow and bake cupcakes with remaining batter. Bake that layer for 40 to 45 minutes, covering with foil after 30 minutes (the cupcakes only need about 20 minutes to bake). After the cake has cooled and been leveled (if needed), slice the cake in half horizontally to create 2 equal layers.
- Have your ingredients at room temperature: You want your butter, eggs, and any dairy products at room temperature so they will mix together easier. This will keep you from over-mixing the batter (and not incorporating too much air), so your cakes will have a better texture and crumb.
- Measure your ingredients carefully: I always use a kitchen scale to measure out my ingredients, hence why I offer you weight as well as volumetric measures for each ingredient. Especially for flour, if you are going to use the volume measurements make sure to fluff it, then spoon into the cup and level off the top. That way you don't pack too much in, which can result in a dry cake.
- Be sure to crumb coat and chill the cake before frosting: These are tender cakes, which can tear if you frost them after layering. Applying a then layer of frosting and chilling it will give you a firmer surface on which to apply the final frosting layer.
Questions asked and answered
Here are some questions you might have...
There are cake pans designed specifically for baking a checkerboard cake, but that's not your only option. As I demonstrated, you can cut the rings from a 9-inch cake using a 6-inch cookie cutter and a 3-inch cookie cutter. Or, just make a template for the 2 sizes you need from cardboard or parchment paper, then cut your rings using your patterns as a guide.
Yes! Divide the cake recipes in half and bake each color in two 6-inch round cake pans. Use a 4-inch round cookie cutter and a 2-inch round cookie cutter to make the rings. Assemble the checkerboard as described. You can even make it only three layers, and use the other half of one of the cake recipes for another use.
Didn't find the answer you're looking for?
Ask AI to answer for this specific recipe:
Disclaimer: I am not responsible for the quality of AI information

I hope you like this recipe! Let me know if you have any questions, and don't forget to leave a comment and rating. Thanks!
Slainté! L'chaim! Cheers!
- Tammy
More recipes for cake to try

Recipe

Checkerboard Cake
Equipment
Ingredients
For the chocolate cake
- 2 cups all-purpose flour
- 2 cups granulated sugar
- ¾ cup cocoa powder, sifted
- 2 tablespoons buttermilk powder, optional, see Recipe Notes
- 2 teaspoons baking soda
- 1 teaspoon baking powder
- 1 teaspoon espresso powder, optional, but recommended
- 1 teaspoon kosher salt
- 2 large eggs, at room temperature
- 1 cup milk, at room temperature
- ½ cup canola oil
- 2 teaspoons pure vanilla extract
- 1 cup boiling water
For the vanilla cake
- 3 cups all-purpose flour
- 2 tablespoons buttermilk powder, see Recipe Notes
- 2 teaspoons baking powder
- 1 teaspoon baking soda
- ¼ teaspoon kosher salt
- 2 cups granulated sugar
- 1 cup unsalted butter, at room temperature
- 4 large eggs, at room temperature
- 1 tablespoon pure vanilla extract
- 1 cup water, see Recipe Notes
- ⅔ cup sprinkles, optional, see Recipe Notes
For the vanilla buttercream frosting
- 1 recipe vanilla buttercream frosting, homemade or store bought
Instructions
- Preheat oven to 350 °F. Spray two 9-inch round cake pans with baking spray and line them with 9-inch parchment paper rounds. Spray the parchment paper rounds. Set aside. See the Recipe Notes if you only have one 9-inch round cake pan.
- Soak the Bake-Even strips (if using) in cold water for 5 minutes. Press out the excess water (do not wring), and wrap them snugly around the cake pans. These will help the cake bake evenly, so there's no need to level them later. Set the pans aside.
- Make the chocolate cake: In the bowl of a stand mixer fitted with a paddle attachment (or a hand mixer and a large bowl), whisk together 2 cups all-purpose flour, 2 cups granulated sugar, ¾ cup cocoa powder, 2 tablespoons buttermilk powder, 2 teaspoons baking soda, 1 teaspoon baking powder, 1 teaspoon espresso powder, and 1 teaspoon kosher salt.
- Add 2 large eggs, 1 cup milk, ½ cup canola oil and 2 teaspoons pure vanilla extract to the bowl and mix well. Slowly add 1 cup boiling water. Mix on low speed until just combined. Don't over-mix the batter.
- Divide the batter equally between the two prepared cake pans (about 3 cups of batter per pan). For the most accurate method, weight the batter with a large bowl set on a kitchen scale. Calculate half the measured weight. Place each cake pan on the zeroed-scale and measure that calculated amount of batter into both cake pans.
- Tap out the pans on the counter to release any trapped air bubbles. Bake for 25 to 30 minutes or until a cake tester comes out with a few crumbs. The cake is fudgy, so be careful not to over-bake the layers.
- Remove the cakes from the oven and allow them to cool for about 10 minutes, then transfer the cakes to cooling racks to cool completely.
- Make the vanilla cake: Clean the cake pans, then spray them with baking spray. Line the pans with parchment paper and spray with baking spray. You can reuse the parchment paper circles from before or put in new paper.
- Re-soak the Bake-Even strips (if using). Once again press out the excess water (do not wring), and wrap them snugly around the cake pans.
- In a large bowl, whisk together 3 cups all-purpose flour, 2 tablespoons buttermilk powder, 2 teaspoons baking powder, 1 teaspoon baking soda, and ¼ teaspoon kosher salt.
- In the bowl of a stand mixer fitted with a paddle attachment (or a hand mixer and a second large bowl), beat 2 cups granulated sugar and 1 cup unsalted butter together on medium-high speed until the mixture is creamy and smooth. If needed, scrape down the sides of the bowl with a spatula.
- On medium speed, add 4 large eggs, one at a time, beating well after each addition, then mix in the 1 tablespoon pure vanilla extract.
- Alternate adding ⅓ of the flour mixture with half of the 1 cup water, mixing after each addition until the batter is just incorporated. The batter will be smooth and thick. Fold in ⅔ cup sprinkles (if using).
- Divide the batter into the prepared cake pans. Use a small offset spatula to smooth the top, if necessary.
- Bake the cakes for 25 to 30 minutes or until a cake tester comes out clean. Remove the cakes from the oven and allow to cool for about 10 minutes, then remove to cooling racks to cool completely.
- Assemble the checkerboard cake: The cakes must be completely cool before assembling the cake. If you didn't use the Bake-Even strips, trim the cake tops to level them.
- Using a 6-inch round cookie cutter, cut a circle into each cake layer. Using a 3-inch round cookie cutter, cut a circle out of the 6-inch circle. You will have four 3-inch circles (the centers), four 6-inch rings (the inner rings), and four 9-inch rings (the outlines). Use the video to see how this step will look.
- Place one vanilla 9-inch outline of cake onto a serving plate or cake stand. Fill with a chocolate 6-inch ring, then a vanilla center for the first layer.Spread the buttercream frosting evenly on top using a large offset spatula. Use a cake lifter to transfer the outer ring if the cake is soft.
- The next layer will be a 9-inch chocolate outline filled with 6-inch vanilla ring and 3-inch chocolate center. Spread the buttercream evenly over this layer. Repeat the pattern for next 2 layers using the opposite cake flavors each time.
- Cover the top and sides of the cake with the remaining buttercream. Decorate the top and sides of cake as desired. For neater slices when serving, refrigerate the cake for at least an hour before serving to let the buttercream set.
- Serve and enjoy the amazement of your family and friends!
- Storage Instructions: This cake can be stored at room temperature for 1 to 2 days, or well covered in the refrigerator for up to a week.
- Make-ahead instructions: You can make the cakes ahead of time, then wrap the layers individually with plastic wrap and refrigerate or freeze until you're ready to assemble. Let the cakes defrost in the refrigerator before using.Store the vanilla buttercream in an airtight container in the refrigerator for up to 2 weeks. Allow the buttercream to sit on the counter for an hour or so to get to room temperature. Stir it well to get it nice and fluffy again.
Notes
- Stir together ½ cup each water and sour cream (or plain Greek yogurt).
- Take 1 cup of milk, remove 1 teaspoon, and stir in 1 teaspoon lemon juice or white vinegar. Let this mixture sit for 5 minutes before using.

Kelly says
This is so cool! I’ve always wondered how they made these cakes, now I know 🙂
Jonathan Mitchell says
I actually got a notification about this post! The fun part of that kind of cake as a kid is pulling it apart, treating each square as a separate cake, getting all the icing off on the bottoms and making another cake of the pieces! Eat a few, stack a few. Giggle until the sugar is too much
Tammy says
I love it! Stack the cubes & make a fort, or a wall, or ...
Jonathan Mitchell says
I work at play. I’m a play explorer!