
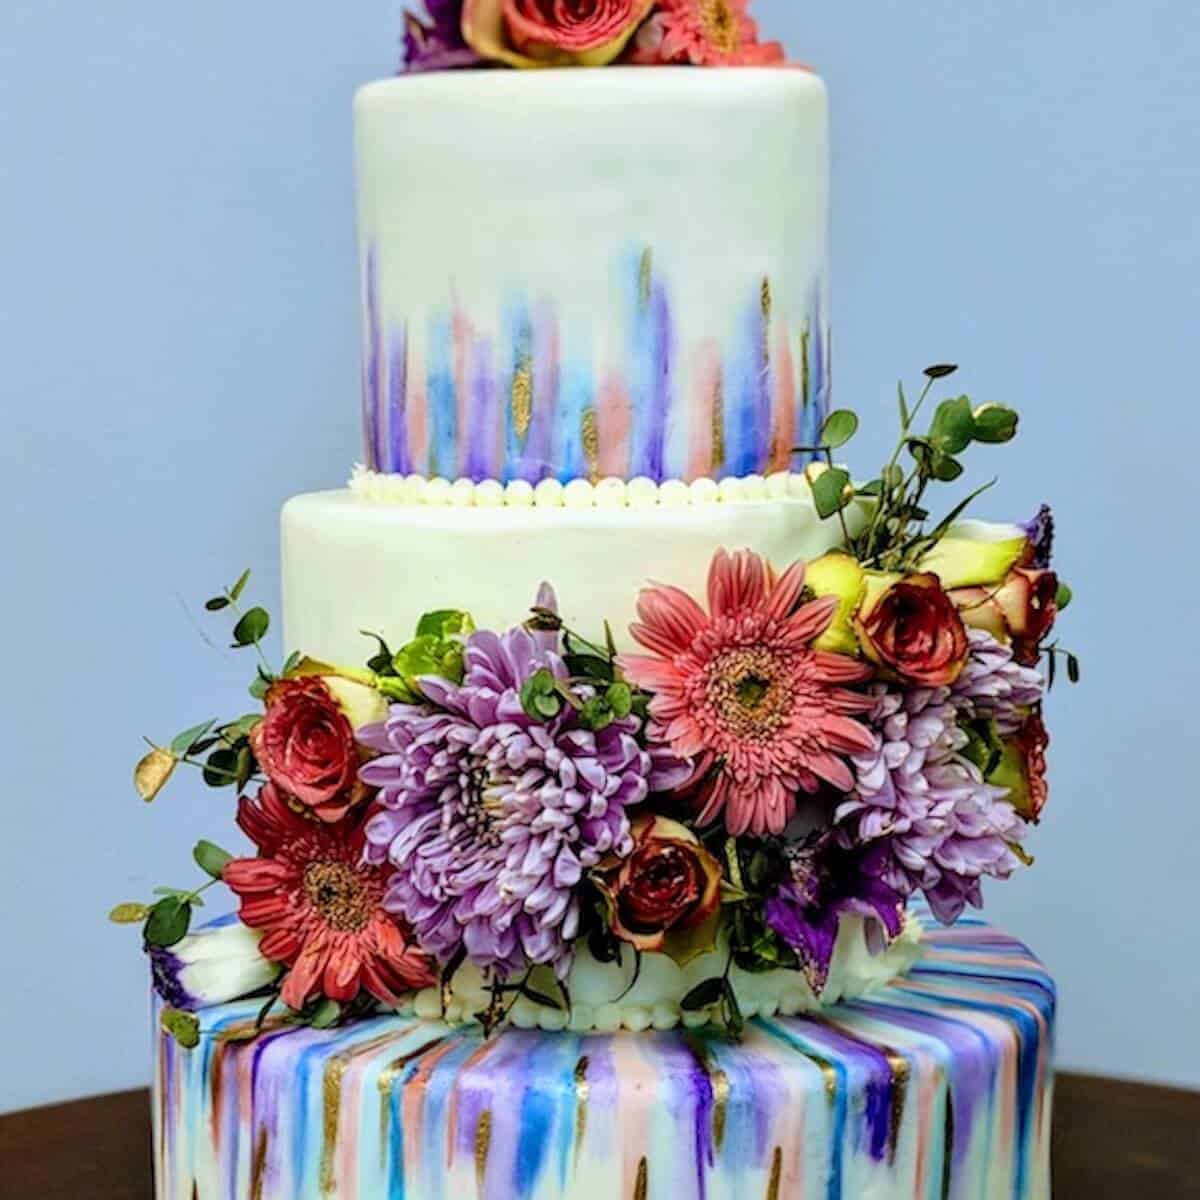
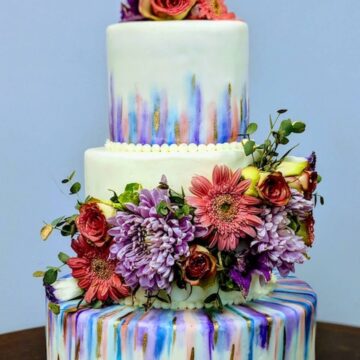
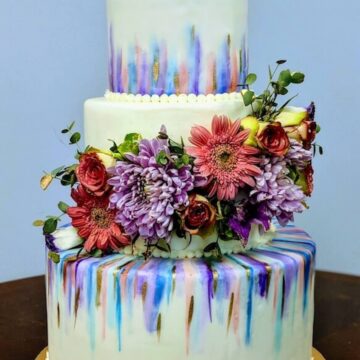
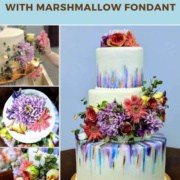
Our DIY wedding cake, decorated with hand-painted pastel watercolor stripes and fresh and gilt flowers, uses marshmallow fondant for better taste and usability. This 3-tiered wedding cake also houses a secret!
Jump to:
- Why these instructions work
- An award-winning cake decorator knows how to design cakes
- Cake sculpting secrets
- Our DIY wedding cake design
- What you need for a DIY wedding cake
- How to make marshmallow fondant
- Storage instructions
- Making and using fondant
- How to make a DIY wedding cake
- Questions asked and answered
- How to make sculpted cakes
- Recipe
- Comments
Why these instructions work
- The design, with hand-painted watercolor stripes and fresh flowers, is easy and beautiful
- Using styrofoam instead of cake for some of the tiers brings down the baking time and cost considerably
- Marshmallow fondant is an improvement on boxed fondant, both in taste and usability
When my daughter and son-in-law got married (with a Mama-baker and a very artistically talented younger daughter around), you can correctly guess that our kitchen didn't remain quiet in the days leading up to the wedding.
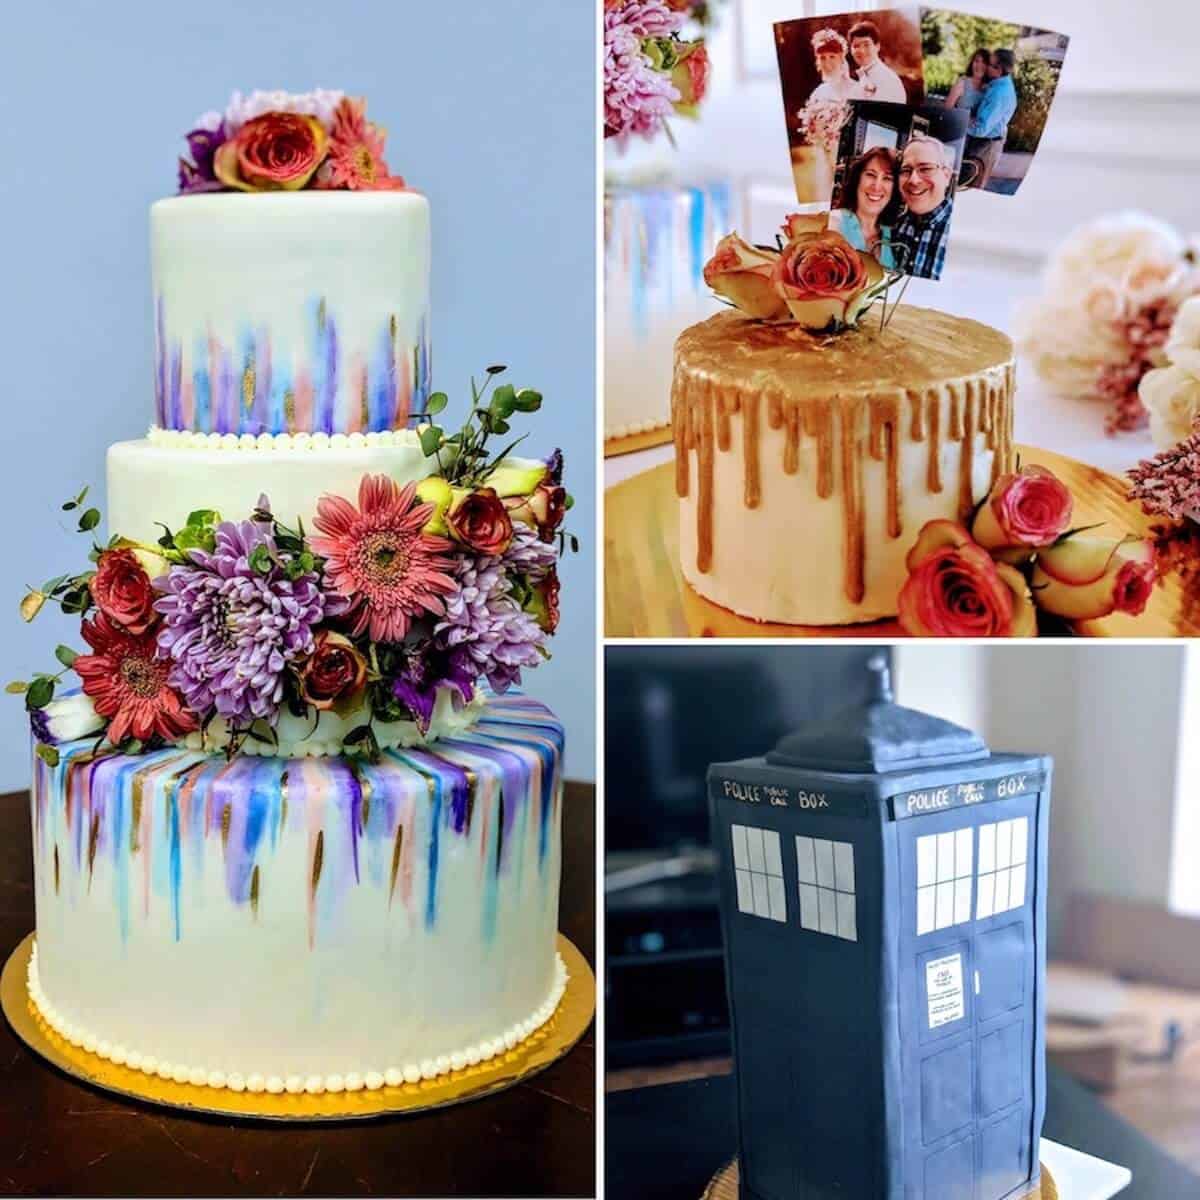
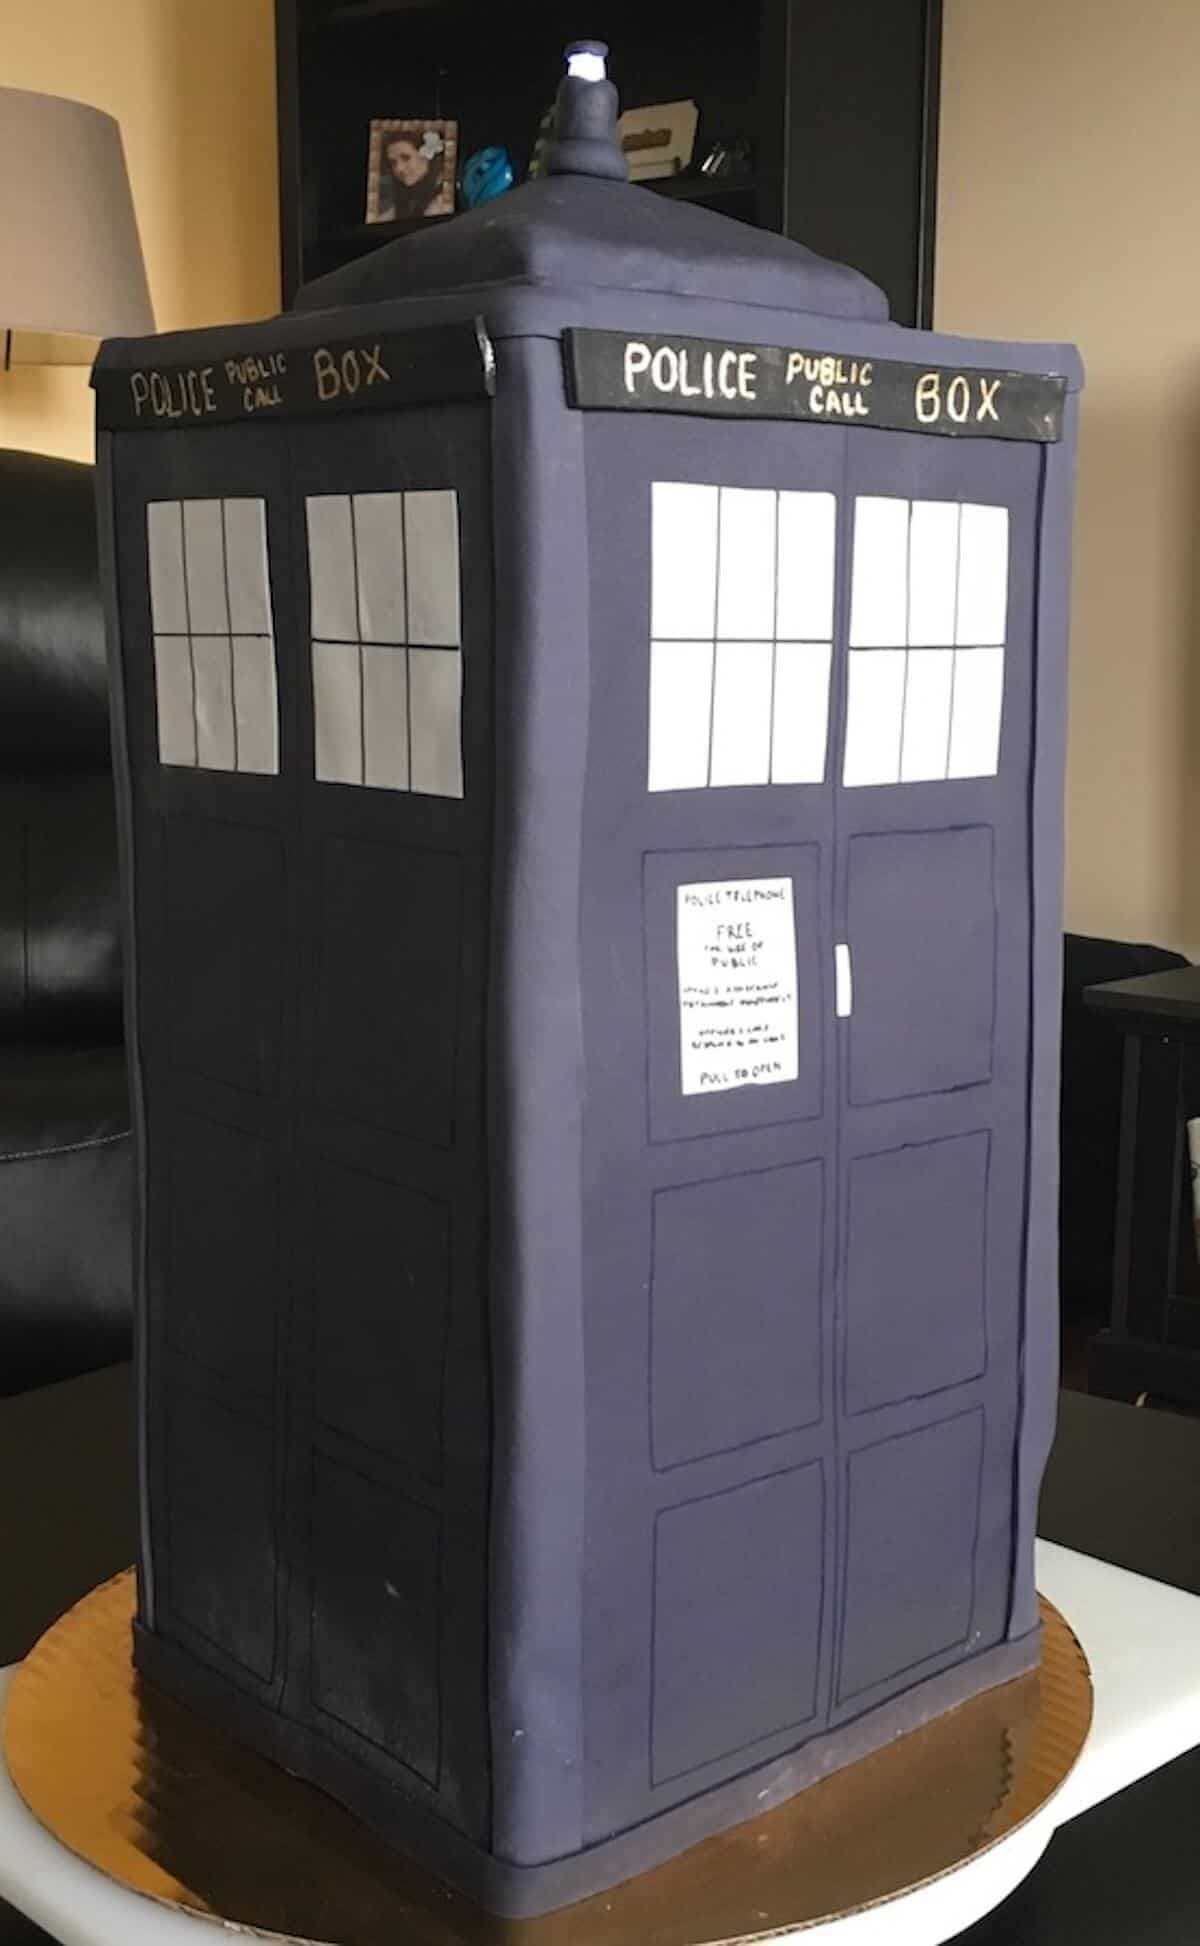
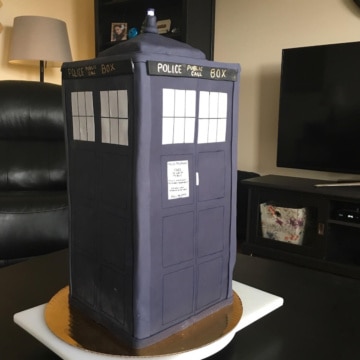
We created two Do It Yourself (aka DIY) wedding cakes: a 3-tiered watercolor pastel drip wedding cake and a surprise groom's cake in the shape of a TARDIS from the long-running BBC TV series, Doctor Who. Plus we made several desserts for a pre-wedding Happy Hour for our out-of-town guests.
Actually, let me correct that - we had three wedding cakes at the celebration. Since the wedding was held on my husband's & my 34th wedding anniversary, our girls created a surprise anniversary cake for us, too. They're so sweet (and sneaky)!
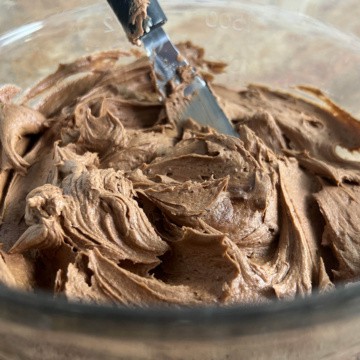
One element we used is marshmallow fondant instead of commercially made fondant out of a box. It is a huge improvement, both in taste and usability. Also, using styrofoam instead of cake for some of the tiers brought down the baking time and cost considerably.
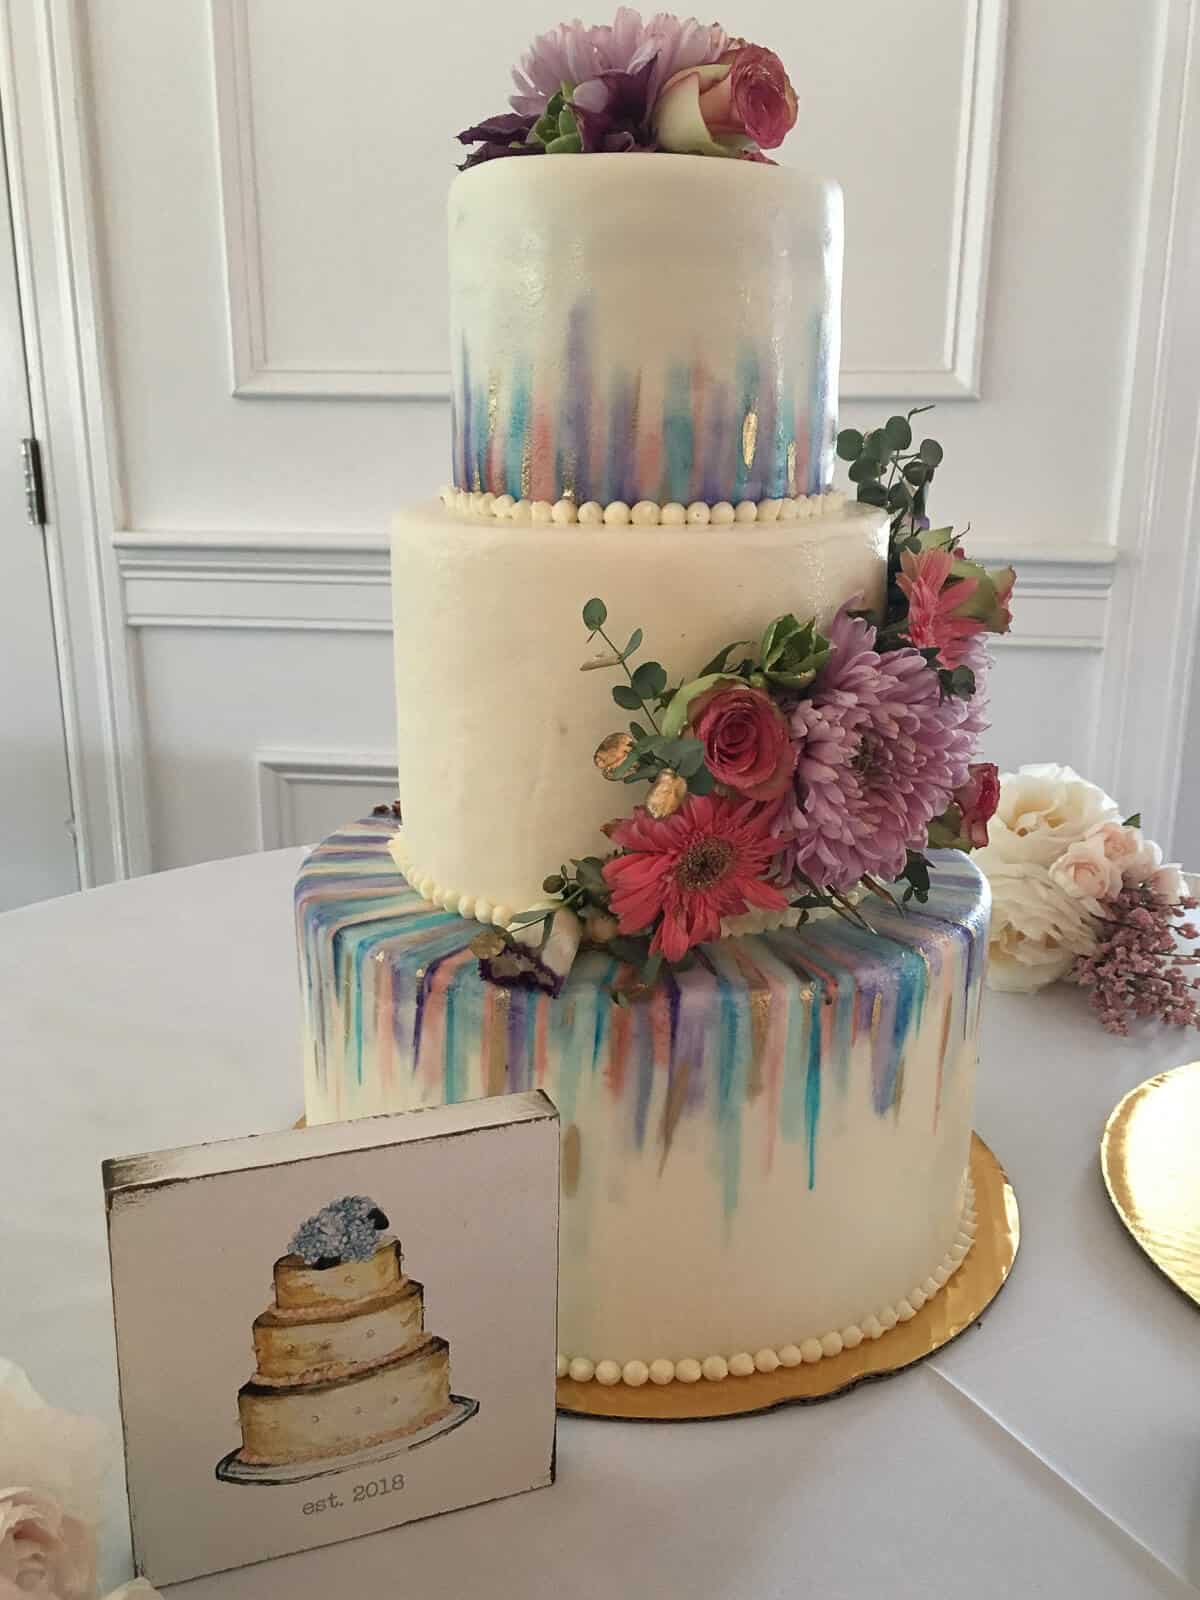
Our flower-festooned DIY wedding cake was a labor of love, and the bride and groom were so overjoyed with the result. The Chocolate Kahlua cake tier filled with the chocolate buttercream was moist and delicious, and the marshmallow fondant was yummy, too. Nobody could tell the bottom tiers were just for show!
And in case you were wondering, we had a large sheet cake from a local bakery waiting in the back. Everyone had cake!
My younger daughter is a brilliant designer, and I'm glad we're able to make incredible cakes for those we love.
Using creativity, ingenuity, and perhaps even a secret element, you can make your own celebration cake, and cover it with delicious marshmallow fondant. It's truly a labor of love with beautiful and delicious results for those you love!
The talent...incredible! ❤️❤️❤️
- Shira
An award-winning cake decorator knows how to design cakes
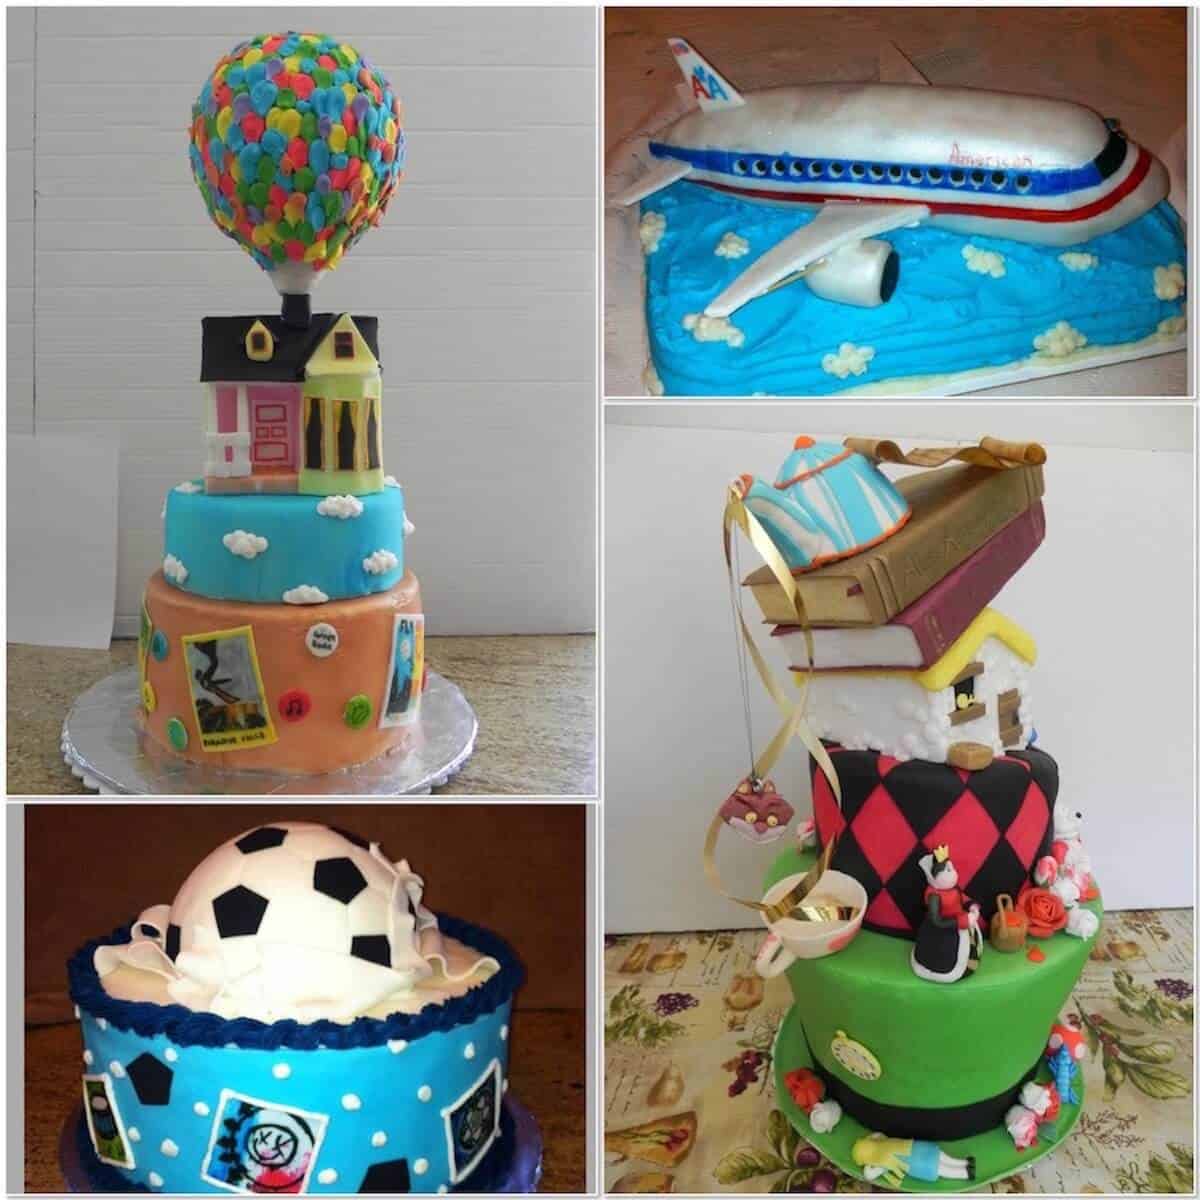
My younger daughter is a talented cake designer and decorator, and it's not just me that says it (although as her mama, I'm her biggest cheerleader). In Middle and High School, she entered our local County Fair's cake decorating competition several years in a row, and always won First Place, and even Best in Show.
Over the years she has made custom birthday cakes, graduation cakes, and baby shower cakes, as well as her fantasy cakes for the competitions. We're a great team, she and I - I bake the cakes and she decorates them. Fun times.
Cake sculpting secrets
When making a sculptured cake like those above, you need an interior structure that's firm enough to be able to stand up in ways other than just in a layer. There are two ways you can go - fully edible or partially edible.
[ ** insert tires screeching sound here ** ] (What do you mean, partially edible?!)
For cake decorating competitions, where the cake will be sitting out for a long time (such as with County or State Fairs), frequently styrofoam will be used on the inside instead of cake. It's covered with fondant to serve as the canvas from which to start decorating. Obviously, styrofoam isn't edible, but it is cheap and easy to carve, and doesn't wilt or spoil over the days of competition.
If you watch those baking shows about fancy (and fully edible) sculpted cakes (like Ace of Cakes), you'll discover that a version of Rice Krispies Treats are frequently used for structure, especially for large cakes. They're cheaper and easier to make than cake layers, plus they're also easy to carve as they don't crumble as a baked sponge cake would. That's what we used for the base of our groom's TARDIS cake.
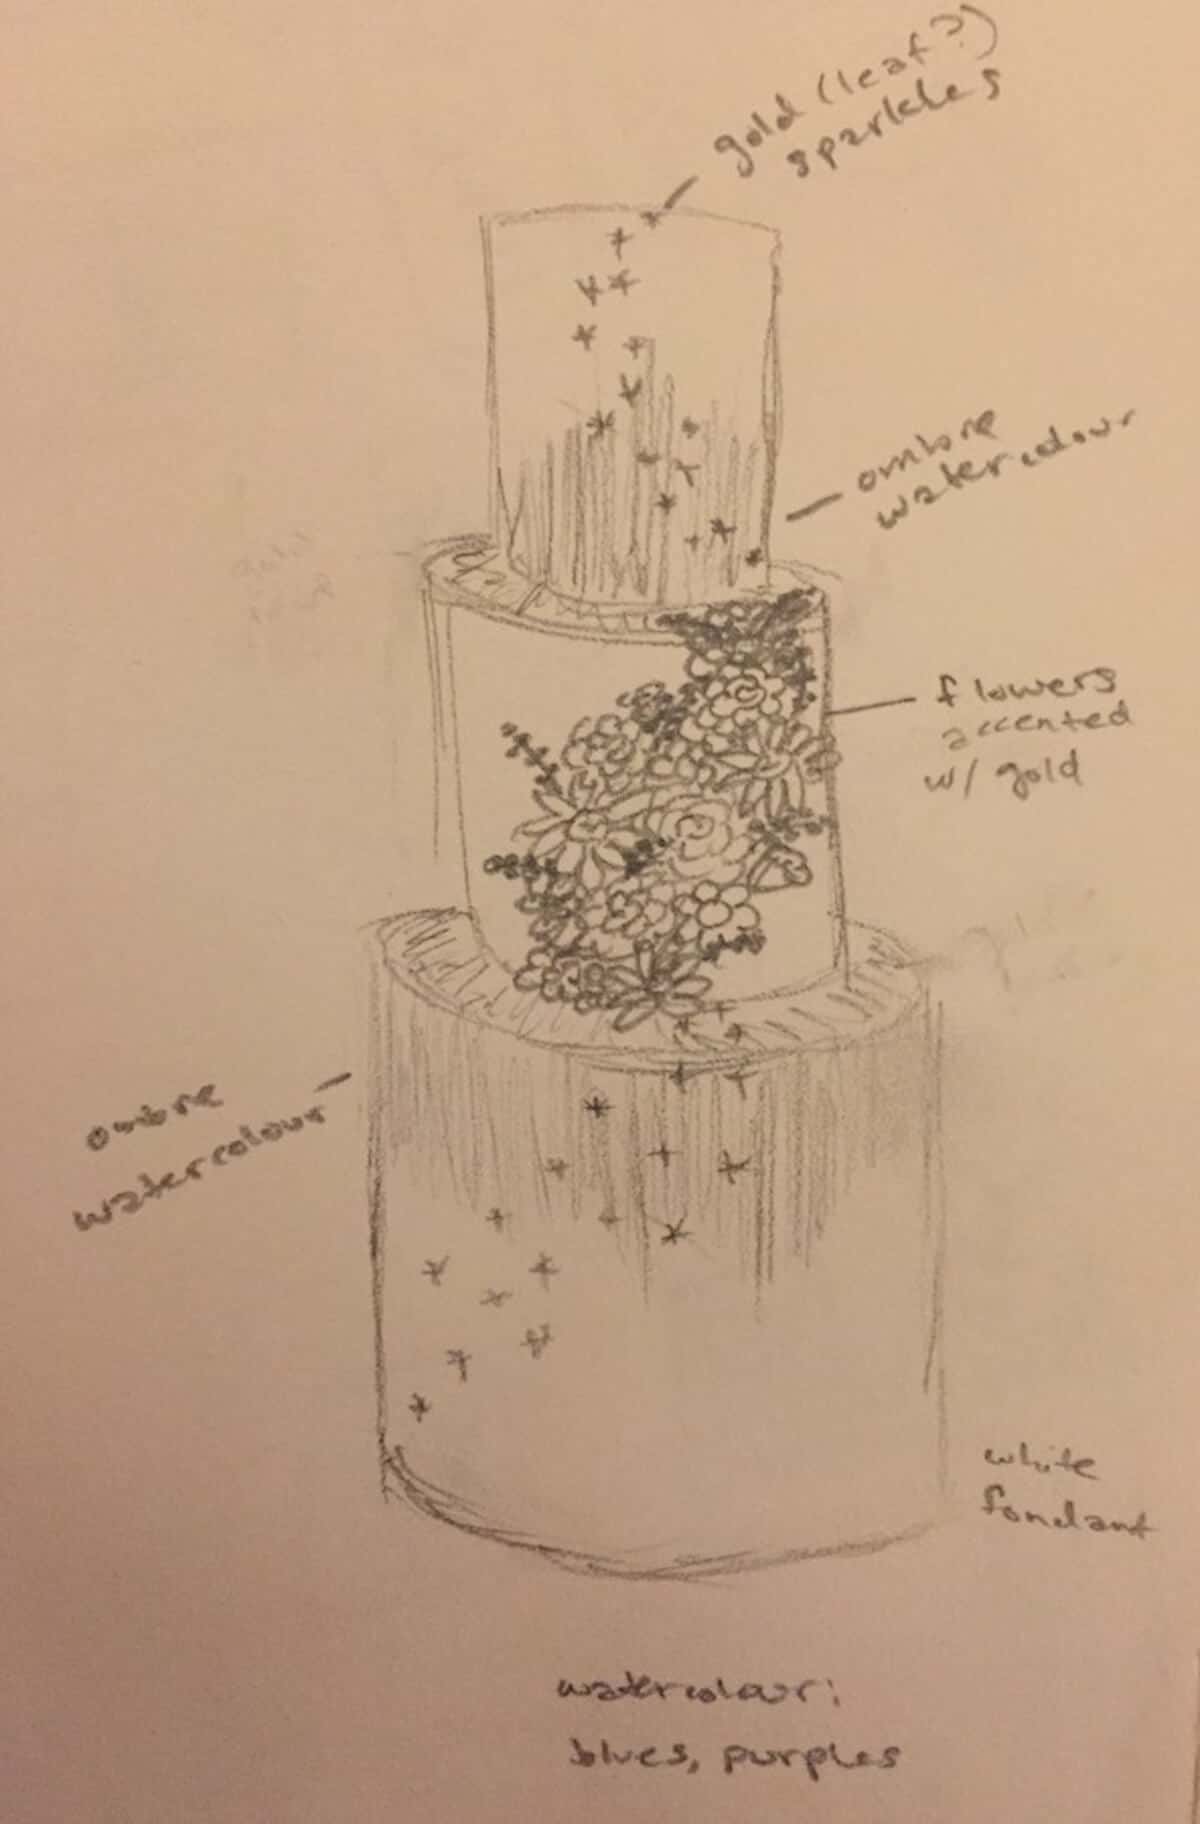
Our DIY wedding cake design
When my older daughter got engaged, my younger daughter and I knew that we were going to make her wedding cake. Our in-house cake decorator designed a lovely 3-tiered cake with a simple, yet elegant theme of hand-painted pastel watercolor stripes with fresh flowers festooned around it.
We also made a strategic decision: only the top tier would be edible.
I live in a small apartment without the walk-in refrigerator/freezer that commercial bakeries have…don't judge.
What you need for a DIY wedding cake
A wedding cake generally consists of 2 or more tiers of layer cake covered in fondant icing and decorated in many ways, from simple to elaborate. We eliminated the cake from 2 tiers, opting to use styrofoam rounds instead. Here are the specific elements we used:
Element #1: Cake for the top tier
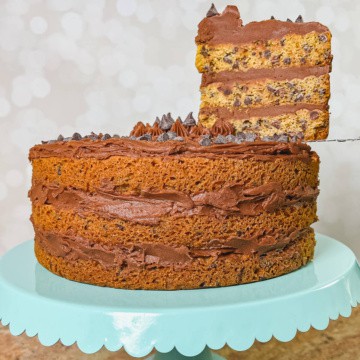
For the top layer, I wanted a cake recipe that I knew the bride loved, namely Chocolate Kahlua Cake. We baked three 6-inch round layers, and filled them with Chocolate Buttercream Frosting to stand 6-inches high. Simple and delicious.
Element #2: Styrofoam for the middle and bottom tiers
The lower two tiers would be two 4-inch high, 8-inch and 12-inch styrofoam rounds, double stacked to stand 8-inches high. This simplified the baking (and the cost) tremendously. My daughter has lots of experience decorating styrofoam "cakes" after all.
Element #3: Fondant icing
Fondant, essentially edible clay, is one of the basic elements in cake decorating. It covers the cake, and acts like a canvas that's then decorated. However, one complaint that I always have with store-bought fondant is that it basically tastes like soft plastic. It's pretty and all, but it truly lacks in the deliciousness department. So we made homemade marshmallow fondant instead.
This marshmallow fondant is smooth and pliable, is easier to roll out, and most importantly, it tastes great. All you need are a box of ready-made fondant, marshmallows, powdered sugar, and vegetable shortening.
Our marshmallow fondant recipe also had another plus - because we fixed the boxed fondant with marshmallows, it stretched the amount of coverage by 300%, and that really brought down the overall cost. Win!
You'll need the following ingredients to make this marshmallow fondant recipe:
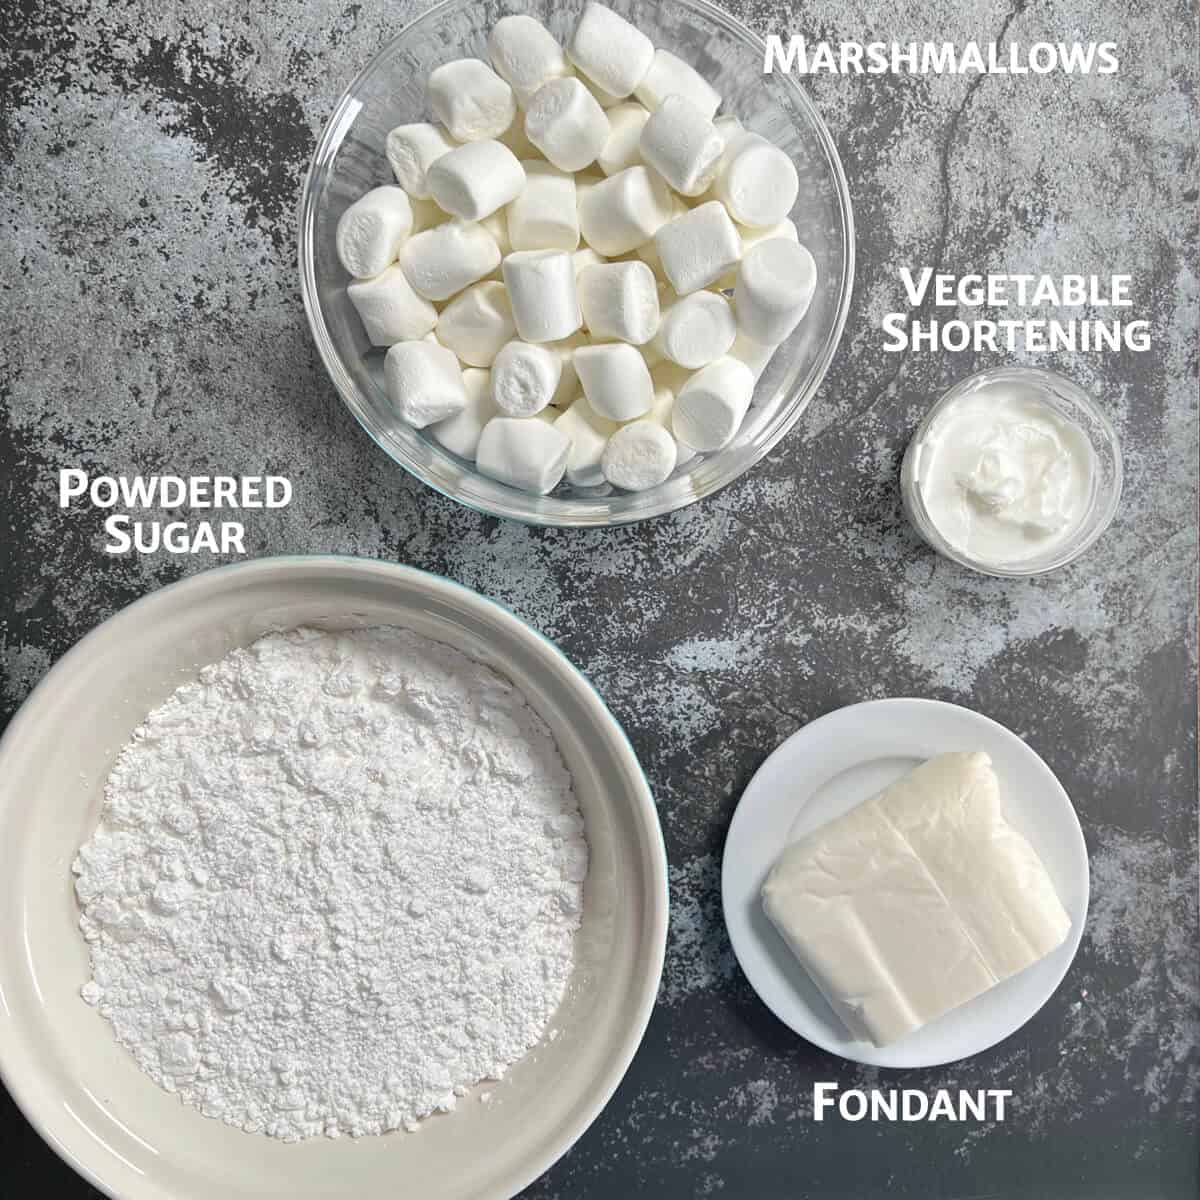
Ingredient Notes
Marshmallows: If using marshmallows containing gelatin is a problem (or if you keep Kosher), you can use commercially-made or homemade marshmallow creme (aka marshmallow fluff) with the same results.
Food coloring: For light colored fondant, knead in the food color gel during the pulling stage.
For bright or dark colored fondant, mix 1 tablespoon food color gel with 1 tablespoon of warm water (don't use too much coloring or the texture of the fondant can be ruined). Add the color in while mixing the marshmallow and shortening together.
See the recipe card for a full list of ingredients and measurements.
Element #4: Decorating items
For our wedding cake, we used food color gel mixed with a bit of vodka for the painted stripes, and fresh flowers and greenery, some gilded with gold luster dust. It's a simple, yet beautiful design concept.
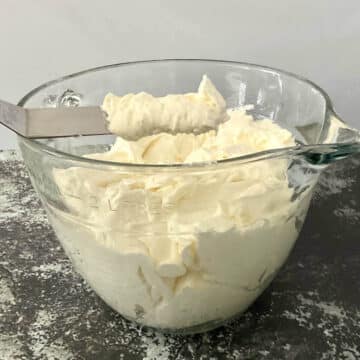
How to make marshmallow fondant
The steps to making a marshmallow fondant recipe are straightforward:
- Sift the powdered sugar into a large bowl. Prepare to use half in the marshmallow mixture.
- Melt the marshmallows in the microwave or on the stove.
- In a stand mixer with a dough hook attachment, combine the melted marshmallows with vegetable shortening, then slowly mix in half of the powdered sugar in 1 cup increments, mixing until smooth. Add color, if desired.
- Heat the ready-made fondant just a bit to soften.
- Place the marshmallow mixture in the bowl with the remaining powdered sugar (greasing your hands with vegetable shortening helps), then add the softened fondant and knead everything together until the sugar is mostly incorporated
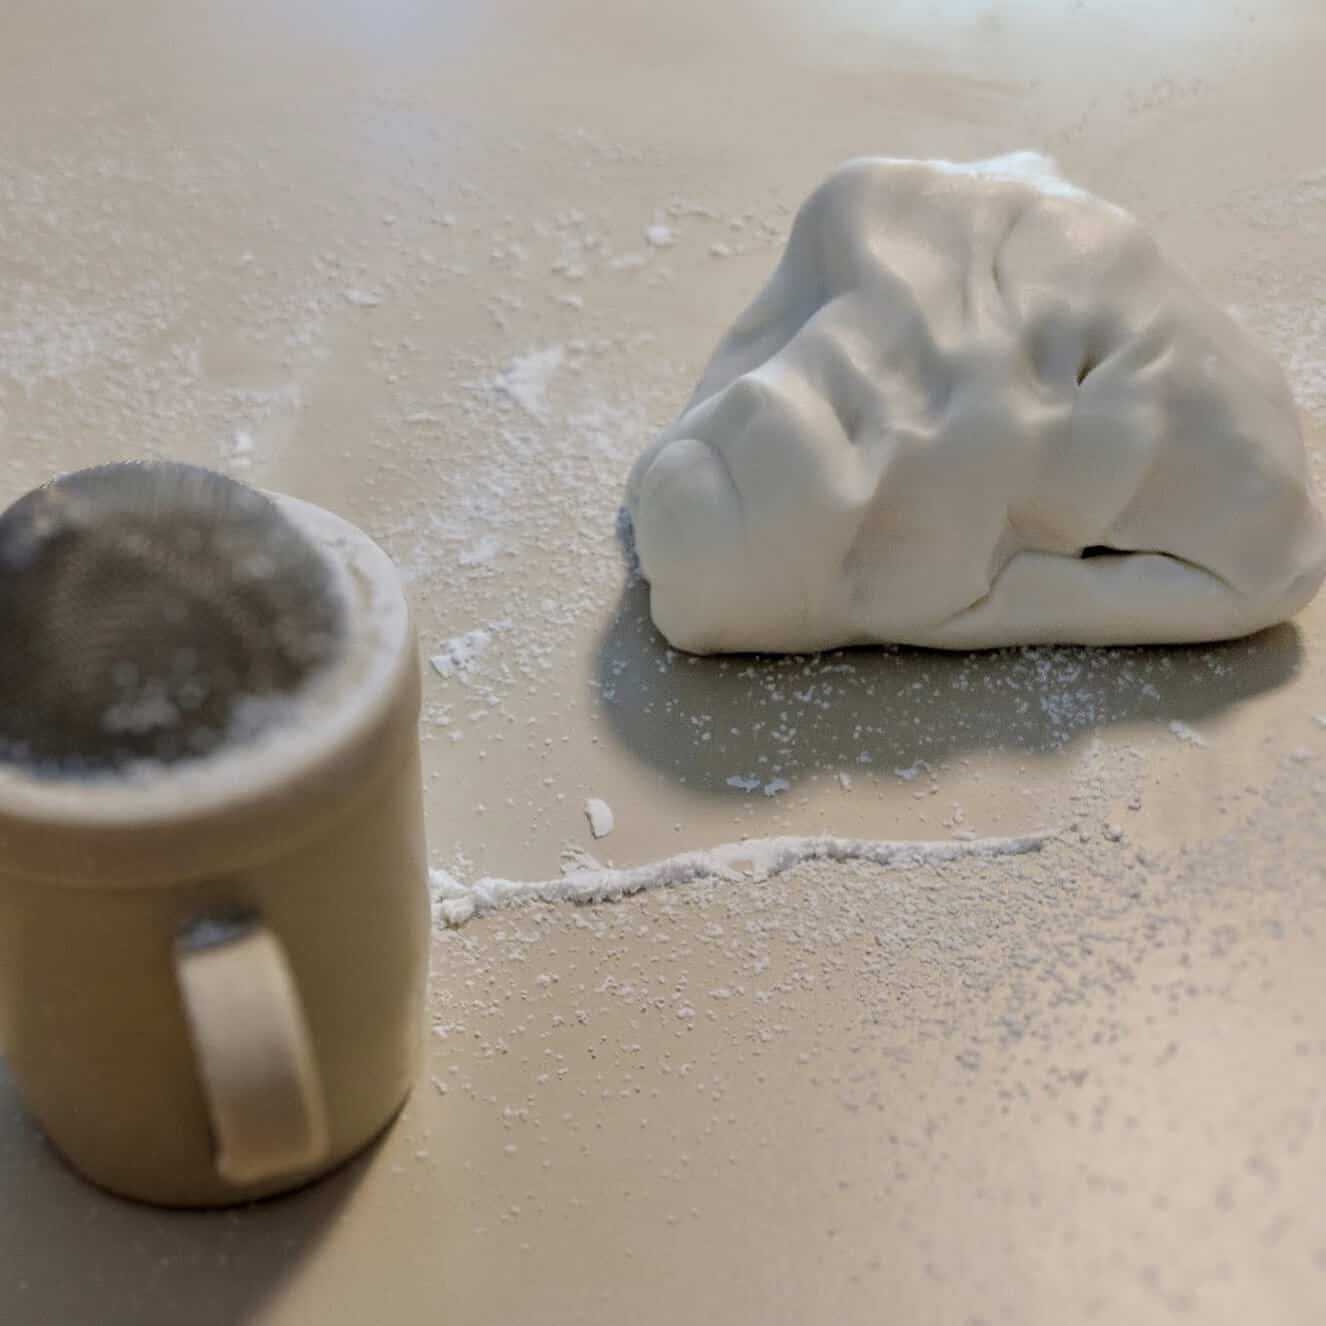
- Transfer the marshmallow fondant to a powdered-sugar-dusted work surface. Smear your hands with vegetable shortening, and knead and pull the fondant like taffy until it's stretchy and smooth.
- If there are rough spots or it's tearing, heat the fondant in the microwave for 30 to 40 seconds until it's hot. Keep pulling the fondant until it stretches without breaking.
Storage instructions
Store the fondant in an airtight bag at room temperature. It will keep for months. To use again, reheat and knead the fondant well until it's stretchy before each use.
One batch of marshmallow fondant should cover a 10-inch, 8-inch, and 6-inch round cake layers if it's rolled out to ⅛-inch thick.
Making and using fondant
Since I'm the baker and not the decorator, I asked my younger daughter for her thoughts on using this marshmallow fondant. Her advice:
- Don't frost beneath the fondant too thickly (called crumb coating) as it makes the sides too soft
- Definitely chill the cake before and after crumb coating the sides before the fondant goes on
- Store the fondant in an airtight bag at room temperature. It will keep for months. To use again, reheat and knead the fondant well until it's stretchy before each use.
When she made the fondant for the wedding cake, she ended up using more powdered sugar than the recipe called for, especially at the end during kneading. It was really humid that day, and this factor depends on climate. She still got some "elephant skin" and tears, but shortening mostly fixed these problems. It happens, folks!
How to make a DIY wedding cake
Now that the fondant is made and we have gathered the decorations, it's time to assemble the wedding cake itself.
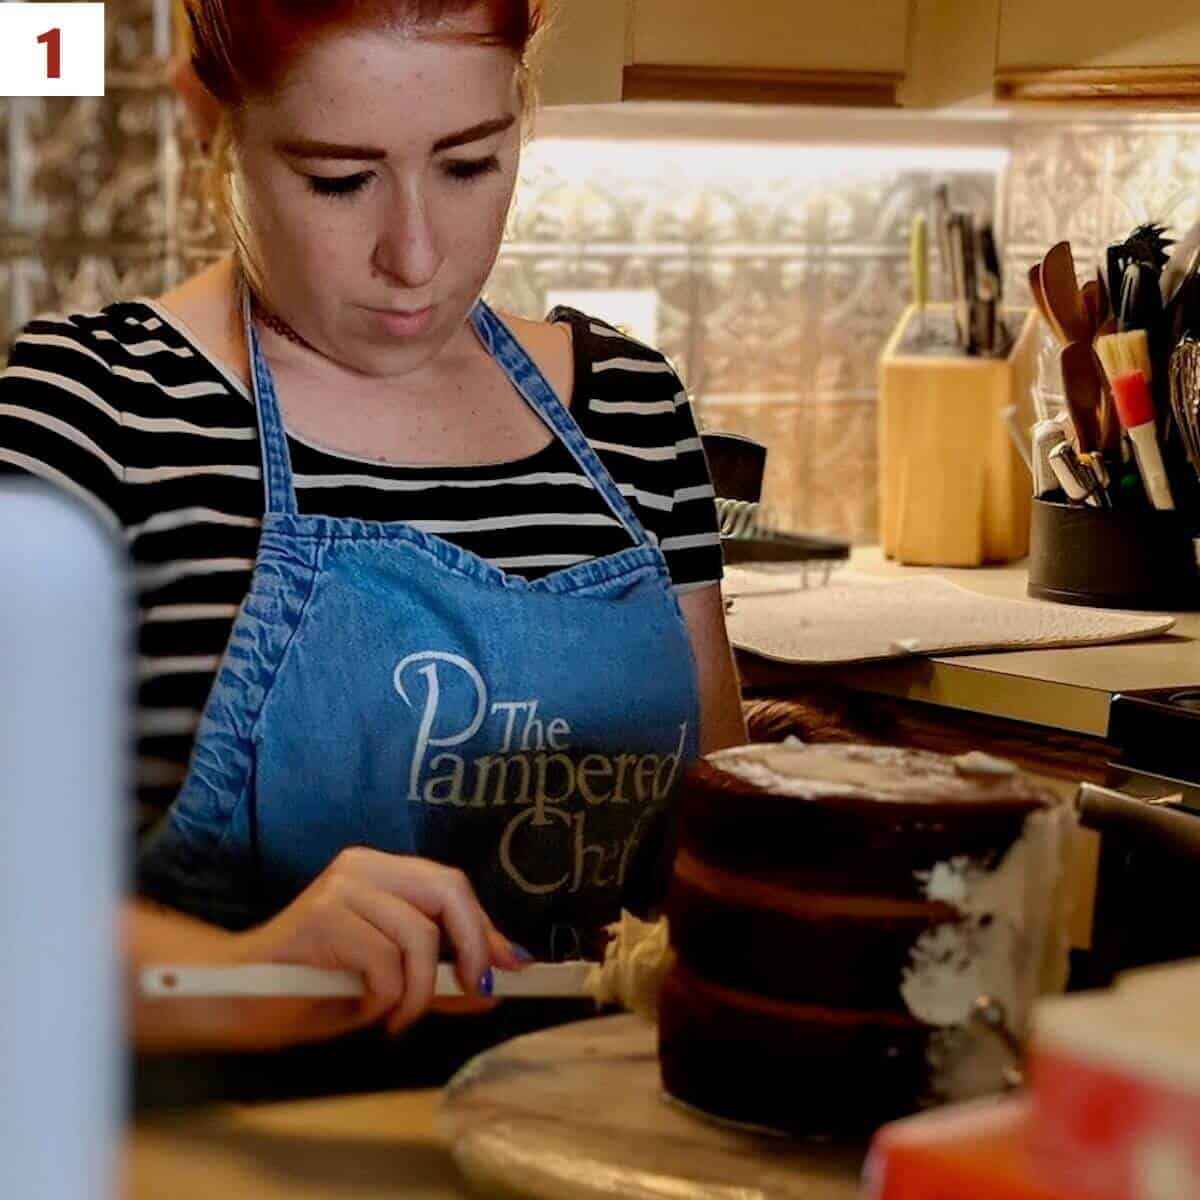
Step 1: Crumb coat the tiers
After chilling the top-tier layer cake (in this case the 6-inch 3-layered Kahlua Cake), it's crumb-coated by frosting the sides with a thin layer of vanilla buttercream (photo 1). The other 2 styrofoam layered tiers are also crumb-coated with vanilla buttercream.
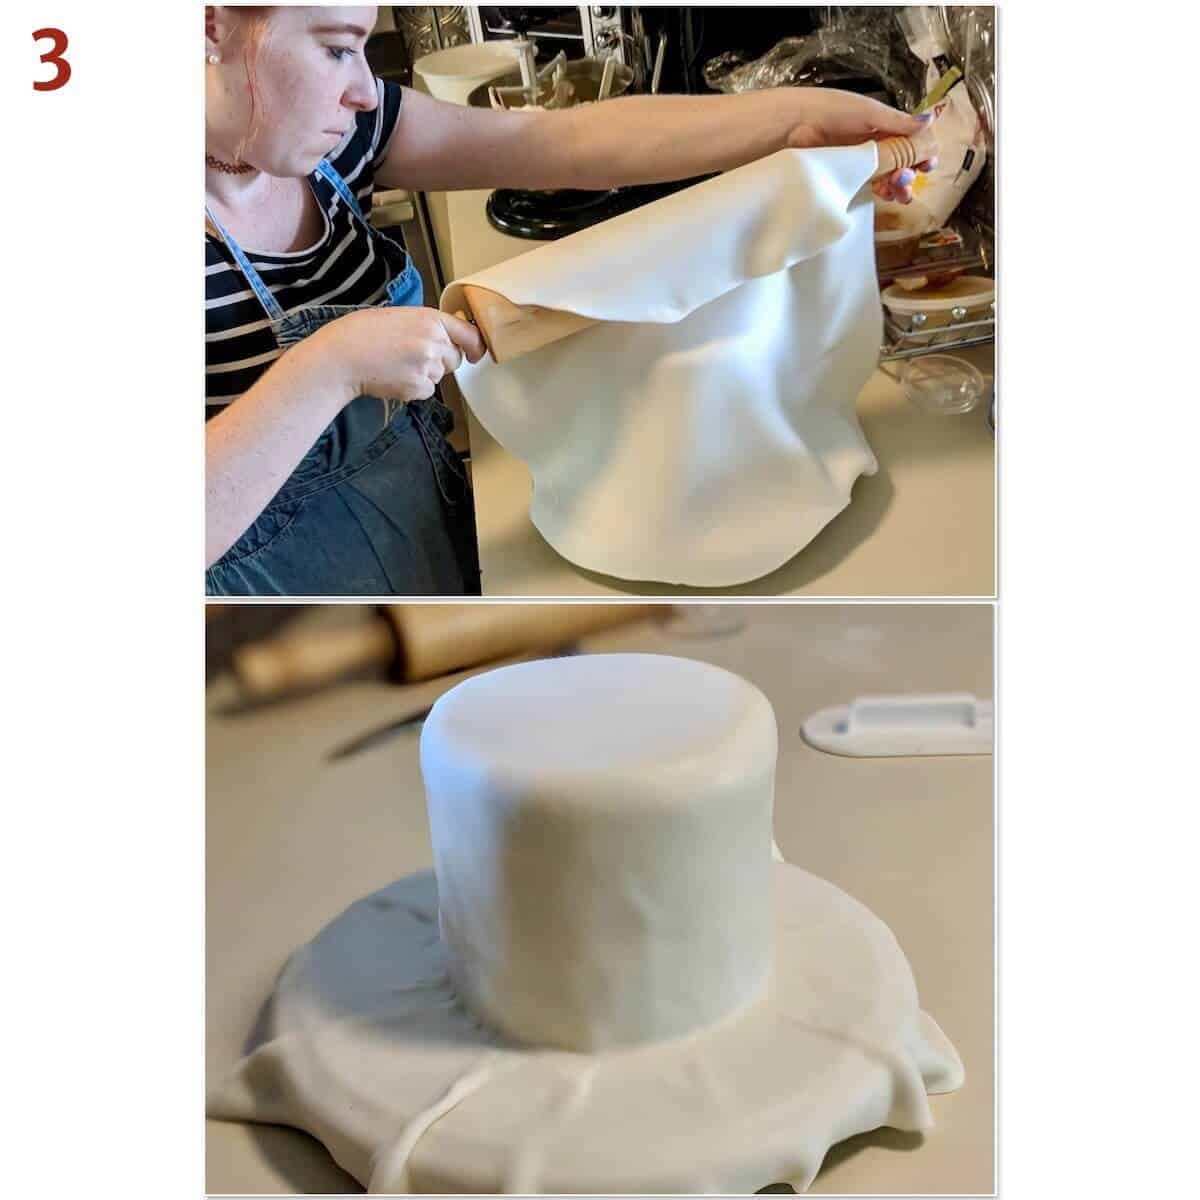
Step 2: Apply the fondant
If necessary, reheat and knead the fondant well until it's stretchy and pliable before each use. Roll it out about ⅛-inch thick in a size larger than the tier to be covered (photo 2).

Carefully transfer the rolled out fondant to the tier with a rolling pin and drape it over the tier, then smooth down the sides (photo 3). Trim off the excess, leaving a 1-inch overhang. Turn the tier upside down and press down the overhang to create an even edge. Repeat with the styrofoam tiers.
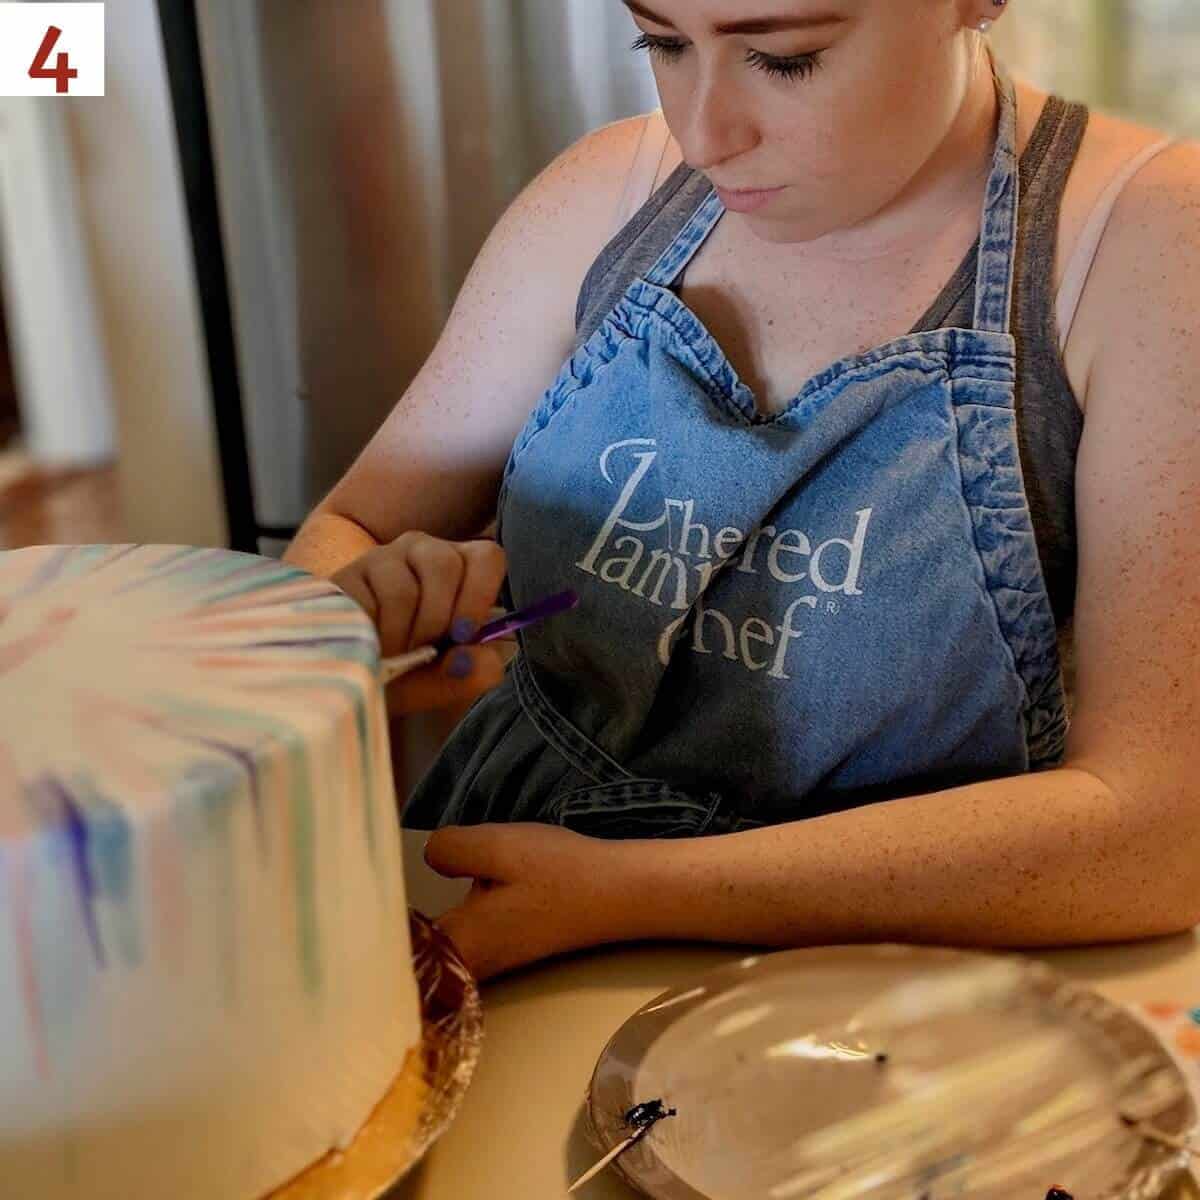
Step 3: Decorate the tiers
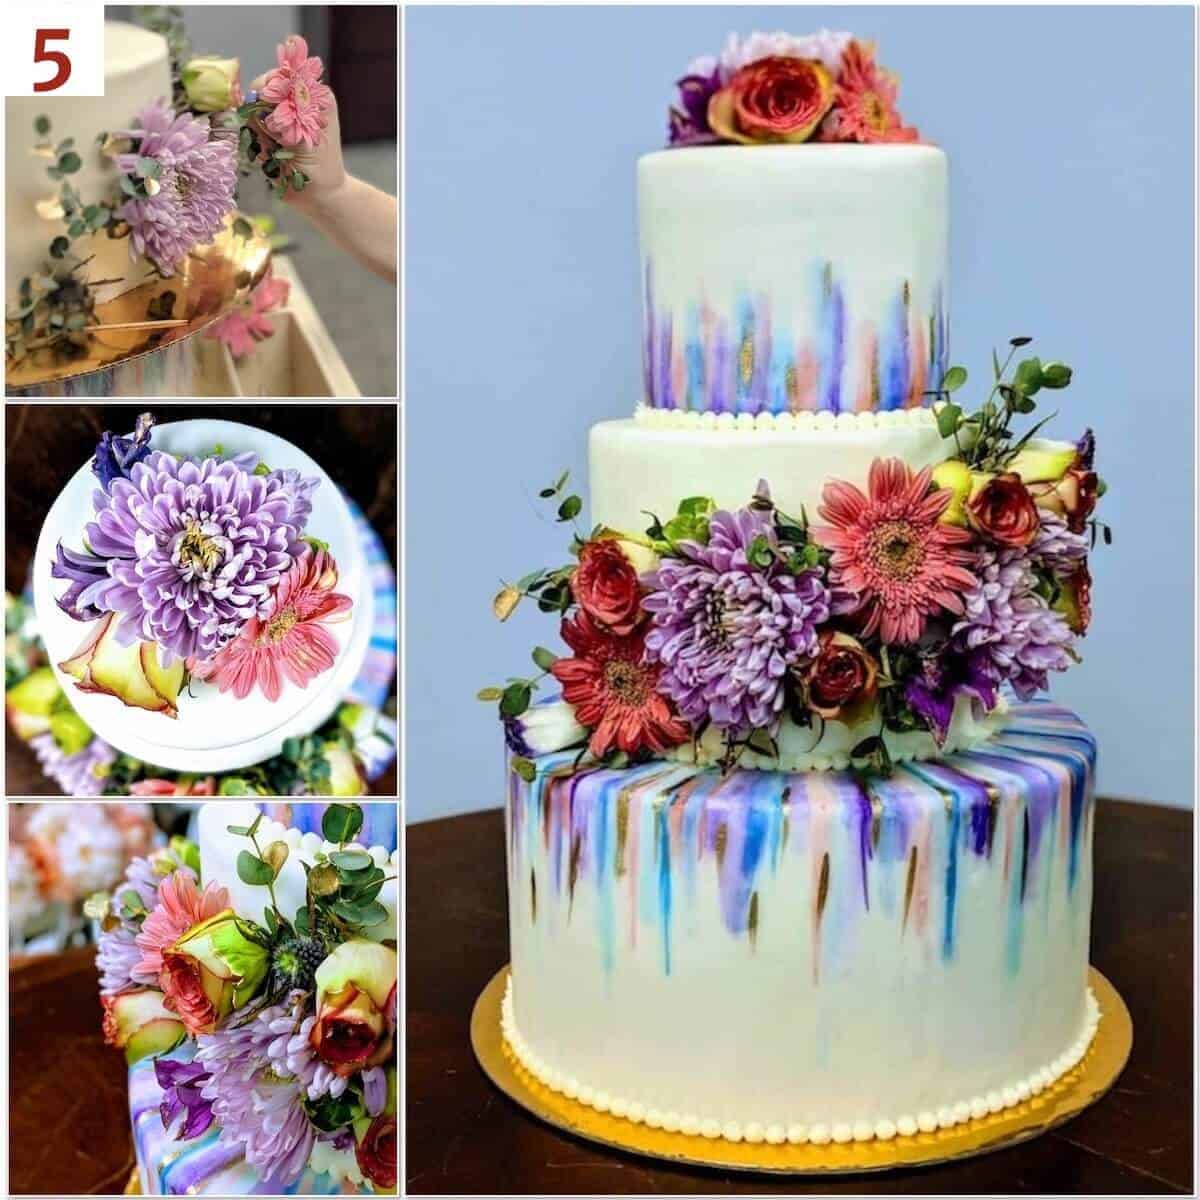
The tiers are ready to decorate how you see fit. For our DIY wedding cake, my daughter used food color gel mixed with a bit of vodka to paint on the stripes. She painted them bottom-to-side on the top tier and top-to-side on the bottom tier (photo 4). The middle tier was left white.
At the venue, fresh flowers and greenery were applied (some gilded with gold luster dust) to the top and middle tiers (photo 5). The cakes were stacked, and the seams covered with beads of white buttercream. The final effects was stunning!
Questions asked and answered
Here are some questions you might have...
If using marshmallows containing gelatin is a problem (or if you keep Kosher), you can use commercially-made or homemade marshmallow creme (aka marshmallow fluff) with the same results.
You'll get better results rolling out the fondant if it's is warm and pliable. Cold fondant doesn't roll out well. Also, if the fondant is too dry, either from too much powdered sugar or just not being stored properly, it will tear or crack during use.
When making our DIY wedding cake, we obviously wanted white fondant. However, there are times you want to have colored fondant, such as with the TARDIS cake, we needed a fondant colored deep blue. If you want bright or dark colored fondant, mix 1 tablespoon food color gel with 1 tablespoon of warm water (don't use too much coloring or the texture of the fondant can be ruined), and add it in while mixing the marshmallow and shortening together.
For light colored fondant, you can just knead in the food color gel during the pulling stage.
Didn't find the answer you're looking for?
Ask AI to answer for this specific recipe:
Disclaimer: I am not responsible for the quality of AI information

I hope you like this recipe! Let me know if you have any questions, and don't forget to leave a comment and rating. Thanks!
Slainté! L'chaim! Cheers!
- Tammy
How to make sculpted cakes
Celebration cakes can be as impressive as they are delicious. These recipes tell how we made a homemade wedding cake and a sculpted TARDIS Cake using what may be some surprising elements. You can use these ideas for your own sculpted cakes!
Recipe
Marshmallow Fondant
Ingredients
- 2 pounds powdered sugar, sifted, divided (about 8 cups)
- ½ cup vegetable shortening
- 1 16-ounce bag marshmallows, see Recipe Notes
- 2 tablespoons water, warm
- 20 ounces fondant, store-bought
Instructions
- Make the fondant: Put 2 pounds powdered sugar (sifted) in a large bowl. Prepare to use half in the marshmallow mixture.
- In the bowl of a stand mixed fitted with a dough hook, add ½ cup vegetable shortening.
- In a microwave-safe bowl, heat 1 16-ounce bag marshmallows in the microwave on high in 30 second increments until they're fully melted, stirring with a spoon after each burst. This can take about 1½ minutes or so. You can also melt the marshmallows instead in a large saucepan over medium-low heat, stirring until they're fully melted.
- Pour 2 tablespoons water on top of the melted marshmallows to loosen from the bowl. Add the mixture to the vegetable shortening.
- With the stand mixer running on its lowest setting, start adding in half the powdered sugar (1 pound, 454 grams), 1 cup (114 grams) at a time and mix for 2 minutes or until it looks smooth. Repeat until you've used half of the powdered sugar (about 4 cups (454 grams) total).
- Pull the marshmallow mixture off the dough hook (putting vegetable shortening on your fingers helps), and add it into the large bowl with the remaining powdered sugar.
- Soften 20 ounces fondant in the microwave on high for 40 seconds, then add it to the marshmallow mixture. Knead everything together until it's all mostly incorporated (some powdered sugar may not get mixed in depending on your kitchen's environment).
- Dust your work surface with a bit of powdered sugar, and smear your hands with shortening (to keep the fondant from sticking. Transferring the marshmallow fondant to the work surface, knead and pull it like taffy until it's stretchy and smooth. If there are rough spots or it's tearing, heat the fondant in the microwave for 30 to 40 seconds until it's hot. Keep pulling the fondant until it stretches without breaking.
- To use: Roll out the warm, pliable fondant about ⅛-inch thick in a size larger than the cake you're covering. It's best for the cakes to be chilled before covering so the crumb coating is cold.
- Storage instructions: Store the fondant in an airtight bag at room temperature. It will keep for months. To use again, reheat and knead the fondant well until it's stretchy before each use.
- One batch of marshmallow fondant should cover a 10-inch, 8-inch, and 6-inch round cake layers if it's rolled out to ⅛-inch thick.

Judi says
So happy to have found that you have pursued your love of baking. I saw the beautiful wedding picture on Facebook. Everyone looks so happy and healthy! Judi
Shira Spencer says
The talent...incredible! ❤️❤️❤️